1. Welcome to Tundras.com!

    You are currently viewing as a guest! To get full-access, you need to register for a FREE account.

    As a registered member, you’ll be able to:
    • Participate in all Tundra discussion topics
    • Transfer over your build thread from a different forum to this one
    • Communicate privately with other Tundra owners from around the world
    • Post your own photos in our Members Gallery
    • Access all special features of the site

Rotundra - 2020 TRD Pro Adventure Rig

Discussion in '2.5 Gen Builds (2014-2021)' started by TampaRD Pro, Aug 19, 2021.

  1. Sep 3, 2021 at 10:07 AM
    #31
    TampaRD Pro

    TampaRD Pro [OP] Cunning Linguist

    Joined:
    Dec 23, 2019
    Member:
    #40248
    Messages:
    418
    Gender:
    Male
    First Name:
    Stanley
    Vehicle:
    2020 MGM CM TRD Pro
    Lots.
    Thanks for the compliment! I didn't have to touch the headliner or anything inside the cab at all. If you take off the reflective lens on the third brake/cargo light and feel the area above the bulbs inside the housing you will find that there is a good sized area where the housing isn't "doubled", i.e. a single layer of plastic instead of two. You can carefully drill through that area for your pigtail connector wiring to pass through and have plenty of room to insert it into the cargo light bulb receptacle. I used rubber grommets on the wires to seal the holes I drilled in the housing and also black marine grade silicone sealant inside and out to keep it all dry inside. We've had several heavy rains and I've washed the truck a couple of times since installing the lights. I've had no condensation at all and I opened it up to check for water tightness and found it to be completely dry.
     
  2. Sep 9, 2021 at 11:06 PM
    #32
    TampaRD Pro

    TampaRD Pro [OP] Cunning Linguist

    Joined:
    Dec 23, 2019
    Member:
    #40248
    Messages:
    418
    Gender:
    Male
    First Name:
    Stanley
    Vehicle:
    2020 MGM CM TRD Pro
    Lots.
    Received and installed my @Rago Fabrication Tundra Dash Plate. I had ordered it the first week of June but due to back order I had to wait about 2-1/2 months to receive the part. In that time they made a modification to the original and the newly designed dash plates incorporate a recessed center mounted USB port. I received the new version which I find to be an improvement as I intended to install an ICS Quick Charge 3.0 USB port on the dash plate anyway to reduce cable clutter. [​IMG]

    I ordered the USB port from ICS as well as their Tundra 2014+ Lower Dash Mount Support Plate on the same day as I ordered the Dash Plate from Rago. I replaced the USB port that came with the plate with the ICS model to take advantage of the Quick Charge 3.0 capability.

    https://www.ics-fab.com/products/ics-lower-dash-mount-support-plate

    https://www.ics-fab.com/products/ic...78782&pr_ref_pid=4754775277630&pr_seq=uniform

    [​IMG]

    To help in measuring and drilling the dash I attached some 3M trim adhesive to the bottom of the dash plate mount.

    [​IMG]

    Then I placed the mount in the grooves in the dash recess and aligned it to be equal on all sides.
    Note: I found that if you placed the tabs in the bottom of the mounting plate into the grooves in the dash recess and pushed the plate towards the windshield until it stopped that it perfectly centered the dash plate in the recess.

    I followed the video instructions from Rago to remove the radio to allow access to the bottom of the dash plate.

    https://youtu.be/oBGQcwEsslg

    I then used a 90 degree angle drill attachment to drill through the dashboard and also the ICS under dash mounting plate. [​IMG]

    I used wire loom and heat shrink to protect the wiring and Posi-Taps to make a secure connection to the cigarette lighter wires.

    https://www.amazon.com/gp/product/B00H242NNY?ie=UTF8

    [​IMG]

    After reinstalling the radio and other parts I removed to allow access I attached RAM mounts to the dash plate to hold my iPhone 12, iPad Mini, and GoPro Hero 9 Black. I took the truck out for a test drive on some light trails and found the attachments to be very steady with little vibration. I'm very satisfied with the results.

    [​IMG]
     
    Last edited: Dec 18, 2021
    J&ATundra likes this.
  3. Sep 12, 2021 at 6:54 AM
    #33
    TampaRD Pro

    TampaRD Pro [OP] Cunning Linguist

    Joined:
    Dec 23, 2019
    Member:
    #40248
    Messages:
    418
    Gender:
    Male
    First Name:
    Stanley
    Vehicle:
    2020 MGM CM TRD Pro
    Lots.
    J&ATundra likes this.
  4. Sep 12, 2021 at 6:57 AM
    #34
    FISHN43

    FISHN43 New Member

    Joined:
    Apr 27, 2020
    Member:
    #45592
    Messages:
    735
    First Name:
    Mike
    Ohio
    Vehicle:
    2020 Super White TRD Pro
  5. Sep 12, 2021 at 7:19 AM
    #35
    TampaRD Pro

    TampaRD Pro [OP] Cunning Linguist

    Joined:
    Dec 23, 2019
    Member:
    #40248
    Messages:
    418
    Gender:
    Male
    First Name:
    Stanley
    Vehicle:
    2020 MGM CM TRD Pro
    Lots.
    Yes, one is the oil temperature in the pan and the other is temp in the torque converter as you suggested. When installing the OBD Fusion app I purchased the 2020 Toyota add-on in the app to allow for monitoring the A/T temps. I then had to designate those PIDs so it would display those sensors on my dashboard and when I did I left the default name for the PIDs in the app in the description box. I can change it in the app to where it would output the exact designation for each sensor but I wasn't exactly sure which was which at this point. I just installed it yesterday and haven't really dug that deep into it yet to figure it all out. Logic would probably dictate that #1 would be the oil pan and #2 would be the TC but that would just be a scientific wild ass guess by me and we all know the dangers of relying on logic when dealing with some aspects of Toyota engineering. ;)
     
    Last edited: Dec 25, 2022
    FISHN43[QUOTED] likes this.
  6. Sep 29, 2021 at 5:40 PM
    #36
    TampaRD Pro

    TampaRD Pro [OP] Cunning Linguist

    Joined:
    Dec 23, 2019
    Member:
    #40248
    Messages:
    418
    Gender:
    Male
    First Name:
    Stanley
    Vehicle:
    2020 MGM CM TRD Pro
    Lots.
    Installed my onboard air system. Purchased an ARB CKMTA12 Twin compressor and the SDHQ firewall mount for it. Wired the leads directly to the battery and stripped down the switch wiring harness to just the purple trigger wire and connected to my Switch Pros SP-9100 system. I wanted to install a modified "Wifey" air system with fender well connections and intend to later add air horns.
    [​IMG]
    https://www.amazon.com/ARB-CKMTA12-Board-Performance-Compressor/dp/B0050DI9YQ

    https://sdhqoffroad.com/products/07-21-toyota-tundra-arb-air-compressor-mount-kit

    Since my SP-9100 is mounted to a Power Trays mount on my engine compartment fuse box I had to come up with a location to securely mount the distribution manifold for the air up/down function. After much consideration I found the best place for me to install it would be to the top of the compressor fan mount. There was plenty of room and clearance for the mounting bolts for the block and it in no way interferes with the operation of the compressor. I took a piece of .125 x 3" aluminum flat bar, fabbed up a mount and painted it gloss black.

    [​IMG]

    [​IMG]


    [​IMG]

    I ordered all of the individual components for the the air distribution system separately instead of purchasing the "Wifey" kit from Rago Fabrication, mainly because I could get upgraded parts for the same price (or less). I used a Viair 9280 6 port manifold with mounting holes so that I could easily secure it to the mount. I used lock washers and Red Loctite to secure the manifold bolts to the mount I made due to the heat and vibration of the compressor while in use. This manifold is the only aluminum part I used, opting for solid brass connections for the Legris sleeve/slide valve and on all other air line parts. I assembled the manifold on my work bench and tested all of the connections to it for leakage with my garage compressor before installing it in the truck so as to not be torquing on the mounted compressor. I included an ARB quick connect chuck to allow for a standard air hose to be connected from the front of the vehicle.

    https://www.amazon.com/Viair-92820-...iair+distribution+block&qid=1632949368&sr=8-3

    https://www.grainger.com/product/LEGRIS-1-4-in-Nickel-Plated-Brass-1DDY5

    https://www.northridge4x4.com/part/...MI4JvAno2l8wIVTAeICR0jMA__EAQYAyABEgIPCvD_BwE

    [​IMG]

    As I mentioned before I used all brass fittings, including the air line push in connections and Tees instead of the plastic ones that are susceptible to heat damage and are rated for less air pressure. I'm sure the plastic fittings work fine but I opted for the metal ones out of an abundance of caution. I also chose red nylon brake tubing, in keeping with the color scheme of my truck, that is rated to 362 psi and 248 degrees. I was very careful to route the tubing along the frame and wiring mounts and to keep well clear of the exhaust pipe and other heat sources.

    https://www.amazon.com/gp/product/B08HQSZHZG?ie=UTF8

    [​IMG]

    I used Rago Fabrication Tundra air chuck mounts in the fender wells. [​IMG]

    [​IMG]

    [​IMG]

    After finishing the install I checked every connection for leaks, aired down to 18 pounds and aired back up again. The system works great and I'm looking forward to using it for a long time.
     
    Last edited: Oct 21, 2021
  7. Oct 4, 2021 at 12:35 PM
    #37
    TampaRD Pro

    TampaRD Pro [OP] Cunning Linguist

    Joined:
    Dec 23, 2019
    Member:
    #40248
    Messages:
    418
    Gender:
    Male
    First Name:
    Stanley
    Vehicle:
    2020 MGM CM TRD Pro
    Lots.
  8. Oct 5, 2021 at 12:35 PM
    #38
    TampaRD Pro

    TampaRD Pro [OP] Cunning Linguist

    Joined:
    Dec 23, 2019
    Member:
    #40248
    Messages:
    418
    Gender:
    Male
    First Name:
    Stanley
    Vehicle:
    2020 MGM CM TRD Pro
    Lots.
    Installed the Rear Differential Breather Relocation mod. Thanks go out to @RainMan_PNW Casey for the part numbers and excellent tutorial on his build page.

    [​IMG]

    [​IMG]
     
    RainMan_PNW likes this.
  9. Oct 7, 2021 at 10:19 AM
    #39
    TampaRD Pro

    TampaRD Pro [OP] Cunning Linguist

    Joined:
    Dec 23, 2019
    Member:
    #40248
    Messages:
    418
    Gender:
    Male
    First Name:
    Stanley
    Vehicle:
    2020 MGM CM TRD Pro
    Lots.
    Received and did a test install in my driveway of a Cascadia Vehicle Tents Awning Mesh Room for my CVT 79" Hybrid Awning. Perfect for keeping away the 'skeeters and no-see-ums when sitting by the beach or campsite.

    https://cascadiatents.com/awning-mesh-room.html

    IMG-1342a.jpg

    IMG-1343a.jpg

    IMG-1344a.jpg
     
  10. Mar 3, 2022 at 5:01 PM
    #40
    drgordon13

    drgordon13 New Member

    Joined:
    Feb 14, 2021
    Member:
    #59093
    Messages:
    73
    Gender:
    Male
    Vehicle:
    2020 Gray Tundra TSS
  11. Mar 3, 2022 at 5:25 PM
    #41
    thedonn

    thedonn New Member

    Joined:
    Aug 27, 2021
    Member:
    #67318
    Messages:
    419
    Gender:
    Male
    wow - that is great and exactly what I need! how long do you think it would take to air all 4 back up from 18 or so? I am thinking about a similar set up...did you consider a coiled hose in each wheel well that could be secured when not in use? the attention to detail in your build is incredible!
     
    Last edited: Mar 3, 2022
  12. Mar 4, 2022 at 5:44 AM
    #42
    TampaRD Pro

    TampaRD Pro [OP] Cunning Linguist

    Joined:
    Dec 23, 2019
    Member:
    #40248
    Messages:
    418
    Gender:
    Male
    First Name:
    Stanley
    Vehicle:
    2020 MGM CM TRD Pro
    Lots.
    Thank you for the compliment. The SDHQ billet battery terminals are an easy install and there is no cutting of the cables required, just unbolt the old ones and attach the new ones.
     
  13. Mar 4, 2022 at 6:29 AM
    #43
    TampaRD Pro

    TampaRD Pro [OP] Cunning Linguist

    Joined:
    Dec 23, 2019
    Member:
    #40248
    Messages:
    418
    Gender:
    Male
    First Name:
    Stanley
    Vehicle:
    2020 MGM CM TRD Pro
    Lots.
    The ARB twin compressor is a very efficient unit and will pump up to it's max 150 psi pretty quickly, depending on the volume of air required. I haven't strictly timed going from 18 psi back to the 36 or so that I generally run in the Toyo AT III's, but would guess that it takes about six minutes or so for all four wheels at once, which is the whole idea of the install.

    I personally wouldn't want to coil and secure the hoses in the wheel wells for fear of them getting loose and damaged in the carnage that can occur in that area when wheeling offroad. The Schrader valves in the wheel wells make it very easy to connect the pigtails for each wheel. I have recently upgraded to Haltec quick connects for the pigtail ends and they clip on securely and don't leak. I am fortunate to have a Crossbin 13 aluminum tray on the bed rails behind the cab underneath my Diamondback cover that I securely store all my recovery gear and tools in. The pigtails are small enough that they would easily fit in the ESP storage bins that I installed under the rear seats if I didn't have the Crossbin system.

    Just yesterday I installed a 3 gallon air tank under the truck alongside the frame in way of the passenger side rocker panel. This tank is rated for 200 psi working pressure and I installed a 175 psi safety valve, it has 3/8" main inlet and outlets and three additional 1/4" threaded connections. I wanted this air tank for the ability to run air tools and also the addition of air horns which are currently on backorder. I will have an install post with pictures soon as I have made a few other mods to the truck that I need to catch up on on my build page.
     
    Last edited: Mar 4, 2022
  14. Mar 4, 2022 at 8:05 AM
    #44
    TampaRD Pro

    TampaRD Pro [OP] Cunning Linguist

    Joined:
    Dec 23, 2019
    Member:
    #40248
    Messages:
    418
    Gender:
    Male
    First Name:
    Stanley
    Vehicle:
    2020 MGM CM TRD Pro
    Lots.
    Added a 3 gallon air tank to my onboard air system.

    Note: The aspect of the picture makes it look closer to the muffler than it actually is. I had to install it as far aft under the truck as possible to allow access to the drain cock because I am about to install my Valhalla's Shield Cat Plates which would have made that difficult further forward.
    [​IMG]

    [​IMG]

    [​IMG]

    [​IMG]
     
  15. Mar 4, 2022 at 8:28 AM
    #45
    TampaRD Pro

    TampaRD Pro [OP] Cunning Linguist

    Joined:
    Dec 23, 2019
    Member:
    #40248
    Messages:
    418
    Gender:
    Male
    First Name:
    Stanley
    Vehicle:
    2020 MGM CM TRD Pro
    Lots.
    Installing the air tank was straight forward except for the lack of space to get my large hands into small areas to tighten down all the hardware, but with some persistence and a few foul words I was able to prevail.
    Parts list for this install:

    1. Boss Air Suspensions three gallon five port air tank.
    https://bossairsuspension.com/shop/airtanks/aluminum-air-tank-3-gallon-5-port/

    2. Viair 3/8" NPT female to 3/8" NPT male check valve.
    https://www.amazon.com/dp/B003EM95PW?ref=ppx_yo2_dt_b_product_details

    3. Viair Tank Port Fittings kit including 175 psi safety valve and drain cock.
    https://www.amazon.com/dp/B000YC5ID8?ref=ppx_yo2_dt_b_product_details

    4. 1-1/2" x 3/16" aluminum flat bar and assorted stainless steel bolts, washers and lock nuts.
     
  16. Mar 4, 2022 at 5:39 PM
    #46
    thedonn

    thedonn New Member

    Joined:
    Aug 27, 2021
    Member:
    #67318
    Messages:
    419
    Gender:
    Male
    I am super impressed with your build!
    which ss3s are these? im thinking of pro driving lights for this location w amber backlight
     
  17. Mar 4, 2022 at 7:54 PM
    #47
    TampaRD Pro

    TampaRD Pro [OP] Cunning Linguist

    Joined:
    Dec 23, 2019
    Member:
    #40248
    Messages:
    418
    Gender:
    Male
    First Name:
    Stanley
    Vehicle:
    2020 MGM CM TRD Pro
    Lots.
    They are white DD SS3 Pro’s in combination driving format since I use them as true ditch lights to illuminate the sides of the road for deer which are prevalent here in the South. I also purchased the DD amber plastic snap on diffusing filters for the SS3’s for use in foggy conditions. I bought the same amber type Rigid snap on filters for the Rigid fog lights that come stock in the bumpers on the TRD Pro’s for the same reason but generally run the white lights in both instances.
     
    Last edited: Mar 10, 2022
    thedonn[QUOTED] likes this.
  18. Mar 9, 2022 at 3:12 PM
    #48
    Mr. Moto

    Mr. Moto SPIDERMAN, my 2019 Tundra TRD Sport-PRO

    Joined:
    Aug 30, 2019
    Member:
    #35360
    Messages:
    70
    Gender:
    Male
    First Name:
    Dan
    Eastlake, OHio
    Vehicle:
    2019 Tundra TRD Sport (converted to PRO)
    TRD Pro Shocks (Fox 2.5 internal bypass w/ external reservoirs all around), TRD Pro dual exhaust; Nitto LT285/60R20, TRD off-road skid plates CBI Steel bumper, RC 20,000 lb. winch synthetic rope, BD S1 bush lights, rear floods.
    Hi Stanley,
    I'm about to add an ARB Twin and mount under the driver seat using the DesertDoesIt mounting bracket. Is it possible to go with the 5 gal. tank?
    Thanks,
    Dan

    DesertDoesIt Under Seat compressor mount.jpg
     
    TampaRD Pro[OP] likes this.
  19. Mar 10, 2022 at 7:29 AM
    #49
    TampaRD Pro

    TampaRD Pro [OP] Cunning Linguist

    Joined:
    Dec 23, 2019
    Member:
    #40248
    Messages:
    418
    Gender:
    Male
    First Name:
    Stanley
    Vehicle:
    2020 MGM CM TRD Pro
    Lots.
    Dan,
    I would definitely say that there is not room to mount a 5 gallon air tank underneath either front seat if that is what you are asking. I mounted the air tank underneath the truck where there are a few different location options for mounting tanks. It all depends on the dimensions of the tank that you purchase as there are several types for each capacity tank, i.e. basic cylinder, pancake, hot dog (long and skinny), etc. The ARB Twin will work fine with any 5 gallon tank and I originally considered that size but I have limited space underneath due to the TRD Pro dual exhaust and the Valhalla Shields cat theft deterrent/skid plates in my configuration. Another consideration with the larger tank is the amount of "cycle time" required for the compressor to fill and replenish the tank when in use, especially since you are mounting the compressor in the cab where it will be loud as they aren't exactly quiet when in operation. If you are using it mainly to inflate tires and run air tools while stopped this might not be that much of a concern for you, but if like me you intend to install air horns it could be annoying having the compressor kick on intermittently while driving and holding a conversation, listening to music, etc.

    I thought long and hard before deciding on where to mount the compressor as I really wasn't thrilled about the heat and dust under the hood in the South Florida summers. Overall though, I'm very happy with the SDHQ firewall mount as it is unobtrusive tucked up against the passenger side firewall and though the noise of the compressor while driving can definitely be heard as a loud hum when running it is not overwhelming by any means.

    Good luck with your install and post up some pics when done.
     
  20. Mar 10, 2022 at 2:22 PM
    #50
    TampaRD Pro

    TampaRD Pro [OP] Cunning Linguist

    Joined:
    Dec 23, 2019
    Member:
    #40248
    Messages:
    418
    Gender:
    Male
    First Name:
    Stanley
    Vehicle:
    2020 MGM CM TRD Pro
    Lots.
    I purchased and installed a Vantrue X4S Duo 4K 5G WiFi Dual Dash Cam. I researched thoroughly and found this camera to have all of the features I wanted. Including; front 4K and rear 1080p HD capability, capacitor instead of battery powering (better for the Florida heat), WiFi downloading capability via an app as well as SD card transfer, parking security functions. The packaging and documentation were all of high quality and reminiscent of Apple or Ring products packaging. Install was easy, I routed the rear camera USB C cable under the headliner along the top of dash, under my driver side grab handle mod (and the airbag there), under the side curtain airbags on the drivers side of the car around to the top center of the rear window. This was carefully done to make sure and be under the airbags so as not to interfere with their deployment if ever the need occurs. I fashioned a small thin aluminum tab that I hot glued to the metal above the rear window that allowed me to attach the rear facing camera to it with the 3M adhesive pad provided. This way it sits flush to the glass as if attached to it but does not affect the raising and lowering of the rear window.
    https://www.amazon.com/dp/B09LLLF8PG?ref=ppx_yo2_dt_b_product_details

    I also bought the Vantrue X4S GPS Receiver Module with USB C Port Adhesive Mount. The suction mount without GPS that came with the unit worked fine, and you can purchase the GPS Module with a suction mount as well, but I won't be swapping this dashcam to any of my other vehicles and the adhesive mount should be more robust for wheeling the trails.
    https://www.amazon.com/dp/B08D3G5GKJ?ref=ppx_yo2_dt_b_product_details

    To make mounting cleaner I ordered the Dongar Technologies Dash Cam Power Adapter for Toyota that plugs into the back of the rearview mirror. It works perfectly and no cables to hide.
    https://www.amazon.com/dp/B07DMW3DML?ref=ppx_yo2_dt_b_product_details

    To connect to the Dongar Adapter to the dash cam I ordered a 6" USB A to USB C connector cable and the length was perfect for this application.
    https://www.amazon.com/dp/B012V56D2A?ref=ppx_yo2_dt_b_product_details&th=1

    For storage I got a SanDisk 256 GB High Endurance Video microSDXC Card for Dash Cam. I figured the "high endurance dashcam/video rated" features couldn't hurt in the heat of the windshield. Vantrue pushes you to purchase their branded SD card at twice the price of similar cards but research online and common sense dictates that any correctly rated V30 C10 card would work fine.
    https://www.amazon.com/dp/B07P4HBRMV?ref=ppx_yo2_dt_b_product_details

    Not a great picture but you can at least see the compact size of the dashcam and its placement on the windshield, I could actually move it up another inch or so if I wanted to.
    [​IMG]
     
    Occidentalis likes this.
  21. Mar 10, 2022 at 4:03 PM
    #51
    scpete24

    scpete24 Duuuuuuude

    Joined:
    Feb 15, 2017
    Member:
    #6387
    Messages:
    698
    Gender:
    Male
    Orange County, CA
    Vehicle:
    2016 TRD Pro Super White
    Nice clean build Stan, very well done!
     
    TampaRD Pro[OP] likes this.
  22. Mar 10, 2022 at 4:17 PM
    #52
    TampaRD Pro

    TampaRD Pro [OP] Cunning Linguist

    Joined:
    Dec 23, 2019
    Member:
    #40248
    Messages:
    418
    Gender:
    Male
    First Name:
    Stanley
    Vehicle:
    2020 MGM CM TRD Pro
    Lots.
    :thumbsup: Thank you!
     
  23. Mar 11, 2022 at 12:54 PM
    #53
    Mr. Moto

    Mr. Moto SPIDERMAN, my 2019 Tundra TRD Sport-PRO

    Joined:
    Aug 30, 2019
    Member:
    #35360
    Messages:
    70
    Gender:
    Male
    First Name:
    Dan
    Eastlake, OHio
    Vehicle:
    2019 Tundra TRD Sport (converted to PRO)
    TRD Pro Shocks (Fox 2.5 internal bypass w/ external reservoirs all around), TRD Pro dual exhaust; Nitto LT285/60R20, TRD off-road skid plates CBI Steel bumper, RC 20,000 lb. winch synthetic rope, BD S1 bush lights, rear floods.
    Thanks for your info. I am installing the tank the same way you did and I have the PRO exhaust. Is there room to mount the 5 gal. tank there instead? I am recovering from surgery and cannot get under my truck right now to measure, but have started the process to get the installation scheduled. And where did you buy the tank? Was it direct or through a dealer?
    Thanks,
    Dan
     
  24. Mar 11, 2022 at 1:20 PM
    #54
    65SNAKE

    65SNAKE New Member

    Joined:
    Aug 1, 2020
    Member:
    #50168
    Messages:
    88
    Gender:
    Male
    First Name:
    RON
    Vehicle:
    2020 TRD PRO
    Wow, lots of very cool mods! I'm waiting for VaraRam to make a true ram air for the Tundra. That would be about 40+ FREE hp at 35mph and above.
     
    TampaRD Pro[OP] likes this.
  25. Mar 11, 2022 at 9:30 PM
    #55
    TampaRD Pro

    TampaRD Pro [OP] Cunning Linguist

    Joined:
    Dec 23, 2019
    Member:
    #40248
    Messages:
    418
    Gender:
    Male
    First Name:
    Stanley
    Vehicle:
    2020 MGM CM TRD Pro
    Lots.
    It's very ironic that I have just recovered from recent surgery as well and have been biding my time to get back to work modding the truck. I as well did lots of research and ordering while convalescing and have a backlog of parts waiting to be installed as I am just now able to get out and under the truck again. In fact, just today I worked all day under and around the truck installing multiple parts and will make a post soon to catalog it all.

    I purchased the tank online from Boss Air Suspension Systems, they have a good line of T6 aluminum heat treated air tanks that won't corrode under the truck like a steel tank will. Also, their tanks have welded in tapped bungs which are much better than cheaply made tanks that have threads tapped directly in the aluminum walls of the tank. Importantly for mounting underneath they also have adjustable mounting legs which allow you many mounting configuration options and also the ability to spin the tank barrel to orient the drain cock as needed. I would avoid a tank with welded on legs for mounting under the truck as it will be tough to position it properly. The vendor was very good to deal with and I received my tank in about 4 or 5 days.
    https://bossairsuspension.com/aluminium-airtanks/

    I think you could fit one of the 5 gallon tanks as their stated size is L30″xW9″xH7″, whereas my 3 gallon tank measures L18″xW9″xH7″ so the difference in size is the length only. I believe you could mount it on the passenger side like I did but further forward towards the front of the truck. I was limited in that regard because of my cat shields/skids. The 5 gallon tank definitely will not fit in the space where I mounted mine as it would be too long. When you recover measure carefully and decide if it will tuck in or not, it was very important to me for the tank to be above the frame so as to not reduce ground clearance or offer an opportunity to be torn off or punctured while off roading.

    Get well soon and post up some pics when you get it all sorted out.
     
    Mr. Moto[QUOTED] likes this.
  26. Mar 11, 2022 at 9:36 PM
    #56
    TampaRD Pro

    TampaRD Pro [OP] Cunning Linguist

    Joined:
    Dec 23, 2019
    Member:
    #40248
    Messages:
    418
    Gender:
    Male
    First Name:
    Stanley
    Vehicle:
    2020 MGM CM TRD Pro
    Lots.
    Thanks! :thumbsup: Yeah, true ram air for the silly fake hood scoop would be awesome and I would be down for that. As it is I think it only adds about 15 hp more than the lowly non-hood scooped Tundras. ;)
     
  27. Mar 11, 2022 at 10:35 PM
    #57
    TampaRD Pro

    TampaRD Pro [OP] Cunning Linguist

    Joined:
    Dec 23, 2019
    Member:
    #40248
    Messages:
    418
    Gender:
    Male
    First Name:
    Stanley
    Vehicle:
    2020 MGM CM TRD Pro
    Lots.
    So, yesterday my truck hit 10,000 miles after owning it for almost 27 months. I work out of the country most of the year and it's not my only vehicle, hence the low mileage. It's been 5,000 miles since the dealer performed the first oil change and it's time for me to get it set up correctly so that I can do it from now on. I want to make it as clean and simple as possible so that I can perform the oil changes without dropping the TRD front skid plate. With that in mind I made the following changes to the truck.

    1. Dropped the TRD front skid plate to allow unfettered access to the oil filter and oil drain plug. While I had it off I pressure washed it to satisfy my Tundra induced OCD.

    2. Drained the oil from the oil pan and installed a Fumoto F133S Valve. This is the newer model of the Fumoto valve that will fit the Tundra and will allow me to cleanly drain the oil, with the use of a plastic hose, without dropping the front skid plate.
    https://www.amazon.com/dp/B08CMLV964?ref=ppx_yo2_dt_b_product_details

    3. Purchased and used a Motivx Oil Filter Wrench to remove the oil filter cap. Also, purchased an oil filter drain tool and hose to allow clean draining of the oil filter through the TRD skid plate access door. Got the Motivx Engine Oil Funnel for Tundra as well. Note: I would have bought the complete Motivx kit for the Tundra but they were out of stock so I ended up purchasing the parts separately since it was time to change the oil and I didn't want to wait around for it.
    https://www.amazon.com/dp/B00XTAGHU0?ref=ppx_yo2_dt_b_product_details
    https://www.amazon.com/dp/B08LMVJBMJ?ref=ppx_yo2_dt_b_product_details
    https://www.amazon.com/dp/B016FVJUX0?ref=ppx_yo2_dt_b_product_details

    4. Replaced the bs OEM plastic Oil Filter Cap Assembly with the correct fitting Toyota aluminum version. There is a lot of instruction online here and on YouTube describing how to do this properly, but mainly you have to switch the center part of the oil filter cap on the aluminum version with the longer one in the original plastic model. Very simple to do and the end result is an aluminum cap that you don't have to worry about cross threading or cracking over time.
    https://www.amazon.com/dp/B008BHP68A?ref=ppx_yo2_dt_b_product_details

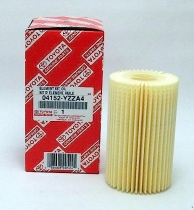
    5. Purchased a half case of 5 OEM Oil Filter Kits.
    https://www.amazon.com/dp/B007OW6LSC?ref=ppx_yo2_dt_b_product_details

    6. Changed the oil with Mobil 1 Extended Performance Full Synthetic 0W-20. (Purchased at the local Wally World for $27 each.)

    7. While I had the skid plate off I finally got around to installing the TRD Front Sway Bar that's been sitting in my garage for quite a while. Easy-peasy install, took about 20 minutes by myself once I had the skid plate off.


    upload_2022-3-12_0-50-22.jpg

    upload_2022-3-12_1-29-45.jpg
     
    Last edited: Dec 25, 2022
  28. Mar 13, 2022 at 9:30 AM
    #58
    Mr. Moto

    Mr. Moto SPIDERMAN, my 2019 Tundra TRD Sport-PRO

    Joined:
    Aug 30, 2019
    Member:
    #35360
    Messages:
    70
    Gender:
    Male
    First Name:
    Dan
    Eastlake, OHio
    Vehicle:
    2019 Tundra TRD Sport (converted to PRO)
    TRD Pro Shocks (Fox 2.5 internal bypass w/ external reservoirs all around), TRD Pro dual exhaust; Nitto LT285/60R20, TRD off-road skid plates CBI Steel bumper, RC 20,000 lb. winch synthetic rope, BD S1 bush lights, rear floods.
     
  29. Mar 15, 2022 at 8:19 AM
    #59
    TampaRD Pro

    TampaRD Pro [OP] Cunning Linguist

    Joined:
    Dec 23, 2019
    Member:
    #40248
    Messages:
    418
    Gender:
    Male
    First Name:
    Stanley
    Vehicle:
    2020 MGM CM TRD Pro
    Lots.
    I installed my Valhalla's Shields Front and Rear Cat Theft Deterrent Plates. So glad that I upgraded to the 1/4" thick aluminum plates as they are really beefy and heavy duty. They will certainly serve double duty as skids for the type of wheeling that I do which is mainly beach and trails.

    I also used Rock Hard 4x4 Rock Dome Tapered Bolt Head Protectors for the security bolts on the bottom of the skids.
    https://www.northridge4x4.com/part/...UkFBcAHCvAIXKQY47GKdN0-WspfQntRgaAs5tEALw_wcB

    You can see the heavy gauge of the aluminum on this picture of the front plate taken before installation.
    [​IMG]

    [​IMG]

    [​IMG]
     
    Occidentalis likes this.
  30. Mar 15, 2022 at 8:55 AM
    #60
    TampaRD Pro

    TampaRD Pro [OP] Cunning Linguist

    Joined:
    Dec 23, 2019
    Member:
    #40248
    Messages:
    418
    Gender:
    Male
    First Name:
    Stanley
    Vehicle:
    2020 MGM CM TRD Pro
    Lots.
    I put some more Meso Customs products in the truck. I installed the Ultimate Dome and Map Lights about a month ago and they are an awesome upgrade. Continued on with the Meso Chrome Delete Kit for the cup holder and shifter surround. I also repositioned my Vantrue X4S dashcam GPS mount about an inch higher than I had it before to fine tune the install.

    [​IMG]

    [​IMG]

    [​IMG]

    [​IMG]
     
    Last edited: Mar 28, 2022
    THORYOTA and DannyD303 like this.

Products Discussed in

To Top