1. Welcome to Tundras.com!

    You are currently viewing as a guest! To get full-access, you need to register for a FREE account.

    As a registered member, you’ll be able to:
    • Participate in all Tundra discussion topics
    • Transfer over your build thread from a different forum to this one
    • Communicate privately with other Tundra owners from around the world
    • Post your own photos in our Members Gallery
    • Access all special features of the site

Rotundra - 2020 TRD Pro Adventure Rig

Discussion in '2.5 Gen Builds (2014-2021)' started by TampaRD Pro, Aug 19, 2021.

  1. Aug 19, 2021 at 9:09 PM
    #1
    TampaRD Pro

    TampaRD Pro [OP] Cunning Linguist

    Joined:
    Dec 23, 2019
    Member:
    #40248
    Messages:
    418
    Gender:
    Male
    First Name:
    Stanley
    Vehicle:
    2020 MGM CM TRD Pro
    Lots.
    Time to finally get it all together and post my progress from the beginning. It may take a while but I will get it done... eventually.

    It's been my intention to set the truck up as an Overlanding/Adventure Rig to use for trail riding, camping and hauling around our kayaks and dive gear. I plan to do all of the work myself as much as possible. It's not my daily driver and I'm in no big hurry to get everything done. The work will come along in spurts as I work out of the country and I'm gone for months at a time for most of the year. I've been lurking in this forum for a while and have/had a general idea of what I want to do and how I want to set it up. I found my tastes and choices changing as time went along and it became clearer to me exactly what I did and did not want to do with it. I know that I want everything that I do to the truck to be an improvement for me and not just form over function. After having owned brand new off the lot 4WD vehicles for over 30 years I'm happy with my choice and plan to keep it for a long time.

    I shopped around and contacted just about every dealer in Florida looking for a good deal on a TRD Pro. I was paying cash with no trade in so I expected that I would be able to work a deal somewhere. Even so, it was tough to get them to come down on a TRD Pro and some dealers refused to come off of MSRP and others added a premium to it. Luckily, this was just before the COVID outbreak hit and you could still find dealers who were ready to sell a truck, especially if they had it in stock and on the lot. It was the end of the year and right at Christmas, my truck had just come in and had a build date of 11/2019. I was able to negotiate an out the door price that was where I wanted to be and well below what the other dealers were talking. It was a no b.s. transaction and I was on my way home in the new truck in about two hours.

    Day one. Purchased December 23, 2019 from Sun Toyota in Holiday, FL. Merry Christmas!
    IMG_0051.jpg

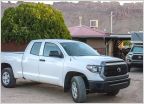
    Bone stock Crewmax in Magnetic Gray Metallic w/ sunroof and spray in bed liner from factory.
    IMG_0053.jpg

    Many mods to come.
     

    Attached Files:

    Last edited: Aug 19, 2021
  2. Sep 1, 2021 at 6:48 AM
    #2
    TampaRD Pro

    TampaRD Pro [OP] Cunning Linguist

    Joined:
    Dec 23, 2019
    Member:
    #40248
    Messages:
    418
    Gender:
    Male
    First Name:
    Stanley
    Vehicle:
    2020 MGM CM TRD Pro
    Lots.
    The only "dealer option/add on" that I purchased with the truck was to have fender flares color matched and installed. I specified black bolt heads instead of them being painted MGM like the truck. I took it back to the dealer after I had the truck for about a week and they had them ready and installed in a couple of hours.

    [​IMG]
     
    Black@Blue19 likes this.
  3. Sep 1, 2021 at 7:00 AM
    #3
    TampaRD Pro

    TampaRD Pro [OP] Cunning Linguist

    Joined:
    Dec 23, 2019
    Member:
    #40248
    Messages:
    418
    Gender:
    Male
    First Name:
    Stanley
    Vehicle:
    2020 MGM CM TRD Pro
    Lots.
    I searched around for a good price on the running boards I wanted, which are the W Drop Step Running Boards offered by Southeast Toyota dealers. I purchased them from the parts department of a local Toyota dealer here in SW Florida, but not the dealer where I purchased the truck. They were over a hundred bucks cheaper from this dealer than the other, and even cheaper than ordering them from Sparks (who also stocks them) once you factored in the shipping costs. I installed them in about an hour, taking my time and doing it by myself. Eight bolts each side, all factory pre-drilled and tapped but note that the bolts on the drivers side are a size different from the passengers. They were clearly marked and separated in the box. I looked at a lot of different side step/running boards before deciding on these. I liked the fact that they are powder coated aluminum and tuck up close to the rocker panels. They certainly aren't as protective as rock sliders but then they aren't meant to be. I looked at the S.E.T. Predator steps too, as the dealership where I purchased the truck had several lifted 2020 Tundras and Tacomas on the lot with both types installed, but decided that the steps hanging down reduced ground clearance a bit and looked like something I could bend or otherwise damage easily on the trails.

    Part: W Drop Step Running Boards (00016-34787)

    [​IMG]
     
    Black@Blue19 likes this.
  4. Sep 1, 2021 at 7:09 AM
    #4
    TampaRD Pro

    TampaRD Pro [OP] Cunning Linguist

    Joined:
    Dec 23, 2019
    Member:
    #40248
    Messages:
    418
    Gender:
    Male
    First Name:
    Stanley
    Vehicle:
    2020 MGM CM TRD Pro
    Lots.
    I added ceramic tint to the windows that is as dark as the legal limit here in Florida allows. I chose clear for the windshield with a top band. This is one of the few jobs I contracted instead of doing myself.

    upload_2021-9-1_10-5-22.jpg
     

    Attached Files:

    Last edited: Sep 1, 2021
    Metro14536 and Black@Blue19 like this.
  5. Sep 1, 2021 at 7:52 AM
    #5
    TampaRD Pro

    TampaRD Pro [OP] Cunning Linguist

    Joined:
    Dec 23, 2019
    Member:
    #40248
    Messages:
    418
    Gender:
    Male
    First Name:
    Stanley
    Vehicle:
    2020 MGM CM TRD Pro
    Lots.
    Next, I switched out all of the incandescent bulbs on the truck to LED. I used interior lights and rear brake/turn signals from @Headlight Revolution. I soldered in resistors for the rear turns to resolve the hyper-flash problem.

    All other lights I purchased from VLEDS including the cargo/third brake lights and front turn signals. For the front turn signals I used V6 EXTREME AMBER 3157CK SKU V6_KIT_EX_A_3157CK and couldn't be happier with the result.
    To avoid the radio frequency interference problem with the key fob unlocking doors while the cargo light is illuminated I used the VLEDS 2018+ TOYOTA TUNDRA CARGO LIGHTS NO RF NOISE 5500K WHITE 36 LED 921, SKU 921_36_W_T_2

    upload_2021-9-1_10-51-49.jpg
     
    Black@Blue19 likes this.
  6. Sep 1, 2021 at 8:50 AM
    #6
    TampaRD Pro

    TampaRD Pro [OP] Cunning Linguist

    Joined:
    Dec 23, 2019
    Member:
    #40248
    Messages:
    418
    Gender:
    Male
    First Name:
    Stanley
    Vehicle:
    2020 MGM CM TRD Pro
    Lots.
    I decided that I would get a CMC/BMC (Cab/Body Mount Chop) done to preclude any future clearance problems with the larger tires that I planned to install. It is a daunting task to think about cutting on your brand new expensive truck but after researching and seeing the results on other Tundras I decided that there was minimal risk if properly performed. The problem was finding someone who could do it locally that was experienced in doing this instead of just using some welder in the phone book. My main concern was the correct amount of metal to remove for clearance and avoiding excessive heat on the rubber body mount itself as it could be damaged if done incorrectly. It is an easy straightforward process to do a little cutting/welding at a time and let it cool off between welds instead of just "burning" through the job to get through in a hurry, as most retail production shops would do. I researched on this forum and also on Tacoma World for someone nearby who had experience doing this to other Toyota vehicles. I was lucky to find Tim at @Timbo's Customs, he lives in the area and is well respected for the fab work he does on Tacos and Tundras. I purchased 07+ Tundra Cab Mount Chop Plates from @Relentless Fabrication and found them to be well made, heavy duty and preformed to fit the truck. I got together with Tim and he did a great job of installing the plates in no time as I checked out his Tundra and the other Toyota vehicles in his driveway.

    IMG_0239.jpg

    IMG_0242.jpg

    BMC Done.jpg
     
    Last edited: Sep 1, 2021
  7. Sep 1, 2021 at 9:29 AM
    #7
    TampaRD Pro

    TampaRD Pro [OP] Cunning Linguist

    Joined:
    Dec 23, 2019
    Member:
    #40248
    Messages:
    418
    Gender:
    Male
    First Name:
    Stanley
    Vehicle:
    2020 MGM CM TRD Pro
    Lots.
    Next up was suspension upgrade to get ready for the larger tires. I ordered a @Coachbuilder TRD Pro Kit to make the necessary changes for wheel clearance. I specified the +3 rear shackles to maintain a little rake for when I attach my kayak or motorcycle trailers. It took a while for me to get my kit after ordering it but it was definitely worth the wait. I spoke to David at Coachbuilder on the phone before ordering to make sure I was getting the right options for my intended use and found him to be super knowledgeable and helpful. Their customer service is top notch for sure.

    I installed the kit myself and found it to be an easy process following the included documentation and instructions. Removing the rubber bushings from the leaf springs is a problem for some people but mine came out relativley easily and the new bushings were no problem to press in.

    The main delay in receiving my kit was waiting for the BORA wheel spacers to be manufactured as they were backlogged with orders. I called and spoke with Lenny at BORA concerning the delay and found him to be very nice and helpful in shipping my spacers promptly once built. I ordered the 1.25" size to give me clearance for 35" tires on the stock TRD Pro rims.

    After installing the kit I drove it straight to Firestone and purchased the "lifetime alignment" package. They aligned the vehicle using the recommendations in the Coachbuilder instructions and had no problem getting it into spec.

    This picture after the Coachbuilder install and with the stock tires looks like I skipped "leg day" at the gym, but illustrates the amount of lift I got with the kit.

    IMG_0279.jpg
     
    Last edited: Oct 4, 2021
    Black@Blue19 likes this.
  8. Sep 1, 2021 at 10:31 AM
    #8
    TampaRD Pro

    TampaRD Pro [OP] Cunning Linguist

    Joined:
    Dec 23, 2019
    Member:
    #40248
    Messages:
    418
    Gender:
    Male
    First Name:
    Stanley
    Vehicle:
    2020 MGM CM TRD Pro
    Lots.
    It was finally time to get some proper sized tires to go with the truck. I loved the way the stock Michelin ATX tires rode and felt on the truck on the highway but absolutely hated the way that they looked. IMHO the TRD Pro should come from the factory with tires more suitable for the application of the vehicle. The Michelins are good tires and I have used various versions on other vehicles I have owned with great result, however they just don't seem right for a model whose intended purpose is to have offroad capability and characteristics. I think they are fine for Platinums and SR5's that in stock form are intended to spend the majority of their time on finished surfaces, but the TRD Pro should come stock with more agressive tires with at least some offroad capability. Mind you I'm not talking about dedicated mud tires or monster truck size meats that look impressive but perform poorly on the road, but something more than street tires branded ATX.

    Tire brand, and more so tire size, is the subject of hundreds of posts on this forum. There are dozens of threads with "what size will fit" questions and answers. It is understandable though as it is a big expense to get new tires and/or wheels and one of the first things a lot of people on here want to do to their truck. I've owned 4WD vehicles continuously for over 35 years so I had a pretty good idea of what I did and didn't want regarding tires. There are trade offs with every configuration and decision. I basically wanted tires that would get me through sugar sand on the beaches and the sometimes muddy trails that I frequent. I never plan to "mud bog" the truck or do any rock crawling around here. I do want something I can air down and get me into places most 2WD's can't. I don't want extremely loud tires when on the hard roads where the truck will truthfully be most of the time, and I don't want tires so large and heavy to excessively degrade the ride and already poor gas mileage of the Tundra. That's a hard list to accomplish.

    After much consternation and research I decided to go with Toyo AT III's in 35x12.5r18. I knew that if I went with the 295/70r18's that I was seriously considering I would end up kicking myself for not going with my first choice. At the time I was buying tires the new AT III's just came out and I couldn't get them in the 295/70 size so that sealed the deal for me. I went to Discount Tire to get the Toyo's but they refused to mount the 35x12.5's on the stock TRD Pro rims due to the rim width. I ended up going to my local tire shop guy who said he would install them no problem and he gave me a great trade in credit on the Michelins as well.

    The tires cleared my UCA's with plenty of room to spare and with the Coachbuilder bumper spacers I only had a very slight rub on the driver side plastic fender liner at full lock. I fixed that with a heat gun and a basketball to concave shape the fender liner slightly. I had previously removed the front mud flaps for the BMC and I have plenty of clearance with the body mount and room to spare.

    After installing the tires I had them recheck the alignment Firestone had done and he found it to be spot on which made me feel better to have it verified by two independent shops. The steering wheel is dead center with no vibration issues, the tires ride great with minimal noise for an AT tire, acceleration suffers to a slight degree compared to the Michelins but not unreasonably so. Gas mileage still sucks, no big surprise there, but only minimally worse than before.

    IMG_0282.jpg

    IMG_0286.jpg
     
    Last edited: Sep 1, 2021
  9. Sep 1, 2021 at 12:54 PM
    #9
    TampaRD Pro

    TampaRD Pro [OP] Cunning Linguist

    Joined:
    Dec 23, 2019
    Member:
    #40248
    Messages:
    418
    Gender:
    Male
    First Name:
    Stanley
    Vehicle:
    2020 MGM CM TRD Pro
    Lots.
    Now it was time to get that bed covered. We use our truck for camping, hauling kayaks, motorcycles and dive gear so I need a way to store items securely in the bed. As always, I researched the web and specifically this forum to come up with ideas to help me find the right bed cover. It rains a LOT here in SW Florida in the spring and especially in the summer so keeping things dry as possible was also a requirement for me. I intended to get a roof top tent in the future so that was also a consideration. After looking at all of the options I settled on the Diamondback HD for several reasons. First there is security, this bed cover is very secure with it's locking system in the stock Toyota rails. Secure enough that I see Florida Highway Patrol pickups around here with Diamondback covers on them to protect their gear in the back, that says a lot to me. Second is the weight carrying capacity. The HD is rated at 1750 pounds on top of it, that pretty much exceeds the weight limit of the bed rails to be honest. Since I can't easily have a traditional overlanding style bed rack with the DB cover, I need to be able to mount the RTT to the bed cover itself and have it support the weight of it and its occupants. True, KB Voodoo and a couple of other brands have options for mounting a bed rack with a DB bed cover but none of them allow easy access to the bed with the rack installed. I still want the capability to open the cover with the rack in place without a big production and also to mount the rack in a way to maintain the water resistant seal that the DB cover offers. Diamondback and Front Runner put together a system that allows a bed rack to be mounted on top of the DB cover, this is excellent for mounting a RTT on top of the bed cover while still allowing easy access to the bed and adding various stowage options when the RTT is not mounted on the rails. The racks do not interfere with opening and closing the cover while still attached, and since they're mounted to the cover itself they don't affect the rubber seal around the perimeter of the bed rails.

    I ordered a Diamondback HD cover, a Diamondback Cross Bin 13 aluminum box to securely store tools and recovery gear under the cover, then later added the Front Runner X Diamondback Rack System. The cover and Cross Bin arrived after about a month and I installed it myself with help from my son in positioning the panels on the bed rails.

    Here again, it is daunting to drill into your brand new $2000 waterproof bed cover to mount load bars but the process was sound and I have not had any leaking or adverse effect in the year since installing the load bars.

    upload_2021-9-1_15-32-8.jpg

    Bed covered, check.
    upload_2021-9-1_15-32-59.jpg

    Cross Bin 13 in truck.
    upload_2021-9-1_15-40-34.jpg

    Front Runner Load Bars (w/ CVT tent installed, which came later)
    upload_2021-9-1_15-46-26.jpg
     
    Last edited: Dec 18, 2021
    Black@Blue19 likes this.
  10. Sep 1, 2021 at 1:09 PM
    #10
    TampaRD Pro

    TampaRD Pro [OP] Cunning Linguist

    Joined:
    Dec 23, 2019
    Member:
    #40248
    Messages:
    418
    Gender:
    Male
    First Name:
    Stanley
    Vehicle:
    2020 MGM CM TRD Pro
    Lots.
    I also started installing some interior mods, like Weathertech full coverage floor mats front and rear. Then, I installed the ESP Under Rear Seat Storage System.

    upload_2021-9-1_16-5-55.jpg
    Cut holes through the Weathertech mats, carpet and foam underneath the seat.

    upload_2021-9-1_16-7-13.jpg
    Installed Kilmat sound deadener to the floor of the cab where the foam was removed for the insert.

    upload_2021-9-1_16-8-50.jpg
    Placed insert into prepared holes for a clean install.
     
    Last edited: Oct 7, 2021
    Fastlane47 and Black@Blue19 like this.
  11. Sep 1, 2021 at 1:26 PM
    #11
    TampaRD Pro

    TampaRD Pro [OP] Cunning Linguist

    Joined:
    Dec 23, 2019
    Member:
    #40248
    Messages:
    418
    Gender:
    Male
    First Name:
    Stanley
    Vehicle:
    2020 MGM CM TRD Pro
    Lots.
    Added a little flair to my MGM truck with some TVD Vinyl Decals in keeping with the black and red color scheme of the TRD Pro. Radio/head unit red accent lettering (not shown).

    [​IMG]
    Grill lettering.

    [​IMG]

    upload_2021-9-1_16-18-40.jpg
    Tailgate handle lettering.

    [​IMG]
    Door sill protectors and accent lettering.
     
    Fastlane47 and Black@Blue19 like this.
  12. Sep 1, 2021 at 1:33 PM
    #12
    TampaRD Pro

    TampaRD Pro [OP] Cunning Linguist

    Joined:
    Dec 23, 2019
    Member:
    #40248
    Messages:
    418
    Gender:
    Male
    First Name:
    Stanley
    Vehicle:
    2020 MGM CM TRD Pro
    Lots.
    Not shown;
    1. I installed the OEM Toyota electronic tailgate lock. Toyota part number PK3B6-34. Easy-peasy install, plug-n-play, quiet, too.
    2. Ordered and installed the OEM drivers side grab handle from Sparks Toyota, should have come this way from the factory.
    3. Installed the Carlinkit Wireless Apple CarPlay Adapter Dongle for wired CarPlay, works great!
    4. Painted my brake calipers red using brake caliper paint, then installed TRD heat resistant vinyl lettering on them.
    5. Painted my front tow hooks red.
     
    Last edited: Sep 1, 2021
    Black@Blue19 likes this.
  13. Sep 1, 2021 at 1:45 PM
    #13
    TampaRD Pro

    TampaRD Pro [OP] Cunning Linguist

    Joined:
    Dec 23, 2019
    Member:
    #40248
    Messages:
    418
    Gender:
    Male
    First Name:
    Stanley
    Vehicle:
    2020 MGM CM TRD Pro
    Lots.
    I installed Rago Fabrication bed stiffeners in preparation for installing my new RTT. I really like the design and it was a relatively simple install other than having large hands getting into small spaces.

    [​IMG]
     
    Black@Blue19 likes this.
  14. Sep 1, 2021 at 1:47 PM
    #14
    TampaRD Pro

    TampaRD Pro [OP] Cunning Linguist

    Joined:
    Dec 23, 2019
    Member:
    #40248
    Messages:
    418
    Gender:
    Male
    First Name:
    Stanley
    Vehicle:
    2020 MGM CM TRD Pro
    Lots.
    I bought a CVT Mt. Shasta Hybrid Extended roof top tent for camping.

    [​IMG]

    [​IMG]

    [​IMG]
     
    Last edited: Sep 1, 2021
    Fastlane47 and Black@Blue19 like this.
  15. Sep 1, 2021 at 1:57 PM
    #15
    TampaRD Pro

    TampaRD Pro [OP] Cunning Linguist

    Joined:
    Dec 23, 2019
    Member:
    #40248
    Messages:
    418
    Gender:
    Male
    First Name:
    Stanley
    Vehicle:
    2020 MGM CM TRD Pro
    Lots.
    Finally got around to installing my roof rack that I ordered around Black Friday. I went with the Victory 4x4 rack as I have a friend with the same rack and like the sturdy construction and the way it looks on a Tundra. I am aware of the controversy about the vendor and former install instructions that apparently led to damaged side curtain airbags with some members of this forum. Thanks to @TwoWheels, the original poster of that thread, who brought this safety issue to light and as always for the good information this forum provides to the Tundra community. I took extra precautions when drilling my roof to prevent any possible damage to my airbags and have to admit it was daunting drilling into the roof of my truck for any reason. First, I marked the locations to drill the holes to mount the rack. Then I dropped the headliner around the sides of the truck so that I could inspect the clearance of the airbags and any wiring that might be in that area. Then I took a piece of 1/2" inch thick x 2" wide aluminum flat bar and laid it on top of the airbags beneath the drilling locations as I drilled each set of holes just in case I accidentally over drilled a hole. I used drill stops set to around 5/8" inch depth on the drill bits and carefully drilled the holes. By going slow I was able to control the drill pretty well and the stops "bottomed out" the drill bit without slipping and prevented any over drilling. I used an Astro Pneumatic Model 1442 RivNut Setter to properly set the rivnuts instead of the flimsy wrench tool provided with the rack. I filled the holes with marine grade sealant before setting the rivnuts. Then I bolted the rack to the rivnuts and added some more sealant on top of the bolts just for good measure. The rack is now very sturdily mounted to the the truck and is ready to mount my backordered CVT Hybrid Awning when it comes in.

    [​IMG]
    I installed a 4" wide 3M "clear bra" over the windshield to prevent the rubber trim on the bottom of the fairing from chafing the paint. (It's kinda hard to see.)

    [​IMG]
    I measured and marked the hole locations, and installed drill depth stops on the drill bits to be used.

    [​IMG]
    Dropped the sides of my headliner to inspect and have access to the side curtain airbags.

    [​IMG]
    This is the 1/2" thick x 2" wide aluminum flat bar I laid over the top of the airbags prior to drilling the roof.

    [​IMG]
    Astro Pneumatic Model 1442 RivNut Setting Tool and 3M marine grade sealant. Holes drilled and rivnuts set.

    [​IMG]
    Finished results.

    [​IMG]

    [​IMG]
     
    Last edited: Sep 1, 2021
    65SNAKE and Black@Blue19 like this.
  16. Sep 1, 2021 at 2:01 PM
    #16
    TampaRD Pro

    TampaRD Pro [OP] Cunning Linguist

    Joined:
    Dec 23, 2019
    Member:
    #40248
    Messages:
    418
    Gender:
    Male
    First Name:
    Stanley
    Vehicle:
    2020 MGM CM TRD Pro
    Lots.
    I fabbed up some aluminum flat bar mounts for my Oak Orchard Canoe style J-Cradles so that I could attach them to my new roof rack. This works great for me when I just want to take one or two kayaks and not use my 6-up Continental kayak trailer. It can be difficult finding parking for the truck and trailer at some of the put-ins during the cool weather busy season in Florida and also allows me to use the receiver bike hitch. I can even mount my 14 foot Wilderness System Pungos up top and not interfere with my RTT, even though this time we took our 12 footers. I used soft mounts for the bow lines under the hood to avoid any chafing and attached the stern lines to my Diamondback HD cleats.

    [​IMG]

    [​IMG]
     
    65SNAKE and Black@Blue19 like this.
  17. Sep 1, 2021 at 2:04 PM
    #17
    TampaRD Pro

    TampaRD Pro [OP] Cunning Linguist

    Joined:
    Dec 23, 2019
    Member:
    #40248
    Messages:
    418
    Gender:
    Male
    First Name:
    Stanley
    Vehicle:
    2020 MGM CM TRD Pro
    Lots.
    Finally received and installed my backordered CVT 79" Hybrid Awning that matches my CVT Mt. Shasta Hybrid RTT. I used the Victory 4x4 awning hangers on my rack and they worked perfectly. Really happy to make this addition to my overlanding project rig.


    [​IMG]

    [​IMG]
     
    Fastlane47 and Black@Blue19 like this.
  18. Sep 1, 2021 at 2:09 PM
    #18
    TampaRD Pro

    TampaRD Pro [OP] Cunning Linguist

    Joined:
    Dec 23, 2019
    Member:
    #40248
    Messages:
    418
    Gender:
    Male
    First Name:
    Stanley
    Vehicle:
    2020 MGM CM TRD Pro
    Lots.
    Last edited: Dec 18, 2021
  19. Sep 1, 2021 at 2:11 PM
    #19
    TampaRD Pro

    TampaRD Pro [OP] Cunning Linguist

    Joined:
    Dec 23, 2019
    Member:
    #40248
    Messages:
    418
    Gender:
    Male
    First Name:
    Stanley
    Vehicle:
    2020 MGM CM TRD Pro
    Lots.
    Finally got around to installing my Switch-Pros SP9100, too.

    To secure the SP9100 in the engine bay I used the PowerTrays standoff version tray that mounts on top of your engine bay fuse/relay box.
    https://www.powertrays.com/collections/powertrays/products/switch-pros-powertray-standoff

    You can purchase the accessory bundle for the terminal blocks and wiring or source them separately for a little less.
    https://www.powertrays.com/collecti...essory-bundle-for-switch-pro-powertray-toyota

    There is also a circuit breaker option instead of the marine rated battery fuse version as well.

    Next up, ditch lights.

    [​IMG]

    [​IMG]

    [​IMG]
     
    Last edited: Sep 3, 2021
    Black@Blue19 likes this.
  20. Sep 1, 2021 at 2:17 PM
    #20
    TampaRD Pro

    TampaRD Pro [OP] Cunning Linguist

    Joined:
    Dec 23, 2019
    Member:
    #40248
    Messages:
    418
    Gender:
    Male
    First Name:
    Stanley
    Vehicle:
    2020 MGM CM TRD Pro
    Lots.
    Installed my custom TRD Pro battery hold down bracket from @Coupe.

    [​IMG]
     
    Black@Blue19 and Coupe like this.
  21. Sep 1, 2021 at 2:19 PM
    #21
    TampaRD Pro

    TampaRD Pro [OP] Cunning Linguist

    Joined:
    Dec 23, 2019
    Member:
    #40248
    Messages:
    418
    Gender:
    Male
    First Name:
    Stanley
    Vehicle:
    2020 MGM CM TRD Pro
    Lots.
    Also, got around to installing my Diode Dynamics SS3 Pro ditch lights on my Rago Low Pro Mounts.

    [​IMG]

    [​IMG]
     
    Black@Blue19 likes this.
  22. Sep 1, 2021 at 2:26 PM
    #22
    TampaRD Pro

    TampaRD Pro [OP] Cunning Linguist

    Joined:
    Dec 23, 2019
    Member:
    #40248
    Messages:
    418
    Gender:
    Male
    First Name:
    Stanley
    Vehicle:
    2020 MGM CM TRD Pro
    Lots.
    Installed LED "Porch Lights" on my roof rack. My intention was to connect four lights that could be controlled by the OEM cargo light switch on my dash. I also wanted to be able to independently control the lights for each side, since I use my CVT canopy on either side of the truck depending upon my camping site. Most importantly I wanted to avoid drilling any holes in the roof to run the wires if at all possible. Thanks go out to @junior and his "My DIY Roof Rack" thread which gave me some ideas as to how to accomplish this.

    These lights sell for $99 a pair for this rack from the manufacturer of the rack.
    https://www.victory4x4.com/product/VRKLED.html

    I found the exact same lights (check the specifications on both sites) for $14.95 each so I purchased four of them.
    https://www.superbrightleds.com/mor...ch-and-utility-light-700-lumen-12v/5568/9848/

    [​IMG]

    The light kit from from the rack manufacturer comes with CNC cut backing plates. I bought a 48" aluminum ruler for $4.99. To make my backing plates I cut them to length and drilled holes for the bolts, it was the perfect width for the cut outs in the rack.
    [​IMG]

    [​IMG]

    I spray painted the backing plates with black enamel. These are the parts I used to make my wiring harness for the lights.
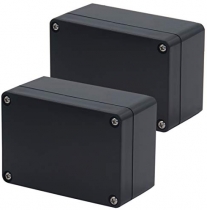
    2 - waterproof boxes from Amazon.
    [​IMG]
    $9 Otdorpatio 2 Pack Project Box IP65 Waterproof Junction Box ABS Plastic Black Electrical Boxes DIY Electronic Project Case Power Enclosure 3.94x2.68x1.97"(100 x 68 x50 mm)


    2 - pigtails to fit my cargo light bulb receptacles.
    [​IMG]
    $10 BlyilyB 6-Pack T10 Male Socket Extended Wire Connector Plug Adapter Assembly Holders Used For Turn Signal Lights, Brake Lights,Tail Lights, Daytime Running Lights


    2 - small waterproof switches
    [​IMG]
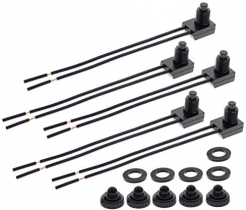
    $10 5Pcs 12V Waterproof Push-Button On-Off Switch, Carbhub 12V Waterproof Push-Button On-Off Switch with 4" Leads For Motorcycle/Auto Car


    I didn't end up using the 2 pictured male and female Deutsch connectors for this install, I soldered my connections instead. I also used marine grade adhesive lined shrink wrap on all the connections.
    [​IMG]

    I removed my cargo light LED bulbs and installed the pig tails. I drilled two small holes through the plastic top of my cargo/third brake light receptacle. I used rubber grommets and black silicone sealant on both sides of the holes (not shown).


    [​IMG]

    I ran the wires along the inner side of the rack and mounted the waterproof box behind the Victory logo using that cutout for the bolts for the box.

    Note: I temporarily used zip ties to secure the wiring to the rack but didn't care for the look. I went back and installed black plastic cable clips with exterior 3M foam adhesive for a much cleaner hidden attachment of the wiring.
    https://www.amazon.com/gp/product/B08RMS5H25?ie=UTF8

    [​IMG]

    I mounted a waterproof switch on top of each box to keep it dry and I can reach up and click the switch to turn on/off the lights on either side (it rained on me).

    [​IMG]

    The lights work great, give out a lot of light and the two rear facing ones replace the cargo lights where I tapped the connection from. It's more useful for them to be further outboard on the rack when I use my RTT anyway.

    [​IMG]

    Overall a cost effective, secure and watertight method of installing lights on my cab rack without drilling the roof.

    [​IMG]
     
    Last edited: Oct 4, 2021
    Black@Blue19 likes this.
  23. Sep 1, 2021 at 2:28 PM
    #23
    TampaRD Pro

    TampaRD Pro [OP] Cunning Linguist

    Joined:
    Dec 23, 2019
    Member:
    #40248
    Messages:
    418
    Gender:
    Male
    First Name:
    Stanley
    Vehicle:
    2020 MGM CM TRD Pro
    Lots.
    I also attached Rhino Rack Pioneer MaxTrax Small Side Mount Brackets to my Front Runner x Diamondback Rack System, so that I can carry my Maxtrax MKII's out of the bed area and still carry my kayaks on my roof rack at the same time.
    [​IMG]
    Rhino Rack Pioneer MaxTrax Side Mount Bracket, Small


    https://diamondbackcovers.com/colle...oducts/front-runner-x-diamondback-rack-system

    [​IMG]

    I used another set of the Rhino Rack Pioneer MaxTrax Small Side Mount Brackets to attach a pair of Victory Roof Rack Accessory Mounts on the other side of the bed to allow mounting of RotopaX or shovel/axe, etc.

    [​IMG]

    I used eye bolts as part of the mounting assembly to add mounting options for the bars.

    [​IMG]

    [​IMG]
     
    Last edited: Oct 4, 2021
    Black@Blue19 likes this.
  24. Sep 1, 2021 at 2:30 PM
    #24
    TampaRD Pro

    TampaRD Pro [OP] Cunning Linguist

    Joined:
    Dec 23, 2019
    Member:
    #40248
    Messages:
    418
    Gender:
    Male
    First Name:
    Stanley
    Vehicle:
    2020 MGM CM TRD Pro
    Lots.
    And... to finish my weekend modding I installed a Midland MicroMobile MXT275 GMRS radio into Rotundra. The install was easy as I mounted the head unit inside the center console where it fit nicely. I ran the hot wire directly to the battery to avoid electrical interference. I actually ran it to my new Blue Seas Fuse Block that I installed with my Switch Pros 9100 system recently. I used a 10 amp fuse in the block, it made for a very clean install. The radio comes with a cable and small magnetic base antenna but I purchased a Midland 6 meter NMO cable and a Midland 3db Gain Ghost Antenna (and a Midland 32" 6 db Gain Antenna with Spring Base to give me more options depending upon terrain and conditions). I ran a CAT 6 cable extension through my console to one of the factory switch blanks under the radio. I modified the switch blank to accept the female RJ-45 connector and it looks like it came that way from the factory. I plugged the microphone cable into this receptacle and now the unit is completely hidden except for the mic which has all the necessary controls for operating the radio.
    [​IMG]
    $150 Midland MicroMobile 15W GMRS Two-Way Radio with Integrated Control Microphone

    [​IMG]

    $25 Midland 6 Meter Antenna Cable with NMO Connector - Works with Midland MicroMobile MXT105, MXT115, MXT275, MXT400

    [​IMG]
    $40 Midland 3 dB Gain Ghost Antenna with NMO Connection - Works with Midland MicroMobile MXT105, MXT115, MXT275, MXT400

    [​IMG]
    $50 Midland 6 dB Gain Antenna with Durable Spring Base and NMO Connection - Works with Midland MicroMobile MXT105, MXT115, MXT275, MXT400


    https://www.amazon.com/dp/B08YRJFP9D?ref=ppx_yo2_dt_b_product_details


    [​IMG]

    I routed the antenna cable through the rubber firewall grommet into the engine bay and attached it to my Rago Fabrication Lo-Pro Ditch Light Bracket via a Rago Ham Antenna Ditch Bracket Extension.

    [​IMG]

    [​IMG]
     
    Last edited: Oct 4, 2021
    vanthesupreme and Black@Blue19 like this.
  25. Sep 1, 2021 at 2:32 PM
    #25
    TampaRD Pro

    TampaRD Pro [OP] Cunning Linguist

    Joined:
    Dec 23, 2019
    Member:
    #40248
    Messages:
    418
    Gender:
    Male
    First Name:
    Stanley
    Vehicle:
    2020 MGM CM TRD Pro
    Lots.
    My wife surprised me with a Krazy Beaver for a belated birthday present... shovel that is.
    Installed a couple of pair of QuickFist mounts to my new accessory rack mounting system and mounted it, an axe and on the other side my Maxtrax recovery boards in anticipation for a weekend excursion.

    [​IMG]

    [​IMG]

    [​IMG]
     
    Black@Blue19 likes this.
  26. Sep 1, 2021 at 2:33 PM
    #26
    TampaRD Pro

    TampaRD Pro [OP] Cunning Linguist

    Joined:
    Dec 23, 2019
    Member:
    #40248
    Messages:
    418
    Gender:
    Male
    First Name:
    Stanley
    Vehicle:
    2020 MGM CM TRD Pro
    Lots.
    Got around to making the dual rear seat power outlet mod. Thanks go out to @Chelly for the excellent computer printed mounting plate. Super easy and clean install.
    I went with A USB 3.0 Quick Charging Car Outlet without the voltage reading because those kind of spurious lights drive me nuts in a dark cab at night. This one does light up blue when in use but that matches the rest of the lighting in the truck and is normally covered.
    [​IMG]
    $13 YONHAN 36W Quick Charge 3.0 Dual USB Car Charger Socket, Metal Waterproof 12V USB Outlet with Blue LED & 10A Fuse for 12V/24V Marine Boat Golf Cart Truck Motorcycle and More


    [​IMG]

    [​IMG]
     
    Last edited: Oct 4, 2021
    bulldog93, 65SNAKE and Black@Blue19 like this.
  27. Sep 1, 2021 at 3:12 PM
    #27
    Black@Blue19

    Black@Blue19 Old Salt

    Joined:
    Dec 16, 2018
    Member:
    #23066
    Messages:
    3,699
    Gender:
    Male
    First Name:
    Ken
    SE Texas
    Vehicle:
    21 SR5 TSS Onroad, 24 Camaro 2SS 6.2 L
    To much to list:)
    Wow!!! That is a lot of add ons and each looks nicely done!!! Good On Ya!!! Very nice looking rig!!! Way to go!!:)
     
    Nic146 and TampaRD Pro[OP] like this.
  28. Sep 1, 2021 at 3:27 PM
    #28
    TampaRD Pro

    TampaRD Pro [OP] Cunning Linguist

    Joined:
    Dec 23, 2019
    Member:
    #40248
    Messages:
    418
    Gender:
    Male
    First Name:
    Stanley
    Vehicle:
    2020 MGM CM TRD Pro
    Lots.
    Thanks! It's a work in progress, for sure. There are still things on my list that I want to do as time and the budget allows.
     
  29. Sep 2, 2021 at 2:30 PM
    #29
    RelentlessFabrication

    RelentlessFabrication relentlessfabrication.com Vendor

    Joined:
    Sep 12, 2018
    Member:
    #19307
    Messages:
    171
    Sparks, NV
    Glad to hear the plates worked out for you!
     
  30. Sep 3, 2021 at 8:32 AM
    #30
    Grendel

    Grendel New Member

    Joined:
    May 10, 2017
    Member:
    #7663
    Messages:
    315
    Gender:
    Male
    Vehicle:
    2016 Quicksand TRD PRO
    Great looking truck!!! I was going to do something similar with my roof rack lights but go in the side of the third brake light. But I may just go in the top. when you installed did you drop the head liner or were you able to hook everything up through the brake light? Thanks
     
    Black@Blue19 and TampaRD Pro[OP] like this.

Products Discussed in

To Top