1. Welcome to Tundras.com!

    You are currently viewing as a guest! To get full-access, you need to register for a FREE account.

    As a registered member, you’ll be able to:
    • Participate in all Tundra discussion topics
    • Transfer over your build thread from a different forum to this one
    • Communicate privately with other Tundra owners from around the world
    • Post your own photos in our Members Gallery
    • Access all special features of the site

Introduction: New (to us) 05 Tundra 2WD DC

Discussion in '1st Gen Tundras (2000-2006)' started by BadBryan, Aug 12, 2025.

  1. Aug 12, 2025 at 9:29 PM
    #1
    BadBryan

    BadBryan [OP] New Member

    Joined:
    Aug 12, 2025
    Member:
    #139201
    Messages:
    16
    Gender:
    Male
    First Name:
    Bryan
    Vehicle:
    05 Tundra SR5 2WD DC V8 Silver Sky Metallic
    Hey everyone,

    posted this in new member section, but thought it might be more appropriate here. Hope you don’t mind the introduction posted here, too.

    I’ve been reading through the forum for the past week and learning a lot (especially the “So you wanna buy/just bought…” thread), so I figured it was time to introduce myself.

    Back in the early/mid-2000s I had an ’89 4WD Toyota Van that I absolutely loved. Bought it used, high miles, but dependable as long as I replaced the alternator now and then thanks to that infamous power steering leak dripping on it (if you know those vans, you know). It was my first time wrenching on my own vehicles instead of just dropping them off at a shop, and it gave me a real appreciation for communities like this one.

    Christmas 2008 was a turning point. My wife and I were driving from SoCal to British Columbia in her compact 2WD sedan when we got caught in that massive snowstorm that shut down Portland. The same day, I got the news that my father had tragically passed away. We were stranded with no idea how long we’d be stuck. My wife, being brilliant, started calling around to see if we could make a deal on a 4WD Toyota. She actually worked it out with a local dealer to deliver us a brand new 2008 FJ Cruiser, like ordering a pizza. Fell in love with it instantly, sold the van (ironically, to a guy from Portland who flew down to pick it up), and the FJ has been bulletproof ever since.

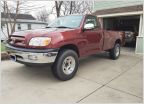
    Even with the FJ, I’ve always wanted a pickup. For years I’ve made do with tarps in the SUV, renting trailers, or borrowing trucks. I’ve browsed Craigslist off and on, but never found “the one”… until recently. I spotted an ad for a 2005 Tundra Double Cab SR5, 2WD, low miles, priced right. Showed it to my wife right after waking up and decided to jump on it. We were the first to call, and it was only about an hour away.

    Turns out it was a single-owner truck, driven by an elderly gentleman and maintained primarily at the dealership. The Carfax was full of service records, including not one but two timing belt replacements, the most recent just a few thousand miles ago. Frame looked great, and it checked every box for our needs. Just some dents and dings in body, cosmetic; a very annoyingly drivers side mirror vibration; bad stereo head unit; and a concerningly loud AC blower on high. Also, no record of LBJ replacement. We bought it on the spot. So far, no surprises.

    Specs: 2005 Tundra DC SR5 2WD, 133,500 miles, sunroof, JBL sound, Toyota bed liner.

    Now I’m here to learn, wrench a bit, and make smart upgrades. First on my radar (obviously):
    • OEM lower ball joints
    • Bilstein 4600 shocks
    • Possibly LCA bushings while I’m in there (Have a 10K Dake)
    • TRD brake pads and stainless steel brake lines, maybe (still researching…)
    The one catch—I’ve had back surgery and need to be very careful with lifting and bending. If I have help with removing/replacing the wheels and take it slow, I wonder if I may be able to handle the LBJ/shock job… but I’m also realistic. If it’s too much physically, I will need to source a trusted SoCal shop, bring OEM parts, and pay for the labor.

    So my intro doubles as a question: For those who’ve done LBJs and shocks on these trucks, is it a doable job for someone with a bad back (with help for the heavy lifting), or should I farm it out? Can anyone in SoCal recommend a good shop in the Santa Barbara area, or reasonable drive?

    Glad to be here and looking forward to learning from all of you.

    IMG_7034.jpg IMG_7036.jpg DSC01221.jpg IMG_7135.jpg IMG_7137.jpg
     
    bmf4069, MooreKen, BroHon and 7 others like this.
  2. Aug 12, 2025 at 9:50 PM
    #2
    455h0le_dachshund

    455h0le_dachshund Death machine & man in love gogogogo

    Joined:
    Nov 21, 2023
    Member:
    #107257
    Messages:
    8,395
    First Name:
    Rev. Hotdog
    TX...big surprise
    Vehicle:
    Dragstrip Rocketship, Death Machine
    How bad a back we talking? I have a bad back from being overweight and hunched over most my life, but with a milkcrate to sit on, I've swapped my front suspension several times. Both by myself and with a second set of hands. Same goes for the LBJs. Make sure to get a ball joint removal tool to make it easier.

    Given your surgery, its probably best to pay someone or find some tundra locals on this forum who are willing to help for food and booze. That way you don't strain your back.

    For the front shocks, most auto parts stores will let you rent coil compressor.they are a bit sketchy though. I've used em a few times. Or just remove the front coil assembly and take it along with the new shock to a.shock that has a wall mounted compressor. Then reinstall yourself.
     
  3. Aug 12, 2025 at 10:34 PM
    #3
    Upshot Knothole

    Upshot Knothole New Member

    Joined:
    Sep 5, 2024
    Member:
    #122480
    Messages:
    380
    Gender:
    Male
    First Name:
    Thatchery
    PDX OR
    Vehicle:
    2003 SR5 V8 AC TRD 4x4
    With a proper impact wrench, front suspension tools, and an able bodied helper, it should be doable. The heaviest lifting is mounting the tires back on when you're done and torquing stuff down. I did mine maybe a month or so after getting off crutches from a broken knee. It was awkward, but not horrible. Most of it can be done from a rolling stool or a milk crate, just make your helper crawl underneath for the 4 bolts on the bottom.
     
  4. Aug 13, 2025 at 6:57 AM
    #4
    shifty`

    shifty` Earth acid cleanses me, cleanses me clean

    Joined:
    Jun 20, 2020
    Member:
    #48239
    Messages:
    31,487
    Gender:
    Male
    ATL
    Vehicle:
    '06 AC Limited V8/4WD
    (see signature for truck info)
    If you're OK with sharing, what does the back surgery involve? Are you talking lumbar/sacral fusion, L3-L5 and potentially into S1-S2, i.e. the type of shit where you won't be cleared to drive for (potentially) 3-4 months and the doctor will say you shouldn't lift anything heavier than 20-30lb, and not until they confirm the bones are well-fused? Or are you going in for cervical stuff, because you have a bone spur that's impinging on your spine causing referrals into your hands, or maybe a thoracic/lumbar laminectomy, blown disk, ???

    I was sick when I did my overhaul. Lots of health issues. To the point I had to back out, wait a few weeks, then jam it in before having surgery to remove shit from my body. I saw the price tag on what two local shops wanted to charge and backed out. 6-8 hours of work quoted, and all north of $2k-3k, when I felt I could (and ultimately did) do in 3-4 hours for the front and 1-2 hours out back.

    On the bullets provided, the LCA bushings, dude, just replace the LCAs during the next Toyota Parts national sale. Order online for local pickup or something. I can explain why if you really need to know. And don't bother replacing unless those LCA bushings are clearly fucked. Just, whatever you do, don't use aftermarket rubber, or you'll be doing it again in 1-3 years from now. Don't buy aftermarket LCA, none of them are worth a shit (trust me, we've tried every brand on here that's got a decent reputation). You can get new LCA during Toyota Parts Program sales for $250-350/ea, OEM bushings during non-sales will cost you that much.

    I wouldn't bother with the stainless brake lines, and for the TRD pads ... make sure you can use them in your 13WL calipers. I'd just buy the Advics kit if I were you.

    Note you have the LSPV, so when/if you bleed, start at the LSPV first, then move to the passenger rear, driver rear, passenger front, driver front. Pressure bleeding is king, vacuum bleeding works, don't recommend classic pedal-mash bleeding.

    Also note you have LSD rear, and they really don't like synthetic fluids (chatter). The Valvoline flex packs and Amsoil Severe Gear are the only two "proven" no-chatter synthetics. Most people use Lucas 80w90 or Motul 90 conventional. I tell you this as the self-admitted dumbass who doubted others, and spent like $100 on Mobil1 synthetic gear oil for mine, and ... yup, had to dump it all after getting chatter while backing up with the wheel turned, maybe the 2nd or 3rd trip out of my garage? Mobil1 refunded me, but man ... what a waste!
     
    BadBryan[OP] and bfunke like this.
  5. Aug 13, 2025 at 8:33 PM
    #5
    BadBryan

    BadBryan [OP] New Member

    Joined:
    Aug 12, 2025
    Member:
    #139201
    Messages:
    16
    Gender:
    Male
    First Name:
    Bryan
    Vehicle:
    05 Tundra SR5 2WD DC V8 Silver Sky Metallic
    Developed back pain, but most people in my circle of friends and teammates also said their backs hurt. My assumption was that I was no different, so pushed through it. People depended on me, and I wanted to be there for them.

    My wife, who was fighting cancer at the time, noticed it worsening and urged me to see a doctor. Tests showed I needed surgery at L4, L5, and S1. I had a discectomy and foraminotomy, timed between her cancer surgeries.

    The odds were good, but I landed in the small group where surgery did not work. Scar tissue on the nerve root left my left leg weak and the pain constant. I could not return to work.

    No fusion was needed, but a spinal cord stimulator reduced the pain dramatically. Now I use a cane for distance, limit bending and lifting, and work smarter with help from my wife, my strong 11-year-old, and the right tools.

    Having been through all this, I will not go back to that level of injury or pain. If I cannot do a job safely for my body, I will not do it.

    That is why I am in this deep research phase reading past posts, watching videos, and asking questions. I am in no huge rush, but I have read enough here to realize I need to do the LBJ soon to avoid the risk of a catastrophic failure.

    My plan now is LBJ and shocks, adding LCA or other parts only if needed, and skipping brake lines. The truck drives smooth, so I will avoid overdoing it.

    Thank you, Shifty, and others for the advice. There is so much knowledge in this forum. Most of my questions have already been answered so I just need to keep reading and searching.

    Side note, during recovery I discovered the YouTube channel “Scoutcrafter.” Tool restoration became a back-friendly hobby that gave me an outlet. There is something satisfying about turning a rusty old tool into something that looks and works like new again.

    This truck, and this community, scratch that same itch.
     
  6. Aug 14, 2025 at 5:54 AM
    #6
    shifty`

    shifty` Earth acid cleanses me, cleanses me clean

    Joined:
    Jun 20, 2020
    Member:
    #48239
    Messages:
    31,487
    Gender:
    Male
    ATL
    Vehicle:
    '06 AC Limited V8/4WD
    (see signature for truck info)
    Awesome, although I'm sorry to hear about your situation, healthwise. Realizing it could be worse, and a lot of us, me included, are waiting for that other shoe to drop. With all the skateboarding shenanigans I had as a juveline, and early adulthood, I'm still shocked my knees, my ankles, my hips haven't given out, and I haven't had any back issues (yet). I know my spine is compressed at this point, I'm 1½" shorter than I was when I graduated high school 35yrs ago. Hopefully things pick up, the body is pretty amazing in what it can manage to rebuild and adapt to.

    On the suspension, there may be a shop in SoCal that can help - we do have several members in the area. We actually may have a member or two on here that'd be willing to swing over and work with you on it, I've done similar for forum members, and I've also done so for people on other forums who needed a hand, and I've had people do the same for me when I needed a hand.

    On some of the other topics, I assume you're aware of the bolts that need tightening to fix the mirror issue? It's a common problem. I guess I need to add that in our community info thread, which lists a lot of the other issues and fixes for our trucks. Tightening these TORX T15 and T25 fasteners usually fixes the mirror wobble.

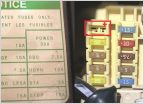
    Loud A/C blower on high: There is no cabin filter, so debris can drop right into the blower motor, and often does. Likewise, there's a fastener that sits just above the blower motor that will begin to leak after 10-15 years, and dump water into the blower motor housing. If you look under the glovebox, find the round blower motor (blue circle below). Unplug its harness, and there's three 10mm bolts to pull out, and the motor drops down, and can be cleaned out. Take a pic of what you find inside! Some people have found full on mouse corpses. Also worth pointing out, the blower motor resistor (where the red box is) is held in by two bolts, this is what controls the speed selection of your fan. It needs to be carefully slid out of its hole. You can also vacuum inside there, as smaller debris will make its way in there, lead to low air flow, bad smells, etc. This reply covers how to refresh and clean out the evaporator coil, which you can see in this pic, all the wavy fins.

    (more text below, after the pic)


    Happy to kick you some advice on the stereo, or let you know if there may be a fix. Got some symptoms?

    Likewise, any thoughts on what you'd like on the suspension, like if you wanted to maybe pick up the nose a hair, to get rid of the crazy forward rakes these trucks had from the factory, but not go all-out to make the truck sit level?
     
  7. Aug 14, 2025 at 1:40 PM
    #7
    Hooptytrix

    Hooptytrix Squeaky Chicken

    Joined:
    Nov 12, 2016
    Member:
    #5179
    Messages:
    1,783
    Gender:
    Male
    Dirty South
    Vehicle:
    2000 AC 4x4, 2001 AC 4x4 Sold. 2005 DC SR5 2WD
    Welcome to the best gen family. After reading about your back struggles, I would definitely say pay somebody. I've got a few miles on this body and I'm comfortable saying "nope" .
     
    BadBryan[OP] and Kalannar97 like this.
  8. Aug 14, 2025 at 3:15 PM
    #8
    bfunke

    bfunke Tundra Curmudgeon

    Joined:
    Oct 13, 2019
    Member:
    #37321
    Messages:
    2,713
    Gender:
    Male
    First Name:
    Bryan
    South Carolina
    Vehicle:
    2018 SR-5 CM 5.7, 2000 SR-5 AC 4.7L
    Welcome. Don’t forget to update profile with your engine.
     
    BadBryan[OP] likes this.
  9. Aug 15, 2025 at 7:52 PM
    #9
    BadBryan

    BadBryan [OP] New Member

    Joined:
    Aug 12, 2025
    Member:
    #139201
    Messages:
    16
    Gender:
    Male
    First Name:
    Bryan
    Vehicle:
    05 Tundra SR5 2WD DC V8 Silver Sky Metallic
    Thanks for the replies. This really is an awesome community, and I didn’t expect that when I lucked out checking Craigslist the other morning. Turns out I got more than just a truck.

    Updates….

    Mirror: I went straight to tightening the TORX screws, but it didn’t help much. Saw on the forum that it may need to come off the door, maybe with washers to compensate for screw length. I bookmarked it for when I tackle the stereo. Not sure if I’ll swap door speakers, but that would be the time. I’ve got some leftover sound deadening from my FJ project and may throw some inside the door skins while I’m in there. For now, I jammed some cardstock from an old hotel key in the pivot joint. Not proud of that “fix,” but it’s holding.


    A/C: Done! My blower was basically a treasure chest—acorns, mouse droppings, leaves. Cleaning it out was hugely satisfying, and it’s quiet now. Still need to go back for a deeper condenser clean, but it’s night and day already. Pulling the resistor like Shifty suggested was a little tricky, but I rigged up some drip tubing to a vacuum nozzle and it worked great for cleaning the tight spots.

    IMG_7289.jpg
    IMG_7293.jpg

    Stereo: Shifty, would love your input. The volume knob is shot, spins and erratically sends volume up and down without respect of direction turning. Steering wheel controls still work fine. I assume the head unit’s just worn out after 20 years. I’ll probably replace it anyway since I’d like CarPlay and a rear camera. Plan is to keep steering wheel controls, maybe with a Maestro module as I’ve used before.


    Rear Camera: I’ve got a spare license plate camera, but I’m not sure about the bumper blocking lateral view. Since the tailgate handle trim is cracked, I was considering a handle-integrated camera. Any thoughts?

    IMG_7287.jpg

    Radiator: Once I finish the LBJs, the radiator is next on my list (last of the big three). I’ve read that picking the right OEM or near-OEM replacement isn’t straightforward, so I need to dig into the forum threads again before pulling the trigger.


    Forward Rake: Yes! You nailed what was bugging me about the stance. I’d definitely like your thoughts on bringing the nose up slightly without overdoing it.


    Dent/Rust: This is the biggest cosmetic issue. The truck has a football-sized dent with some rust starting where paint was scratched to bare metal. Open to suggestions on the best way to approach, don’t want it spreading.

    IMG_7298.jpg

    Appreciate the help and all the input so far. This community makes taking on these projects a lot less intimidating.


    – Bryan
     
    bmf4069 and BroHon like this.
  10. Aug 16, 2025 at 7:37 AM
    #10
    shifty`

    shifty` Earth acid cleanses me, cleanses me clean

    Joined:
    Jun 20, 2020
    Member:
    #48239
    Messages:
    31,487
    Gender:
    Male
    ATL
    Vehicle:
    '06 AC Limited V8/4WD
    (see signature for truck info)
    I have no doubts you could find another JBL OEM radio, or even update yourself to the JBL OEM NAV head unit these trucks came with, and I suspect a shot of DeOxit into the potentiometer for the volume dial on your radio would fix your issue, but if you want more-modern stuff ....

    Not sure how audio savvy you are, I'll toss out the basics.
    • The big issue with the 8-speaker JBL system: The OEM speakers are a mix of 2-ohm and 4-ohm drivers, wired such that the amp sees three 2-ohm channels per side; three speakers in the front door are wired to create two different 2-ohm channels, and the rear door speaker is 2-ohm. This makes driver replacement (and aftermarket stereo addition) something you can't just swap in willy-nilly. Note that, especially in hot/dry climates, the surrounds on the JBL speakers decay with time, but it's relatively easy to re-foam them, the speakers are actually quite good. When it happens, they'll rattle and sound blown when they aren't, actually. If you chose to keep the OEM radio, there are companies like GTA who sell a hands-free bluetooth kit, which also adds an auxiliary audio input.
    • There are a wild array of ways to work around this. Two big ones: Either install an all-in-one solution to adapt/keep the OEM JBL amp and speakers, or use a wiring bypass that will effectively delete the amp and update the speakers. Some all-in-one kits have quirks with them, where you need to pre-configure the OEM radio to very specific settings (i.e. set the radio at exactly half volume before turning the truck off & uninstalling it) so this is definitely a case of RTFM (read the f'n manual) before you start.
    • I'm going to assume you have steering controls, given you have DC, and premium JBL, so you will need to adapt that out with some form of SWC, whether Maestro/iDlink or otherwise - more info on options here. Some of the all-in-one adaptive kits include SWC functionality. And if you wanted to add right-hand controls for phone to your steering wheel, that thread I linked covers it, a couple of replies up (I added to my truck).
    • I can toss out some all-in-one kit suggestions if that's the route you want to go. It's the least expensive, least-hassle way to upgrade, but there have been no shortage of complaints about poor quality sound from some kits, I just haven't gotten enough feedback (ha) on which kits it is, or why. It could be poor user install. However, that said, if you were to be a smart little beaver and shop with Crutchfield, you could pay a small upcharge and they'll pre-configure/attach all harnesses for you to make it as plug-and-play as possible, and if there were an issue with sound, they'd own up. It's also possible those people had blown surrounds on their JBL speakers, and that contributed! Or that they made the mistake of keeping the JBL OEM amp, and updating the speakers with the wrong impedance/ohm drivers!!
    • To get CarPlay, etc. you'll need to update the head unit, though...
    On the rear camera, Master Tailgaters is the originator of the design you show. The IP thieves which scAmazon encourages/supports have stolen the design by now, and there are a plethora of knockoffs on the market. It's a good option, but I can tell you, as someone with a plate-mounted camera, it does everything I need, no issues. I have a basic BOYO brand unit I bought from Crutchfield. Install is pretty easy. "HOW" is over here, check this post.

    Hopefully those bastard rodents didn't get under the intake and nest :rofl: but know it's worthwhile to use a mirror to look up on top of the gas tank for evidence of rodent activity, and if you have a snake cam, feed it up under the intake to look for signs of nesting/damage. If you park outdoors or live in a high-rodent area, they eventually get into one or another. And clearly they got inside the cowl at one point, enough so that they were dropping acorn shells into the blower motor hole inside the cowl.

    LBJ part number thread for sanity check is over here. It's a bit much to take in.

    On suspension, taken from the megathread's suspension section:

    Guidance to pick the right lifted spring w/Bilstein 5100/4600: With OME (Old Man Emu, not 'OEM') springs, here's which OME spring to pick, between the 2883, 2884, 2885, 2886, 2887. We know from 100s of user lifts what to expect, far better than any vendor:​
      • OME springs require these isolators (here's why), and if your current struts aren't factory/OEM you'll probably need these tophats.
      • For AC/RC with 2WD, both V6 and V8, you'll get near-level with OME 2883. Don't do 2884 unless you plan a rear lift.
      • For AC/RC with 4WD, go 2883 for a sport rake, 2884 to get level, don't go with 2885 unless you plan a rear lift
      • For nearly all DC applications, 2883 for near-stock ½-¾" lift, 2884 for slight rake, level w/2885, if you plan 1-2" rear lift, 2887 is probably your choice.
      • With any suggestion given here, your lift may take a bit to settle at final height.
    In your case, it's a tough call. If you want to err on the side of caution, I'd probably go with the 2883, which will give you at least a ½" of lift, but will likely give ¾". The 2884 would probably get you closer to level because you're 2WD and have less weight up front. But if nearly-level is what you're going for, the 2884 is your answer. Basically, as you step up from 2883 -> 2884 -> 2884, with each model# increment, you add ½" - ¾" of lift, depending on whether you're 2WD or 4WD, and what cab type you have. A DC with 4WD would be at the lower end of lift for each step, an AC with 2WD would be at the higher end of each step.
     
    BroHon and BadBryan[QUOTED][OP] like this.
  11. Aug 16, 2025 at 7:41 AM
    #11
    shifty`

    shifty` Earth acid cleanses me, cleanses me clean

    Joined:
    Jun 20, 2020
    Member:
    #48239
    Messages:
    31,487
    Gender:
    Male
    ATL
    Vehicle:
    '06 AC Limited V8/4WD
    (see signature for truck info)
    Oh, and on the scrape. Get OEM paint pens for primer and your paint color from the dealer, I think they're like $10/ea.

    Step #1 is to get that metal cleaned and protected. Naval Jelly. It's a CRC product. Slather it on any scraped areas, rusty spots. Leave it on for 10-15 minutes. Wipe it off with a paper towel, then rinse (spray bottle is sufficient, wear PPE). Repeat one or two more times until there is nothing but shiny metal showing (it won't damage paint). Allow to completely dry. Clean the area fully. I recommend to remove the tail light while doing this work.

    Read the directions on the pen for application times. Apply the primer, wait for the recommended recoat window. Apply the touch-up paint, and reapply a touch-up within the recoat window.

    This is what you can do/expect. These pics are taken from my truck. It still look as good today as when I did the work 4-5 years ago.

     
    BroHon and BadBryan[OP] like this.
  12. Aug 17, 2025 at 7:10 PM
    #12
    BadBryan

    BadBryan [OP] New Member

    Joined:
    Aug 12, 2025
    Member:
    #139201
    Messages:
    16
    Gender:
    Male
    First Name:
    Bryan
    Vehicle:
    05 Tundra SR5 2WD DC V8 Silver Sky Metallic
    Read Shifty’s post. Hum… guess I better check the air intake. Well, crap. IMG_7360.jpg
     
  13. Aug 17, 2025 at 7:19 PM
    #13
    shifty`

    shifty` Earth acid cleanses me, cleanses me clean

    Joined:
    Jun 20, 2020
    Member:
    #48239
    Messages:
    31,487
    Gender:
    Male
    ATL
    Vehicle:
    '06 AC Limited V8/4WD
    (see signature for truck info)
    On the upside, if they didn't chew thru the filter they probably didn't bet into the throttle body.

    That said, it's up under the intake they normally get into. If you take the 4.7L iForce rectangular plastic cover off the intake, you can probably look around either side of the throttle body to see if you find grass and other crap in there. Snake cam will let you see deeper inside.

    If you're not popping any codes like P0333 or P0328, and the truck is starting just fine, chances are they haven't chewed up much, if anything, under there.

    I think we 2005-2006 owners are a little more lucky, thanks to the Secondary Air Injection pump, we have a crapload more clutter up under the air intake, making it (probably) less palatable for those little bastards to nest.
     
  14. Aug 18, 2025 at 1:42 PM
    #14
    BadBryan

    BadBryan [OP] New Member

    Joined:
    Aug 12, 2025
    Member:
    #139201
    Messages:
    16
    Gender:
    Male
    First Name:
    Bryan
    Vehicle:
    05 Tundra SR5 2WD DC V8 Silver Sky Metallic
    Update:

    Rodents: My inspection camera crapped out. When new one arrives I will snake the recesses. Based on the acorns in the other two locations, I would not be surprised to find more crap, but after cleaning I will take steps to prevent them. I may try removing and cleaning under the front window cowl/AC inlet when the AC refresh kit arrives; plan to clean inside with the foam as it’s probably gross. Maybe add some stainless hardware cloth over inlets.

    Paint: Naval jelly and paint pen ordered.

    LBJ: Read through the 9 pages on link you supplied, ordered the requisite parts from Ourisman Toyota. Very helpful figuring out what exactly I need for my truck.

    Springs: Was back and forth on OME and 4600 but I’m now convinced 2883 will be fine. Maybe I’ll even wish I had gone 2884… on a slight angle in driveway, rear is currently 36 1/4” and front is 33 1/4”, fender to ground. Ride quality more important than addressing stance for appearance sake, but shooting for both.

    Stereo: Probably need to wait, save some money up. I’m focusing research new head unit with the bits and bobs to work with factory (re-foamed) speakers. Camera.

    Antenna: The one on car is broken in half with a glob of weld on top. Ordered an OEM replacement.

    Bulbs: Third brake is burned out. Replaced but noticed gasket has seen better days. Ordered one off Amazon, not OEM but hopefully ok for what it is. Reading some black rtv on top and sides may also be a good idea to prevent water intrusion. Yes or no? If yes, caulk around edges after assembly, or other preferred technique?

    Cool find:
    IMG_7292.jpg
     
    The Black Mamba and shifty` like this.
  15. Aug 18, 2025 at 2:31 PM
    #15
    shifty`

    shifty` Earth acid cleanses me, cleanses me clean

    Joined:
    Jun 20, 2020
    Member:
    #48239
    Messages:
    31,487
    Gender:
    Male
    ATL
    Vehicle:
    '06 AC Limited V8/4WD
    (see signature for truck info)
    Have replacement clips on-hand to fix the pesky leak that forms, and the fact you'll break clips removing the plastic grate that snaps over the cowl. More info in the Definitive Leak Thread, see the tidbits about the notorious cowl leak there. Part numbers you'll need are there too. Be patient when popping the grate free.

    Remember to apply a little blue Loctite on the boltsbefore install. Don't over-torque, follow factory spec. I like to take a paint marker and mark the bolt head position (line thru head and onto the LBJ) and I'll peek over during oil changes to make sure the bolts haven't moved.

    Fender to ground is a good measurement for reference of difference before/after, but center of wheel to center of fender is king - if you change your tires for a taller/larger tire, fender to ground is no longer valid. Not important, just a note to consider.

    Camera-wise, note there are some interesting wireless options these days. Wolfbox is one of the vendors that's come up a couple times on here.

    Not sure if interesting, but I ordered a slightly shorter one, got sick of the OEM one scraping the ceiling in parking decks.

    What I ordered: https://www.tundras.com/threads/wha...-gen-tundra-today.2558/page-2325#post-3897326

    More info, install pics: https://www.tundras.com/threads/wha...-gen-tundra-today.2558/page-2333#post-3904158

    For light-to-cab seal, depending on the brand, it's the only option. No OEM option out there, unless you buy a new housing. G-PLUS is (I think) who others have used on here. Just be sure to remove EVERYTHING from the OEM gasket off the cab, then prep with alcohol to clean before install. Note the old halogen bulbs always melt the plastic above each bulb in the housing. You can buy replacement OEM plastics, but honestly, replace with LEDs. Sylvania ZEVO bulbs are my one-and-done choice here. You do you.

    Don't use caulk. Seriously. Use the foam gasket. I wish there was a good butyl seal on the market I could trust, but butyl tends to pick up every piece of dirt and debris...
     
  16. Aug 19, 2025 at 10:33 AM
    #16
    KTM_AJ421

    KTM_AJ421 New Member

    Joined:
    Sep 1, 2023
    Member:
    #103221
    Messages:
    448
    Gender:
    Male
    First Name:
    AJ
    Houston, TX
    Vehicle:
    2006 SR5 DC 2WD 4.7
    265/75r17 M/T Baja Boss AT 17x8.5 -10mm SCS Ray 10’s Bilstein 5100’s 2nd notch
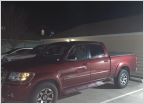
    For reference here is my 2006 dc 2wd with Bilstein 5100 bottom notch and dobinson 59-300 springs on 265/75r17. Still a small bit of rake but they ride great.

    IMG_0480.jpg
     
  17. Aug 19, 2025 at 11:05 AM
    #17
    BadBryan

    BadBryan [OP] New Member

    Joined:
    Aug 12, 2025
    Member:
    #139201
    Messages:
    16
    Gender:
    Male
    First Name:
    Bryan
    Vehicle:
    05 Tundra SR5 2WD DC V8 Silver Sky Metallic
    I was just about to order the OME 2883. Already ordered the 4600’s. Seems like the Dobinson 59-300 springs should work with the 4600, too. Provide similar lift to the 2883’s, but maybe ride smoother with the progressive spring? Now I need to pause and research this a bit.

    Also, will save me a bit of checking on this, but do I need new top hats or bushings or anything to go with the new shocks and springs? I made a note to go back and check on that but haven’t done it yet, feeling a bit lazy at the moment. But also excited to get all the parts here and start working on it with a buddy.
     
  18. Aug 19, 2025 at 11:27 AM
    #18
    shifty`

    shifty` Earth acid cleanses me, cleanses me clean

    Joined:
    Jun 20, 2020
    Member:
    #48239
    Messages:
    31,487
    Gender:
    Male
    ATL
    Vehicle:
    '06 AC Limited V8/4WD
    (see signature for truck info)
    What tophat and isolator were required? This is something @BadBryan will need to know. I know what's required for OME 2883, not for Dobby 59-300.

    I know others running Dobbies on here. They're generally happy with them. But we have a lot less info. However, with you being DC/2WD and OP having same, lift should land pretty identical.
     
  19. Aug 19, 2025 at 12:17 PM
    #19
    KTM_AJ421

    KTM_AJ421 New Member

    Joined:
    Sep 1, 2023
    Member:
    #103221
    Messages:
    448
    Gender:
    Male
    First Name:
    AJ
    Houston, TX
    Vehicle:
    2006 SR5 DC 2WD 4.7
    265/75r17 M/T Baja Boss AT 17x8.5 -10mm SCS Ray 10’s Bilstein 5100’s 2nd notch
    i had these built by 1st gen off-road. They are the kyb top hats and insulators I believe. I think the 4600’s will still work since I have my 5100s at bottom notch so I believe stock length? It made more sense for me to have them assembled
     
    BadBryan[OP] and shifty`[QUOTED] like this.
  20. Aug 23, 2025 at 7:33 PM
    #20
    BadBryan

    BadBryan [OP] New Member

    Joined:
    Aug 12, 2025
    Member:
    #139201
    Messages:
    16
    Gender:
    Male
    First Name:
    Bryan
    Vehicle:
    05 Tundra SR5 2WD DC V8 Silver Sky Metallic
    Some things are easy, some are hard…

    while waiting for LVJ parts (and final decision on springs), I tackled a few things today. And created a few new problems….

    1. Antenna snapped off as soon as I tried to unscrew it. Was rustier than I realized. Wish I would have just left it alone, but here we are. Tried penetrating oil and a screw extractor on drill. No dice. Looks like I’ll need to source and install more than just antenna now. Bummer

    2. Center brake light gasket was a PIA to remove. Rosonol lighter fluid is a great solvent for stickers, but still mess. I didn’t realize how melted the plastic was above the bulbs (but did read about this on here)… installed with new gasket, for now, but want to just order a new one housing. More parts shopping.

    3. Behind the brake light two of these orange clips were loosely lying in the compartment. No clue. Took them out for now, don’t need them rattling around while I investigate.

    IMG_7481.jpg


    4. Inspection camera arrived. Evidence of mice discovered in engine. What’s the best approach to cleaning this hard to reach spot without taking apart half the engine? Maybe shopvac with the small diameter tube taped on? I’ll search this forum, but so far no indication of problems, so that’s good!

    Reminder that the rodent crap came with the truck when I bought it. Less of them where I live, but they are everywhere. Hopefully I can clean and deter.
    IMG_7488.jpg IMG_7487.jpg
     
    BroHon likes this.
  21. Aug 24, 2025 at 10:32 AM
    #21
    shifty`

    shifty` Earth acid cleanses me, cleanses me clean

    Joined:
    Jun 20, 2020
    Member:
    #48239
    Messages:
    31,487
    Gender:
    Male
    ATL
    Vehicle:
    '06 AC Limited V8/4WD
    (see signature for truck info)
    I'd try the vacuum method, similar to what many of us do with the Evaporator coil housing, after removing the blower motor resistor. Something like 1" landscape sprinkler hose taped to a shop vac would work.

    I can run the part number for the entire light assembly. It may be different p/n for your DC than it was for my AC. This is what I paid for mine, direct from Toyota's Part Program, during a sale - another sale should be here soon for Labor Day.

    upload_2025-8-24_13-32-15.png
     
  22. Aug 25, 2025 at 6:51 PM
    #22
    Bought2Pull

    Bought2Pull New Member

    Joined:
    Jul 26, 2024
    Member:
    #120430
    Messages:
    1,048
    Gender:
    Male
    First Name:
    Greg
    WV
    Vehicle:
    2006 Tundra 4 door
    Best wishes on overcoming your Tundra problems!

    Last pic is encouraging.......my 4WD Tundra gets better gas mileage than what's listed on the sale sheet. :bananadance:
     
    BadBryan[QUOTED][OP] likes this.
  23. Aug 30, 2025 at 9:16 AM
    #23
    BadBryan

    BadBryan [OP] New Member

    Joined:
    Aug 12, 2025
    Member:
    #139201
    Messages:
    16
    Gender:
    Male
    First Name:
    Bryan
    Vehicle:
    05 Tundra SR5 2WD DC V8 Silver Sky Metallic
    Update – If nobody minds, I’ll just keep posting progress here and start a new thread only if there’s something major to contribute.

    I did end up finding the part number for the center brake light and ordered it along with the antenna assembly. Install will happen once they arrive.

    Headlights & Lighting:
    • Swapped out the OEM yellowed plastics for a pair of Eagle Eyes replacements. Price and time savings made it worthwhile right now.
    • Saving the OEM housings to see if I can restore them later.
    • Running good halogen bulbs in the headlights (my preference), with LEDs in the interior, rear, cargo, brake, and reverse lights. Mix of no-name and Diode Dynamics—results are solid.


    A/C & Rodents:
    • Ran the Toyota A/C refresher after thoroughly vacuuming the fan housing. Air smells clean again and it feels better knowing the rodent mess is gone. Easy process overall.

    Window Trim:
    • Planned to pull and paint, but found drop-in replacements at trailrunnercustoms.com and decided to give those a try.
    • Still planning to pull, sand, and paint the rear window trim.

    Suspension Plans:
    • Called 1st Gen Off-Road—super helpful folks.
    • Going with Dobinsons C59-300 front coils paired with Bilstein 4600s.
    • Ordered top hats and bushings so a local shop can assemble the struts.
    • Side note: my local parts shop will handle the assembly and can resurface rotors—nice to see that skill still around.
    • Expecting a very slight rake, which should even things out.
    • I’ll take before/after measurements and photos for the forum.
    • From what I’ve read, the Dobinsons ride just a touch better than OME 2883s for my use case (2WD, mostly pavement). We’ll see.

    Open Question:

    When I pulled the center brake light housing, I found two loose orange/red clips in the recess behind it. I’m guessing they were meant to hold the wiring harness, but they don’t seem necessary and must have worked loose. Anyone know for sure what they’re supposed to secure?

    IMG_7485.jpg IMG_7482.jpg IMG_7484.jpg
     
    BroHon likes this.
  24. Aug 30, 2025 at 4:17 PM
    #24
    BadBryan

    BadBryan [OP] New Member

    Joined:
    Aug 12, 2025
    Member:
    #139201
    Messages:
    16
    Gender:
    Male
    First Name:
    Bryan
    Vehicle:
    05 Tundra SR5 2WD DC V8 Silver Sky Metallic
    Figured it out… new rear light unit arrived. Apparently, clips were supposed to be attached to it but were off on the one on the truck. As you can see, pretty melted. IMG_7606.jpg IMG_7604.jpg IMG_7603.jpg IMG_7599.jpg
     
    BroHon and shifty` like this.
  25. Sep 1, 2025 at 5:49 AM
    #25
    BroHon

    BroHon What day is it?

    Joined:
    Sep 19, 2023
    Member:
    #104169
    Messages:
    2,902
    First Name:
    Bro
    Final Outpost/Bitch Mitten
    Vehicle:
    '00 SR5 AC V8 4x4
    Iron oxide weight reduction
    Mine was pretty smoked too. I went with LED replacement because I think it cuts down on the heat in there, and the "self ventilate" issue o_O
    20230520_114149.jpg

    20230520_114923.jpg
     
    BadBryan[QUOTED][OP] likes this.
  26. Sep 2, 2025 at 9:04 AM
    #26
    BadBryan

    BadBryan [OP] New Member

    Joined:
    Aug 12, 2025
    Member:
    #139201
    Messages:
    16
    Gender:
    Male
    First Name:
    Bryan
    Vehicle:
    05 Tundra SR5 2WD DC V8 Silver Sky Metallic
    Had the dreaded rattle, or klacking, and held off posting because let’s be real, nobody can diagnose that through the Internet without at least a video.

    After reading through posts, I realized it could be a lot of things. First on my list: the four transmission mounting bolts. The noise sounded like smacking a metal cake pan with a wooden spoon, one sharp clack,right before stopping, sometimes again on takeoff. Definitely seemed like something loose.

    Crawled under with a flashlight today. All four bolts were there and looked tight, but one gave me about a half to three-quarters of a turn. While I was at it, I found a heat shield bolt above that was really loose and snugged that down too. Everything else looked solid.

    Took it for a drive, noise is gone! No more cake-pan rattle. Not sure if it was the bolt or the shield, but either way it’s fixed. Hell yeah. Always feels good to stop worrying it’s some big expensive issue.

    Thanks to everyone who posts here, this place makes it possible to track stuff down. Hope your rattles end up being just as easy. Cheers.
     
    bmf4069, jerryallday and shifty` like this.
  27. Sep 2, 2025 at 9:18 AM
    #27
    Hi06silver

    Hi06silver Fat. Thumbs.

    Joined:
    Dec 2, 2018
    Member:
    #22498
    Messages:
    1,068
    Gender:
    Male
    First Name:
    Ryan
    Vehicle:
    2006 DC 4x4 Waltrip
    5 inch TC Lift. Icon 2.5 Ext. travel coilovers- Icon Resi- shocks w/Firestrone air-ride 285/75/17 Toyo OC Ext. FN Overlander wheels Retrofit Projectors Kenwood H/U Natika Back-up camera
    I think I still have my OEM JBL if ya want it. Lemme know, I'll double check tonight.
     
  28. Sep 2, 2025 at 9:20 AM
    #28
    shifty`

    shifty` Earth acid cleanses me, cleanses me clean

    Joined:
    Jun 20, 2020
    Member:
    #48239
    Messages:
    31,487
    Gender:
    Male
    ATL
    Vehicle:
    '06 AC Limited V8/4WD
    (see signature for truck info)
    Hey there you go @BadBryan

    Another potential source is @Dakillacore, if he's willing to get rid of his. We yanked his out a few days ago.
     
  29. Sep 2, 2025 at 11:04 AM
    #29
    Dakillacore

    Dakillacore Brake now, you Mickey Mouse-piece of shit!

    Joined:
    Sep 24, 2023
    Member:
    #104420
    Messages:
    1,083
    Gender:
    Male
    Georgia
    Vehicle:
    2006 Toyota Tundra Limited DC V8 2WD
    Mine has the same issue that @BadBryan is currently describing. The volume knob is shot.

    I do have the GTA bluetooth adapter for your headunit if you don't already have one. You can have it if you want it. Just cover the shipping.
    https://www.gtacarkits.com/product/toyota-sequoia-2003-2007-iphone-aux-kit/

    I just don't have the foam cover over the mic. It disappeared in my truck one day. I think it was the borrowers.
    upload_2025-9-2_14-2-7.png

    In regard to the integrated tailgate handle I went with the Master Tailgaters handle. It's metal, which is nice.
    Link here

    While you're in there, you might as well do the beefy upgrade. Seen here
     
    shifty`[QUOTED] likes this.
  30. Sep 3, 2025 at 9:55 PM
    #30
    BadBryan

    BadBryan [OP] New Member

    Joined:
    Aug 12, 2025
    Member:
    #139201
    Messages:
    16
    Gender:
    Male
    First Name:
    Bryan
    Vehicle:
    05 Tundra SR5 2WD DC V8 Silver Sky Metallic
    Thank you, and Shifty, and Dakillacore. I think I’m going to go with an aftermarket stereo and backup camera, maps, etc… was happy with my “dumb stereo” in the FJ, but wife insisted on a backup camera, etc. So gone went the factory stereo (or rather, in storage) and in went a nice Kenwood, amp, sub, speakers… turned into my mid-life crisis stereo I guess, LOL. My son and his buddies enjoy it when I’m chauffeuring them to waterpolo practices, so there’s that. I expect I will go for a more toned down version of that in the Tundra. No amp or sub.

    I was noticing today that my truck has the JBL logo on the door speaker grills, but the window sticker says “AM/FM/CD with 6-speakers.” When I go searching, should I expect this set up to have the jbl amp? I haven’t bothered to poke around looking just yet.
     

Products Discussed in

To Top