1. Welcome to Tundras.com!

    You are currently viewing as a guest! To get full-access, you need to register for a FREE account.

    As a registered member, you’ll be able to:
    • Participate in all Tundra discussion topics
    • Transfer over your build thread from a different forum to this one
    • Communicate privately with other Tundra owners from around the world
    • Post your own photos in our Members Gallery
    • Access all special features of the site

My Do-Everything Truck

Discussion in '2nd Gen Builds (2007-2013)' started by RepeatPete, Aug 13, 2020.

  1. Aug 13, 2020 at 2:01 PM
    #1
    RepeatPete

    RepeatPete [OP] New Member

    Joined:
    Aug 13, 2020
    Member:
    #50743
    Messages:
    272
    Gender:
    Male
    First Name:
    Pete
    Vehicle:
    2008 Tundra SR5
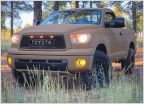
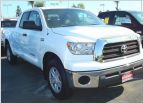
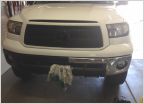
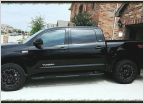
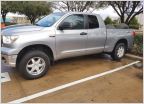
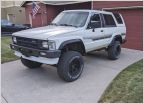
    I just bought this 2008 Toyota Tundra SR5 4x4. I had a '97 Wrangler as my first car and bought a 1990 Jeep Grand Wagoneer soon after I got married to travel the country with my wife. A baby put that on hold, but the dream is still there. I wanted a vehicle that was more reliable than the old Wagon, had a big enough back seat to fit a carseat and our dog, 4wd, and if possible had a bed to make loading our mountain bikes easier. I found this beauty that met all those needs on Craigslist one day and the rest is history.
    Tundra 2.jpg
    Tundra 1.jpg
    Tundra 4.jpg
    Tundra 3.jpg

    And here's the Jeeps:
    Muddy TJ.jpg
    Outside3.jpg
    It already has:
    - Toytec Boss coilovers at 3" up front and Toytec boss shocks with shackles in the rear - sits almost exactly level
    - SPC upper control arms
    - Toyo AT2 Extreme in 285/75R17
    - Rock Warrior wheels with Spydertrax spacers
    - ARE Z series shell
    - Hewitt Tech Gen I kit

    Overall I'm pretty happy with it so far - not nearly as much character as my old manual Wrangler, but at only 120k miles it comparatively feels brand new, and its much easier to eat going down the road without having to shift gears. Let the build begin!
     
    Downytide, Terndrerrr, WVI and 7 others like this.
  2. Aug 13, 2020 at 2:02 PM
    #2
    Hbjeff

    Hbjeff New Member

    Joined:
    Jan 20, 2019
    Member:
    #24845
    Messages:
    4,897
    Gender:
    Male
    Huntington Beach
    Vehicle:
    2010 DC 5.7 2wd
    Trd sways, bullydog, magnaflow, sumo springs
    Welcome, looks like a nice find!
     
  3. Aug 13, 2020 at 2:14 PM
    #3
    RepeatPete

    RepeatPete [OP] New Member

    Joined:
    Aug 13, 2020
    Member:
    #50743
    Messages:
    272
    Gender:
    Male
    First Name:
    Pete
    Vehicle:
    2008 Tundra SR5
    Thanks, I thought so too!

    One of the first things that I noticed was the lighting, or lack thereof. Everything seemed pretty dim. When backing up at night I could see essentially nothing, so I got some Sylvania LED bulbs to put in the reverse location. They were definitely better (i.e. I could actually see them come on) but aren't enough. Coming from a 2-door Wrangler, a big, lifted truck with a camper shell is a lot harder to see out of!

    Reverse Light 1.jpg
    Reverse Light 2.jpg

    I'm thinking of something like the VLeds backup license plate frame. It seems to have pretty good reviews, is low profile, and compared with LED pods isn't terribly expensive at $75. Anyone here have any experience with it?
     
  4. Aug 13, 2020 at 2:36 PM
    #4
    Hbjeff

    Hbjeff New Member

    Joined:
    Jan 20, 2019
    Member:
    #24845
    Messages:
    4,897
    Gender:
    Male
    Huntington Beach
    Vehicle:
    2010 DC 5.7 2wd
    Trd sways, bullydog, magnaflow, sumo springs
    I just bought some led floods to cut into my back bumper. Can’t wait to get to it
     
  5. Sep 2, 2020 at 6:45 AM
    #5
    RepeatPete

    RepeatPete [OP] New Member

    Joined:
    Aug 13, 2020
    Member:
    #50743
    Messages:
    272
    Gender:
    Male
    First Name:
    Pete
    Vehicle:
    2008 Tundra SR5
    A few small updates:
    Finished the LED bulbs in the interior and also did the front footwell LED kit from VLeds. The footwell kit is very high quality with well-written instructions. I would highly recommend it and I plan on getting the extension kit for the rear footwells too. The truck is so much more usable after dark now.

    Interior Lights 1.jpg
    Interior Lights 2.jpg

    I also picked up these two console organizers from Amazon:
    https://www.amazon.com/gp/product/B015S49S1E/ref=ppx_yo_dt_b_asin_title_o00_s01?ie=UTF8&psc=1
    https://www.amazon.com/gp/product/B01KI3P26K/ref=ppx_yo_dt_b_asin_title_o00_s00?ie=UTF8&psc=1
    I was surprised at how well they fit and how much I actually like them. I thought the squares in the lower grid organizer would be too small to actually be useful, but that's not the case. Something like these should have been included from the factory.

    Console Organizer.jpg

    Finally, when I bought my truck, the jack tools were missing, so I picked up those from Sparks Parts. Not interesting products, but still nice to get genuine Toyota parts.

    Jack Kit.jpg
     
    IndianaGeologist and Dwarven1 like this.
  6. Sep 2, 2020 at 6:50 AM
    #6
    YardBird

    YardBird Native San Diegan

    Joined:
    Jan 15, 2019
    Member:
    #24572
    Messages:
    7,534
    Gender:
    Male
    First Name:
    Jonesy
    Vehicle:
    2005 RCLB
    American Thunder Cat Back ~ Retrax Pro ~ Toyota Bed Mat ~ OEM Split Spoke Wheels
    Welcome aboard from SoCal.
     
  7. Sep 2, 2020 at 11:47 AM
    #7
    RepeatPete

    RepeatPete [OP] New Member

    Joined:
    Aug 13, 2020
    Member:
    #50743
    Messages:
    272
    Gender:
    Male
    First Name:
    Pete
    Vehicle:
    2008 Tundra SR5
    I pulled the stock side steps. Much less functional, but I think it looks a ton better.

    Without Steps.jpg
     
  8. Sep 2, 2020 at 12:54 PM
    #8
    Rube207

    Rube207 New Member

    Joined:
    Sep 8, 2019
    Member:
    #35813
    Messages:
    454
    First Name:
    Rob
    Atlanta
    Vehicle:
    2010 Pyrite Mica Limited CM
    Looks great. What size spacers behind the RW wheels?
     
  9. Sep 2, 2020 at 2:06 PM
    #9
    RepeatPete

    RepeatPete [OP] New Member

    Joined:
    Aug 13, 2020
    Member:
    #50743
    Messages:
    272
    Gender:
    Male
    First Name:
    Pete
    Vehicle:
    2008 Tundra SR5
    Thanks!
    They are 1.25” Spidertrax spacers
     
  10. Sep 2, 2020 at 3:41 PM
    #10
    Sunnier

    Sunnier Pity the warrior that slays all his foes

    Joined:
    Aug 21, 2017
    Member:
    #9171
    Messages:
    12,266
    First Name:
    Sunny
    San Diego, CA
    Vehicle:
    2017 Inferno Tundra DC TRD & Longtravel 1st Gen, Banner/ HulkSmash build
    Fixed it for you. :cool:

    Now you’ve got better ground clearance for adventure!
     
  11. Sep 3, 2020 at 6:33 AM
    #11
    RepeatPete

    RepeatPete [OP] New Member

    Joined:
    Aug 13, 2020
    Member:
    #50743
    Messages:
    272
    Gender:
    Male
    First Name:
    Pete
    Vehicle:
    2008 Tundra SR5
    Haha, more functional for adventure, just less so for day-to-day - I'm willing to make that trade-off!

    I finished making more clearance by removing the rear mud flaps and chopping the exhaust after the axle.
    Exhaust Chop.jpg
     
    Rex Kramer and Sunnier[QUOTED] like this.
  12. Sep 3, 2020 at 7:44 AM
    #12
    Sunnier

    Sunnier Pity the warrior that slays all his foes

    Joined:
    Aug 21, 2017
    Member:
    #9171
    Messages:
    12,266
    First Name:
    Sunny
    San Diego, CA
    Vehicle:
    2017 Inferno Tundra DC TRD & Longtravel 1st Gen, Banner/ HulkSmash build
    I do want to caution you about that chopped exhaust outlet. I chopped mine and, as anticipated, it started doing a number on my brake lines. Luckily, we fixed it before they needed replacing. Based on your pic, I’d say that shock boot will need to be kept an eye on.
     
  13. Sep 3, 2020 at 11:40 AM
    #13
    RepeatPete

    RepeatPete [OP] New Member

    Joined:
    Aug 13, 2020
    Member:
    #50743
    Messages:
    272
    Gender:
    Male
    First Name:
    Pete
    Vehicle:
    2008 Tundra SR5
    Thanks for the heads up - I'll definitely keep an eye on everything. What happened to your brake lines? Did the soft lines near the wheel start melting?

    Here a more side view picture - the end of the tailpipe is at least a foot from the shocks or axle.

    Side Exhaust Dump.jpg
     
  14. Sep 3, 2020 at 12:52 PM
    #14
    Sunnier

    Sunnier Pity the warrior that slays all his foes

    Joined:
    Aug 21, 2017
    Member:
    #9171
    Messages:
    12,266
    First Name:
    Sunny
    San Diego, CA
    Vehicle:
    2017 Inferno Tundra DC TRD & Longtravel 1st Gen, Banner/ HulkSmash build
    Nothing. As soon as we cut it (but after), I anticipated the problem. Ran it about 2k miles, checking on it regularly, then got a downturn welded on to redirect the heat downward. What I anticipated and checked for were signs the lines were getting brittle or melted.

    As for the cut-off being farther than a foot away, I don’t think that’s enough. To test, run your truck to get it hot, then leave it on to idle and reach in front of that exhaust to touch that shock boot... or... DON’T because it may be too hot! If it’s too hot for you, it will eventually ruin anything not built to withstand intense heat.
     
  15. Sep 3, 2020 at 2:32 PM
    #15
    Sunnier

    Sunnier Pity the warrior that slays all his foes

    Joined:
    Aug 21, 2017
    Member:
    #9171
    Messages:
    12,266
    First Name:
    Sunny
    San Diego, CA
    Vehicle:
    2017 Inferno Tundra DC TRD & Longtravel 1st Gen, Banner/ HulkSmash build
  16. Sep 3, 2020 at 2:56 PM
    #16
    RepeatPete

    RepeatPete [OP] New Member

    Joined:
    Aug 13, 2020
    Member:
    #50743
    Messages:
    272
    Gender:
    Male
    First Name:
    Pete
    Vehicle:
    2008 Tundra SR5
    Hmmm...
    Just by looking at it I still think I'm in the clear, but I'm also not too proud to be cautious. What's the general consensus on the correct way to do this? The downturns that I've seen on some dirtydeeds exhausts have a small 90 and point straight down. I wanted mine kicked out to the side a little to avoid blowing up dust when in dusty conditions.

    This is the thread I used for reference before doing this:
    https://www.tundras.com/threads/cutting-exhaust-pipe-after-axle.39208/
    @GodlessPro Mine is cut just like yours - any issues?
     
    GodlessPro and Sunnier[QUOTED] like this.
  17. Sep 3, 2020 at 3:09 PM
    #17
    Sunnier

    Sunnier Pity the warrior that slays all his foes

    Joined:
    Aug 21, 2017
    Member:
    #9171
    Messages:
    12,266
    First Name:
    Sunny
    San Diego, CA
    Vehicle:
    2017 Inferno Tundra DC TRD & Longtravel 1st Gen, Banner/ HulkSmash build
    We just did the shortest extension we could find of the right diameter, and it directs exhaust straight down. The pipe I cut is on my first GEN, and so far I have not noticed any plume of dust. It does have a slightly more throaty rumble though. I’ll try to find a pic. But I’d use advice of Joon, Warren 831Tun and Matt GodlessPro— the tight gens trucks + far more field and mod experience.
     
  18. Sep 3, 2020 at 4:28 PM
    #18
    SouthWestGA

    SouthWestGA New Member

    Joined:
    Oct 1, 2018
    Member:
    #20074
    Messages:
    1,416
    Gender:
    Male
    Vehicle:
    2007 Tundra CrewMAX and 2014 Nissan NV3500 Passenger
    Nice color! I have the same!
     
  19. Sep 4, 2020 at 8:47 AM
    #19
    GodlessPro

    GodlessPro Bougie BASTRD

    Joined:
    Oct 14, 2016
    Member:
    #4867
    Messages:
    2,495
    Gender:
    Male
    First Name:
    Matthew
    NorCal
    Vehicle:
    2018 Cement CM Limited
    No issues
     
  20. Sep 4, 2020 at 9:41 AM
    #20
    RepeatPete

    RepeatPete [OP] New Member

    Joined:
    Aug 13, 2020
    Member:
    #50743
    Messages:
    272
    Gender:
    Male
    First Name:
    Pete
    Vehicle:
    2008 Tundra SR5
    Thanks for all the advice! I'll keep an eye on it, and will do the same with a short turndown if any issues come up.

    Thanks! When it's cloudy it just looks like a normal dark blue, but in the sun the paint really pops.

    Thanks!
     
  21. Sep 21, 2020 at 7:07 AM
    #21
    RepeatPete

    RepeatPete [OP] New Member

    Joined:
    Aug 13, 2020
    Member:
    #50743
    Messages:
    272
    Gender:
    Male
    First Name:
    Pete
    Vehicle:
    2008 Tundra SR5
    I replaced my third brake light because there was lots of condensation in the old one, and I'm trying to track down some leaks in the shell. The new light came from Truck Outfitters and seems decent quality. The fit was a little off; it overhangs the rear of the shell, and didn't sit in the recess quite right. It's held in with 3M tape on the bottom, and I siliconed the edges to help it stay in place and to seal water out. So far the shell is still leaking, but much less, and I like the red vs. the faded clear much better.

    Third Brake Light 3.jpg
    Third Brake Light 1.jpg
    Third Brake Light 2.jpg
     
    Lake.Life24 likes this.
  22. Sep 21, 2020 at 7:23 AM
    #22
    RepeatPete

    RepeatPete [OP] New Member

    Joined:
    Aug 13, 2020
    Member:
    #50743
    Messages:
    272
    Gender:
    Male
    First Name:
    Pete
    Vehicle:
    2008 Tundra SR5
    Also changed some rubber seals out. I did the outer window wipes which were delaminating and the antenna grommet. It really is only a 10 minute job to do all 5.
    I used this video as a guide. https://www.youtube.com/watch?v=rXgBU2KrekA
    The part numbers are:
    68160-0C020 - front passenger
    68210-0C020 - front driver
    68164-0C020 - rear driver, crewmax
    68163-0C020 - rear passenger, crewmax
    86392-0C040 - Bezel for radio antenna

    Antennae.jpg
    Seals 1.jpg
    Finally, I have never like the debadged look, so I picked up a cheap badge kit on Amazon for $35. https://www.amazon.com/gp/product/B083LP84VW/ref=ppx_yo_dt_b_asin_title_o00_s00?ie=UTF8&psc=1
    The reviews say the adhesive falls off so I don't have super high hopes, but so far so good. I went with the 3rd gen position of the 5.7 emblem on the door. I wasn't sure if I wanted chrome or black, but I could find the black kit much cheaper and really like it with the black door handles and mirrors.

    Emblems 1.jpg Emblems 2.jpg
     
    15whtrd, Rex Kramer and Prostar 190 like this.
  23. Oct 28, 2020 at 12:00 PM
    #23
    RepeatPete

    RepeatPete [OP] New Member

    Joined:
    Aug 13, 2020
    Member:
    #50743
    Messages:
    272
    Gender:
    Male
    First Name:
    Pete
    Vehicle:
    2008 Tundra SR5
    I finally got a phone mount setup. I copied the A-Pillar RAM mount from TacomaWorld as I wanted something that was 100% reversible, sturdy, and able to operate one-handed.
    I bought:
    Quick Grip XL Phone Holder- RAM-HOL-PD4-238AU
    Handlebar Clamp Base - RAM-B-367BU
    Double Socket Swivel Arm - RAP-B-200-12U

    I used a 50mm long M6 bolt with two M6 nuts to space out the RAM ball from the bottom A-Pillar mount. RAM Ball.jpg
    RAM A-Pillar.jpg
    The phone mount is currently upside down as the RAM ball on the back of the phone mount is not centered, and I needed a little more length. I may look at 67Designs for a different arm in the future, but this works well for now.
    Phone Mount.jpg
     
    TheBeast likes this.
  24. Nov 19, 2020 at 12:00 PM
    #24
    RepeatPete

    RepeatPete [OP] New Member

    Joined:
    Aug 13, 2020
    Member:
    #50743
    Messages:
    272
    Gender:
    Male
    First Name:
    Pete
    Vehicle:
    2008 Tundra SR5
    CM2007 likes this.
  25. Dec 14, 2020 at 8:34 AM
    #25
    RepeatPete

    RepeatPete [OP] New Member

    Joined:
    Aug 13, 2020
    Member:
    #50743
    Messages:
    272
    Gender:
    Male
    First Name:
    Pete
    Vehicle:
    2008 Tundra SR5
    I plastidipped my front bumper this weekend. It's a shorter term solution as I'd like to make or buy an aftermarket bumper, but I like the way it turned out!
    Black Front Bumper.jpg
     
    NoRcptn, zcarpenter92 and 300BLK like this.
  26. Dec 14, 2020 at 8:45 AM
    #26
    300BLK

    300BLK New Member

    Joined:
    Aug 1, 2019
    Member:
    #34022
    Messages:
    803
    Vehicle:
    2014 Tundra SR5 - Black
    Those RW wheels look so good. Truck is coming together nicely.
     
    RepeatPete[OP] likes this.
  27. Dec 14, 2020 at 8:56 AM
    #27
    Rex Kramer

    Rex Kramer Vinyl Spinner

    Joined:
    Apr 9, 2017
    Member:
    #7181
    Messages:
    6,620
    Gender:
    Male
    Georgia
    Vehicle:
    2002 4.7L RCLB 4X4 2007 5.7L RCSB 4X2
    I cut my tail pipe about a year ago, zero issues.IMG_7654.jpg
     
  28. Dec 14, 2020 at 12:13 PM
    #28
    RepeatPete

    RepeatPete [OP] New Member

    Joined:
    Aug 13, 2020
    Member:
    #50743
    Messages:
    272
    Gender:
    Male
    First Name:
    Pete
    Vehicle:
    2008 Tundra SR5
    Thanks! It's funny, I don't like wheels with silver and a different color and I don't like fake beadlocks - but somehow these are among my all-time favorite wheels!
    Good to hear! I keep an eye on it, but am pretty confident it'll be just fine.
     
  29. Jan 5, 2021 at 11:35 AM
    #29
    RepeatPete

    RepeatPete [OP] New Member

    Joined:
    Aug 13, 2020
    Member:
    #50743
    Messages:
    272
    Gender:
    Male
    First Name:
    Pete
    Vehicle:
    2008 Tundra SR5
    I finally received the lights I ordered on Black Friday. Baja Designs Squadron Sport driving combo in amber. I also picked up the OEM fog bracket kit on Amazon.
    Honestly, I'm not really impressed. The brackets are kind of a pain to install, but that's not really BD's fault, just tricky to work with the Toyota setup. On one of the connectors the wires were reversed, meaning the little clip wouldn't hook onto the retaining tab on the normal BD connector, and I don't have the tools to depin the connector and flip the wires. I just wrapped the joint with electrical tape so the connector won't come undone.
    Also, one of the pins popped right out of the back of the wiring adapter connector when pushed into the light connector. Not the end of the world, but took a lot of fiddling to get the pin to correctly engage, and hopefully some electrical tape will keep it all in place.

    The lights seem okay, but I had a pair of Rigid Duallys (just a basic 2x2 pod) that seemed to throw light farther than these and just as spread in the nearfield. I still have to fine-tune the aiming, but not as blown away as I thought I would be. I guess maybe I have to step up to the price point of the Squadron Pros to get what I'm after. :monocle:

    I don't want to be all negative - I've called twice and they do have good customer service, and they sure do look good sitting in the bumper. In working with the lights they definitely seem well built.


    Baja Designs 1.jpg
    Baja Designs 2.jpg
     
  30. Jan 5, 2021 at 12:04 PM
    #30
    RepeatPete

    RepeatPete [OP] New Member

    Joined:
    Aug 13, 2020
    Member:
    #50743
    Messages:
    272
    Gender:
    Male
    First Name:
    Pete
    Vehicle:
    2008 Tundra SR5
    I also started working on a backup camera solution. I've had this truck for going on 6 months, but still not confident in backing up in tight spaces after being spoiled by my tiny Jeep TJ. I ordered the Boss BE7ACP Stereo with the package that comes with a camera, but also got a separate backup camera. I picked this head unit because it is just about the cheapest on that you can get with Apple CarPlay, but also has two camera inputs.
    https://www.crutchfield.com/p_104BE7ACPC/Boss-BE7ACP-C-Package.html?tp=72357

    I wanted to go with a camera that plugs into the factory wiring, but at a price difference of $200, figured I could run some wires. This is the one I got: https://tailgatecamera.com/collecti...13-for-aftermarket-radios-handle-not-included
    I'm going to try and use the camera that came with the head unit as a front camera.

    I'm very thankful for Crutchfield and all the install and wiring info they send with your purchase.
    Head Unit Harness.jpg
    Here's the hole for the reverse camera, as seen from inside the tailgate.
    Backup Camera Hole.jpg Backup Camera Wire.jpg
     

Products Discussed in

To Top