1. Welcome to Tundras.com!

    You are currently viewing as a guest! To get full-access, you need to register for a FREE account.

    As a registered member, you’ll be able to:
    • Participate in all Tundra discussion topics
    • Transfer over your build thread from a different forum to this one
    • Communicate privately with other Tundra owners from around the world
    • Post your own photos in our Members Gallery
    • Access all special features of the site

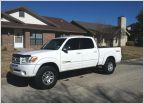
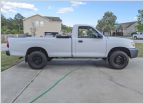
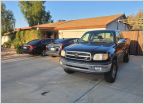
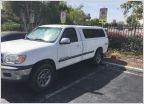
2000 4.7L SR5

Discussion in '1st Gen Builds (2000-2006)' started by MarkBeast10, Feb 5, 2019.

  1. Feb 5, 2019 at 10:24 AM
    #1
    MarkBeast10

    MarkBeast10 [OP] New Member

    Joined:
    Jan 30, 2019
    Member:
    #25356
    Messages:
    53
    Gender:
    Male
    First Name:
    Mark
    Vehicle:
    2000 4.7l SR5
    2000 4.7L SR5-


    Needed new battery: Went with Optima Red Top.
    085AD1AE-6D59-4F61-9D1A-919A65988A7D.jpg

    Started with full service flushes for the Coolant, Power Steering and Brake Fluid Service at 50K and new a Radiator.

    Starter failed so I replaced the relay:
    CE39699C-9CB1-436D-8802-FE1DC690B50D.jpg

    After the easiest fix didn’t work, i looked up the tundra schematics and decided to clean it up:
    47BD9E4A-15EB-48A7-80F7-04A6B66FAB9B.jpg

    I didn’t really want to take the whole thing apart and get to the starter way deep in the engine bay like the map was telling me:
    EC34EA8B-9F16-4B7B-9772-72043203B46D.gif
    So I just drained the system, removed the minimal amount of bolts, unplugged all the hoses and anything in the way and removed the whole upper and lower intake manifold together without disassembling the throttle body assembly.
    You have to becareful because I let it set on the temperature sensor (circled) and had to replace it:
    1E3CB65C-5841-49B8-9ECD-4F02B8B82069.jpg

    Although I did it the wild man style you have to be prepared to pick up the whole intake straight up, I did it alone but if my friend had stayed for another hour it would have been easier to lift.

    Now I had access to remove the starter:
    2F76836F-32C0-4B98-8ADD-2DC38435BD65.jpg

    I considered changing the contacts on the starter as a rebuild but there was no way on Earth I was going to put it all back together on a 50/50 chance I would have to do it again. Plus the teeth looked kind of worn out and I wanted to show my work off:
    012446B6-0959-4575-AFC4-439EEB3AABA7.jpg

    I finally got some sleep once the starter was out and woke up to how wild I was being on the dismantling so I changed plans and pulled out the fuel lines and got new o-rings for the injectors:
    8FCDDD13-9ACE-4DE9-96C8-1E716446FEC3.jpg

    Cleaned up the engine compartment and installed the new starter.
    DC164370-E1F5-41FE-8B50-D38B9815B666.jpg

    I went ahead and bought a new gasket set for the intake manifold:
    89B0BC8A-F068-4816-A07C-B12833257B13.jpg

    I still didn’t disassemble the lower and upper assembly or the throttle body I just lifted it up, Jimmyed it alittle and placed it back down in place, Reconnected all the hoses and plugs And reset the fuel lines. As long as I put the gaskets in correctly, it was working:
    726EFD59-9DBB-43B4-8E0B-D2193694E473.jpg
    09AF0C3E-8DAD-4B6D-8AF1-34069B260587.jpg

    At this point I decided to put silicone hoses on before reintroducing the coolant since I’d have the truck back up and running. I double checked everything and reinstalled the battery:
    35FCE31B-9B1F-41A6-89B4-53161723A27F.jpg

    For some reason I just didn’t want to put the OEM airbox back in place. I went back and forth between the different short rams and boxes available but my 97 S10 Chevy was K&N decked out with performance pumps, KN oil filters, KN CAI etc since day one so naturally I looked at the K&N CAI set up and installed it:
    A7CEF3FD-BC1A-4C1B-90E8-BA76AEF842CA.jpg

    Once I had the CAI set up in place I kept looking at this side compartment that the OEM box vented into, I went ahead and took the tube out of the OEM box and installed it on the side wall:
    29FBADC5-1442-496E-A37C-9C041316073D.jpg
    2E816172-70F8-49F4-888B-E21223C85681.jpg

    Whether this did anything is still up for debate or whether I should cut it shorter to ram air or be less restrictive is one my dyno friend is still having conversations to me about. I’m holding off on cutting it incase I decide to use the OEM box again. I put in a JET MAF:
    DB0D96A3-6A49-45B4-A680-DEF7101F7E13.jpg

    I also put in a tornado in the CAI at the TB: 5D13F206-1C7D-4F1D-9F09-86EFFCEA8465.jpg
    but sold it and replaced it with a Taylor TBS:
    89E511A9-082F-4B5B-8A96-766ED1FE1DD4.jpg

    At 125k I went ahead and had the TKT-021 Kit put in for the water pump and timing belt, crankshaft and camshaft seals. The mileage sits at 150k as of now so I’m considering the second phase of what I will do with the engine build. Not really looking to blow it out with a supercharger although considering upgrading injectors, stronger rods and maybe throttle body coolant bypass.

    For phase two I’ve started with JBL shorties:
    F297A987-7427-4E25-8019-643940783E6C.jpg

    I decided to go with wrap to keep the heat down. I noticed if you place masking tape over the wrap before you cut, it won’t splinter and fray everywhere. This way I didn’t lose all my material:
    6782F8FF-866F-4CF4-8E8F-6F6026E318F4.jpg
    58740759-D672-4AE3-8441-40DFEC8B77C1.jpg

    I used basic metal ties to secure the wrap to the headers. Then I began to spray them with high temp coating yesterday:
    F230BFEB-DEE2-4EE0-9950-23985524B58C.jpg
    Once I get these squared away I will begin phase two.

    This is my engine set up today:
    43F16E7B-91F9-416B-B872-C02ECEE64D55.jpg

    Finally got the shorty headers on after a year or so of lallygagging with it. Didn’t have to lift the truck to get to the bolts after all. Once I figured that out I didn’t have to remove the motor mounts or even use jack stands.
    8DA3C709-A6D9-463A-A71E-213A72F8D1BB.jpg

    Replaced the shocks and struts
    E1672F02-AE19-4526-B974-1D2E9E4EC9D3.jpg
    9494F4A6-B104-42B3-9693-87BC37BC5F84.jpg

    Decided to put on new lower control arms. I usually don’t like putting new parts on old parts, but I’ll eventually get around to replace the upper control arms as well when I have the time.
    589F9370-E74C-48CD-B470-E032EFD545A0.jpg
    941424F6-AD71-4999-A937-182AE151837D.jpg

    After messing with the suspension I noticed a squeak coming from underneath and realized the center support bearing was completely broken, so I replaced it with only one ujoint. I have two more ujoints to replace on the front and back of the drive shaft when I can get around to them
    4A37D435-EC5F-4ED4-93E5-5C6DDF3A1D6B.jpg

    Also noticed I was missing a bolt on the fuel filter bracket so I replaced the filter and will search the junk yards for the bolt later
    94A15A85-6118-4BFC-9018-25E1AF552D86.jpg

    My tires were just about shot being a 23 year old truck with tread less than stable. Went ahead and had a tire shop put on some BF’s. Much better traction than before with almost none.775A8D44-0058-4567-95BD-30017E384216.jpg

    Just about the only time I’ll play around with lights or accessories is when they go out, so when one brake light went out it gave me the opportunity to replace them.
    FCC13962-89D0-4409-9DDC-E21983EA8829.jpg

    Replaced front brake rotors and brake pads, but they’re slightly squeaking when I depress the pedal, it’s a slight squeak, but annoying enough to take them off again so I’ll get pictures when I do. Also my leafs have a little squeak too, need to figure that out..
     
    Last edited: Mar 18, 2022
  2. Feb 5, 2019 at 10:26 AM
    #2
    TXMiamiFan

    TXMiamiFan SSEM #3 and tractor extraordinaire

    Joined:
    Nov 26, 2015
    Member:
    #2160
    Messages:
    25,307
    Gender:
    Male
    First Name:
    Jose
    Houston, TX
    Vehicle:
    2016 White Crew Max TRD
    TRD Pro Grille, ESP Storage, Tailgate Inserts, Line-X Bedliner, Weathertech Floorliners, Wet Okole Seat Covers, 5" Shorty Antenna, Mickey Thompson MM-366 Wheels, ToyTec Boss, 35" BFG KO2 to name a few.
    Nice write up and pics!
     
    MarkBeast10[OP] likes this.
  3. Feb 5, 2019 at 11:05 AM
    #3
    MarkBeast10

    MarkBeast10 [OP] New Member

    Joined:
    Jan 30, 2019
    Member:
    #25356
    Messages:
    53
    Gender:
    Male
    First Name:
    Mark
    Vehicle:
    2000 4.7l SR5
    Thanks, I appreciate it!
     
    TXMiamiFan[QUOTED] likes this.
  4. Feb 5, 2019 at 1:48 PM
    #4
    FirstGenVol

    FirstGenVol Brake Czar

    Joined:
    Dec 13, 2018
    Member:
    #22934
    Messages:
    13,055
    East TN
    Vehicle:
    2002 AC
    Sweet write up. A recommendation for you. Most of us have swapped out our interior bulbs for LED's. Total cost for just the lights is around $25 and makes a huge difference.
     
  5. Feb 5, 2019 at 8:03 PM
    #5
    MarkBeast10

    MarkBeast10 [OP] New Member

    Joined:
    Jan 30, 2019
    Member:
    #25356
    Messages:
    53
    Gender:
    Male
    First Name:
    Mark
    Vehicle:
    2000 4.7l SR5
    Cool feedback thanks! I will definitely do that this weekend, sounds like fun. Would you recommend changing the cluster lights in the instrument panel or would I have to get out a soldering iron for those?
     
  6. Feb 5, 2019 at 9:28 PM
    #6
    because_wumbo-truck

    because_wumbo-truck TTC#036 & 1st Degenerate

    Joined:
    Aug 19, 2018
    Member:
    #18314
    Messages:
    3,110
    First Name:
    Jon
    Houston, Texas
    Vehicle:
    2006 AC Tundra Limited 4x4 v8
    flowmaster 40, DDI injectors, sliders, bumper
    Man you had me til I saw this. What carburetor?
     
  7. Feb 6, 2019 at 2:36 AM
    #7
    FirstGenVol

    FirstGenVol Brake Czar

    Joined:
    Dec 13, 2018
    Member:
    #22934
    Messages:
    13,055
    East TN
    Vehicle:
    2002 AC
    Yes. Might as well do the clusrer lights as well. No soldering iron required.

    Here is a good thread on it. Most ordered from superbrightLEDs.com
    https://www.tundras.com/threads/gear-indicator-lamp.11916/
     
  8. Feb 6, 2019 at 3:23 AM
    #8
    Brownsfanhere

    Brownsfanhere New Member

    Joined:
    Jan 21, 2019
    Member:
    #24881
    Messages:
    413
    Gender:
    Male
    2015 Crew Max
    I like this write up. Very cool. Paint looks pretty good for a gen1. New to Toyota myself. Weird place for a starter. Geez. Nice work. Love write ups like this. Job well done.
     
    MarkBeast10[OP] likes this.
  9. Feb 6, 2019 at 5:08 PM
    #9
    MarkBeast10

    MarkBeast10 [OP] New Member

    Joined:
    Jan 30, 2019
    Member:
    #25356
    Messages:
    53
    Gender:
    Male
    First Name:
    Mark
    Vehicle:
    2000 4.7l SR5
    That tornado is shoved in to the CAI where it meets the throttle body assembly. Someone suggested to get a throttle body spacer but I don’t think it’ll fit with the CAI tube possibly hitting the radiator fan.
     
  10. Feb 6, 2019 at 5:12 PM
    #10
    MarkBeast10

    MarkBeast10 [OP] New Member

    Joined:
    Jan 30, 2019
    Member:
    #25356
    Messages:
    53
    Gender:
    Male
    First Name:
    Mark
    Vehicle:
    2000 4.7l SR5
    That starter location was the most awkward situation I’ve ever encountered. Once I looked under the wheel and then searched for it a bit in the engine compartment, I went to the diagram and was shocked to find it in the engine bay. The paint is good, I’ll take a full body picture one of these days. Thanks for the feedback!
     
    Brownsfanhere[QUOTED] likes this.
  11. Feb 6, 2019 at 5:14 PM
    #11
    MarkBeast10

    MarkBeast10 [OP] New Member

    Joined:
    Jan 30, 2019
    Member:
    #25356
    Messages:
    53
    Gender:
    Male
    First Name:
    Mark
    Vehicle:
    2000 4.7l SR5
  12. Feb 6, 2019 at 5:31 PM
    #12
    BrandonL812

    BrandonL812 New Member

    Joined:
    Aug 5, 2018
    Member:
    #17783
    Messages:
    979
    Gender:
    Male
    First Name:
    Brandon
    Vehicle:
    2017 Sequoia LTD
    Rx350 retrofitted, Morimoto Led fogs. interior and exterior leds swap. TRD drop in filter. Carbon filter delete. Led DRL panels. TRD Shift knob.
    shoulda clean the TB while you had it off..
    good work
     
    MarkBeast10[OP] likes this.
  13. Feb 6, 2019 at 8:57 PM
    #13
    MarkBeast10

    MarkBeast10 [OP] New Member

    Joined:
    Jan 30, 2019
    Member:
    #25356
    Messages:
    53
    Gender:
    Male
    First Name:
    Mark
    Vehicle:
    2000 4.7l SR5
    I want to take the TB off one of these days and clean it. I took off the whole upper and lower intake assembly without removing the TB individually. Do you recommend using a wire brush to clean it? Thanks
     
  14. Feb 7, 2019 at 5:19 AM
    #14
    BrandonL812

    BrandonL812 New Member

    Joined:
    Aug 5, 2018
    Member:
    #17783
    Messages:
    979
    Gender:
    Male
    First Name:
    Brandon
    Vehicle:
    2017 Sequoia LTD
    Rx350 retrofitted, Morimoto Led fogs. interior and exterior leds swap. TRD drop in filter. Carbon filter delete. Led DRL panels. TRD Shift knob.
    No. Please dont use wirebrush.
    3 items
    1. Old toothbrush
    2. TB cleaner (spray can)
    3. Clean rag

    Spray, brush, spray , wipe. Pretty easy really.
     
  15. Dec 20, 2019 at 7:18 PM
    #15
    MarkBeast10

    MarkBeast10 [OP] New Member

    Joined:
    Jan 30, 2019
    Member:
    #25356
    Messages:
    53
    Gender:
    Male
    First Name:
    Mark
    Vehicle:
    2000 4.7l SR5
    Thanks, Was pretty easy, and quite clean already. Any way to make it spotless?

    AB990BD1-BBB0-479F-BDE5-2EF60B07CB82.jpg
     
    FrenchToasty likes this.
  16. Dec 20, 2019 at 7:35 PM
    #16
    BrandonL812

    BrandonL812 New Member

    Joined:
    Aug 5, 2018
    Member:
    #17783
    Messages:
    979
    Gender:
    Male
    First Name:
    Brandon
    Vehicle:
    2017 Sequoia LTD
    Rx350 retrofitted, Morimoto Led fogs. interior and exterior leds swap. TRD drop in filter. Carbon filter delete. Led DRL panels. TRD Shift knob.
    No need to be spotless. You can unbolt the throttle body and clean the other side.
     
    MarkBeast10[OP] likes this.
  17. Dec 20, 2019 at 7:37 PM
    #17
    MarkBeast10

    MarkBeast10 [OP] New Member

    Joined:
    Jan 30, 2019
    Member:
    #25356
    Messages:
    53
    Gender:
    Male
    First Name:
    Mark
    Vehicle:
    2000 4.7l SR5
    Good suggestion! if I really want it OCD spotless I probably will. Might have to, feels like I made it more oily trying to clean it. It’s Still in good shape though

     
  18. Dec 20, 2019 at 7:39 PM
    #18
    BrandonL812

    BrandonL812 New Member

    Joined:
    Aug 5, 2018
    Member:
    #17783
    Messages:
    979
    Gender:
    Male
    First Name:
    Brandon
    Vehicle:
    2017 Sequoia LTD
    Rx350 retrofitted, Morimoto Led fogs. interior and exterior leds swap. TRD drop in filter. Carbon filter delete. Led DRL panels. TRD Shift knob.
    Use CRC throttle body cleaner. That's what I used and it clean well enough for me.
     
    MarkBeast10[OP] likes this.
  19. Dec 20, 2019 at 7:53 PM
    #19
    MarkBeast10

    MarkBeast10 [OP] New Member

    Joined:
    Jan 30, 2019
    Member:
    #25356
    Messages:
    53
    Gender:
    Male
    First Name:
    Mark
    Vehicle:
    2000 4.7l SR5
    Ok will do! I’ve been needing to get some contact cleaner too, do you soak it at all or just spray a rag and soft brush it?


  20. Dec 20, 2019 at 8:14 PM
    #20
    BrandonL812

    BrandonL812 New Member

    Joined:
    Aug 5, 2018
    Member:
    #17783
    Messages:
    979
    Gender:
    Male
    First Name:
    Brandon
    Vehicle:
    2017 Sequoia LTD
    Rx350 retrofitted, Morimoto Led fogs. interior and exterior leds swap. TRD drop in filter. Carbon filter delete. Led DRL panels. TRD Shift knob.
    Depends on how much carbon build up. If I unbolt the tb then I spray it down. Washing away any carbon that can be lifted. Then wipe and repeat til satisfied. If soak, I wont soak very long, couple sec is enough. Most of the cleaning is from the brush and wipe.
     
    MarkBeast10[OP] likes this.
  21. Dec 20, 2019 at 8:48 PM
    #21
    MarkBeast10

    MarkBeast10 [OP] New Member

    Joined:
    Jan 30, 2019
    Member:
    #25356
    Messages:
    53
    Gender:
    Male
    First Name:
    Mark
    Vehicle:
    2000 4.7l SR5
    I definitely need to do that! Any advice on cleaning the topside? Someone said take a rotary wire brush to the aluminum.. I can still see blemishes, I probably should have cleaned both sides better when I had them off.
    B4DA0BC3-1687-441B-B016-AC44FE718775.jpg

    Do you advise using a rotary tool inside the engine bay?
     
  22. Dec 21, 2019 at 3:17 AM
    #22
    Professional Hand Model

    Professional Hand Model A.K.A ‘Golden Hands’

    Joined:
    Apr 29, 2018
    Member:
    #14878
    Messages:
    15,007
    Gender:
    Male
    First Name:
    Fred
    ‘Somewhere’... a State of Mind
    Vehicle:
    2002 Tundra SR5 4WD 4.7L AC Silver Metallica
    Hand Protectors
    Just spray a rag with some fluid film or penetrating fluid and wipe the metal down for a refresh. No need for wire brushing but if you you go that route use a roto-zip at low speed with one of their little wire brush heads. You’ll probably had to wipe it down after the brushing as described above.
     
    MarkBeast10[OP] likes this.
  23. Dec 21, 2019 at 3:27 AM
    #23
    Professional Hand Model

    Professional Hand Model A.K.A ‘Golden Hands’

    Joined:
    Apr 29, 2018
    Member:
    #14878
    Messages:
    15,007
    Gender:
    Male
    First Name:
    Fred
    ‘Somewhere’... a State of Mind
    Vehicle:
    2002 Tundra SR5 4WD 4.7L AC Silver Metallica
    Hand Protectors
    You should post up more often over in the What’d You Do Section. You’ve done some cool stuff. You see any performance gains from the air box work?
     
    MarkBeast10[OP] likes this.
  24. Dec 21, 2019 at 3:53 AM
    #24
    Johnsonman

    Johnsonman New Member

    Joined:
    Nov 25, 2019
    Member:
    #39132
    Messages:
    1,215
    Gender:
    Male
    Austin
    Vehicle:
    Sequoia
    LED headlamps/fogs; interior footlamps.
    Nice find and work up along the way. How has the 'vornado' worked out, improved fuel efficiency?

    Not sure about wrapping the exhaust pipes. In my experience, they get wet and cause rust on the pipes. Perhaps you'll be luckier. Enjoy the gift. : ^ ))
     
    MarkBeast10[OP] likes this.
  25. Dec 22, 2019 at 2:28 AM
    #25
    MarkBeast10

    MarkBeast10 [OP] New Member

    Joined:
    Jan 30, 2019
    Member:
    #25356
    Messages:
    53
    Gender:
    Male
    First Name:
    Mark
    Vehicle:
    2000 4.7l SR5
    Thanks! I’ll look around for the What’d You Do section and post some more of these works. I messed around with the air box a little bit more but ended up sticking with the same KN setup. I saw a tundra with a funnel on the front bumper to increase air flow to their box, might try that.
     
  26. Dec 22, 2019 at 2:33 AM
    #26
    MarkBeast10

    MarkBeast10 [OP] New Member

    Joined:
    Jan 30, 2019
    Member:
    #25356
    Messages:
    53
    Gender:
    Male
    First Name:
    Mark
    Vehicle:
    2000 4.7l SR5
    I ended up selling that ‘vornado’ to a s10 friend who wanted it for some reason;


    Hmm, hope these don’t get wet if so I’ll cut the wrap off down the road. I think I’m too late to turn back now. Wrapped and sprayed..
    795E22EB-89D9-4C61-99A7-63CBA0BEB476.jpg
     
  27. Dec 27, 2019 at 7:49 AM
    #27
    FirstGenVol

    FirstGenVol Brake Czar

    Joined:
    Dec 13, 2018
    Member:
    #22934
    Messages:
    13,055
    East TN
    Vehicle:
    2002 AC
    Please let us know how the install goes on this. I've heard everything from "it's terrible" to "it wasn't that bad". I think it really depends on how rusty the bolts are.
     
  28. Jan 22, 2020 at 3:50 PM
    #28
    MarkBeast10

    MarkBeast10 [OP] New Member

    Joined:
    Jan 30, 2019
    Member:
    #25356
    Messages:
    53
    Gender:
    Male
    First Name:
    Mark
    Vehicle:
    2000 4.7l SR5
    Luckily I had minimal rust on the header bolts. The bolts came off the studs very easily.
    4789F4F3-A8F5-4DF2-A9E7-580C5A7C36FD.jpg
     
    FirstGenVol[QUOTED] likes this.

Products Discussed in

To Top