

-
Welcome to Tundras.com!
You are currently viewing as a guest! To get full-access, you need to register for a FREE account.
As a registered member, you’ll be able to:- Participate in all Tundra discussion topics
- Transfer over your build thread from a different forum to this one
- Communicate privately with other Tundra owners from around the world
- Post your own photos in our Members Gallery
- Access all special features of the site
 Double Cab Ceiling Cargo Net Solution
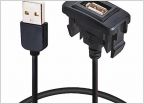 Aux plug?
 How to put electric plug into bumper
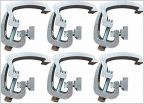 Camper Top Using Rail Mounts?? Help finding parts
 Door locks failing with remote and switch
 Got my headlights restored
What have you done to your 2nd gen Tundra today?
Discussion in '2nd Gen Tundras (2007-2013)' started by T-Rex266, Jan 7, 2014.
Page 452 of 573
Page 452 of 573
Products Discussed in


