1. Welcome to Tundras.com!

    You are currently viewing as a guest! To get full-access, you need to register for a FREE account.

    As a registered member, you’ll be able to:
    • Participate in all Tundra discussion topics
    • Transfer over your build thread from a different forum to this one
    • Communicate privately with other Tundra owners from around the world
    • Post your own photos in our Members Gallery
    • Access all special features of the site

What have you done to your 2nd gen Tundra today?

Discussion in '2nd Gen Tundras (2007-2013)' started by T-Rex266, Jan 7, 2014.

  1. Jan 6, 2022 at 10:07 AM
    Ericsopa

    Ericsopa Old man and the sea

    Joined:
    Nov 7, 2015
    Member:
    #2069
    Messages:
    1,501
    Gender:
    Male
    First Name:
    Mike
    N of Rio Grande, S of Red, E of Pecos, W of Sabine
    Vehicle:
    2013 Tundra CrewMax TRD Ltd Super Duper White OVtuned
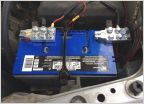
    Well, this is probably one y'all haven't heard before. It might work, and might not work, and with luck, I'll never even know if it would work or not. Installed an EMP Shield in the truck. This after also installing one on my house (two in my residence, in fact, one at the house, one at the out-building). Won't know if they work unless the SHTF. The ones on the buildings also protect from lightning hits, so there's that. But if there's an EMP event, I won't be able to tell y'all if this thing worked, since the internet will likely be kaput. But here it is, in any case. 5 minute hook-up, red to battery positive, black to battery negative, green to chassis ground. Unit mounted with heavy duty velcro-type attachment. Only other place to mount was other side of engine compartment. https://www.empshield.com/
    20220106_111512.jpg
     
  2. Jan 6, 2022 at 1:54 PM
    Wangofree

    Wangofree New Member

    Joined:
    Jun 17, 2021
    Member:
    #64395
    Messages:
    25
    Gender:
    Male
    First Name:
    Mike
    Midwest
    Vehicle:
    07 Tundra Double Cab 5.7L
    Made in Burlington Kansas. . . pretty cool.
     
    Tundrastruck91 and joseph_womack like this.
  3. Jan 6, 2022 at 2:38 PM
    shannon

    shannon New Member

    Joined:
    Dec 25, 2018
    Member:
    #23464
    Messages:
    159
    Gender:
    Male
    First Name:
    shannon
    Asheville, NC
    Vehicle:
    2010 DC
    Did it come with a shiny hat? One for everyone hopefully.
     
  4. Jan 6, 2022 at 4:03 PM
    Ericsopa

    Ericsopa Old man and the sea

    Joined:
    Nov 7, 2015
    Member:
    #2069
    Messages:
    1,501
    Gender:
    Male
    First Name:
    Mike
    N of Rio Grande, S of Red, E of Pecos, W of Sabine
    Vehicle:
    2013 Tundra CrewMax TRD Ltd Super Duper White OVtuned
    Cute. :rolleyes:
     
  5. Jan 6, 2022 at 4:58 PM
    PayItOff428

    PayItOff428 New Member

    Joined:
    Apr 5, 2021
    Member:
    #61398
    Messages:
    258
    Gender:
    Male
    First Name:
    Jake
    The United State of Texas
    Vehicle:
    2012 SR5 Double Cab 4X4
    Just buy an old pickup with a points distributor and don’t worry about it. Classic cars will soon become valuable because of their lack of technology.
     
  6. Jan 6, 2022 at 7:38 PM
    red_5ive

    red_5ive Jedi Knight and friend of Cpt. Solo

    Joined:
    Apr 22, 2021
    Member:
    #62187
    Messages:
    1,246
    Gender:
    Male
    Southern California
    Vehicle:
    2008 4.7L CrewMax
    • 3.5" Maxtrac Spindle Lift • 2.5" Spacer • Monster XD778 18 x 9 wheels, +18 Offset • Nitto Ridge Grappler 325/65 R18 (34.6 x 12.8 - temporarily back on the 32s until I can decide on gears) • Nitro 5:29 Gears (awaiting installation - on hold for now) • Black/smoke headlights • Clazzio custom leather seats • Boss Wireless Android Auto head-unit • Backup camera
    Santa left me one of those magnet things in my stocking. Easiest mod ever. Took me longer to open the packaging lol. Probably not the best spot for it, but I'm waiting to wash the truck again before I try it elsewhere.

    [​IMG]
     
    MTRock, D4x4TRD, Mountun Goat and 7 others like this.
  7. Jan 6, 2022 at 7:53 PM
    PhotoNerd

    PhotoNerd New Member

    Joined:
    Apr 6, 2021
    Member:
    #61465
    Messages:
    418
    Gender:
    Male
    First Name:
    Tony
    Waterford, CT
    Vehicle:
    2008 Salsa Red Tundra DC SR5 4x4
    Chrome delete, Sequioa grill, bed lights, LED + head, fog & tail lights, Dynamat throughout, front & rear cameras, Pheonix PX6 13" head unit, 8" subwoofer, JBL speaker upgrades, tonneau cover, custom shifter, steering wheel cover
    Replaced the old battery. Question: can you tell the age of the battery from these numbers?

    A231070C-11B6-47A2-B51E-35E84E111AD2.jpg

    Could be July 2010 or May 2016?

    A 5-minute job took two hours because I found rust and compulsively removed it. Also organized the headlight wiring that I had just crammed in beside the battery because I'm a lazy hack.

    E1236DBB-81C3-4898-9959-DCBCFCD48701.jpg

    Thanks to this forum for recommending this battery. I've added many electronics and heated seats so it needed more juice.
     
  8. Jan 7, 2022 at 6:15 PM
    joseph_womack

    joseph_womack @ 4x4bound

    Joined:
    Nov 3, 2020
    Member:
    #54467
    Messages:
    1,034
    Gender:
    Male
    First Name:
    Joe
    Louisiana
    Vehicle:
    2007 RCLB, 4WD, 4.7L V8
    3/1 Lift, 35s, Front Bumper, etc etc
    I put mine to the right of the V8 badge, at the same height right below that body line
     
    red_5ive[QUOTED] likes this.
  9. Jan 7, 2022 at 9:39 PM
    red_5ive

    red_5ive Jedi Knight and friend of Cpt. Solo

    Joined:
    Apr 22, 2021
    Member:
    #62187
    Messages:
    1,246
    Gender:
    Male
    Southern California
    Vehicle:
    2008 4.7L CrewMax
    • 3.5" Maxtrac Spindle Lift • 2.5" Spacer • Monster XD778 18 x 9 wheels, +18 Offset • Nitto Ridge Grappler 325/65 R18 (34.6 x 12.8 - temporarily back on the 32s until I can decide on gears) • Nitro 5:29 Gears (awaiting installation - on hold for now) • Black/smoke headlights • Clazzio custom leather seats • Boss Wireless Android Auto head-unit • Backup camera
    Thanks, I'll give that a go this weekend since it's wash day tomorrow. Nothing clean, right.
     
  10. Jan 8, 2022 at 2:29 PM
    Half Assed

    Half Assed me ne frego

    Joined:
    Jul 6, 2020
    Member:
    #48947
    Messages:
    930
    Heartland Florida
    Vehicle:
    10 crewmax
    Attempted to find the source of my belt squeal on startup. Hopefully this is it and cleaning the pulleys solves it.

    Also replaced a leaking radiator and threw a new belt on.

    20220108_150302.jpg
     
    wv00097, Prostar 190, MTRock and 4 others like this.
  11. Jan 8, 2022 at 2:42 PM
    Trooper2

    Trooper2 Premium Lone Star Member / SSEM #13

    Joined:
    Feb 7, 2018
    Member:
    #12738
    Messages:
    6,774
    Gender:
    Male
    First Name:
    JR
    Houston, TX (Suburban South)
    Vehicle:
    2019 Tundra 5.7L Crewmax TSS 2WD
    If not the belt then maybe a new tensioner. They need to be replaced about every two belt changes.
     
    Last edited: Jan 8, 2022
    joseph_womack and WVI like this.
  12. Jan 8, 2022 at 6:30 PM
    NueveTundra

    NueveTundra Mod list in Bio

    Joined:
    May 24, 2020
    Member:
    #47031
    Messages:
    653
    Gender:
    Male
    Planet Earth
    Vehicle:
    07, Black Tundra SR5 CrewMax
    Exterior: Toytec ultimate 3" lift level, Total Chaos Uniball UCA's, Total Chaos Cam Tab Gusset kit, AcanII smoked headlights, AcanII smoke Tail lights (2.5 gen style), DV8 front winch bumper , Badlands 12k winch with Apex Synthetic, White AUTMATCH Shackles 3/4" D Ring Shackle, Apex Winch shackle, Trail Ridge mirrors ,Icon Rebound Pro 17"x8.5" +25, Cooper Discovery STT Pro 285/70R17, PowerStop drilled n slotted rotors W/Carbon pads, Rigid flood flush mounts rear bumper , WeatherTec rain guards , OEM black side badges , Rigid Amber Radiance Pods. Energy Suspension Red Rack and Pinion Bushings, EAG front mesh Grille, RCI HighLift bed mounts. Rough Country DS2 Steps, A.R.E OverLand Canopy with Ascend basket, Stickers: ToyTec lifts windshield banner, Red Strange Music window sticker(back cab), White Strange Music sticker(back canopy), White Rigid sticker x2 (canopy sides), white Official BigFoot Research Team (Back Canopy) Interior: Alpine double din touch iLX-650 , JL C5-653's (front) JL C1-650x (rear) , JL JX400 4 channel amp , JL JX500 mono amp , 2 JL 12" subs , WeatherTec floor mats, Kenwood F/R Dash Cams, Black steering wheel emblem overlay, Tekonsha P3 Brake controller, ToyTec "Fresh" Scent coilover air freshener, Under the Hood: Koyo all aluminum radiator, Mishimoto red silicon hoses , XS Power 3000 amp battery , LAlectric 300 amp Alternator , K&N replacement filter. Online LED store accessories Fuse/relay box. (Identified) Dirty Deeds 8" Cat back exhaust with DD resonator delete/axel over converted into dump. Coming soon:
    I'm a bad man no pics atm, but started a interior detail about 80% done after 4 hours got to dark, will pick up on it tomorrow and then double wash time. If my exterior gets to dirty I like to first wash it all with dawn then go back over with mothers wash and wax. Find thats the best way for deep clean and deep shine. If I get that done at a decent time tomorrow might start my front shock replacement.

    definitely going to be looking for brushed aluminum like trim vinyl for the inside to cover the silver trim since its showing age in some spots and a leather wrap for the wheel all this hand sanitizer use is really doing a number on my steering wheel foam.
     
    WVI, Prostar 190 and joseph_womack like this.
  13. Jan 8, 2022 at 6:32 PM
    Half Assed

    Half Assed me ne frego

    Joined:
    Jul 6, 2020
    Member:
    #48947
    Messages:
    930
    Heartland Florida
    Vehicle:
    10 crewmax
    I changed the belt and tensioner last year and it was quiet until recently. But i cant recall if the pulleys had the rubber on them or not. Might be why it was making noise back then.

    It's not squealing now, but it's not 6am Monday morning yet. Lol
     
    Prostar 190, D4x4TRD and Mountun Goat like this.
  14. Jan 8, 2022 at 8:27 PM
    Windsor

    Windsor Why do I do this to myself?

    Joined:
    Jul 8, 2018
    Member:
    #16847
    Messages:
    911
    Gender:
    Male
    First Name:
    Chris
    Homeless in Oregon
    Vehicle:
    2008 Tundra Crewmax 5.7L
    Some.
    Drilled some holes in my roof to install the Rhino Rack Backbone. Of course, I have one hole on each side that is just far enough shifted that the bolt won't go in straight. So I will take a round file to the edge of the slots on Tuesday. After drilling (and vacuuming and cleaning with rubbing alcohol), I painted the exposed metal with cold galvanizing paint, then installed the supplied rivnuts.

    I don't like how the the rivnuts on the front passenger side holes collapsed inwards, so I think I might just make some welded nut backing plates instead for the front on both sides. But, that will wait until I take the headliner completely out to do wiring and install sound deadener and insulation (just waiting for the deadener to get delivered). Reason being, this is the leading edge and I'd rather have overkill on securing it than have my platform go for a flight.

    For those who consider adding a roof rack. There is one vendor (whom I shall not name) that shows an install video where the schlub just drills right in (at one point picking a piece of headliner or air bag off the drill bit). DO NOT DO THAT! DO NOT FU**ING FOLLOW WHAT THAT PUTZ SAYS. He also uses a magnet to clean up the metal from drilling the hole, rubbing it across the paint. USE A FU**ING VACUUM! And vacuum it often to prevent buildup of stuff that will drop in through the hole or get kicked around by the bit.
    I went a little overkill on my method. I used a good clamp style drill bit stop as primary, a cheap HF set screw style drill bit stop as spacer (clamp style is too big to fit in the drip rail and the HF ones are cheap enough to buy with the intent of using as spacers), and I used a putty knife as a backer. The HF ones came loose even just being used as spacers.
    IMG_20220108_122706.jpg
    You will find that you need to drill different depths depending on how many pieces of metal there are and what is behind them. Start shallow (I started at 3/16") on all holes, then adjust to go deeper on the ones that need it, and keep adjusting. The shallowest holes are about 6" Infront of the clamps that hold the drip rail moulding at the back, this is where the side curtain airbag is directly below just two layers of metal.
    Drill all holes one depth at a time instead of working one hole til it's done.
    The reason why I say be very cautious is because you WILL fu** it up in an expensive way if you do what that vendor putz says. You will put a hole in your headliner, or kill your side curtain air bags.
    IMG_20220108_121402.jpg
    IMG_20220108_121356.jpg

    I don't have the platforms up here with me on the mountain, so I sealed the edges of the rivnuts with butyl tape and put the bolts in to seal the holes. I'll install the rack next week, just getting it set up since I only have about 6 hours to do everything for the week when I'm off the mountain before I have to head back up.
    Sorry for rambling.
     
    COElkHunter, WVI, Prostar 190 and 4 others like this.
  15. Jan 8, 2022 at 8:45 PM
    joseph_womack

    joseph_womack @ 4x4bound

    Joined:
    Nov 3, 2020
    Member:
    #54467
    Messages:
    1,034
    Gender:
    Male
    First Name:
    Joe
    Louisiana
    Vehicle:
    2007 RCLB, 4WD, 4.7L V8
    3/1 Lift, 35s, Front Bumper, etc etc
    great trick for the drill bit stops, gotta keep that in the back of the brain for when I build my roof rack
     
    Windsor[QUOTED] likes this.
  16. Jan 8, 2022 at 8:52 PM
    Windsor

    Windsor Why do I do this to myself?

    Joined:
    Jul 8, 2018
    Member:
    #16847
    Messages:
    911
    Gender:
    Male
    First Name:
    Chris
    Homeless in Oregon
    Vehicle:
    2008 Tundra Crewmax 5.7L
    Some.
    $20 for two sets of drill bit stops and a putty knife is substantially cheaper than replacing airbag components. If I had some 3/8" washers with me, I would have added those too because the clamp bolt still hit paint a couple times.
     
    joseph_womack[QUOTED] likes this.
  17. Jan 9, 2022 at 2:44 AM
    Nit2wn

    Nit2wn New Member

    Joined:
    Sep 3, 2015
    Member:
    #1759
    Messages:
    124
    Gender:
    Male
    First Name:
    James
    Alabama
    Vehicle:
    2013 Crewmax TRD 4wd
    Windsor, you're completely correct. In that last pic IS the side curtain airbag. I have no idea what they cost, but somewhere along that curtain is an aluminum reservoir to fire it off and wires going to it to explode it in the event of a wreck. It's not the kind of wiring I'd want to just tape back up.
     
    joseph_womack and Windsor like this.
  18. Jan 9, 2022 at 2:48 AM
    Ricos

    Ricos New Member

    Joined:
    Jan 18, 2021
    Member:
    #57825
    Messages:
    89
    Gender:
    Male
    First Name:
    Ricardo
    Vehicle:
    2010 Tundra SR5 White Widow
    Never stopping ...
  19. Jan 9, 2022 at 4:50 AM
    COTundie

    COTundie Whoa Black Betty

    Joined:
    Jun 15, 2021
    Member:
    #64339
    Messages:
    1,063
    Gender:
    Male
    First Name:
    Trey
    Vehicle:
    Black 5.7 DC TRD 4x4
    Pretty things
    Going TTV6 are we?

    Did you confirm what the ticky ticky tick ended up being??
     
    Mountun Goat likes this.
  20. Jan 9, 2022 at 5:18 AM
    PhotoNerd

    PhotoNerd New Member

    Joined:
    Apr 6, 2021
    Member:
    #61465
    Messages:
    418
    Gender:
    Male
    First Name:
    Tony
    Waterford, CT
    Vehicle:
    2008 Salsa Red Tundra DC SR5 4x4
    Chrome delete, Sequioa grill, bed lights, LED + head, fog & tail lights, Dynamat throughout, front & rear cameras, Pheonix PX6 13" head unit, 8" subwoofer, JBL speaker upgrades, tonneau cover, custom shifter, steering wheel cover
    I've been thinking about exactly this too. Hopefully you do it first and share pictures ;)
     
  21. Jan 9, 2022 at 5:18 AM
    Ricos

    Ricos New Member

    Joined:
    Jan 18, 2021
    Member:
    #57825
    Messages:
    89
    Gender:
    Male
    First Name:
    Ricardo
    Vehicle:
    2010 Tundra SR5 White Widow
    Never stopping ...

    Connecting rod bearings and maybe more… waiting for my engine stand and then I will open her up from the bottom.

    1D07C72C-2789-4898-8F87-82AD872B4A11.jpg
     
  22. Jan 9, 2022 at 7:55 AM
    Windsor

    Windsor Why do I do this to myself?

    Joined:
    Jul 8, 2018
    Member:
    #16847
    Messages:
    911
    Gender:
    Male
    First Name:
    Chris
    Homeless in Oregon
    Vehicle:
    2008 Tundra Crewmax 5.7L
    Some.
    When I take my headliner out to add deadener, I'll add a couple pictures showing where all the components are with a measuring tape showing distance from set points.

    Edit: took the time to drop the headliner. Note, to take it out of the truck, take it out the rear window.
    I found that only the rear 3 rivnuts on either side expanded properly, the front 3 expanded inwards and between layers as the compression seems to have been above the lowest layer of metal.
    So, all the rivnuts are going to be drilled out. I will be mounting it using nyloc nuts and fender washers cut to fit. Probably add blue loctite for good measure.
    IMG_20220111_154943.jpg
    I am also including pictures of measurements. Known points are the center of the B pillar, door moulding, and the bottom of the depressed section of the roof for the location of the cylinder. Cylinder is about 3/4" below the roof and just barely not touching the cross braces. Other than the section at the front of the cylinder, the airbags are roughly 1 1/2" below the roof forward of the B pillar and 2" - 2 1/2" behind the B pillar.
    IMG_20220111_154549.jpg IMG_20220111_154635.jpg IMG_20220111_154715.jpgIMG_20220111_154737.jpg
    Along with the 6 screws holding the overhead console up, the rear light is held in with those plastic push clips. Just give it a firm tug and it will come down. There are also 6 of the clips at the back of the headliner above the window moulding. Start on one side and work your way across.
    Once dropped, you will find that all the wiring for the front lights and prewire for what I assume is an OE backup camera is glued to the front lip of the headliner and the center light wiring is glued to the headliner along the driver side and across to the light.
     
    Last edited: Jan 11, 2022
  23. Jan 9, 2022 at 8:22 AM
    COTundie

    COTundie Whoa Black Betty

    Joined:
    Jun 15, 2021
    Member:
    #64339
    Messages:
    1,063
    Gender:
    Male
    First Name:
    Trey
    Vehicle:
    Black 5.7 DC TRD 4x4
    Pretty things
    Yikes. That's a lot of glitter.

    Not fun, but interested to see what the teardown yields.
     
    Ricos[QUOTED] likes this.
  24. Jan 9, 2022 at 1:42 PM
    PhotoNerd

    PhotoNerd New Member

    Joined:
    Apr 6, 2021
    Member:
    #61465
    Messages:
    418
    Gender:
    Male
    First Name:
    Tony
    Waterford, CT
    Vehicle:
    2008 Salsa Red Tundra DC SR5 4x4
    Chrome delete, Sequioa grill, bed lights, LED + head, fog & tail lights, Dynamat throughout, front & rear cameras, Pheonix PX6 13" head unit, 8" subwoofer, JBL speaker upgrades, tonneau cover, custom shifter, steering wheel cover
    Finished the driver's seat. Just need to finish the bench and center console lid, steam everything to remove the wrinkles and then wire the seat heaters.

    F50D565C-9E3E-4465-BB54-502D7D5AA239.jpg
     
  25. Jan 9, 2022 at 6:36 PM
    Asmith2945

    Asmith2945 New Member

    Joined:
    May 6, 2020
    Member:
    #46075
    Messages:
    22
    Gender:
    Male
    First Name:
    Andrew
    Iowa
    Vehicle:
    2008 DC Tundra SR5 Grey
    Aftermarket rims, added fogs, new headlights, led brake light housings, cargo cover, nerf bars, bilstein shocks and coil overs, k&n drop-in filters, yellow sumo springs, Icon RXT leaf springs, after market 1” shackles, forged upper control arms, 3” spacer lift soon
    Added a spacer lift until my bilsteins finally kick the bucket. Did the UCA switch and differential drop a week or so back. Seeing about 3.5” but figure it’ll settle some .
     
  26. Jan 9, 2022 at 7:11 PM
    Silverghost

    Silverghost New Member

    Joined:
    Sep 26, 2019
    Member:
    #36672
    Messages:
    137
    Gender:
    Male
    First Name:
    Mike
    Vehicle:
    13 tundra 4x4
    BAD ASS
     
  27. Jan 9, 2022 at 7:47 PM
    Mountun Goat

    Mountun Goat She baaaaaahd

    Joined:
    Feb 19, 2018
    Member:
    #13002
    Messages:
    5,811
    Gender:
    Male
    First Name:
    Dan
    EhBerta, Canadia
    Vehicle:
    It’s a Goat.
    :hattip::fistbump:
    Thanks. Not gunna lie, tossing the rack on kind of got me stoked on it all over again. Now if it wasn’t a million below zero :monocle:
     
  28. Jan 10, 2022 at 6:31 AM
    thumper_racer

    thumper_racer Not a New Member

    Joined:
    Jul 25, 2017
    Member:
    #8741
    Messages:
    94
    Gender:
    Male
    TN
    Vehicle:
    2012 MGM Rock Warrior
    A little grinding on the lca for the new coilovers.

    Before:
    20211230_124933.jpg

    After:
    20211231_135611.jpg
     
  29. Jan 10, 2022 at 11:36 AM
    chrisf111

    chrisf111 New Member

    Joined:
    Dec 14, 2021
    Member:
    #71770
    Messages:
    368
    Gender:
    Male

    I just finished finished putting new leather on my center console. $15 part on Amazon. Looks good, but god it was a pain to install. Took over 2 hours. Best method I found was to bring the lid inside and use clothes lines pins to hold the leather in place while you strech it out and get it set. Then used hot glue to lock in place, then reinstalled the plastic rim to lock in place.

    Good luck!

    20220108_183951.jpg

    20220108_172526.jpg
     
  30. Jan 10, 2022 at 11:41 AM
    is348cm

    is348cm New Member

    Joined:
    Jun 22, 2020
    Member:
    #48316
    Messages:
    10
    Gender:
    Male
    Texas
    Vehicle:
    07 Tundra Limited CM TRD
    Thanks for the info. Installed this weekend and works like a charm.
     
    Ericsopa[QUOTED] likes this.

Products Discussed in

To Top