

-
Welcome to Tundras.com!
You are currently viewing as a guest! To get full-access, you need to register for a FREE account.
As a registered member, you’ll be able to:- Participate in all Tundra discussion topics
- Transfer over your build thread from a different forum to this one
- Communicate privately with other Tundra owners from around the world
- Post your own photos in our Members Gallery
- Access all special features of the site
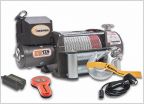 Portable 12v winch
 Little help with air compressor couplings
 Staun Tire Deflators
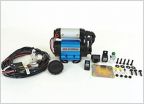 Plumbing OBA - Best place for pressure switch?
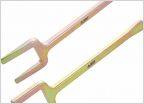 Fastener Sizes
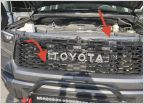 Warn Zeon Platinum 10-S install w/control pack relocation kit - accessing on/off switch
Wanting to build a custom bed rack
Discussion in 'Recovery & Gear' started by KissMyAxe1, Feb 18, 2020.
Page 2 of 2
Page 2 of 2


