1. Welcome to Tundras.com!

    You are currently viewing as a guest! To get full-access, you need to register for a FREE account.

    As a registered member, you’ll be able to:
    • Participate in all Tundra discussion topics
    • Transfer over your build thread from a different forum to this one
    • Communicate privately with other Tundra owners from around the world
    • Post your own photos in our Members Gallery
    • Access all special features of the site

VLEDS Footwell Lighting Install

Discussion in 'General Tundra Discussion' started by Sas, Jul 27, 2018.

  1. Aug 12, 2018 at 12:41 PM
    #31
    T-Rex266

    T-Rex266 Owner, CTO and executive chairman of X Staff Member

    Joined:
    Jan 5, 2014
    Member:
    #6
    Messages:
    163,431
    Gender:
    Male
    First Name:
    Elon
    Am I to splice into something with this?

    4BE5C4F6-9C48-4E89-B051-7DF70280A55A.jpg
     
  2. Aug 12, 2018 at 12:43 PM
    #32
    Sas

    Sas [OP] Humor is everywhere

    Joined:
    Jul 16, 2018
    Member:
    #17087
    Messages:
    4,406
    Gender:
    Male
    First Name:
    Jason
    OKC, OK
    Vehicle:
    '17 SR5 CM TSS 4WD MGM 5.7 FF
    Lost track after #1.
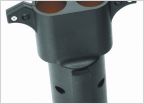
    There should be an adapter with the kit that plugs in where the bulb went. Should look something like the second pic.

    [​IMG]
     
  3. Aug 12, 2018 at 12:50 PM
    #33
    Sas

    Sas [OP] Humor is everywhere

    Joined:
    Jul 16, 2018
    Member:
    #17087
    Messages:
    4,406
    Gender:
    Male
    First Name:
    Jason
    OKC, OK
    Vehicle:
    '17 SR5 CM TSS 4WD MGM 5.7 FF
    Lost track after #1.
    Yeah, those little connectors go on the ends of the wires. Here's a video.

     
  4. Aug 12, 2018 at 12:59 PM
    #34
    T-Rex266

    T-Rex266 Owner, CTO and executive chairman of X Staff Member

    Joined:
    Jan 5, 2014
    Member:
    #6
    Messages:
    163,431
    Gender:
    Male
    First Name:
    Elon
    Are these supposed to slide over one another?

    172804E6-3F11-4645-9FB3-31FD4CE7CCCD.jpg
     
  5. Aug 12, 2018 at 1:03 PM
    #35
    Sas

    Sas [OP] Humor is everywhere

    Joined:
    Jul 16, 2018
    Member:
    #17087
    Messages:
    4,406
    Gender:
    Male
    First Name:
    Jason
    OKC, OK
    Vehicle:
    '17 SR5 CM TSS 4WD MGM 5.7 FF
    Lost track after #1.
    Yep. It looks like they won't go together correctly when you begin to fit them together, but they do connect securely. Note what the instructions say about polarity. This is where it gets fiddly and you need to check each strip to make sure you have all your connections correct and that everything lights up when they're all connected together before wiring everything in. If you have different connectors that you like I'd honestly just use those instead of the ones that came in the kit.
     
    NewImprovedRon likes this.
  6. Aug 12, 2018 at 1:13 PM
    #36
    T-Rex266

    T-Rex266 Owner, CTO and executive chairman of X Staff Member

    Joined:
    Jan 5, 2014
    Member:
    #6
    Messages:
    163,431
    Gender:
    Male
    First Name:
    Elon
    Screw this polarity lol. Can’t get the 2nd strip to light
     
  7. Aug 12, 2018 at 1:15 PM
    #37
    Sas

    Sas [OP] Humor is everywhere

    Joined:
    Jul 16, 2018
    Member:
    #17087
    Messages:
    4,406
    Gender:
    Male
    First Name:
    Jason
    OKC, OK
    Vehicle:
    '17 SR5 CM TSS 4WD MGM 5.7 FF
    Lost track after #1.
    Yeah, it's friggin' :annoyed: as shit. You have to unhook one of those little connectors and flip the wires over then clamp it down again. I didn't have any left after I was done because 2-3 of them broke.
     
  8. Aug 12, 2018 at 1:15 PM
    #38
    TXMiamiFan

    TXMiamiFan SSEM #3 and tractor extraordinaire

    Joined:
    Nov 26, 2015
    Member:
    #2160
    Messages:
    25,274
    Gender:
    Male
    First Name:
    Jose
    Houston, TX
    Vehicle:
    2016 White Crew Max TRD
    TRD Pro Grille, ESP Storage, Tailgate Inserts, Line-X Bedliner, Weathertech Floorliners, Wet Okole Seat Covers, 5" Shorty Antenna, Mickey Thompson MM-366 Wheels, ToyTec Boss, 35" BFG KO2 to name a few.
    My hands are delicate ;)
     
  9. Aug 12, 2018 at 1:16 PM
    #39
    Larmand

    Larmand SSEM #6

    Joined:
    Dec 30, 2017
    Member:
    #11835
    Messages:
    4,158
    Gender:
    Male
    First Name:
    Lucas
    Fort Worth, TX
    Vehicle:
    2018 SLIGHTLY MODIFIED SR5 TRD CM 4x4-CEMENT
    I had to purchase 2 kits, after i screwed up all the connectors and wires for the 1st one, i trashed it and tried again.
     
  10. Aug 12, 2018 at 1:18 PM
    #40
    Sas

    Sas [OP] Humor is everywhere

    Joined:
    Jul 16, 2018
    Member:
    #17087
    Messages:
    4,406
    Gender:
    Male
    First Name:
    Jason
    OKC, OK
    Vehicle:
    '17 SR5 CM TSS 4WD MGM 5.7 FF
    Lost track after #1.
    It's honestly going to save some headache and frustration by running up to Walmart or something and buying a couple of packs of T-taps or other connector that is meant for 18-22 gauge wire.
     
  11. Aug 12, 2018 at 1:25 PM
    #41
    T-Rex266

    T-Rex266 Owner, CTO and executive chairman of X Staff Member

    Joined:
    Jan 5, 2014
    Member:
    #6
    Messages:
    163,431
    Gender:
    Male
    First Name:
    Elon
    Ok- it’s all connected and working. Now, I need to run it somehow to the passenger side
     
  12. Aug 12, 2018 at 1:32 PM
    #42
    Larmand

    Larmand SSEM #6

    Joined:
    Dec 30, 2017
    Member:
    #11835
    Messages:
    4,158
    Gender:
    Male
    First Name:
    Lucas
    Fort Worth, TX
    Vehicle:
    2018 SLIGHTLY MODIFIED SR5 TRD CM 4x4-CEMENT
    I ran mine across the firewall and tucked all the wires in the center
     
    Sas[OP] and T-Rex266[QUOTED] like this.
  13. Aug 12, 2018 at 1:43 PM
    #43
    Sas

    Sas [OP] Humor is everywhere

    Joined:
    Jul 16, 2018
    Member:
    #17087
    Messages:
    4,406
    Gender:
    Male
    First Name:
    Jason
    OKC, OK
    Vehicle:
    '17 SR5 CM TSS 4WD MGM 5.7 FF
    Lost track after #1.
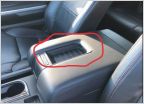
    If you're running them under the driver and passenger seats as well then you'll probably want to pop out the center console cover so you can run the wires easier. It's easiest to start if you open the storage lid and begin working from where the center console meets the storage box. Wedged a body trim tool as a starting point for reference.

    20180812_153903[1].jpg


    Here's a good video on removing it (start it 1:00 in if you have your battery disconnected, otherwise 1:30 in):

     
  14. Aug 12, 2018 at 1:49 PM
    #44
    Larmand

    Larmand SSEM #6

    Joined:
    Dec 30, 2017
    Member:
    #11835
    Messages:
    4,158
    Gender:
    Male
    First Name:
    Lucas
    Fort Worth, TX
    Vehicle:
    2018 SLIGHTLY MODIFIED SR5 TRD CM 4x4-CEMENT
    Didnt go that route either. I just tucked wires up under the plastic skirt of the center console. Its loose enough to fish wires up under but tight enough to hold the wires in.
     
  15. Aug 12, 2018 at 1:55 PM
    #45
    T-Rex266

    T-Rex266 Owner, CTO and executive chairman of X Staff Member

    Joined:
    Jan 5, 2014
    Member:
    #6
    Messages:
    163,431
    Gender:
    Male
    First Name:
    Elon
    Complete. Thanks!

    346814F5-DFF4-4EF6-9782-F1D89C8BBFCA.jpg
    F884F3E5-0401-4669-BF30-FA3513CD9439.jpg
     
  16. Aug 12, 2018 at 1:57 PM
    #46
    Sas

    Sas [OP] Humor is everywhere

    Joined:
    Jul 16, 2018
    Member:
    #17087
    Messages:
    4,406
    Gender:
    Male
    First Name:
    Jason
    OKC, OK
    Vehicle:
    '17 SR5 CM TSS 4WD MGM 5.7 FF
    Lost track after #1.
    Right on. Mine was already off because I was already doing another mod at the same time.
     
  17. Aug 12, 2018 at 1:59 PM
    #47
    Sas

    Sas [OP] Humor is everywhere

    Joined:
    Jul 16, 2018
    Member:
    #17087
    Messages:
    4,406
    Gender:
    Male
    First Name:
    Jason
    OKC, OK
    Vehicle:
    '17 SR5 CM TSS 4WD MGM 5.7 FF
    Lost track after #1.
    Nicely done! :thumbsup:
     
    T-Rex266[QUOTED] likes this.
  18. Apr 20, 2019 at 5:29 PM
    #48
    Flyinryank

    Flyinryank New Member

    Joined:
    May 9, 2017
    Member:
    #7635
    Messages:
    1,286
    Gender:
    Male
    First Name:
    Ryan
    Las Vegas, NV
    Vehicle:
    White 2015 CM 4x4
    AFE Dry S Drop-In Filter TRD Air Accelerator TRD Radiator Cap TRD Fuel Cap TRD Pro Grill/Hood Body Mount Chop Bilstein 6112s CB Shim on Driver Side Bilstein 5160s ICON Rear Spring Pack Factory Painted Door Handles BFG KO2s 305/65R18 Method NV 18x9 +25 NFAB RKR Rails SDHQ ABS Guards SDHQ Ditch Light Brackets Baja Designs Squadron Pros
    Hmmmmm. So is this kit worth $40?
     
  19. Apr 20, 2019 at 5:36 PM
    #49
    Sas

    Sas [OP] Humor is everywhere

    Joined:
    Jul 16, 2018
    Member:
    #17087
    Messages:
    4,406
    Gender:
    Male
    First Name:
    Jason
    OKC, OK
    Vehicle:
    '17 SR5 CM TSS 4WD MGM 5.7 FF
    Lost track after #1.
    If I were doing this again, I would just buy the LED's and the footwell adapter so you don't have to tap anything to get power. Then just clip the connectors they use and wire them in yourself using whatever connectors you want. I wasn't a fan of their connectors at all.
     

Products Discussed in

To Top