

-
Welcome to Tundras.com!
You are currently viewing as a guest! To get full-access, you need to register for a FREE account.
As a registered member, you’ll be able to:- Participate in all Tundra discussion topics
- Transfer over your build thread from a different forum to this one
- Communicate privately with other Tundra owners from around the world
- Post your own photos in our Members Gallery
- Access all special features of the site
 Hyperflashing Turn Signal Fix
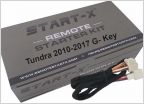 Plug and play remote start
 Plug and Play Wiring Harness for a 2016 Tundra and Leer 100XL
 Which gauge wire should I use?
 What are folks with Platinum and 1794s doing for extra switches?
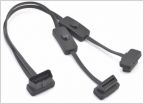 OBD 2 Port Splitter
Ultimate SEQUOIA Wiring Diagrams Collection
Discussion in 'Electrical' started by RainMan_PNW, Aug 8, 2022.
Page 1 of 2
Page 1 of 2


