1. Welcome to Tundras.com!

    You are currently viewing as a guest! To get full-access, you need to register for a FREE account.

    As a registered member, you’ll be able to:
    • Participate in all Tundra discussion topics
    • Transfer over your build thread from a different forum to this one
    • Communicate privately with other Tundra owners from around the world
    • Post your own photos in our Members Gallery
    • Access all special features of the site

The Cream Pie - A 2005 4wd/LS/5-Speed/SAS Conversion

Discussion in '1st Gen Builds (2000-2006)' started by the_white_shadow, Aug 8, 2019.

  1. Feb 16, 2022 at 6:28 AM
    #211
    the_white_shadow

    the_white_shadow [OP] New Member

    Joined:
    Aug 6, 2019
    Member:
    #34217
    Messages:
    192
    Gender:
    Male
    Some wiring tech info so i dont forget it. I couldnt find this information readily when i searched the internet so im posting it here.

    Fuel sending unit wiring:
    07+ tundra with the 5.7l v8 (maybe/probably others)
    Fuel sender ohm readings - 412 ohms empty - 15 ohms full
    At the cluster (for my 05 tundra) there are a brown wire and yellow w/ red stripe wire that go the sending unit in the tank.
    For my Holley 6.86 digital dash (and the 12.3), you connect the brown wire to I/O-7 on the dash and ground out the yellow w/ red stripe wire. I used the ground wire that is built into the tundra cluster to tie this yellow w/ red wire into. Its white with a black stripe. ( Same ground wire coloring toyota has been using for decades).

    I used this video for configuring the gauge in the dash.
    https://www.youtube.com/watch?v=8IsPktCozWQ

    I now have a verified fuel gauge in the digital dash that uses the 07+ sending unit in the 05 Tundra tank.

    Turn signal Info:
    05 Tundra cluster plugs
    Left turn: Green with black stripe
    Right turn: Green with yellow stripe
    These plug directly into I/O-8 and I/O-9 on the digital dash.
    I used this video to configure them:
    https://www.youtube.com/watch?v=dxlsJMpgXag

    AC clutch wire:
    Light Green with black stripe - i picked this in the IE1 plug i posted above behind the glove box. This wire will go directly to the plug on the GM AC compressor. It should turn the compressor on with the Tundra AC switch on the dash (to be confirmed)

    Fuel pump wire:
    Blue with the orange stripe
    This wire can be found in the kick panel wiring on the drivers side. Find the loom of wires that go to the back of the truck (via under the seat) and tap into the wire there. I used the green wire from the Holley Terminator X to directly power the fuel pump.
     
    Last edited: Feb 16, 2022
  2. Feb 16, 2022 at 7:39 AM
    #212
    e30cabrio

    e30cabrio I'm e30cabrio, I'm a modaholic

    Joined:
    Oct 20, 2017
    Member:
    #10410
    Messages:
    4,739
    Gender:
    Male
    West Valley, Phoenix, Az.
    Vehicle:
    Boosted 2013 Sequoia TRD FAUX
    Maggy, Dobinsons, TRD PRO conversion, 18+ lights & cluster too much more to list
    Wow! Really nice work. Thanks for sharing!
     
    the_white_shadow[OP] likes this.
  3. Feb 22, 2022 at 5:50 AM
    #213
    the_white_shadow

    the_white_shadow [OP] New Member

    Joined:
    Aug 6, 2019
    Member:
    #34217
    Messages:
    192
    Gender:
    Male
    Exhausting work but had to be done. Now time to fully weld, paint, and (maybe) wrap. As you can see, i reused as much of the original exhaust from the chevy donor truck as possible. It was mandrel bent tube. 3" diameter into a merge and 3.5" out through the bed side.

    mFxDf1Cj9SA4l6FNrZ4qpYfDYerMh2bnvRhD-WpH_3ba5ac743dcf122e4fd4611f727015fb4014c0d8.jpg

    2_75jFzWgV6dLbJIGD_eaO9h9L3UyQT-FsCV-Usm_c2f977b75bf8be1bba98e612a48381ac1f619c4d.jpg

    FaV_5ue52tRT23e4290JcJaceQEc0Hm2x2HSrF5r_d886eb502421713f6bf4c4791d4782ecb4d83199.jpg

    aCNs80cOMwxVZ-yK6pTXC1vRyikF0pLZJxVHbSYy_e7d7323b1ccd5dc8f5ed2aba1c2d3b673649edf3.jpg
     
  4. Feb 25, 2022 at 5:02 AM
    #214
    the_white_shadow

    the_white_shadow [OP] New Member

    Joined:
    Aug 6, 2019
    Member:
    #34217
    Messages:
    192
    Gender:
    Male
    Exhaust fully welded out and hole cut in the bedside for the exit. I didnt plan it, but got lucky the hole matched up with the body molding. Need to pull it back off and paint it but it was 40 degrees in the shop last night. Axle rebuild and finish welding coming up next.

    mcurJrmzWGJquIpSsSKO4MbXE6WEbssNKm1s1a4J_2b6ee73a9080a442091731684ae6c91826906615.jpg
     
  5. Feb 25, 2022 at 6:31 AM
    #215
    Trailscape

    Trailscape Zip Tie Wizard

    Joined:
    Dec 19, 2018
    Member:
    #23221
    Messages:
    323
    Gender:
    Male
    Alabama
    Vehicle:
    2006 Tundra SR5
    If you have chance, can you get a photo showing the exhaust route into the bed? Been thinking of doing that myself and adding some bezels. Looks great.

    https://www.dirtskum.com/product/fender-exhaust-bezels
     
  6. Feb 25, 2022 at 6:40 AM
    #216
    the_white_shadow

    the_white_shadow [OP] New Member

    Joined:
    Aug 6, 2019
    Member:
    #34217
    Messages:
    192
    Gender:
    Male
    i can take a pic later today. Basically the muffler is under the rear most crossmember where the cab ends. I then put a couple 90-ish degree bends up and over the frame rail and out the bedside. Its angled rearward slightly to blow the exhaust out and away from the cab.
     
  7. Mar 2, 2022 at 5:19 AM
    #217
    the_white_shadow

    the_white_shadow [OP] New Member

    Joined:
    Aug 6, 2019
    Member:
    #34217
    Messages:
    192
    Gender:
    Male
    More work on the Tundra. Front axle is fully welded out and painted. Time to re-gear it to 5.13s with a Detroit.
    1uneGM7pIOU90xRrQ_EbqiQHYrJG2rBhckmO3Uf__45684b575a445e5bd715578235fcb1538a5450bd.jpg

    Also welded up the Artec steering arms to the knuckles. Ball joint eliminators also welded in. Pre/post heat (not necessary on these knuckles) but made me feel better. The large bolt is a fail safe. Ill get them cleaned up and painted today.
    zg1P0j1KmVNiJQeSi8JQwmf0qXQ090ZLl2f3JXTp_7db9050dc4c4bb06c0124332eec0f1346abc8568.jpg

    Got an email that my damn coilovers wont be ready until "late april" now. So much for January like they promised. Then March. Now essentially May. One day ill have a roller again.
     
    5N0W808, Sirfive, eccracer104 and 5 others like this.
  8. Mar 8, 2022 at 6:31 AM
    #218
    the_white_shadow

    the_white_shadow [OP] New Member

    Joined:
    Aug 6, 2019
    Member:
    #34217
    Messages:
    192
    Gender:
    Male
    Mas updates on the cream pie.
    Front axle is rebuilt and painted. It now has 5.13s and a Detroit locker. Rolled the fab table under the lift and bolted the axle back in the truck and set it at bump.
    FzneVAR6ducuE0_p2p2A4KKP6MwKVmzofF2YE90i_e3e370159b9671f1a7fba1092ccac59fe4c7cf27.jpg

    gVcR6mRfLIOIjCyRGaN32h5u5QsgHy84oyK9iiVJ_9296d49e8ce9ed492aaf72fdfbcfe51e774d3d4f.jpg

    Now that its at bump, i measured for shock towers. A friend with a plasma table is going to cut a set out for me.
    EHXtKiSEXhJBMf0ZFfg5sL6vUT8Sr7gYx-BiuD6W_f752b7fa539c8e75962b1ee7815d9d2db0b826d8.jpg

    Drilled and tapped my toyota IFS steering box for hydro assist. It wasnt fun but i got it put back together and in the truck.
    vIvVl9QmaZOwdEerK5NKoVF68NzYgCaVxxtQ13eW_64d35dd46bce026556d7afc1bce3b566c291c420.jpg

    AcWEK98i3mfElu4sfH5TLEJebOSSpKf4uOU5Qzuo_37649543b938eab6a394b25a5c451b0dab96ed62.jpg

    yqJoMgCjjWzuTkr6SObgiEwJnse0jhS4fbFLvesI_fa718bc0c77fe84bfc07fa946fb60ad2af4ab04c.jpg

    _YRnwJaFr7KLZrpxDBfDKPkygdhEf4-OIoD5380k_af08ecdb1b4c977c62de42f9d7775f3b4f091a1d.jpg

    My coilovers should be here next week. This week, i will get the shafts back in the axle and put the unit bearings back on and figure out what brakes i want to run. The tall shock towers will require me to locate the fuse box up and over some, and i will have to get creative with the hydroboost. Probably going to remote mount the assembly. More to come.
     
    Last edited: Mar 8, 2022
  9. Mar 8, 2022 at 7:07 AM
    #219
    easleycrawler

    easleycrawler TOYOTA ADDICT- SSEM #78

    Joined:
    Nov 12, 2016
    Member:
    #5176
    Messages:
    7,590
    Gender:
    Male
    First Name:
    Travis
    Easley, South Carolina
    Vehicle:
    17 Tundra SR5 DC Black 5.7
  10. Mar 10, 2022 at 7:46 AM
    #220
    300BLK

    300BLK New Member

    Joined:
    Aug 1, 2019
    Member:
    #34022
    Messages:
    806
    Vehicle:
    2014 Tundra SR5 - Black
    Very fun to read through this. You make it look easy.
     
  11. Mar 10, 2022 at 7:55 AM
    #221
    the_white_shadow

    the_white_shadow [OP] New Member

    Joined:
    Aug 6, 2019
    Member:
    #34217
    Messages:
    192
    Gender:
    Male
    Thanks for the kind words. Its all coming together well at the moment.
     
  12. Mar 14, 2022 at 8:05 AM
    #222
    the_white_shadow

    the_white_shadow [OP] New Member

    Joined:
    Aug 6, 2019
    Member:
    #34217
    Messages:
    192
    Gender:
    Male
    My new (used) Griffin radiator and fans came in last week and had the weekend to make some mounts. I took a chance that the radiator and fans wouldnt be too thick. Its close, but should be just fine.

    Radiator is about 30" wide and 5.5" thick overall.
    yIx0vsUK-0nql_eTj89AHKwb5JL-gGQ0-SHka2AU_ccb3673f44658b786f0b2fbac6c949d8da5ba5b5.jpg

    OXA4w1nulujMUDSoK-N5wfUhwxwx0Wx3p6OLbhft_7e6ba1b6f879e9a1070f392d3384b15a7b9fa824.jpg

    Made some simple dimple died lower mounts.
    fFOO2KXWMf5fKu7RWuKgdycPgWprIrsMJIULNTBe_e1bce6606f65860d3ff612a2b8a90c8a207569f6.jpg

    Simple upper mounts
    T5ApEOdnWZZU06ZGVjaCLfvOXYVzuatjw3n5lql3_c21cf6f4ba4f47802b2455c3ed98edbaf9b4de50.jpg

    Clearance to the water pump pulley. Its tight.
    K_IkWv3IA32WkYZPsr7u7hHHN45i-E2TrhD2EDpH_6e6d9ea3cbfe426a1548840d6565406bbcce09d2.jpg

    I started to mock up the hoses yesterday and it looks like i can make a simple 90 up top and run a hard pipe in front of the fan and over to the water pump. The trick will be seeing if i can then fit an air filter piping in there some where.

    Also these bad boys finally came in. Fox 2.5 x 14s custom valved and tuned by Accutune Offroad. Cant wait to get them installed.
    WTn7qj40qAJ5jLag6ni3jouWYD832DQXPCO1-ow9_271c04b798fbfae93479e5b6ca8f0c4c90f9a604.jpg
     
    5N0W808, Sirfive, eccracer104 and 7 others like this.
  13. Mar 29, 2022 at 8:21 AM
    #223
    Wes_heppy

    Wes_heppy Trucks...Dirtbikes... Guns...

    Joined:
    Dec 21, 2020
    Member:
    #56456
    Messages:
    158
    Gender:
    Male
    First Name:
    Weston
    Vehicle:
    2003 tundra 4x4 4.7
    TC UCA Radflo coilovers Long Tubes LSD
    Updates? Looking forward to seeing some more!
    In the meantime here is some motivation! This truck was built by a guy up in Oregon and is similar to yours. Running 14'' fox up front on an 05+ and 63s on the rear with a 14 bolt. Stock 4.7 though.
    [​IMG]
     
    Last edited: Mar 29, 2022
  14. Mar 29, 2022 at 8:31 AM
    #224
    the_white_shadow

    the_white_shadow [OP] New Member

    Joined:
    Aug 6, 2019
    Member:
    #34217
    Messages:
    192
    Gender:
    Male
    Unfortunately, none at the moment. Been busy wheeling my crawler and havent had much time, but thats about to change. I will be getting my shock towers made soon, so hopefully i can get the coilovers mounted up.
     
  15. Apr 4, 2022 at 8:57 AM
    #225
    the_white_shadow

    the_white_shadow [OP] New Member

    Joined:
    Aug 6, 2019
    Member:
    #34217
    Messages:
    192
    Gender:
    Male
    Some progress this weekend. A friend printed a shock mount for me to check if it worked. Mounted the 2.5" coilover and flexed it out to check clearances. The spring clears the frame and nothing makes any unwanted contact. Now to print another one and weld them up. I will tie them together with a crossbar (removable) above the engine. Fitting hydroboost will be fun.

    ygHNqRAkSxaWWT-ofddtLQdu_CkVBN8mhxbswQdS_00baf0b2d6befd6c0baf95ce824406eb8c382375.jpg

    qce71zevKjmA_v4wwOkSjlZiqH9r8Iu2Jqp1oDDz_205e94330248245e85e3bce20959b1e4f4d196ae.jpg

    Y0BL_5XCFx6nle3rQ4uyYguQgBMxEUMl91P17eDb_4b88dd0ecfc11ff43cf30a84b049dfdfcedd4095.jpg

    o4nwiOgWZ9ra8OcVFoT3qQCA9Nb2A5tcxb6e8Dbf_ce0dc0f4580c2cb86798081fc466357f6f0e6227.jpg

    PxI-kqDUol97dd6h9r6xzMi58B0UmXuMBpyeW2ol_f399bb0acb42916c2505dcc7c52a0f8d2809d1b4.jpg
     
  16. Apr 7, 2022 at 4:24 AM
    #226
    the_white_shadow

    the_white_shadow [OP] New Member

    Joined:
    Aug 6, 2019
    Member:
    #34217
    Messages:
    192
    Gender:
    Male
    Shock towers and bump stops installed on the frame side. Still need to made a landing pad for the axle side of things. It will be a roller again very soon.
    Cz-Z2-LObNlUwqLnDJyHCvZ8TK3raOwmZXVJNfMY_92c40eec52d0f0aa1d64a9cf47e7b7bc8f27779f.jpg
     
  17. Apr 7, 2022 at 8:47 PM
    #227
    Mountun Goat

    Mountun Goat She baaaaaahd

    Joined:
    Feb 19, 2018
    Member:
    #13002
    Messages:
    5,752
    Gender:
    Male
    First Name:
    Dan
    EhBerta, Canadia
    Vehicle:
    It’s a Goat.
  18. Apr 13, 2022 at 11:00 AM
    #228
    the_white_shadow

    the_white_shadow [OP] New Member

    Joined:
    Aug 6, 2019
    Member:
    #34217
    Messages:
    192
    Gender:
    Male
    On all four tires for a shirt while. Its a monster truck as the springs need to settle 2-3".
    upload_2022-4-13_12-53-53.jpg

    RufffStuff battery box bolted to the inner fender
    upload_2022-4-13_12-54-45.jpg

    Simple air intake. I need to build the crossover tube for my shock towers and will secure the reservoirs to it.
    upload_2022-4-13_12-55-13.jpg

    The roller status was short lived as its back on lift to start on the rear suspension. Rear end and factory leafs have been removed. Time to cut off rivets and remove the stock hangers. I have a riffstuff simpe leaf spring swap kit with new hangers to install. the 57" Ford springs have a different center pin location bay have the same basic free height as the tundra springs. Ill be doing a shackle flip to get some more lift, but i may have to use different springs if thats not enough. Maybe some 2nd gen tacoma springs i found on marketplace.
     
  19. Apr 13, 2022 at 12:54 PM
    #229
    easleycrawler

    easleycrawler TOYOTA ADDICT- SSEM #78

    Joined:
    Nov 12, 2016
    Member:
    #5176
    Messages:
    7,590
    Gender:
    Male
    First Name:
    Travis
    Easley, South Carolina
    Vehicle:
    17 Tundra SR5 DC Black 5.7
    Looking good.
     
  20. Apr 14, 2022 at 6:38 AM
    #230
    the_white_shadow

    the_white_shadow [OP] New Member

    Joined:
    Aug 6, 2019
    Member:
    #34217
    Messages:
    192
    Gender:
    Male
    Wagon technology mocked up last night. 57" ford f150 leafs (4+1), ruffstuff swap kit and a quick shackle flip for the rear. Hopefully its enough lift. Goal is to get it back on its weight tomorrow to check. Fun fact, the tundra rear frame tapers down from 44.5" on center to about 40" on center where the rear hanger mounts. Thats why its outboarded some to keep things square.
    upload_2022-4-14_8-30-50.jpg

    upload_2022-4-14_8-35-12.jpg

    upload_2022-4-14_8-35-38.jpg
     
  21. Apr 14, 2022 at 6:41 AM
    #231
    the_white_shadow

    the_white_shadow [OP] New Member

    Joined:
    Aug 6, 2019
    Member:
    #34217
    Messages:
    192
    Gender:
    Male
  22. Apr 14, 2022 at 7:25 AM
    #232
    Trailscape

    Trailscape Zip Tie Wizard

    Joined:
    Dec 19, 2018
    Member:
    #23221
    Messages:
    323
    Gender:
    Male
    Alabama
    Vehicle:
    2006 Tundra SR5
    Thanks, man!

    This is done without a body lift? Wondering if I can replicate this on my much less modified tundra.
     
  23. Apr 14, 2022 at 7:25 AM
    #233
    the_white_shadow

    the_white_shadow [OP] New Member

    Joined:
    Aug 6, 2019
    Member:
    #34217
    Messages:
    192
    Gender:
    Male
    No Body lift. This is 3.5" exhaust after the muffler.
     
  24. Apr 14, 2022 at 7:32 AM
    #234
    Trailscape

    Trailscape Zip Tie Wizard

    Joined:
    Dec 19, 2018
    Member:
    #23221
    Messages:
    323
    Gender:
    Male
    Alabama
    Vehicle:
    2006 Tundra SR5
    Nice. Almost looks like I could fit a dual outlet in there.
     
  25. Apr 14, 2022 at 7:37 AM
    #235
    the_white_shadow

    the_white_shadow [OP] New Member

    Joined:
    Aug 6, 2019
    Member:
    #34217
    Messages:
    192
    Gender:
    Male
    I dont see why not. There is plenty of room between the frame and bottom of the bed.
     
  26. Apr 14, 2022 at 8:13 AM
    #236
    eccracer104

    eccracer104 Dirty Paws Off-Road

    Joined:
    Dec 18, 2017
    Member:
    #11593
    Messages:
    2,876
    Gender:
    Male
    First Name:
    Mike
    San Diego, CA
    Vehicle:
    2011 Tundra 5.7 4x4 CM
    :popcorn: Don’t mind me. Just reading and enjoying the progress! :popcorn:

    Great work. Looks like a lot of fun :thumbsup:
     
  27. Apr 18, 2022 at 6:53 AM
    #237
    the_white_shadow

    the_white_shadow [OP] New Member

    Joined:
    Aug 6, 2019
    Member:
    #34217
    Messages:
    192
    Gender:
    Male
    Back on all fours to check out the rear suspension and to check my shackle angle. I put 5-600lbs of wheels and tires in the bed to simulate the future rear bumper, topper, gear, etc. Looks like i need to move the rear hanger forward about an inch. Its about 80 degrees at the moment and i would like it around 50-60 degrees for ride quality and flex.
    upload_2022-4-18_8-53-21.jpg
     
  28. Apr 19, 2022 at 12:37 PM
    #238
    the_white_shadow

    the_white_shadow [OP] New Member

    Joined:
    Aug 6, 2019
    Member:
    #34217
    Messages:
    192
    Gender:
    Male
    Sorry for the shit pic, but here is my new shackle angle with the hangers moved 1" forward. its about ~68degrees with the weight still in the bed. Shackles are perfectly 90 degrees at full droop like they should be. New springs should settle 5-10 degrees or so, which will make for a nice plush ride. I need to drop the gas tank to finish weld the drivers side front hanger, then i can rebuild/re-gear the rear and re-install everything. Then it will be off the lift for a good while while i work on the steering and hydroboost brakes.

    upload_2022-4-19_14-37-35.jpg
     
    DZ_, Wes_heppy, Mountun Goat and 3 others like this.
  29. Apr 19, 2022 at 1:19 PM
    #239
    easleycrawler

    easleycrawler TOYOTA ADDICT- SSEM #78

    Joined:
    Nov 12, 2016
    Member:
    #5176
    Messages:
    7,590
    Gender:
    Male
    First Name:
    Travis
    Easley, South Carolina
    Vehicle:
    17 Tundra SR5 DC Black 5.7
    Coming along good.
     
  30. Apr 22, 2022 at 6:38 AM
    #240
    the_white_shadow

    the_white_shadow [OP] New Member

    Joined:
    Aug 6, 2019
    Member:
    #34217
    Messages:
    192
    Gender:
    Male
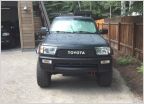
    I picked up another project the other day. I needed another one like i needed a hole in my head. 94 solid axle swapped. 4cyl, 5-speed 35-37" mismatched tires. Hideous paint that continues inside on the dash. Custom bumpers. Typical SAS job from 15 years ago. Way too tall. 3" body lift, 5" lift blocks, etc. Plan is to lower it, fix the small shit and sell it.
    upload_2022-4-22_8-35-38.jpg

    First day at home, already made it look better. Body lift removal is next. Driving this thing is scary.
    upload_2022-4-22_8-36-45.jpg

    Dont worry, this wont interfere with the cream pie. Yesterday i tore out the 14b, put it on the table and comletely tore it down for new gears, locker, bearings. Hope to get it painted and back in this weekend. Last major item to tackle, then its on to brakes and steering.
     
    5N0W808, Mohoman, Wes_heppy and 5 others like this.

Products Discussed in

To Top