1. Welcome to Tundras.com!

    You are currently viewing as a guest! To get full-access, you need to register for a FREE account.

    As a registered member, you’ll be able to:
    • Participate in all Tundra discussion topics
    • Transfer over your build thread from a different forum to this one
    • Communicate privately with other Tundra owners from around the world
    • Post your own photos in our Members Gallery
    • Access all special features of the site

The 6 Million Dollar Tundra Revival Story

Discussion in '1st Gen Builds (2000-2006)' started by BobTTundra, Mar 10, 2021.

  1. Mar 31, 2021 at 12:46 PM
    #31
    Professional Hand Model

    Professional Hand Model A.K.A ‘Golden Hands’

    Joined:
    Apr 29, 2018
    Member:
    #14878
    Messages:
    15,007
    Gender:
    Male
    First Name:
    Fred
    ‘Somewhere’... a State of Mind
    Vehicle:
    2002 Tundra SR5 4WD 4.7L AC Silver Metallica
    Hand Protectors
  2. Mar 31, 2021 at 1:16 PM
    #32
    BobTTundra

    BobTTundra [OP] New Member

    Joined:
    Jan 22, 2021
    Member:
    #57969
    Messages:
    48
    Gender:
    Male
    First Name:
    Bob
    Vehicle:
    2004 Tundra 4WD TRD Limited
    Yes I agree, Oceanside Driveline services the slip yoke when they do the rebuild, all good now. I didn't take a picture of the rebuild prop shaft when it returned from the shop, it was magnificent.
     
  3. Mar 31, 2021 at 2:03 PM
    #33
    KNABORES

    KNABORES Sarcasm incoming

    Joined:
    Jan 1, 2020
    Member:
    #40572
    Messages:
    9,159
    Gender:
    Male
    Arkansas
    Vehicle:
    2000 Limited TRD AC 4X4 Thunder Grey 270k miles. 2019 Limited TRD CM 4x4 Cement Grey 75k miles
    2000: Bilstein 5100's 16x8 589's with 265/75/16 and 1.25" spacers Flowmaster 50 series over the axle dump Pioneer touchscreen with backup camera Full interior and dash LED conversion Trailer brake controller with 7 pin Bedliner coat bumpers & trim ARE topper 2019: ARE topper with full Bedrug kit and Vortex rack TRD shifter 1.25" wheel spacers (I like to live dangerously) Red tow hooks for that +15 grip bonus
    Hey, mine looks just like yours!


    IMG_4081.jpg
     
    Jack McCarthy and Tundrastruck91 like this.
  4. Mar 31, 2021 at 2:05 PM
    #34
    KNABORES

    KNABORES Sarcasm incoming

    Joined:
    Jan 1, 2020
    Member:
    #40572
    Messages:
    9,159
    Gender:
    Male
    Arkansas
    Vehicle:
    2000 Limited TRD AC 4X4 Thunder Grey 270k miles. 2019 Limited TRD CM 4x4 Cement Grey 75k miles
    2000: Bilstein 5100's 16x8 589's with 265/75/16 and 1.25" spacers Flowmaster 50 series over the axle dump Pioneer touchscreen with backup camera Full interior and dash LED conversion Trailer brake controller with 7 pin Bedliner coat bumpers & trim ARE topper 2019: ARE topper with full Bedrug kit and Vortex rack TRD shifter 1.25" wheel spacers (I like to live dangerously) Red tow hooks for that +15 grip bonus
    Hmmm, upon further comparison, I think mine's a little dirtier. And my slip yoke seal is shot, so it keeps slinging the grease I add out. And there's some dirt/grease buildup occurring on the gas tank and pinion U joint. Hey, free rust proofing!
     
  5. Apr 7, 2021 at 7:26 AM
    #35
    BobTTundra

    BobTTundra [OP] New Member

    Joined:
    Jan 22, 2021
    Member:
    #57969
    Messages:
    48
    Gender:
    Male
    First Name:
    Bob
    Vehicle:
    2004 Tundra 4WD TRD Limited
    Stereo Upgrade complete! My Tundra came with the JBL system which when new was a great system, now dated and the speaker foam had rotted in the front door woofers so all of the music was accompanied by a constant rattling sound. No good! Shout out to @weadjust and @jkeith72 for this post from which I learned a lot: https://www.tundras.com/threads/jbl-speaker-replacement-woes.50842/

    The previous owner had upgraded the head unit to a Kenwood Excelon DDX395 double din with big screen that supported a back-up camera in the license plate holder, as well as bluetooth connection and hands free phone calling. The problem is that it barely worked! It was slow to boot up, slow to change screens, very slow to find my phone and connect, and about half the time could barely stream music. You might call it 'skipping', it was more like cutting out for longer periods of time than it played.

    I was ready to junk the head unit but read up on it and it had good reviews and was rated highly. I called Crutchfield and their technician suggested a firmware update - I had no idea that was an option - and led me through the steps. It involved downloading the firmware from the Kenwood website to a USB thumb drive, plugging that into the USB of the head unit, and letting it soak up all of the updates.

    Lo and behold the head unit was reborn! The screens came up quickly, it connected immediately to my phone once paired, and streams music perfectly. Big win, thank you Crutchfield!!!

    As for the speakers I was going to refoam them but decided to replace all four. Crutchfield again, they had to work pretty hard to find speakers that would fit and the adapter plates. My advisor recommended these as they are very efficient, the JBL speakers were 2 ohm so when replacing with 4 ohm they will lose some volume:

    image.jpg

    As usual nothing was straightforward, the front doors have a woofer, midrange, and base. I wired the tweeters to the existing tweeter circuit, then wired the new big speakers to the midrange and had next to no volume. I then wired them to the JBL woofer leads and had good volume.

    Here are the adapters that worked perfectly. When you order from Crutchfield they include this stuff for free(yes, more advertising, they really helped me a lot!)image-1.jpg

    As for the JBL amp it is behind the rear seats in my 2004 double-cab. The current Kenwood head unit still used the existing JBL 6 channel amp, most installers would bypass that amp and put in a new 4 channel amp with a sub. That is the next step - but I ran out of money and energy so decided to stay with what I have.

    When I got everything installed it sounded kind of wonky - missing the midrange as I had wired the front speakers to the woofer circuit. This head unit has a great depth of adjustment, after messing with the equalizer, listener position, speaker location, distance from listener to speakers, time delay (who knew!?) it now sound exquisite. Great success, very happy!
     
    Last edited: Apr 7, 2021
    KNABORES likes this.
  6. Apr 7, 2021 at 11:01 AM
    #36
    rock climber

    rock climber New Member

    Joined:
    Oct 7, 2019
    Member:
    #37106
    Messages:
    1,614
    Gender:
    Male
    Colorado
    Vehicle:
    2001 Sequoia 4X4, 2000 AC 4X4
    Nice work!

    I bypassed my JBL amp with the cutchfield wiring harness, but in hindsight I should have just rewired straight from the headunit. If I were you that's what I'd do. I have an amplifier for the subwoofer, but I ran the four door speakers off the aftermarket head unit and it sounds really good.

    Also, good choice on those hertz speakers, they're one I really want to try.
     
  7. Apr 21, 2021 at 8:45 AM
    #37
    BobTTundra

    BobTTundra [OP] New Member

    Joined:
    Jan 22, 2021
    Member:
    #57969
    Messages:
    48
    Gender:
    Male
    First Name:
    Bob
    Vehicle:
    2004 Tundra 4WD TRD Limited
    Front Brake Blues

    The previous owner had the front brake pads replaced at a local 'Quick Lube' shop (yes, the red flags and alarm bells should be going off now!!) and had trouble. He reported that afterwards the brakes were acting really strange, pulsating and doing weird stuff. After multiple returns to the shop they got an ASE certified mechanic who replaced both front calipers. It was then better, I found the brakes were 'sticking on' about 50% of the time when starting up from a dead stop. The truck would hesitate, then 'let go' with a lunge and proceed down the road.

    Upon inspection I found the pads and clevis pins had no grease on them, and had not been cleaned. Most likely this along with the anti-rattle springs which were mangled into a shape nothing like their intended shape were the cause of the problem. The springs serve to push the pads out/away from each other. I replace them, cleaned and greased all the pivots and clevis pins, and now it is braking well.

    Screen_Capture_-_Apr_21__8_30_AM.jpg Screen_Capture_-_Apr_21__8_32_AM.jpg
     
    15whtrd likes this.
  8. Apr 23, 2021 at 7:56 AM
    #38
    BobTTundra

    BobTTundra [OP] New Member

    Joined:
    Jan 22, 2021
    Member:
    #57969
    Messages:
    48
    Gender:
    Male
    First Name:
    Bob
    Vehicle:
    2004 Tundra 4WD TRD Limited
    I'm pretty much done with the revival, I decided to learn more about detailing and spent quite a bit of time doing so.

    Here are glamor shots:

    DSC_4873.jpg DSC_4868.jpg DSC_4880.jpg


    So happy that it not only looks good but runs great too!
     
  9. Apr 23, 2021 at 3:02 PM
    #39
    rock climber

    rock climber New Member

    Joined:
    Oct 7, 2019
    Member:
    #37106
    Messages:
    1,614
    Gender:
    Male
    Colorado
    Vehicle:
    2001 Sequoia 4X4, 2000 AC 4X4

    That's impressive, looks brand new!
     
  10. May 2, 2021 at 3:03 PM
    #40
    AL_TUNDY

    AL_TUNDY New Member

    Joined:
    Oct 18, 2019
    Member:
    #37525
    Messages:
    137
    Gender:
    Male
    The Land of Nye
    Vehicle:
    2005 Tundra
    Mint.
     
    BobTTundra[OP] likes this.
  11. Jun 16, 2021 at 10:06 AM
    #41
    BobTTundra

    BobTTundra [OP] New Member

    Joined:
    Jan 22, 2021
    Member:
    #57969
    Messages:
    48
    Gender:
    Male
    First Name:
    Bob
    Vehicle:
    2004 Tundra 4WD TRD Limited
    I am still here, I have been driving my 6 Million Dollar Tundra and thankfully nothing has fallen off.

    I am entranced by this engine, so smooth and doesn't ask anything of me, then when it is time to go it comes to life and goes!! I love the exhaust note, present and seems like a high performance engine under load/acceleration. Intoxicating. Then perfectly happy loping along the freeway or in town, ready to go in a moments notice.

    I rebuilt the entire front suspension (Bilstein 4600s, ball joints, sway bar end links, tie rods) and love it. I especially like how it rides over bumps and rough roads, it absorbs the bumps in such a sophisticated manner. Turn in is sharp, it tracks perfectly through corners, and again, doesn't ask anything from me in the driving experience except to relax and enjoy the ride.

    My wife rode in it and said 'it doesn't seem like a truck, it seems like a luxury automobile'. I agree.

    I finally got to the running boards and refinished them today.

    I am going to put a bed slide in the bed so I don't have to crawl in to get at stuff in the forward part of the bed, I will post plans shortly and am looking for advice.

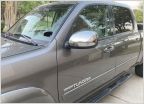
    IMG_5451.jpg DSC_4926.jpg DSC_4927.jpg
     
  12. Jun 16, 2021 at 10:48 AM
    #42
    Brownsfanhere

    Brownsfanhere New Member

    Joined:
    Jan 21, 2019
    Member:
    #24881
    Messages:
    413
    Gender:
    Male
    2015 Crew Max
    incredible truck. jealous.
     
    BobTTundra[OP] likes this.
  13. Sep 7, 2021 at 3:44 PM
    #43
    MPBTundra

    MPBTundra New Member

    Joined:
    Sep 7, 2021
    Member:
    #67756
    Messages:
    6
    Gender:
    Male
    These were some really cool tips and techniques. I'm the original owner of a 2004 Tundra DC, very much like the one you've been working on. Mine has also been garaged, but with more miles (just crossed 200K recently) and yours has much better paint.

    I have the factory JBL with rear entertainment, and a couple years ago I did the speaker re-foam which was actually super easy to do, and it made SO much difference. I never really blasted mine (too much), but I think after time that foam and/or glue just separates no matter what. You could whisper some easy listening out of those and they'd probably still come loose.

    I maintained the factory head unit, but I did add a GTA bluetooth kit which "Y"s off the cable for the DVD player, so it maintains that functionality if needed. It's not as fancy whiz-bang as the double-din units with displays, but I like having it with the stock look, and keeping the rear entertainment intact. Honestly though, in my 17 years of owning it, I can count on my fingers how many times that DVD player has been used. Maybe even the fingers of one hand.

    I did have to replace the drivers arm-rest on the door. The leather had been cracking, just from usage I guess. Fortunately you can get replacements for most of the interior parts in whatever trim color.

    For my dash lights, I did indeed have the "D" light go out. In my case I just replaced all of the instrument cluster lights with LED. I even did the "low fuel" light in LED and quickly realized what a bad idea that was. That bulb gets a varying voltage depending on just how empty you are, so with a normal bulb, it lights a little when you're getting down there, and then goes full illumination when you're on fumes. With an LED bulb you're just going to get weird things happening, and you may have it on all the time because it will light up without too much voltage present.

    One problem is that the LED lights, although they do work well with the dash dimmer, are much brighter than your other bulbs, so you have to find a balance. I "solved" that by replacing lights everywhere else in the cabin with LEDs so they'd all dim pretty much the same, but unfortunately that stock head unit has incandescents. I've seen mods where someone took it apart and replaced those with LED as well, but too much hassle for me. So the way it is now, when I get all the other lights just about right, the head unit is a little dimmer than I'd like, but still perfectly readable.

    This thread has got me thinking of some maintenance I've neglected. Having just crossed 200K, it's time to check my belts (especially timing belt) again. I had it done at 100K but I'm sure it's due. And probably also been a while since doing my fuel filter and just all the other fluid changes like power steering.

    All in all though, these are fairly sturdy trucks if maintained well.

    I was having some issues with the shift to 4WD not always working, especially in the colder temps (which of course is when I'd need it, for snow). I found that a light hammer tap in the right spot would unstick it, and popping into 4WD every couple months just to keep it on its toes... haven't had that problem in a few years now. Knock on wood.

    I really liked your pictorial on cleaning out the AC intake... as I understand it, these Tundras are notorious for the amount of work it takes to get to/replace the evap, so anything I can do to keep it cleaned and in tip-top shape to hopefully prolong its life as long as I can, well that's worth it. Whoever designed it so that you'd have to spend an entire day disassembling the entire dash just to get to that... well, there's a special place reserved for them. :)
     
    des2mtn likes this.
  14. Sep 18, 2021 at 10:07 AM
    #44
    BobTTundra

    BobTTundra [OP] New Member

    Joined:
    Jan 22, 2021
    Member:
    #57969
    Messages:
    48
    Gender:
    Male
    First Name:
    Bob
    Vehicle:
    2004 Tundra 4WD TRD Limited
    Thanks @MPBTundra for the comment and ideas.

    I wondered if the Tundra had a low fuel light, now I know they do, I think mine is out. I will let the tank run low next time I am in town. Where is the needle on the gauge when the light first comes on?

    I forgot about the dimmer for the interior lights, when I am fiddling at night they are so bright as to be bothersome, I will dim them and find the sweet spot.

    Me too on the hammer whack to get the front diff to go into 4WD, 6 months or so later mine still goes in when I remember to do so to keep it limbered up.
     
  15. Sep 18, 2021 at 5:20 PM
    #45
    MPBTundra

    MPBTundra New Member

    Joined:
    Sep 7, 2021
    Member:
    #67756
    Messages:
    6
    Gender:
    Male
    If I remember right (I try not to let it get too low), it kicks in dimly right about when it reaches the red part of the fuel gauge, and then gets brighter until it reaches its brightest level somewhere in the middle of that red section.

    FYI, regarding having to tap the gear box to get it into 4WD, I ran across a video from "mustie1" on Youtube who has a similar year Tundra (2004 or 2005, don't remember) and he disassembles that part in one of his videos and shows how it works and cleaned it up to the point that it was working reliably. That's definitely a great idea for anyone who has issues going into 4WD and doesn't mind a little wrenching underneath:
    https://youtu.be/3TqnZqi4Iw4

    I love his approach which seems to be what I'd eventually do... just get under there and, with a basic understanding of the mechanics, just figure it out. I think somewhere I've got a Haynes for the Tundra, but his approach is more fun. :)
     
  16. Oct 1, 2021 at 8:59 AM
    #46
    BobTTundra

    BobTTundra [OP] New Member

    Joined:
    Jan 22, 2021
    Member:
    #57969
    Messages:
    48
    Gender:
    Male
    First Name:
    Bob
    Vehicle:
    2004 Tundra 4WD TRD Limited
    My 4WD is back to sticking, having trouble with the front actuator going into and then coming out of 4WD. Disassembly/clean/lube is on the list.

    I do have a low fuel light! I drove it down to near the bottom mark and the light came on. It did seem to vacillate between dim and bright.

    IMG_6400.jpg
     

Products Discussed in

To Top