1. Welcome to Tundras.com!

    You are currently viewing as a guest! To get full-access, you need to register for a FREE account.

    As a registered member, you’ll be able to:
    • Participate in all Tundra discussion topics
    • Transfer over your build thread from a different forum to this one
    • Communicate privately with other Tundra owners from around the world
    • Post your own photos in our Members Gallery
    • Access all special features of the site

Something a local mechanic said...."pressing out the ball joints."

Discussion in '1st Gen Tundras (2000-2006)' started by Bought2Pull, Aug 9, 2024.

  1. Oct 31, 2024 at 7:29 AM
    #31
    kentuckyMarksman

    kentuckyMarksman New Member

    Joined:
    Jul 24, 2023
    Member:
    #100837
    Messages:
    553
    Gender:
    Male
    Vehicle:
    2006 Tundra SR5 Double Cab - 4.7L V8 4x4
    You may be able to run a die over those threads and clean them up fairly easily. Don't know the thread though.
     
  2. Oct 31, 2024 at 10:01 AM
    #32
    Bought2Pull

    Bought2Pull [OP] New Member

    Joined:
    Jul 26, 2024
    Member:
    #120430
    Messages:
    1,014
    Gender:
    Male
    First Name:
    Greg
    WV
    Vehicle:
    2006 Tundra 4 door
    Oh? It figures!

    Was going to let the shop do that one. All I had in mind to do myself was the LBJs and (um, now) the outer tie rods.
     
  3. Oct 31, 2024 at 12:46 PM
    #33
    Bought2Pull

    Bought2Pull [OP] New Member

    Joined:
    Jul 26, 2024
    Member:
    #120430
    Messages:
    1,014
    Gender:
    Male
    First Name:
    Greg
    WV
    Vehicle:
    2006 Tundra 4 door
    Got the passenger side LBJ off! Much easier than the other side, things weren't on so tight.

    No damage to threads this time but the tie rod's boot is pretty ragged.

    Will put the new LBJ's on when the new (OEM) tie rod get here from Ourisman Toyota of Richmond, VA.
     
  4. Oct 31, 2024 at 1:32 PM
    #34
    bfunke

    bfunke Tundra Curmudgeon

    Joined:
    Oct 13, 2019
    Member:
    #37321
    Messages:
    2,686
    Gender:
    Male
    First Name:
    Bryan
    South Carolina
    Vehicle:
    2018 SR-5 CM 5.7, 2000 SR-5 AC 4.7L
    Ourisman sent out an email today about 20% off sale
     
    shifty` likes this.
  5. Oct 31, 2024 at 1:51 PM
    #35
    Bought2Pull

    Bought2Pull [OP] New Member

    Joined:
    Jul 26, 2024
    Member:
    #120430
    Messages:
    1,014
    Gender:
    Male
    First Name:
    Greg
    WV
    Vehicle:
    2006 Tundra 4 door
    Thanks man, I saw a discount on their website too.

    Might go on and order the rest of the parts I need tonight.

    Hope to get her ready to run by winter.
     
  6. Nov 17, 2024 at 8:17 AM
    #36
    Bought2Pull

    Bought2Pull [OP] New Member

    Joined:
    Jul 26, 2024
    Member:
    #120430
    Messages:
    1,014
    Gender:
    Male
    First Name:
    Greg
    WV
    Vehicle:
    2006 Tundra 4 door
    Update, have two "decent weather" days left this week. Time to put the tie rods and LBJ's on!

    Question: these off round numbers...."61 Foot Pounds" for LBJ screws.....is 60 Foot Pounds good enough?

    Should I buy a Digital torque wrench from Harbor Freight?
     
  7. Nov 17, 2024 at 8:22 AM
    #37
    bfunke

    bfunke Tundra Curmudgeon

    Joined:
    Oct 13, 2019
    Member:
    #37321
    Messages:
    2,686
    Gender:
    Male
    First Name:
    Bryan
    South Carolina
    Vehicle:
    2018 SR-5 CM 5.7, 2000 SR-5 AC 4.7L
    What bolts did you get? Torque should be either 59 ft-lbs or 37 ft-lbs with black bolts.
     
  8. Nov 17, 2024 at 8:40 AM
    #38
    Bought2Pull

    Bought2Pull [OP] New Member

    Joined:
    Jul 26, 2024
    Member:
    #120430
    Messages:
    1,014
    Gender:
    Male
    First Name:
    Greg
    WV
    Vehicle:
    2006 Tundra 4 door
    Don't have the parts number in hand but came from Ourisman Toyota of Richmond when I bought the new LBJ's. OEM Toyota for sure.

    Getting slightly different torque numbers from different members of this site.
     
  9. Nov 17, 2024 at 9:01 AM
    #39
    bfunke

    bfunke Tundra Curmudgeon

    Joined:
    Oct 13, 2019
    Member:
    #37321
    Messages:
    2,686
    Gender:
    Male
    First Name:
    Bryan
    South Carolina
    Vehicle:
    2018 SR-5 CM 5.7, 2000 SR-5 AC 4.7L
    2006 OEM bolts should be 59 ft-lbs. There are some typos in the FSM
    [​IMG]
     
  10. Nov 17, 2024 at 9:34 AM
    #40
    MT-Tundra

    MT-Tundra Agnostic Gnostic

    Joined:
    Apr 11, 2024
    Member:
    #115150
    Messages:
    1,370
    Montana
    Vehicle:
    2002 AC 4wd V8 Limited
    59 vs 60 vs 61 shouldn't make much of a difference. There will be a far greater difference between a shitty torque wrench and a decent one. I don't know anyone who uses a digital wrench, though I'm sure there are plenty out there. I high quality 'click' style wrench will do it, and seems to be what most use. But there's no reason to be fudging things here. It's really no harder to set a torque wrench to 61 than 60. Why try to round? Best assume Toyota didn't round for a reason. They chose the torque based on it being the proper torque. I see no benefit, time savings, or any less frustration in rounding off torque specs vs just using the recommended spec.
     
  11. Nov 17, 2024 at 9:46 AM
    #41
    Bought2Pull

    Bought2Pull [OP] New Member

    Joined:
    Jul 26, 2024
    Member:
    #120430
    Messages:
    1,014
    Gender:
    Male
    First Name:
    Greg
    WV
    Vehicle:
    2006 Tundra 4 door
    Thanks guys.

    Two last questions:

    1). Red or blue loctite on the 4 bolts?

    2). Which side is which? I had to remove the old LBJ's some weeks ago and couldn't put the new ones on till today. I notice there isn't much difference between the two although I am sure there are! (Packages are not marked as to which side).

    Which ball joint goes on which side?
     
  12. Nov 17, 2024 at 10:30 AM
    #42
    bfunke

    bfunke Tundra Curmudgeon

    Joined:
    Oct 13, 2019
    Member:
    #37321
    Messages:
    2,686
    Gender:
    Male
    First Name:
    Bryan
    South Carolina
    Vehicle:
    2018 SR-5 CM 5.7, 2000 SR-5 AC 4.7L
    Check your bolts some have loctite from factory. Black one don’t.
    Use blue and only a bit on the end threads. Red requires a torch to remove
     
  13. Nov 17, 2024 at 10:34 AM
    #43
    bfunke

    bfunke Tundra Curmudgeon

    Joined:
    Oct 13, 2019
    Member:
    #37321
    Messages:
    2,686
    Gender:
    Male
    First Name:
    Bryan
    South Carolina
    Vehicle:
    2018 SR-5 CM 5.7, 2000 SR-5 AC 4.7L
    And be careful when you undo the castle nut and separate the spindle from LCA. There is a lot of spring pressure and you don’t want to get hurt. Be sure to support it with a jack.
     
  14. Nov 17, 2024 at 10:57 AM
    #44
    Bought2Pull

    Bought2Pull [OP] New Member

    Joined:
    Jul 26, 2024
    Member:
    #120430
    Messages:
    1,014
    Gender:
    Male
    First Name:
    Greg
    WV
    Vehicle:
    2006 Tundra 4 door
    Never mind....looked back at parts numbers on Ourisman website and assuming "left" means "driver side" I should be OK. Double checked with video linked by a member on page 1 of this thread so I think I have the correct sides.

    Just bought some blue loctite. About to give it a go!
     
  15. Nov 17, 2024 at 12:20 PM
    #45
    Bought2Pull

    Bought2Pull [OP] New Member

    Joined:
    Jul 26, 2024
    Member:
    #120430
    Messages:
    1,014
    Gender:
    Male
    First Name:
    Greg
    WV
    Vehicle:
    2006 Tundra 4 door
    Problem: one bolt is not going all the way in. It's torqued to 61 Ft Lbs but not all the way in.

    20241117_151406.jpg
    20241117_151406.jpg
     
  16. Nov 17, 2024 at 12:58 PM
    #46
    shifty`

    shifty` Earth acid cleanses me, cleanses me clean

    Joined:
    Jun 20, 2020
    Member:
    #48239
    Messages:
    31,418
    Gender:
    Male
    ATL
    Vehicle:
    '06 AC Limited V8/4WD
    (see signature for truck info)
    That gap is exactly the length of a washer. Without knowing the length of the shank on the bolt, I can't tell you if it's the right bolt. It's entirely possible the dealership gave you the wrong bolt. In which case, stopgap, I'd reinstall the old bolts temporarily just to motor thru the job.

    What part number did you order for bolt?
    What part number for LBJ?

    Bolt looks to be the right color, I can't recall if my LBJ had that recess though.
     
  17. Nov 17, 2024 at 2:12 PM
    #47
    Bought2Pull

    Bought2Pull [OP] New Member

    Joined:
    Jul 26, 2024
    Member:
    #120430
    Messages:
    1,014
    Gender:
    Male
    First Name:
    Greg
    WV
    Vehicle:
    2006 Tundra 4 door
    No time to wait for a reply---just tightened with a cheater bar until that bolt was flush.

    Sorry not to wait for you Shifty....dark comes fast here and plus I'm in a valley...truck parked outside. Will ask the shop about it when I get her rollbacked in.
     
    shifty` likes this.
  18. Nov 17, 2024 at 2:16 PM
    #48
    Bought2Pull

    Bought2Pull [OP] New Member

    Joined:
    Jul 26, 2024
    Member:
    #120430
    Messages:
    1,014
    Gender:
    Male
    First Name:
    Greg
    WV
    Vehicle:
    2006 Tundra 4 door
    DRIVER'S SIDE LBJ IS ON!

    Could not loosen lock nut on tie rod but did center the steering wheel.

    Tomorrow going for passenger side.
     
  19. Nov 18, 2024 at 9:16 AM
    #49
    Mustanley

    Mustanley Two time totaler

    Joined:
    Sep 10, 2019
    Member:
    #35898
    Messages:
    318
    Gender:
    Male
    Hendersonville, NC
    Vehicle:
    2004 Limited TRD 4x4 DC
    Eibach Shocks/Coils|Doug Thorley Headers|Spintech 3000XL Muffler
    It was probably rust on the last few internal threads causing that bolt to bind up prematurely. I had the same issue when replacing my front brake calipers. Run a thread tap through it first or a wire brush to clear out the rust.

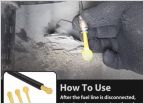
    This little kit works perfectly:
     
  20. Nov 18, 2024 at 11:51 AM
    #50
    assassin10000

    assassin10000 New Member

    Joined:
    Oct 27, 2020
    Member:
    #54157
    Messages:
    2,296
    First Name:
    Andrew
    Northern CA
    Vehicle:
    '05 SR5 AC 2wd
    Remote start alarm Removed keyless entry piezo Qi phone charger & dash mount Subaru underseat subwoofer Hopkins Easylift Steering wheel audio controls No-tenna mod 3/4 adhesive anti-rattle shim D/S door
    Instead of a tap which removes material to cut threads, use a thread chaser which just cleans out existing threads.


    Edit: you can make a thread chaser out of a bolt if need be. Just cut a line straight up & down a bolt with the correct thread size/pitch (across the threads) with a dremel.
     
    Last edited: Nov 18, 2024
  21. Nov 18, 2024 at 5:46 PM
    #51
    Bought2Pull

    Bought2Pull [OP] New Member

    Joined:
    Jul 26, 2024
    Member:
    #120430
    Messages:
    1,014
    Gender:
    Male
    First Name:
    Greg
    WV
    Vehicle:
    2006 Tundra 4 door
    JOB IS DONE.

    THE GOOD:

    Both lower ball joints are in along with driver's outer tie rod. Steering wheel centered. Front wheels (finally) back on. TRUCK IS NO LONGER UP ON BLOCKS. :yes:

    THE BAD:

    Passenger side tie rod lock nut would not come loose. I don't think dad was torching it long enough (he later agreed). Further, when putting the castle nut back on, the threaded shaft freewheeled. So we put on a few washers, put in a cotter pin, and I'll let the shop worry about it.

    Thanks for all the advice and encouragement. I learned a lot.......like to not use hand tools again, but to buy compact power torque drivers and to build a garage with a lift! Next time I'll let the shop handle this.
     
  22. Nov 19, 2024 at 7:33 AM
    #52
    MT-Tundra

    MT-Tundra Agnostic Gnostic

    Joined:
    Apr 11, 2024
    Member:
    #115150
    Messages:
    1,370
    Montana
    Vehicle:
    2002 AC 4wd V8 Limited
    Tie rod shaft spins, yes. Doesn't take much pressure to get it to stop spinning. I put a jack under it to compress it just enough to stop it from spinning, then it's pretty easy to get the nut to snug down.

    PB Blaster or Liquid Wrench for days leading up to any job is always a good idea, even in fairly rust-free areas.

    Nice work.
     
  23. Nov 19, 2024 at 3:23 PM
    #53
    Bought2Pull

    Bought2Pull [OP] New Member

    Joined:
    Jul 26, 2024
    Member:
    #120430
    Messages:
    1,014
    Gender:
    Male
    First Name:
    Greg
    WV
    Vehicle:
    2006 Tundra 4 door
    Oh? So I can still get a nut on that tie rod?

    I have several days before I call for the rollback to haul her to the shop, I'll see if I can try the jack idea, thanks.
     
  24. Nov 19, 2024 at 5:46 PM
    #54
    MT-Tundra

    MT-Tundra Agnostic Gnostic

    Joined:
    Apr 11, 2024
    Member:
    #115150
    Messages:
    1,370
    Montana
    Vehicle:
    2002 AC 4wd V8 Limited
    Only way I've ever been able to get the castle nut on the tie rod is by putting a bottle jack under it and jacking, a bit at a time, until it stops spinning when you try to get the nut on.
     
    Bought2Pull[OP] likes this.
  25. Nov 19, 2024 at 8:06 PM
    #55
    Bought2Pull

    Bought2Pull [OP] New Member

    Joined:
    Jul 26, 2024
    Member:
    #120430
    Messages:
    1,014
    Gender:
    Male
    First Name:
    Greg
    WV
    Vehicle:
    2006 Tundra 4 door
    Well no harm has been done. Once the rain and snow(!) storm is over I'll jack the truck up again and try that.

    Thanks guys!

    I called the stealership I plan to take it to and they were down with the big list of repairs I read off. Also OK with them using my OEM parts and it being rollbacked in and pushed into the shop.

    So...hopefully next week I can get the repairs done and start driving this thing! Once it's on the road I'll put my GMC into the shop to repair the deer hit damage.
     
  26. Aug 17, 2025 at 9:42 PM
    #56
    Bought2Pull

    Bought2Pull [OP] New Member

    Joined:
    Jul 26, 2024
    Member:
    #120430
    Messages:
    1,014
    Gender:
    Male
    First Name:
    Greg
    WV
    Vehicle:
    2006 Tundra 4 door
    Just finishing off this thread:

    The truck sat in the above condition all winter. A bunch of light, fluffy snow blew into the cab since I left the front windows down a bit to allow some airflow through (but still under the vent shades). I was able to remove most of that but some ice formed on the driver's side door, naturally where the window control buttons are! :eek: I broke what I could off but when the rest melted, it didn't seem to hurt anything.

    The battery was dead and it was simply too windy to try and charge the battery, so the wife and I stuffed some towels into the space the partially-down windows created but a later wet snow showed that to be a bad idea. We then removed those towels and covered the cab with a tarp that we tied down in what turned out to be a near-perfect way.

    Come April of 2025, the battery was charged and the truck towed out of the yard and onto the driveway. A rollback then hauled it to a shop where all but the parking brake was fixed.....but also a new steering rack, calipers, rotors, CV axle, etc. were also done. The bill was very high but the truck runs just fine, only that we must block the wheels when on a hill of any size, especially if towing a trailer, which is nearly every time we drive her. I started a "build thread" to better cover her restoration.
     
  27. Aug 18, 2025 at 11:41 AM
    #57
    komodo1942

    komodo1942 New Member

    Joined:
    Aug 2, 2025
    Member:
    #138750
    Messages:
    22
    Gender:
    Male
    Los Angeles
    Vehicle:
    2003 Tundra SR5 2WD V6 Access Cab Automatic Transmission
    As someone who just did both upper and lower ball joints 2 days ago and replaced with OEM Toyota parts in rust free Southern California, this is my experience:

    Lowers: Easy peasy if you have the proper tool. (No, hammering the knuckle probably wont work to loosen it like you see in the youtube vids. It didn't for me even with zero rust and overnight penetration oil soaking into it.). You'll need an ADJUSTABLE ARM ball joint/tie rod end/pitman arm removal tool. The only two in existence that I'm aware of are the OTC 7503 (Also comes in a "heavy duty" version with the model number OTC 7503HD), or the one that comes in the Harbor Freight Maddox front end service tool set. Neither of these are available to rent as part of a kit from Autozone/Oreily Auto parts. You'll have to buy them (or buy them and return them when done using if you have the nerve and are on a budget).

    A regular ball joint tool wont fit the steering knuckle. The ones I mentioned work great. If your existing ball joint has the rubber dust boot surrounding it, it will still work, you just have to press the jaws up until they hook onto the steering knuckle. It will bend the dust boot a bit but it will be fine, it's just rubber.

    Leave the castle nut loosely threaded on and uggadug it with an impact, or use a ratchet until it pops free. Also, make sure you are torquing the 4 mounting bolts to the proper spec when reinstalling the new one depending on what type of bolts your specific year uses. (More info on this on the sticky on this forum).


    Uppers: PAIN IN THE FUCKING ASS if you don't have at least a Harbor freight 12 ton shop press and a bunch of scrap steel plates and ball joint press fittings laying around to ghetto rig it into the press. I watched all the videos on youtube where people were able to just simply hammer them out while the steering knuckle was still connected to the lower ball joint but that didn't work. (You'll have to remove the steering knuckle.)

    Again, even with zero rust on my vehicle and penetrating oil, no amount of hammering (even with my purse) would work to loosen them even 1mm. A miracle happened when I was in my driveway trying to figure this out, my neighbor came out to ask what I was doing and let me borrow his 12 ton HF shop press to do the job. I had to remove the steering knuckle but it wasn't that hard.

    Edit: Forgot to mention, you'll most likely need to cut the stud off the upper ball joint with an angle grinder before attempting to press it out. The stud will flop around and wont sit straight while pressing it out. This is pretty easy though and it only takes 10-15 seconds to cut it off with a $10 HF angle grinder and a new cutoff wheel. Shoots a ton of sparks though so make sure nothing flammable is nearby.

    THEN, there's the snap rings on the upper ball joints, even using heavy duty USA made Snap On snap ring pliers, you'll have a hell of a time removing the original ones and installing the new ones because there's no recessed hole for the jaws on the snap ring pliers to fit into and simply lift them up and out. It's a time consuming process of spreading them apart, having it slip, wedging a screwdriver underneath and trying to slowly but surely wedge them out. And doing a similar process to install the new ones.

    Finally, if you are using Toyota OEM upper ball joints, they DO come with 2 different types of grease which is strange. They are basically squeeze packets. The blue grease gets squeezed into the rubber boot on the bottom, and the white grease gets squeezed into the top of the boot. To lock the boot in place, there's a circular metal ring included which you'd think is spring loaded and you just spread it apart and wedge it around the base of the boot, but the instructions say to completely bend it out until it's straight and wrap the wire around the base of the ball joint and twist it with pliers and cut the excess off with wire cutters. Very strange but that's what I did.

    I ended up twisting the included wire in the Toyota kit a bit too much and it snapped but luckily I had some thicker baling wire in my garage to use which worked better. (This was a Japan Made kit by the way.)
     
    Last edited: Aug 24, 2025
    Bought2Pull[OP] likes this.

Products Discussed in

To Top