-
Welcome to Tundras.com!
You are currently viewing as a guest! To get full-access, you need to register for a FREE account.
As a registered member, you’ll be able to:- Participate in all Tundra discussion topics
- Transfer over your build thread from a different forum to this one
- Communicate privately with other Tundra owners from around the world
- Post your own photos in our Members Gallery
- Access all special features of the site
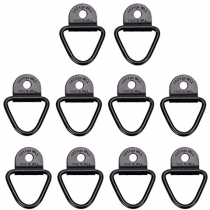
 Grill Clips
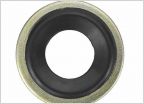 Transmission crush washers
 What Color Should I Wrap My Front Bumper Caps and Grill Surround/Bulge?
 Spray nozzle on backup camera
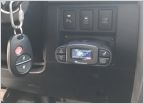 Integrated brake control?
 Remote Start & Bulge LED
O’head dome light
Discussion in '2.5 Gen Tundras (2014-2021)' started by chuck416, Jan 20, 2021.
Page 1 of 2
Page 1 of 2