

-
Welcome to Tundras.com!
You are currently viewing as a guest! To get full-access, you need to register for a FREE account.
As a registered member, you’ll be able to:- Participate in all Tundra discussion topics
- Transfer over your build thread from a different forum to this one
- Communicate privately with other Tundra owners from around the world
- Post your own photos in our Members Gallery
- Access all special features of the site
 Chain Tensioner and Cam Tower Reseal... maybe
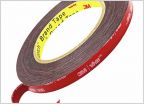 Best tape for in-channel vent visors?
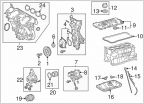 Replace drain bolt gasket for oil changes?
 Aux battery for Hybrid Tundra
 Need some exterior mod ideas. Check out my 19 tundra double cab so far
 Critters got me for $205.11
Just leather wrapped my steering wheel!!
Discussion in 'General Tundra Discussion' started by CCLJ03, Sep 19, 2018.
Page 4 of 4
Page 4 of 4
Products Discussed in


