1. Welcome to Tundras.com!

    You are currently viewing as a guest! To get full-access, you need to register for a FREE account.

    As a registered member, you’ll be able to:
    • Participate in all Tundra discussion topics
    • Transfer over your build thread from a different forum to this one
    • Communicate privately with other Tundra owners from around the world
    • Post your own photos in our Members Gallery
    • Access all special features of the site

I don’t know what wires what

Discussion in '1st Gen Tundras (2000-2006)' started by Ashtonp25, Jul 16, 2020.

  1. Jul 17, 2020 at 6:40 AM
    #31
    Festerw

    Festerw New Member

    Joined:
    May 7, 2017
    Member:
    #7600
    Messages:
    3,880
    Gender:
    Male
    Cambridge Springs, PA
    Vehicle:
    04 Tundra DC
    Everyone has to start somewhere. Nothing like learning how to fix your own mistakes.
     
    Tundra2, speedtre, bmf4069 and 3 others like this.
  2. Jul 17, 2020 at 7:14 AM
    #32
    sflips

    sflips New Member

    Joined:
    Jan 2, 2019
    Member:
    #23839
    Messages:
    91
    Gender:
    Male
    Middle Tn.
    Vehicle:
    2006 DC XSP
    I think we have all had that "O Sh**" what did I just do moment. The OP will be much smarter after this is figured out.
     
    Darkness likes this.
  3. Jul 17, 2020 at 7:26 AM
    #33
    Ashtonp25

    Ashtonp25 [OP] New Member

    Joined:
    Jul 16, 2020
    Member:
    #49421
    Messages:
    16
    First Name:
    Ashton
    Vehicle:
    2000 Toyota Tundra sr5 access cab
    Lol thank y’all I just turned 15 and wanted to start putting new stuff in my truck and everyone’s hammering me abt it cause I’m not some professional
     
    Tundra2, Black Wolf, 270Fan and 5 others like this.
  4. Jul 17, 2020 at 7:32 AM
    #34
    sflips

    sflips New Member

    Joined:
    Jan 2, 2019
    Member:
    #23839
    Messages:
    91
    Gender:
    Male
    Middle Tn.
    Vehicle:
    2006 DC XSP
    You was getting hammered because some of us have dyslexia. We thought you were 51 not 15 lol
     
    Black Wolf and Darkness like this.
  5. Jul 17, 2020 at 7:44 AM
    #35
    robabeatle

    robabeatle New Member

    Joined:
    Jun 14, 2020
    Member:
    #47947
    Messages:
    870
    Gender:
    Male
    AZ
    Vehicle:
    2002 Tundra 4x4 LTD AC
    Bilstein 6112 & 5160, Katskinz, audio upgrades
    Good on you man. go back and read the advice given above.
     
    Darkness likes this.
  6. Jul 17, 2020 at 8:27 AM
    #36
    Festerw

    Festerw New Member

    Joined:
    May 7, 2017
    Member:
    #7600
    Messages:
    3,880
    Gender:
    Male
    Cambridge Springs, PA
    Vehicle:
    04 Tundra DC
    The valuable lesson you learned here, and all of us have learned it at one point (hopefully), is to not reinvent something that has an easy solution.
     
    270Fan, bmf4069 and N84434 like this.
  7. Jul 17, 2020 at 9:26 AM
    #37
    Professional Hand Model

    Professional Hand Model A.K.A ‘Golden Hands’

    Joined:
    Apr 29, 2018
    Member:
    #14878
    Messages:
    14,993
    Gender:
    Male
    First Name:
    Fred
    ‘Somewhere’... a State of Mind
    Vehicle:
    2002 Tundra SR5 4WD 4.7L AC Silver Metallica
    Hand Protectors
    Stick around and we’ll make you a Professional.
     
    Tundra2, ElNopal, bmf4069 and 2 others like this.
  8. Jul 17, 2020 at 10:34 AM
    #38
    sf319

    sf319 New Member

    Joined:
    May 30, 2017
    Member:
    #7941
    Messages:
    421
    Gender:
    Male
    First Name:
    Steve
    Utah
    Vehicle:
    2014 CM Barcelona Red SR5 5.7
    Dash Cam|PowerStop Z36|DIY bed rails|DIY Pop-n-Lock|LED interior
    Key to a Multi Meter is to have a ground, I like to use a bare metal surface on the truck. You could use the brown wire as well.
    https://www.youtube.com/watch?v=TdUK6RPdIrA
    Best purchase I made in highschool was a multi meter. I did exactly what you did in my '86 T-Bird. I didn't know about the adapter kits by Metra and Scoche back then. I didn't have Youtube to learn about electrical either, I had to ask my Grandfather. We'll get you through this. https://www.amazon.com/Etekcity-Multimeter-MSR-R500-Electronic-Multimeters/dp/B01N9QW620
    https://www.walmart.com/ip/GZYF-Dig...Handheld-Portable-Tester-Tool-Meter/464398218
     
  9. Jul 17, 2020 at 10:38 AM
    #39
    bmf4069

    bmf4069 Michelob Ultra coinesour

    Joined:
    Sep 1, 2018
    Member:
    #18880
    Messages:
    9,534
    Gender:
    Male
    First Name:
    Beau
    TX
    Vehicle:
    02 AC sr5 4wd v8
    All your bass are belong to us
    Don't worry homie; we all screw up. I'll add onto what @Festerw said: check on here or you tube before jumping in head first. A little research goes a looooong way.
     
    sf319 likes this.
  10. Jul 17, 2020 at 10:39 AM
    #40
    sf319

    sf319 New Member

    Joined:
    May 30, 2017
    Member:
    #7941
    Messages:
    421
    Gender:
    Male
    First Name:
    Steve
    Utah
    Vehicle:
    2014 CM Barcelona Red SR5 5.7
    Dash Cam|PowerStop Z36|DIY bed rails|DIY Pop-n-Lock|LED interior
  11. Jul 17, 2020 at 11:08 AM
    #41
    Darkness

    Darkness Allergic to white

    Joined:
    Jul 23, 2018
    Member:
    #17315
    Messages:
    9,976
    Gender:
    Male
    First Name:
    Luis
    All over SoCal
    Vehicle:
    The darkest
    It's really dark
    I have those moments just about daily.
     
    bmf4069, robabeatle and ElNopal like this.
  12. Jul 17, 2020 at 6:24 PM
    #42
    Randy Morton

    Randy Morton Life takes its toll, please have exact change.

    Joined:
    May 15, 2016
    Member:
    #3378
    Messages:
    1,702
    Gender:
    Male
    First Name:
    Randy
    Deepinahearta, Texas
    Vehicle:
    2012 Tundra Double Cab (I call it my Land Yacht)
    First, separate the wires and make sure none touch each other. Next, find the fuse box and check the radio fuse, it's marked. One of the wires is always 12v and you may have popped the fuse. Next, go to one of the auto stores, big box stores, or one of the home improvement stores and get one of these.

    It should come with instructions, but there are plenty of youtube videos like this one that will help.

    https://www.youtube.com/watch?v=bmCGgDtCAYA

    Test each wire for voltage with the key off, and then again with the key on. Mark what you find. If none show voltage, check the fuses again. Let us know what you find and we can go from there.
     
  13. Jul 19, 2020 at 7:20 PM
    #43
    Ashtonp25

    Ashtonp25 [OP] New Member

    Joined:
    Jul 16, 2020
    Member:
    #49421
    Messages:
    16
    First Name:
    Ashton
    Vehicle:
    2000 Toyota Tundra sr5 access cab
    I got the test light and none of the wires are lighting it up and I’ve checked every fuse that has something to do with the radio and there all good
     
  14. Jul 19, 2020 at 7:22 PM
    #44
    sf319

    sf319 New Member

    Joined:
    May 30, 2017
    Member:
    #7941
    Messages:
    421
    Gender:
    Male
    First Name:
    Steve
    Utah
    Vehicle:
    2014 CM Barcelona Red SR5 5.7
    Dash Cam|PowerStop Z36|DIY bed rails|DIY Pop-n-Lock|LED interior
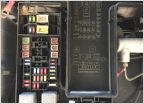
    What about fuses tied to the power outlets and heating and AC?
     
  15. Jul 19, 2020 at 7:32 PM
    #45
    shifty`

    shifty` In South Dakota Trouble ain't hard to find

    Joined:
    Jun 20, 2020
    Member:
    #48239
    Messages:
    28,677
    ATL
    Vehicle:
    '06 AC Limited V8/4WD
    (see signature for truck info)
    This is always my biggest fear when I get any vehicle with an aftermarket radio: How much hacking did the previous owner do?

    @Ashtonp25 if this ever happened to me, first thing I would do is order a cheap METRA adapter from Amazon, then go to the junkyard and cut a factory harness out of a truck there **IF** I didn't have the original harness I cut out still around.

    If you have the OEM radio harness you cut off, either butt-splice the original back on, then use the METRA adapter, or better yet, if you have access to a soldering iron and heat shrink, solder the original harness on and heatshrink the soldered sections. DO NOT twist the wires together and wrap with electrical tape, that's ghetto af.

    @Festerw posted the info you'll need to make this work, but based on the wires touching together in your photos, I suspect you've probably got a blown fuse already, unless your negative battery cable was detached as it should always be when doing this kind of electrical work.
     
    sf319 likes this.
  16. Jul 19, 2020 at 7:47 PM
    #46
    bokch0y

    bokch0y I'm a sucker for DirtySOHC's

    Joined:
    Jul 1, 2020
    Member:
    #48708
    Messages:
    79
    Gender:
    Male
    Did you make sure you have a good ground on the test light? You need to make sure to ground to something bare metal part of the body then test for power afterwards.

    Did the truck come with the factory wire hardness or did you just cut that off yourself? Asking because if you can reconnect the factor harness, you can then also buy that oem harness stereo adapter which will give you your ignition, constant, and ground wires.
     
    sf319 likes this.
  17. Jul 19, 2020 at 8:05 PM
    #47
    JimboSlice413

    JimboSlice413 Super Nice Guy

    Joined:
    Jan 14, 2019
    Member:
    #24486
    Messages:
    1,114
    Gender:
    Male
    First Name:
    Jim
    Bakersfield
    Vehicle:
    2016 Limited 4x4, 2003 Sequoia
    Bilstein 5100/5160 Toyo at2 295/70r18 Ray10 GunMetal
    I just went through this. The wiring diagram that was posted is correct except its missing the power antenna wire, which is white/blue. Go to your battery and check your new test light, confirm it works. Separate all those wires so none of them touch each other accidentally while your testing or your going to be chasing more problems if the wrong two wires touch. Clip the ground of the test light to the brown wire and check your blue/yellow wire for 12v. Next, turn the key to acc and check the gray wire for 12v. Let us know what happens. You can do this, it may just take a little patience
     
    Last edited: Jul 19, 2020
    Black Wolf and NewImprovedRon like this.
  18. Jul 20, 2020 at 6:45 AM
    #48
    shifty`

    shifty` In South Dakota Trouble ain't hard to find

    Joined:
    Jun 20, 2020
    Member:
    #48239
    Messages:
    28,677
    ATL
    Vehicle:
    '06 AC Limited V8/4WD
    (see signature for truck info)
    I missed this specific reply the first time, so taking a few minutes to reply on it, share some wisdom with you, maybe you'll get the bigger picture and walk away understanding more about the reactions above. Many of us have made stupid mistakes via being impatient and jumping right in.

    15 or 51, the first important thing to know: Each and every one of us replying here learned something the hard way and/or had to directly fix some crap someone else screwed up because they didn't know and-or didn't ask. Let the first man who hasn't done something stupid stand up and show themselves. We were all "green" once, nobody is born with unending knowledge, although some of us may sound like it when we speak with confidence. It may feel like people here are hammering you but as someone who's been on the internet since before you were born, trust me: They're being very gentle and respectful considering the situation and what I've seen on countless other forums.

    The second important thing to know is you should always study before you getting involved with something you've never done, this will serve you extremely well in life with everything you do. There are several threads already here on this forum which talk about how to upgrade your stereo. Crutchfield.com is one audio source where you can score sub-$100 and sub-$200 units and they give you a free harness adapter and free phone or chat support. The adapter harnesses are super convenient because you can pre-solder and-or pre-splice the adapter harness onto your new radio's harness totally outside the truck, wrap up the wires, and have a true plug-and-play experience once you get inside the vehicle to install the radio!

    The third important thing to know about cars in the year 2020: Don't cut factory harnesses on anything unless you know there is no adapter made. I've owned, maintained and modified dozens of my own cars from the 1950s to the 2010s and thousands of others. I assure you: There's an adapter for almost everything, and when there isn't, there are plenty of no-cutting alternatives you can use like splice-taps, t-taps, etc. depending on what you're doing and where it is.

    Finally, and the most important thing you need to walk way from this learning:
    PATIENCE IS A VIRTUE WHICH YOU MUST LEARN. If you don't, you'll continue making stupid mistakes in life.

    At the end of this situation, once you get it working again - assuming you haven't fried your ECU or something by letting wires arc together - you need to realize: You could've finished this job in half the time you've already spent if you had more patience. With the stereo harness adapter harness kits, even a newbie can be setup and ready for plug-and-play install in less than one hour. I know this because I taught one of my ex-girlfriends how to install her first radio into her 3000GT VR-4 in high school, and it took her about 35 minutes. I have no doubt you're already at least 2 hours into this and you haven't even actually started yet.

    Last but not least: You *can* get this fixed. I know from experience, sometimes the best way to START is to REWIND. Get things back to the way they were when you started if you can. By that, I mean:

    • Consider re-splicing/re-installing the original factory harness if you can.
    • If there's enough wire, make sure you reinstall the factory harness the mostly-correct way by going to the auto parts/hardware/big box store, getting (a) wire strippers, (b) a pack of twice as many red "butt splice" connectors and (c) a decent pair of crimpers (fully-correct way would be soldering and using heat shrink, fully-incorrect way is to twist wires together and leave them to short against each other, or twist together and electrical tape: both these methods are absolutely stupid and should never be used anywhere in a car or house)
    • Watch some videos on YouTube showing how to crimp butt splices, then practice your crimping on a few spare wires you have laying around before you work on the truck's stuff, don't make your first crimps on wires in the truck
    • After practice, disconnect the NEGATIVE battery cable from your truck, and once disconnected, re-splice the factory harness back in matching the wire colors, then reinstall the factory stereo, don't forget to reinstall the antenna wire into the rear of the factory stereo
    • Reattach the NEGATIVE battery cable, turn the key on, see if it works, if not, let's try to diagnose why using the advice above about two fuse panels, etc. before you tear stuff out.
    • Don't hesitate to come back here and ask if the old factory stereo doesn't work once reinstalled
    Either today or once you get he factory radio working using the factory harness again, go buy an adapter harness from METRA or similar if you don't have one, and a mounting adapter to install the radio in the dash most of the time.

    If you're impatient and there's a Best Buy anywhere near you, they'll probably have one for your vehicle in stock at premium price, or order something on Amazon or Crutchfield.com for bargain prices, and - this is important - you need to know you'll probably also need a mounting adapter kit to mount your new non-Toyota radio in the truck which is also available at one of the shops above (if you shopped at Crutchfield.com they already gave you the wiring kit and mounting kit, often for free).

    When you have the mounting adapter and wiring harness adapter, continue with the install the way you should've the first time:
    • Use the red butt splices and crimpers you bought to connect the METRA adapter to the harness your new stereo came with
    • Go to the truck and start from scratch:
      • Remove the NEGATIVE battery cable before you begin, as you should always do when you're playing with power in your vehicle
      • Remove the factory radio, plug your adapted harness onto the factory harness, then plug your newly adapted harness into the back of your new stereo.
      • Before putting everything back together, make sure the antenna is in the stereo, all wires are in place, then temporarily put the new radio somewhere safe like sliding it into the dash
      • Re-attach the battery cable, tighten it, then turn the key on, confirm the radio powers on and you get sound to each speaker
      • If all works, take your key out of the ignition, remove the NEGATIVE battery cable again, unplug the new stereo's wiring and set it to the side, then continue with closing it up...
    • Bolt in the mounting adapter kit which lets you fit a non-Toyota stereo into your Tundra
    • Attach The harness to the back of the new stereo again, install the antenna into the back of the new radio, then install it onto the adapter kit
    • Once you're sure all wires are attached and no more electrical work is required, go back out, re-attach the NEGATIVE battery cable again, turn key on, make sure the radio is working as expected
    • If all is working OK, reinstall your dash
    Sounds like a lot of work, eh?

    Just think, had you come and asked before cutting, you'd have only had to to the last section of bullet points. This is why you always research before you work on something you've never done before. Ask the experts, don't be afraid to ask questions, "there is no stupid question unless it's being asked for the 3rd+ time". If anyone insults you for asking questions, find another place to ask, but also expect that sometimes people might give you crap for a super-newbie question if you don't search a little first.
     
    Last edited: Jul 20, 2020
    bokch0y, g6t9ed, ElNopal and 4 others like this.
  19. Jul 20, 2020 at 7:01 AM
    #49
    shifty`

    shifty` In South Dakota Trouble ain't hard to find

    Joined:
    Jun 20, 2020
    Member:
    #48239
    Messages:
    28,677
    ATL
    Vehicle:
    '06 AC Limited V8/4WD
    (see signature for truck info)
    PS: Side topic, I think we often see threads like this on automotive forums.

    I feel like every forum should have a sticky topic: "Want to upgrade your 1st Gen Tundra stereo? Read here!"

    I've created similar threads in other forums over the years giving fundamentals, resources, and general knowledge. I don't mind finding one of those, copy-pasting and adapting it to 1st Gen Tundras if there's interest.
     
  20. Jul 20, 2020 at 8:14 AM
    #50
    ezdog

    ezdog New Member

    Joined:
    Mar 1, 2020
    Member:
    #43363
    Messages:
    2,683
    Gender:
    Male
    Gateway To The West
    Vehicle:
    2001 RCLB V8,4WD 2015 RCLB 5.7,4WD
    How exactly are you checking the fuses?

    If you are just looking at them this is not really checking them.

    If you check for power through the fuse with the test light then you know if the fuse is good or bad for sure.
    You will need to check each end seperate from the other too in order to make sure you are checking from the pre-fuse side thru the fuse.

    Also as already mentioned do not do anything at all more until you get every wire clean and freshly stripped and apart from any other wires!
     
  21. Jul 20, 2020 at 9:38 AM
    #51
    SouthPaw

    SouthPaw The headlight guy

    Joined:
    Sep 11, 2019
    Member:
    #35992
    Messages:
    1,284
    Colorado
    Vehicle:
    2000 Limited 4x4 AC
    As someone who has put in only a handful of radios in older vehicles, this is a lot easier than it seems.

    2000 Toyota Tundra Stereo Wiring Information
    Radio Battery Constant 12v+ Wire: Blue/Yellow
    Radio Accessory Switched 12v+ Wire: Gray
    Radio Ground Wire: Brown
    Radio Illumination Wire: Green
    Left Front Speaker Positive Wire (+): Pink
    Left Front Speaker Negative Wire (-): Violet
    Right Front Speaker Positive Wire (+): Green
    Right Front Speaker Negative Wire (-): Blue
    Left Rear Speaker Positive Wire (+): Black
    Left Rear Speaker Negative Wire (-): Yellow
    Right Rear Speaker Positive Wire (+): Red
    Right Rear Speaker Negative Wire (-): White

    Now just match them up to your labeled wires on the radio side and you are good to go.
     
  22. Jul 20, 2020 at 10:01 AM
    #52
    SouthPaw

    SouthPaw The headlight guy

    Joined:
    Sep 11, 2019
    Member:
    #35992
    Messages:
    1,284
    Colorado
    Vehicle:
    2000 Limited 4x4 AC
    Sorry, didn't read this entire thread before commenting. If you aren't getting power to the radio at all, you have a blown fuse. Judging by the picture you posted, I am almost certain some wires may have touched..lol.

    What radio did you buy? Bestbuy will install any radio you purchase from them for free and they price match. Like said in my previous post, I have done my own installs but you really can't beat the BestBuy deal.
     
    Last edited: Jul 20, 2020
    NewImprovedRon likes this.
  23. Jul 20, 2020 at 11:20 AM
    #53
    Ashtonp25

    Ashtonp25 [OP] New Member

    Joined:
    Jul 16, 2020
    Member:
    #49421
    Messages:
    16
    First Name:
    Ashton
    Vehicle:
    2000 Toyota Tundra sr5 access cab
    I’ve checked all fuses with the test light and pulled them out and looked under the hood and by the parking brake I believe it was already a oem harness that’s the stock radio and there was no adapter plugging into that inlet I’m pointing at just the other one

    image.jpg
     
  24. Jul 20, 2020 at 11:22 AM
    #54
    Ashtonp25

    Ashtonp25 [OP] New Member

    Joined:
    Jul 16, 2020
    Member:
    #49421
    Messages:
    16
    First Name:
    Ashton
    Vehicle:
    2000 Toyota Tundra sr5 access cab
    I had bought this from Walmart but everything I’ve looked at they had the two adapters and mine only had one
     
  25. Jul 20, 2020 at 11:22 AM
    #55
    FlyingWolfe

    FlyingWolfe Wolfie

    Joined:
    Apr 4, 2020
    Member:
    #44648
    Messages:
    1,075
    Gender:
    Female
    First Name:
    Crystal
    Maine
    Vehicle:
    2018 TRD Off-Road Inferno
    Welp.. that makes two of us.:rofl:
     
  26. Jul 20, 2020 at 11:27 AM
    #56
    Ashtonp25

    Ashtonp25 [OP] New Member

    Joined:
    Jul 16, 2020
    Member:
    #49421
    Messages:
    16
    First Name:
    Ashton
    Vehicle:
    2000 Toyota Tundra sr5 access cab
    Original harness piece

    image.jpg
     
  27. Jul 20, 2020 at 11:28 AM
    #57
    Ashtonp25

    Ashtonp25 [OP] New Member

    Joined:
    Jul 16, 2020
    Member:
    #49421
    Messages:
    16
    First Name:
    Ashton
    Vehicle:
    2000 Toyota Tundra sr5 access cab
    New unit

    image.jpg
     
  28. Jul 20, 2020 at 11:44 AM
    #58
    SouthPaw

    SouthPaw The headlight guy

    Joined:
    Sep 11, 2019
    Member:
    #35992
    Messages:
    1,284
    Colorado
    Vehicle:
    2000 Limited 4x4 AC
    You will need to use both of those plugs on the radio. Your truck plug will not fit obviously. Here is the wiring layout from your radio via their website:

    upload_2020-7-20_12-39-27.jpg

    Now just match up the wires to this:
    2000 Toyota Tundra Stereo Wiring Information
    Radio Battery Constant 12v+ Wire: Blue/Yellow
    Radio Accessory Switched 12v+ Wire: Gray
    Radio Ground Wire: Brown
    Radio Illumination Wire: Green
    Left Front Speaker Positive Wire (+): Pink
    Left Front Speaker Negative Wire (-): Violet
    Right Front Speaker Positive Wire (+): Green
    Right Front Speaker Negative Wire (-): Blue
    Left Rear Speaker Positive Wire (+): Black
    Left Rear Speaker Negative Wire (-): Yellow
    Right Rear Speaker Positive Wire (+): Red
    Right Rear Speaker Negative Wire (-): White

    Fuse locations:
    https://www.youtube.com/watch?v=RiBQqX4MmXU
     
    bokch0y and NewImprovedRon like this.
  29. Jul 20, 2020 at 11:45 AM
    #59
    Ashtonp25

    Ashtonp25 [OP] New Member

    Joined:
    Jul 16, 2020
    Member:
    #49421
    Messages:
    16
    First Name:
    Ashton
    Vehicle:
    2000 Toyota Tundra sr5 access cab
    There was only one plug tho and it’s the left one but it all worked totally fine
     
  30. Jul 20, 2020 at 11:50 AM
    #60
    SouthPaw

    SouthPaw The headlight guy

    Joined:
    Sep 11, 2019
    Member:
    #35992
    Messages:
    1,284
    Colorado
    Vehicle:
    2000 Limited 4x4 AC
    I honestly think your best bet is to take it in and have someone install it for you. We can all tell you how to do it but this is a big project for a young person to try and tackle by themselves with no experience. Take it from me who has learned the hard way on multiple occasions.
     
    04DCTundraMan likes this.

Products Discussed in

To Top