

-
Welcome to Tundras.com!
You are currently viewing as a guest! To get full-access, you need to register for a FREE account.
As a registered member, you’ll be able to:- Participate in all Tundra discussion topics
- Transfer over your build thread from a different forum to this one
- Communicate privately with other Tundra owners from around the world
- Post your own photos in our Members Gallery
- Access all special features of the site
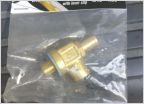 Fumoto Valve Installation
 New (to me) 2005 Tundra, Getting ready to tackle some maintenance!
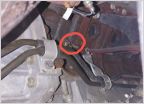 Overheated - Fixed :)
 Has any one ordered ext cab side window closure bracket parts?
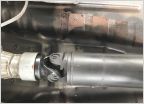 Small Transmission Drip, repair?
 4.7 Leaking Head?
First steps for my new-to-me 05 Tundra
Discussion in '1st Gen Tundras (2000-2006)' started by 05TundraSR5, Sep 14, 2023.

