1. Welcome to Tundras.com!

    You are currently viewing as a guest! To get full-access, you need to register for a FREE account.

    As a registered member, you’ll be able to:
    • Participate in all Tundra discussion topics
    • Transfer over your build thread from a different forum to this one
    • Communicate privately with other Tundra owners from around the world
    • Post your own photos in our Members Gallery
    • Access all special features of the site

DIY smoked taillights

Discussion in 'Sequoia Builds' started by farnsrocket, Nov 8, 2023.

  1. Nov 8, 2023 at 7:48 AM
    #1
    farnsrocket

    farnsrocket [OP] New Member

    Joined:
    Feb 14, 2021
    Member:
    #59103
    Messages:
    330
    Gender:
    Male
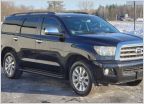
    I smoked my taillights the other week. I knew there weren't going to be any aftermarket lights available anytime soon and I didn't want to spend a fortune on them anyways. I saw a guy who did this on the Facebook Sequoia page (Gil Monarrez) and decided to try it out. I used Rustoleum Lens Tint and Rustoleum @x Ultra Cover Clear to finish them. I showed how you take off each taillight below. Basically cleaned the taillights up, wiped them down with rubbing alcohol and taped off the round portions of the taillights. I didn't want to smoke out the whole taillight and reduce their light output and this are sort of like the newer 18+??? taillights. Your first coat of lens tint has to be very fine to avoid drips. Then I did two good coats of lens tint. I dried them with a heat gun in between coats to speed up the process. I then took the rectangular side piece of tape off.......I precut this from the round part so it would come off nicely. Then I sprayed two more coats on. I then removed the rest of the tape exposing the round portions and finished them off with two coats of clear......making sure to do an initial fine coat to avoid runs,, so really three coats. I think they came out pretty good!!

    Outside taillight bolts accessed through the subwoofer and HVAC covers on either side of the hatch.
    [​IMG]

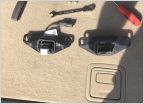
    2 bulb plugs and view of 2 side clips and plunger clip....taillight pulls straight out with a little prying around the edges.
    [​IMG]

    Better view of clips
    [​IMG]

    Orientation of clips and plunger on taillight
    [​IMG]

    2 bolts holding inside taillight on the edge of the hatch
    [​IMG]

    Orientation of inside taillight clip.......this one is a little tricky, you have to pull the tailight out to the side with the taillight pressed against the hatch and then pull it out and away
    [​IMG]

    Another shot of the orientation of the clip for inside taillight
    [​IMG]

    Taped off.....I taped them off all the way, then traced the round portions with a Sharpie and carefully cu the tape away. I didn't cut into the taillight to bad and didn't really care as it was going to be painted over and not show up anyways.
    [​IMG]

    1st coat of lens tint
    [​IMG]

    Side piece of tape removed
    [​IMG]

    Before clear coat
    [​IMG]

    Clear coated
    [​IMG]

    Lights on
    [​IMG]

    Daytime
    [​IMG]

    Daytime
    [​IMG]


    [​IMG]

    [​IMG]
     
    S. Equoia and AZBoatHauler like this.
  2. Nov 9, 2023 at 5:15 PM
    #2
    S. Equoia

    S. Equoia New Member

    Joined:
    Dec 14, 2020
    Member:
    #56143
    Messages:
    137
    Gender:
    Male
    Ontario, Canada
    Vehicle:
    2015 Sequoia
    Looks great on the black Sequoia! Super clean work. Wonder how it would look on the MGM?
     
    farnsrocket[OP] likes this.

Products Discussed in

To Top