

-
Welcome to Tundras.com!
You are currently viewing as a guest! To get full-access, you need to register for a FREE account.
As a registered member, you’ll be able to:- Participate in all Tundra discussion topics
- Transfer over your build thread from a different forum to this one
- Communicate privately with other Tundra owners from around the world
- Post your own photos in our Members Gallery
- Access all special features of the site
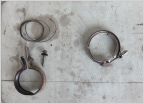 Exhaust Clamp Issue
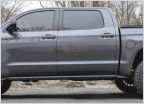 Amp Running Boards vs Sliders
 AMP RESEARCH power-steps?
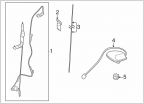 Antenna replacement
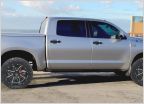 Contemplating having my calipers custom painted “RED”....
 Cam tower leak fix tutorial ?
DIY: Replace Clockspring/spiral cable + remove steering wheel
Discussion in 'General Tundra Discussion' started by csuviper, Jun 3, 2018.
Page 3 of 3
Page 3 of 3


