1. Welcome to Tundras.com!

    You are currently viewing as a guest! To get full-access, you need to register for a FREE account.

    As a registered member, you’ll be able to:
    • Participate in all Tundra discussion topics
    • Transfer over your build thread from a different forum to this one
    • Communicate privately with other Tundra owners from around the world
    • Post your own photos in our Members Gallery
    • Access all special features of the site

Chrome Delete Covers for Tundra Bumpers - BumperShellz

Discussion in '2.5 Gen Tundras (2014-2021)' started by EC1, Oct 19, 2018.

  1. Aug 4, 2021 at 9:18 AM
    #3961
    EC1

    EC1 [OP] Ask about our BumperShellz Vendor

    Joined:
    Oct 19, 2018
    Member:
    #20739
    Messages:
    1,324
    Gender:
    Male
    Rocklin, CA
    BumperShellz
    Oh sweet baby ray's :eek2::eek2:
     
  2. Aug 24, 2021 at 6:07 PM
    #3962
    NAIVIAN

    NAIVIAN This is the way....

    Joined:
    Jan 5, 2021
    Member:
    #57143
    Messages:
    107
    Gender:
    Male
    First Name:
    Doug
    Spring, TX
    Vehicle:
    2021 Black SR5
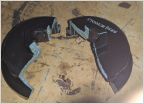
    @EC1 - Sorry about the rant- I originally was excited about getting the front and back bumper shells as well as the from hood bulge in order number 10927. I got these in a while ago as they came in on July, but was dealing with my mother in law at the time who was diagnosed with cancer and getting her back and forth to treatments and stuff and then when I did have time to install them since I live in the great city of Houston, TX it seemed to be monsoon season as it rained on my days off. So I finally got a break as my wife took he mother to chemo and radiation this weekend which gave me time to put all of this to work and "Let the chrome deletion party begin." Let me tell you the plastics seemed to really good quality and the paint match was pretty good to my Attitude Black (218) of my new truck that I just got in January of this year. And then the frustration began. If you look at the pictures below it seems there has been some quality control issues as I know mine may have been the 1st or 2nd batch of color match items out but it seems that who ever was trimming these pieces (the back passenger bumper and the driver front bumper) got a little bit careless. I mounted took it off and remounted each of the two pieces about 3 different times thinking well maybe I didn't push the shell far enough in or maybe I needed more tape so to Auto zone I go and bought a small roll of 3m auto and chrome tape that was double sided and sticky as hell, and two whole bottles of isopropyl alcohol (to really clean the chrome up) as well as adhesive promoter. Now I am just very , very frustrated after spending all that money on the tape and stuff as well as all the time about 4 hours on Saturday, and 2 hours on Sunday and another 2 hours on Monday night to come to the conclusion that the product was not up to snuff. I also am having the problem with the front hood bulge showing some chrome as it will not stick to the front, will not stay down or even reach the edge and I only applied it once to the front. I even looked through the forums before I posted this to see what other have tried and I tried the heat gun which I went back to auto zone and bought me a heat gun which I may never use but just for this application and nope that did not work as well. It appears that the front bulge is a tape issue that I can see based off of all these posts here. I am not sure what else to do. @EC1 can you please help.

    ANGLE 1 FRONT DRIVER'S SIDE.jpg ANGLE 2 FRONT DRIVER'S SIDE.jpg ANGLE 1 REAR PASSENGER SIDE.jpg ANGLE 2 REAR PASSENGER SIDE.jpg ANGLE 3 REAR PASENGER SIDE.jpg
     
    Pbed85 likes this.
  3. Aug 25, 2021 at 4:03 PM
    #3963
    EC1

    EC1 [OP] Ask about our BumperShellz Vendor

    Joined:
    Oct 19, 2018
    Member:
    #20739
    Messages:
    1,324
    Gender:
    Male
    Rocklin, CA
    BumperShellz
    Hey Doug! Just spotted this on Forum now too after our conversation this morning so no worries, I've got the stuff all ready for you now! I said this to you in our talk, but I think it's a good thing to say out loud too, but I get the frustration when things don't go as planned especially after spending so much money and taking a chance on a relatively small company. That sucks. No matter what caused the issue, we'll do whatever we can to make sure you get the result you had in your mind when you were stoked to get these on. In this case it was something so small like missing the installation instructions that made everything go downhill, so every time something like that happens, we make immediate changes to ensure that doesn't happen again. I've already told the shipping department to seal all of the instructions in the bags with the parts now to ensure they don't get lost purely based on our conversation. You've obviously got some not very fun stuff going on in your life right now, so hopefully the fix I've put together for you will help brighten things up a little, and I wish your mother in law the absolute best in her fight.
     
    NAIVIAN[QUOTED] and DodgerBlues like this.
  4. Aug 25, 2021 at 4:05 PM
    #3964
    joe557

    joe557 New Member

    Joined:
    Jun 21, 2021
    Member:
    #64589
    Messages:
    36
    Gender:
    Male
    First Name:
    Joe
    Vehicle:
    2014 Crewmax SR5 4x4 TRD
    Bilstein 6112/5160s, durobumps, 1" CB shackles, RCI skids
    I had these exact problems. Installed my fronts a couple weeks ago and rears just now. I got them to fit. Took a few dry runs. For the rears, I started at the corner of the bumper closest to the cab. Only pull off a section of the red film from the tape, and then fold it over the side and use painters tape to hold it in place until you’re ready to pull it entirely off. Get the fitment right then pull the red film.

    I struggled with both front and rear, and honestly believe there is never going to be a perfect fit. The plastic is so thin, it easily warps and even the slightest bit will cause it to be off. These shellz are a great idea and I applaud the company, but not worth the hassle or issues for the price. Way over priced for what these are. I can’t see the materials costing more than $20 a corner.

    In hindsight, I wouldn’t do this again. Better to use that money towards some after market bumpers or oem color caps.

    I also had issues with my order which didn’t help the situation. Only received a partial order, fronts. They messed up and didn’t ship the rears. Didn’t receive the adhesive promoter in either shipment. They did refund me a very small amount but overall price paid still not worth it, to me. Great customer service though and good company ethics!
     
    NAIVIAN[QUOTED] likes this.
  5. Aug 25, 2021 at 4:25 PM
    #3965
    NAIVIAN

    NAIVIAN This is the way....

    Joined:
    Jan 5, 2021
    Member:
    #57143
    Messages:
    107
    Gender:
    Male
    First Name:
    Doug
    Spring, TX
    Vehicle:
    2021 Black SR5
    @EC1 I wrote this before I knew about the email option. I found that out afterwards from the website where I cut and pasted the same thing here to the email. I hope that the fix will be the thing to fix it all. So I will work on it when the new parts come out. Thank you for the kind words to my mother in law.
     
    Last edited: Aug 25, 2021
    EC1[QUOTED][OP] likes this.
  6. Aug 25, 2021 at 4:28 PM
    #3966
    NAIVIAN

    NAIVIAN This is the way....

    Joined:
    Jan 5, 2021
    Member:
    #57143
    Messages:
    107
    Gender:
    Male
    First Name:
    Doug
    Spring, TX
    Vehicle:
    2021 Black SR5
    All I can say at this time is I agree with you that they have really great customer service and great company ethics. I await the parts needed to complete my install. After that I will repost my evaluation about it all.
     
    EC1[OP] likes this.
  7. Aug 25, 2021 at 4:29 PM
    #3967
    EC1

    EC1 [OP] Ask about our BumperShellz Vendor

    Joined:
    Oct 19, 2018
    Member:
    #20739
    Messages:
    1,324
    Gender:
    Male
    Rocklin, CA
    BumperShellz
    PSA on BumperShellz V2 Installation Instructions
    Since the introduction of the V2 BumperShellz, we've changed the medium of the installation instructions. We've gone away with the traditional paper packet in favor of digital, online instructions. Reason being, we can fit so much more information, detailed pictures, and video helps when we're not constrained to paper. The thought behind this was to make install easier and more like a process that we walk you through instead of a piece of paper with tiny pictures. The response has been great! But there has been one unforeseen issue with this method. Namely, that the installation instructions are much smaller and thus, much easier to lose or be forgotten. Ordinarily this wouldn't be a problem because there we're multiple other ways to see how they were installed including people on this forum and you tube. However, since the installation of the V2 Front BumperShellz varies in critical areas from the previous version, using these other methods is going to actually lead you to install the BumperShellz incorrectly. As of right now, there are NO YouTube videos, or any other information out there as far as I know that will demonstrate how to correctly install the Front BumperShellz besides the installation instructions found in the actual BumperShellz order. Even our YouTube video is a help for the Old version of the Tundra BumperShellz as there are still a couple of those floating around out there. I'll post a picture of what the digital instructions will look like below. From now on, they will be sealed in the bag that the parts are shipped in, taped to the inside of the part to ensure they are not lost. Please reach out to me or our customer service for faster response if you can't find your instructions. Thanks everyone!
    install packet picture Tundra.jpg
     
  8. Aug 26, 2021 at 3:00 PM
    #3968
    Beer Man

    Beer Man @cement.tundra

    Joined:
    Aug 1, 2021
    Member:
    #66262
    Messages:
    356
    Gender:
    Male
    Florida
    Vehicle:
    2021 SR5 XP CrewMax Cement
    Sad to see all the negative reviews here recently. Did they change something? Move warehouses? Change the item versions again?

    I only ask because I ordered at the end of July. I ordered paintable plastic, not the flat black or bed liner version. On the website it said those shipped the fastest in about 14 days. I sent them an email last week asking for an update because I hadn’t seen anything. I got a response the next day saying it was shipping tomorrow. What a coincidence? The shipping email shows like 7 different skus shipped within my order. I only ordered the front 2 corners? Now my package that was supposed to be here is showing as delayed without any updates on UPS.

    hahahahahahahahahahahahahahahaahahahahahahahahahahahahahaahahahahaahI guess you just have to laugh & have patience. At least that’s what I’m telling myself.
     
  9. Aug 27, 2021 at 9:38 AM
    #3969
    EC1

    EC1 [OP] Ask about our BumperShellz Vendor

    Joined:
    Oct 19, 2018
    Member:
    #20739
    Messages:
    1,324
    Gender:
    Male
    Rocklin, CA
    BumperShellz
    You don't have to laugh and have patience, but it's nice lol. Send me your order number in a pm and I'll figure out what's going on with UPS. There are a billion skus on the order because it includes every single thing that is shipped in the box "instructions, adhesion promoter, etc." I'm assuming that's what you are seeing there. If you really did get shipped seven sets, I'm just going to spin that into us reeaallly going above and beyond.

    As far as the parts go, we've updated the mold for the Front BumperShellz and with that came a different installation method. There have been some issues with installations happening using old YouTube videos made by us and others, as well as instructions found in other ways. Those show how to install the old version, and the methods are completely different. So if they're installed using the old installation method, they will not fit. We've made that situation worse by making our digital instructions a much smaller item in the box than the traditional instructions, so those are getting lost understandably, and then people search online for the installation instructions, where they will then find what is effectively the wrong way of doing it for the new version.

    There were some legitimate issues with the initial hood bulge and grille surrounds (so side-note if any of you who have those versions are having issues still, let me know). We designed them to fit exactly on all the trim areas so it looked perfect in all our testing, but then in the real world, if you were even a little bit off on one part of the installation, it threw the whole thing off and you'd see chrome somewhere, or the tape wouldn't fully attach, or both. That is all fixed at this point, and I can honestly say those things fit perfectly now, but it was a rocky roll-out for sure.

    Anyway, long answer, but I've seen the same thing where there have been much more issues posted here and it's usually just talk about when certain colors are going to be released and "after install" pictures. I prefer that lol. But it's definitely our fault for running too fast by launching what was essentially 3 new products (V2 BumperShellz, Grille, and color match) all at the exact same time, and not considering things as simple as the installation packet size, among other things. Luckily, we think we've identified and fixed everything that has come to our attention with parts/methods, and hopefully fixed stuff with anyone who had an issue come up.
     
  10. Aug 27, 2021 at 9:45 AM
    #3970
    Broomsky06

    Broomsky06 New Member

    Joined:
    May 20, 2021
    Member:
    #63328
    Messages:
    36
    Gender:
    Male
    First Name:
    Matt
    Vehicle:
    2021 Tundra Silver CM

    Looking at your photos it appears you may have the issue I had, but wasn't Ecoological's fault. First, I installed the front bumpershellz by watching a youtube video which looked legit, but was for the original design not the updated design. I quickly realized that after my shellz didn't sit on the car properly and were showing chrome through and was missing a very important step that the original designs didn't have.

    My hood bulge and grille surround went on perfectly without any chrome showing through. I will admit I did not use any of the included black tape as it wasn't needed to hide any chrome edges that may have appeared so not sure why it wasn't fitting correctly for you.

    Now, looking at the your front bumpershellz it appears you have literally zero gap from the grille surround to the center valance. I ended up having to go through my foglight (remove the foglight bracket) and adjust the center valance 3 14mm bolts downward to give me a gap to be able to slide the bumpershellz correctly (I will post a before and after below). This actually fixed my crooked front bumper so it was a win/win for me. Some of the Tundras come with the gap and others (as you can see from searching "crooked front bumper") you will see they have legit zero space. That space, in my case was needed otherwise the top of the bumpershell was rubbing and not allowing me to sufficiently pull it over enough.

    I also had to remove the three small bolts behind the center valance (which are listed in the instructions) to pop the black center valance off enough to allow me to slide the lip of the bumpershell underneath. Once I did this I was able to remove the gap along the center valance and secure the bumpershellz.

    The picture on the left was before I adjusted the gap on my center valance. I was still able to partially tuck it under, but it didn't look clean and caused the piece that goes under the grille surround to rub and make a screeching noise as I hit bumps. The picture on the right is after I adjusted the center valance to allow me to pull it over enough to tuck it under correctly. You can see the clearance I have now between the grille and the valance.

    123.jpg

    In regards to the rear bumpershellz. My passenger side fits flawless, the drivers side I do have a gap that matches yours that I have to continue to tuck under the step pad. I realized last weekend the hole underneath where the bolt comes through needed to be cut just a tad bit more so I will just shave the hole enough to be able to slide it what I need to tuck it in. Should be an easy fix.

    Overall I am extremely pleased with them and recommend them any chance I get. I just made the mistake of not going through the provided instructions and relied on a youtube video, but didn't pay attention that I had an updated version which didn't line up the same way.
     
    Last edited: Aug 27, 2021
    EC1[OP] likes this.
  11. Aug 27, 2021 at 10:23 AM
    #3971
    Beer Man

    Beer Man @cement.tundra

    Joined:
    Aug 1, 2021
    Member:
    #66262
    Messages:
    356
    Gender:
    Male
    Florida
    Vehicle:
    2021 SR5 XP CrewMax Cement
    Thanks for the reply. That makes sense on the multiple items showing as shipped. I only ordered the front 2 bumper caps so need to get into all the other stuff going on here. I’ll use the directions provided & go from there. I’ll report back with any issues, hopefully none!

    The good news is that my package magically reappeared in Jacksonville, FL. Getting closer!
     
    EC1[QUOTED][OP] likes this.
  12. Aug 27, 2021 at 6:33 PM
    #3972
    Blue By U

    Blue By U New Member

    Joined:
    Aug 11, 2021
    Member:
    #66647
    Messages:
    497
    Gender:
    Male
    I got my shells sometime around May. My son put them on for me while I was at work. They fit well without any problems. My problem was the rears were sanded for paint and the fronts were not. I contacted Ecoological about this as I did not want to paint them. The fronts are a nice Black and the rears have a Gray hue. I sent them pics and when I heard back they told me they were prepped for paint which I did not ask for. They would let me know, that was the end of conversation. So if you just want the natural black make sure they understand that.
     
  13. Sep 4, 2021 at 12:30 PM
    #3973
    AKLA98

    AKLA98 New Member

    Joined:
    Sep 1, 2019
    Member:
    #35438
    Messages:
    56
    Gender:
    Male
    First Name:
    Liam
    Anchorage, AK / Boulder, CO
    Vehicle:
    2019 MGM TRDOR Double Cab
    TRD PRO Grille, Colormatched Mirror Caps, Rear Bumper Caps, Husky X-Act Floor Mats, 20% VLT Front Tint, BAJA Designs Squadron Sport Fog Lights, LockerDown Console Vault
    Received my front bumpershellz. I may have thrown away the instruction, adhesive promoter, black vinyl strips, etc. I remember seeing a post that said the online instructions are out of date. Would anyone be able to send me the virtual instructions for the front set? Can the install still be done w/o the vinyl and adhesive promoter?
     
    EC1[OP] likes this.
  14. Sep 4, 2021 at 12:35 PM
    #3974
    Rs551569

    Rs551569 New Member

    Joined:
    Jan 22, 2021
    Member:
    #58007
    Messages:
    18
    Gender:
    Male
    First Name:
    Russel
    Vehicle:
    2019 Black Tundra tss off road
    I looked it up on YouTube
     
  15. Sep 9, 2021 at 10:43 AM
    #3975
    EC1

    EC1 [OP] Ask about our BumperShellz Vendor

    Joined:
    Oct 19, 2018
    Member:
    #20739
    Messages:
    1,324
    Gender:
    Male
    Rocklin, CA
    BumperShellz
    Just make sure you have the same version as the YouTube video. Anything within the past month or so will be the new version that is only available on the Digital Instructions.
     
  16. Sep 9, 2021 at 10:45 AM
    #3976
    EC1

    EC1 [OP] Ask about our BumperShellz Vendor

    Joined:
    Oct 19, 2018
    Member:
    #20739
    Messages:
    1,324
    Gender:
    Male
    Rocklin, CA
    BumperShellz
    Shoot me a message with a picture of your BumperShellz and I'll send you the exact version of the digital instructions that you need. The latest version doesn't need blackout tape since it tuck underneath the center valance.
     
  17. Sep 17, 2021 at 3:48 PM
    #3977
    1904Tundra

    1904Tundra New Member

    Joined:
    Jul 6, 2021
    Member:
    #65206
    Messages:
    40
    Gender:
    Male
    Sam Diego
    Vehicle:
    2015 MGM Limited CM
    Installed my TPO front bumper caps! They look amazing and really impressed with the quality of the product, however my sensor won’t stop beeping… any tips? Or similar experiences?

    13AFF9C6-8731-494A-905E-021A27AC33B6.jpg
    04F89A6C-DF3B-4271-BCD1-265B10750862.jpg
     
  18. Sep 17, 2021 at 4:18 PM
    #3978
    Blue By U

    Blue By U New Member

    Joined:
    Aug 11, 2021
    Member:
    #66647
    Messages:
    497
    Gender:
    Male
    I believe the sensors need to be surface mounted on the caps.
     
    biebs96 likes this.
  19. Sep 17, 2021 at 4:23 PM
    #3979
    EC1

    EC1 [OP] Ask about our BumperShellz Vendor

    Joined:
    Oct 19, 2018
    Member:
    #20739
    Messages:
    1,324
    Gender:
    Male
    Rocklin, CA
    BumperShellz
    It looks like the sensors are underneath the bumpershellz. In the instructions it should have you remove the sensors and then put them back through the bumpershellz and the bumper itself. I think I'm also seeing a little bit of chrome around the fog lamps which makes me think that you might still need to tuck the inside edges underneath the center valance. Let me know if you need me to send you a link to the digital instructions! It will walk you through how to do both of those things
     
  20. Sep 17, 2021 at 4:32 PM
    #3980
    EC1

    EC1 [OP] Ask about our BumperShellz Vendor

    Joined:
    Oct 19, 2018
    Member:
    #20739
    Messages:
    1,324
    Gender:
    Male
    Rocklin, CA
    BumperShellz
    OUT OF TOWN UNTIL 9/24

    Also, just a heads up. I'm going out of town until the end of next week, so make sure to contact customer service with questions. You can still send me messages if you don't need an answer right away. Have a great week everyone!
     
  21. Sep 17, 2021 at 4:36 PM
    #3981
    EC1

    EC1 [OP] Ask about our BumperShellz Vendor

    Joined:
    Oct 19, 2018
    Member:
    #20739
    Messages:
    1,324
    Gender:
    Male
    Rocklin, CA
    BumperShellz
    CEMENT GREY METALLIC

    We've officially sprayed our first test set of Cement in our booth after a year of waiting! We're making some more upgrades to the booth this week while we gear up for mass-manufacturing. As soon as I have a solid date from my painter, I'll open up pre-orders so stay tuned if you've been waiting on that color.
     
  22. Sep 17, 2021 at 4:39 PM
    #3982
    trucknut

    trucknut New Member

    Joined:
    Nov 20, 2020
    Member:
    #55113
    Messages:
    198
    Vehicle:
    2021 Cav blue SR5 TRD Off Road
    What's the next color you plan to test?
     
    EC1[QUOTED][OP] likes this.
  23. Sep 17, 2021 at 4:43 PM
    #3983
    EC1

    EC1 [OP] Ask about our BumperShellz Vendor

    Joined:
    Oct 19, 2018
    Member:
    #20739
    Messages:
    1,324
    Gender:
    Male
    Rocklin, CA
    BumperShellz
    I'm assuming you hope I say Cavalry Blue? haha

    Not sure. It's probably just going to be a bit of everything after that. I just know we have a ton of people waiting on Cement, so that's why we're going to do a dedicated run of just that color first
     
    501Rich34 likes this.
  24. Sep 17, 2021 at 4:45 PM
    #3984
    trucknut

    trucknut New Member

    Joined:
    Nov 20, 2020
    Member:
    #55113
    Messages:
    198
    Vehicle:
    2021 Cav blue SR5 TRD Off Road
    Assumption correct. That makes sense. Cement is a great color too.
     
  25. Sep 17, 2021 at 6:12 PM
    #3985
    1904Tundra

    1904Tundra New Member

    Joined:
    Jul 6, 2021
    Member:
    #65206
    Messages:
    40
    Gender:
    Male
    Sam Diego
    Vehicle:
    2015 MGM Limited CM

    Sorry that was a before pic when I dry fitted them on..I forgot to take a pic when I installed them. The sensors are mounted outside the bumpers
     
  26. Sep 17, 2021 at 6:13 PM
    #3986
    1904Tundra

    1904Tundra New Member

    Joined:
    Jul 6, 2021
    Member:
    #65206
    Messages:
    40
    Gender:
    Male
    Sam Diego
    Vehicle:
    2015 MGM Limited CM


    Sorry that was a before pic when I dry fitted them on..I forgot to take a pic when I installed them. The sensors are mounted outside the bumpers
     
  27. Sep 17, 2021 at 6:26 PM
    #3987
    biebs96

    biebs96 my other truck is a big brown truck

    Joined:
    Jul 30, 2019
    Member:
    #33915
    Messages:
    3,058
    Gender:
    Male
    PA
    Vehicle:
    2017 Sunset Bronze TRD Crewmax 4x4
    make sure the plugs are fully seated. They really need a good click in. Inspect the pins before installing them, but they do need a fair amount of force to lock into place.
     
  28. Sep 18, 2021 at 6:23 PM
    #3988
    1bad10tacoma

    1bad10tacoma New Member

    Joined:
    Oct 27, 2018
    Member:
    #21038
    Messages:
    39
    Gender:
    Male
    First Name:
    Mark
    Vehicle:
    2019 Tundra
    I'm in for a set when these are ready, I have been hating the chrome for 3 years it's time to go away
     
    501Rich34 likes this.
  29. Sep 28, 2021 at 9:07 AM
    #3989
    mschein1

    mschein1 New Member

    Joined:
    Sep 15, 2021
    Member:
    #68073
    Messages:
    66
    Gender:
    Male
    First Name:
    Matt
    Vehicle:
    2006 Tundra Dbl Cab 2021 Cement CM - Sold
    Are these the front bumper caps? or have they sold out already? I didn't see cement on the website.
     
  30. Sep 28, 2021 at 1:16 PM
    #3990
    50Shades

    50Shades Sin City Tundras

    Joined:
    Sep 16, 2021
    Member:
    #68120
    Messages:
    410
    First Name:
    J
    West Coast
    Vehicle:
    2021 Tundra SR5 CrewMax Trail Edition 4x4
    he said they are still gearing up for mass-production of the cement bumpershellz. stay tuned.
     
    mschein1[QUOTED] likes this.

Products Discussed in

To Top