1. Welcome to Tundras.com!

    You are currently viewing as a guest! To get full-access, you need to register for a FREE account.

    As a registered member, you’ll be able to:
    • Participate in all Tundra discussion topics
    • Transfer over your build thread from a different forum to this one
    • Communicate privately with other Tundra owners from around the world
    • Post your own photos in our Members Gallery
    • Access all special features of the site

AMP Powersteps on FGT Double Cab

Discussion in '1st Gen Tundras (2000-2006)' started by Tohopko, Mar 7, 2020.

  1. Mar 7, 2020 at 7:04 PM
    #1
    Tohopko

    Tohopko [OP] New Member

    Joined:
    Dec 29, 2019
    Member:
    #40480
    Messages:
    131
    Gender:
    Male
    First Name:
    Jim
    Vehicle:
    2004DC
    Let's start with the why.
    Lifted 2"
    I'm short
    I'm not as nimble as I used to be
    She who must be obeyed is even less nimble
    I was getting new leather seats I didn't want to scarf sliding in and out
    I don't need rockers
    I don't like the look of boards/steps that hang down all the time
    I have the AMPs on another truck that have been abused for 10 years and are still going strong

    AMP does not list a kit for the FGT. Their earliest is a 2007 Tundra. They also have a kit for the Taco double cabs. Comparing the instructions and a few videos, it became apparent the Taco kit was not going to be an easy mod. The 2nd Gen Tundras, however, have the same basic mounting points as my 2004 DC. The difference is in the angle of the inner rocker from horizontal. The 2nd Gens have a much lower angled (more horizontal) surface to mount to. Without some kind of adapter, the boards will not fully retract, and when fully extended, will be angled down from horizontal (outer to inner edge)20200218_091222.jpg
    On the 2004, there are 3 mounting points, one approximately centered on each door, with one between. The upper mount is an M8 stud, the lower is an M8 nut welded to a support plate behind the rocker skin. I was unable to remove the studs, so ended up cutting them off and tapping them, as the studs were not long enough for my first go at a mounting solution. I've figured out since that it would have been fine to leave them. The lower bolts were missing on my passenger side, but were in the lower holes on the driver's side.
     
    Darkness, speedtre and CodyP like this.
  2. Mar 7, 2020 at 7:08 PM
    #2
    Tohopko

    Tohopko [OP] New Member

    Joined:
    Dec 29, 2019
    Member:
    #40480
    Messages:
    131
    Gender:
    Male
    First Name:
    Jim
    Vehicle:
    2004DC
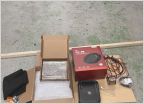
    The boards that I used were :

    75137-01A PowerStep Electric Running Boards for 2007-2018 Toyota Tundra Double Cab & CrewMax, 2008-2017 Sequoia

    This is the kit without the OBDII interface. I was not sure the same signals would be sent on the FGT, so went with the direct wire. $1399 from Amazon


    Note: These boards are made to fit the 2nd Gen Crewmax unaltered, with the board being cut to fit the Double Cab. The length is almost perfect for the FGT Double Cab.
     
    Last edited: Mar 7, 2020
  3. Mar 7, 2020 at 7:09 PM
    #3
    Tohopko

    Tohopko [OP] New Member

    Joined:
    Dec 29, 2019
    Member:
    #40480
    Messages:
    131
    Gender:
    Male
    First Name:
    Jim
    Vehicle:
    2004DC
    So the AMP Research Powersteps have a safety feature that also serves as their movement limiter. If the board hits an obstacle, on extension or retraction, the extra load and current draw on the motor causes the controller to stop movement.

    My first thought was that this feature could be used to stop the boards from over-extending beyond horizontal by adding a shim under the existing stop bumpers. I used tape on wheel weights, slightly bent, to provide approximately 1/8" of "shimming" against the bumper. It did indeed stop the extension, but not until it was about 10° beyond horizontal.20200214_174240.jpg20200214_174246.jpg

    Here the arm is shown in the correct orientation. The board mounts into the "slot" on the lower portion of the arm


    20200214_174224.jpg

    Obviously, plan "B" was needed, some kind of spacer with the mounting brackets
     
    Last edited: Mar 7, 2020
  4. Mar 7, 2020 at 7:09 PM
    #4
    Tohopko

    Tohopko [OP] New Member

    Joined:
    Dec 29, 2019
    Member:
    #40480
    Messages:
    131
    Gender:
    Male
    First Name:
    Jim
    Vehicle:
    2004DC
    Now the redneck part comes in. My first thought was that I would simply be able to stack washers or a spacer under on the top stud to make the mounting surface of the arm more horizontal. As I mentioned before, the top studs were too short, so I ended up drilling and tapping to accommodate longer M8 bolts. The next problem was that the arm, if mounted flat against the rocker, would not clear the pinch weld at the bottom of the rocker. That was the easy solution:20200218_110539.jpg

    A piece of flat 1/4 steel, drilled for the mounting holes, spaces the arm out away from the rocker enough for it to clear the rocker pinch weld. It did not, however, change the angle. Since figuring out the geometric ratios was beyond my old aviator brain, I started stacking washers. With the wheel weights limiting movement, washers stacked to provide 5/8" spacing on the top mounting bolt stopped the boards at horizontal.
    20200218_191701.jpg20200218_184505.jpg
    Several problems with this approach, of course. First, the angle between the bolt head and the mount puts too much shear stress on the bolt. It holds me fine at 170lbs, and I have had a 200lb friend use the board, but I would not push it much beyond that, or expect it to last. In addition, only one "arm" is motor driven on the AMP boards. The rear arm is simply an idler. Unfortunately, my less than rigid mounting solution allows the front motor-driven arm to twist slightly as it retracts, which causes a slight bind and delay in the rear portion of the board coming up. It also requires a bit of "fiddling" with the board to arm mountings to get them set just right, else the twist also causes the rear portion of the board to stop short of full retraction. This video shows the "walking" retraction:
    https://youtu.be/aJXtfQmMdJk

    I believe the spacing is adequate using the front and rearmost mounting points, but a more rigid adapter is needed. My thought is a flat mount to bolt to the existing stud and holes and a wedged portion with M8 studs for the board. Something like this:
    20200218_175218.jpg
    Karmakannon was kind enough to do a file in solid works that illustrates it much better than my crude drawing. This could be a machined part, or as Karma noted, it could be built out of sheet metal, with the wedge being a welded piece. The measurements on hole spacing are not quite right, but this gives you the idea. I'm not certain they are all exactly the same, but measuring the centers of the mounts, as well as the centers of the holes on the AMP mounts is the only positive way for a good fit.

    Even more rigidity could be produced by extending the flat plate between the center and rear mount for the idler arm, then placing the idler wedge about 6" forward of the rear mount. This would decrease a little more twist, and still keep the arm centered approximately where someone would step.
     

    Attached Files:

    Last edited: Mar 8, 2020
    evilrb, dinosaur and bmf4069 like this.
  5. Mar 7, 2020 at 7:09 PM
    #5
    Tohopko

    Tohopko [OP] New Member

    Joined:
    Dec 29, 2019
    Member:
    #40480
    Messages:
    131
    Gender:
    Male
    First Name:
    Jim
    Vehicle:
    2004DC
    I'll say right up front that I HATE wiring. I remember when I installed these on my 2006 Dodge--the wiring was just downright painful. Guess what? This was simple.

    First, follow the AMP directions for placing the brain box (Driver side engine bay) and wiring it to the battery. The positive wire is fused, and you will be pulling the fuse before continuing to work.

    From the "brain", there are two branches of the wiring harness. The longer end routes across the engine bay on the firewall, the shorter drops down under the master cylinder. Both sides follow along the frame rails. This brings you to step #

    Now, remove the scuff plates from both the front and rear doors, fold the rear seats forward, and remove the rear trim panel as well as the corner panels just aft of each rear door.

    Lift up the carpet and find the body plug/grommet that is just in front of the front row seats. Cut a small slit in the grommet and feed the blue and grey wires from the harness up through the slit. This brings you to step #12 in the AMP instructions. Now you can stop following them :)

    AMP would have you find the signal wires from each door on the plugs that lead to the body ECU. That makes from some tight fits and some mental fits as you try to sort out which is which ( did I mention I hate wiring and wiring diagrams?). The MUCH easier way is to identify the wire from each door courtesy switch and tap into it with the provided vampire taps. I actually pulled each of the switches to check the wire color. AMP isn't completely clear in their instructions which of their wires to use, but : Blue is front for both sides, grey is rear.

    On the 2004, the easiest spot to tap the wires was near the transition from the front scuff panel to the front kick panel. On the passenger side connect the Blue Amp wire to the light Green wire with black stripe in the wire bundle that runs along the sill and to a connector in the right kick panel. On the driver side, connect the blue AMP wire to the Grey wire with the red stripe. On the driver side, I just separated the bundle and found the wire. No way was I digging into the mess under the driver side dash to find a connector.

    Rear switches (2004) are both black with an orange stripe, but that color does not extend to the front. They pass through a diode and change to Red with white, but there is a problem. Once they pass the diode, the signal is not differentiated between doors. If you tap the Red with white near the front, regardless of which rear door you open, both boards will come down. I added an extension wire to the grey AMP wire and ran all the way to the rear courtesy switches, tapping into the Black with orange just below the switch.

    That's it, believe it or not. Put the fuse back in the positive feed and test.

    Once you have good function, go back to the AMP directions to read about the light installs. Ignore the measurements--just find a center point on each door, drill the pinchweld, insert grommets, connect wires and stick on the lights. All done!

    Passenger side: The wire running from the front courtesy switch is

    Colors for other models may be different, easy to pull the switches and see what color wire is attached.

    Also--if any of you wiring gurus knows the colors or better spots to tap for other models, sing out!

    Oh...almost forgot. Boards retracted. With a better bracket, I would anticipate a slightly tighter fit against the body. (wires hanging were for the lights)20200219_193634.jpg 20200219_193647.jpg 20200219_193653.jpg
     
    Last edited: Mar 7, 2020
    MS22, Tundra2, richiewestside and 4 others like this.
  6. Mar 7, 2020 at 8:01 PM
    #6
    artsr2002

    artsr2002 2005 Tundra DC SR5

    Joined:
    Sep 2, 2019
    Member:
    #35520
    Messages:
    2,108
    'Yonder
    Vehicle:
    Red-Maroon-Something 05 DC 4.7 4x2
    Looking forward to this......
     
  7. Mar 7, 2020 at 8:27 PM
    #7
    CodyP

    CodyP Such a n00b

    Joined:
    Oct 27, 2018
    Member:
    #21047
    Messages:
    3,118
    Gender:
    Male
    First Name:
    Cody
    CDA, ID
    Vehicle:
    2006 Tundra 4x4 DC
    Man if I could only justify those steps. I love them and like you hate the look of bars and steps. Looking forward to seeing these done.
     
  8. Mar 8, 2020 at 4:46 AM
    #8
    abcinv

    abcinv OEM (+) Junkie

    Joined:
    Jan 13, 2019
    Member:
    #24407
    Messages:
    828
    Gender:
    Male
    First Name:
    Tommy
    South of ATL
    Vehicle:
    2006 Tundra 4X4 Limited Dbl Cab
    So what’s the cost for the custom install???
    Great job!
     
  9. Mar 8, 2020 at 6:51 AM
    #9
    Professional Hand Model

    Professional Hand Model A.K.A ‘Golden Hands’

    Joined:
    Apr 29, 2018
    Member:
    #14878
    Messages:
    15,000
    Gender:
    Male
    First Name:
    Fred
    ‘Somewhere’... a State of Mind
    Vehicle:
    2002 Tundra SR5 4WD 4.7L AC Silver Metallica
    Hand Protectors
    Nice job! Thank took some brain power. That mounting post you cut off is non-existent on the 2002 model.
     
    TX-TRD1stGEN likes this.
  10. Mar 9, 2020 at 8:42 PM
    #10
    KarmaKannon

    KarmaKannon Master of None

    Joined:
    Jun 3, 2019
    Member:
    #31428
    Messages:
    1,919
    Gender:
    Male
    Utah
    Vehicle:
    2006 Double Cab w/long travel
    Some junk
    Getting there. Need any more cad stuff?
     
  11. Mar 9, 2020 at 8:57 PM
    #11
    Tohopko

    Tohopko [OP] New Member

    Joined:
    Dec 29, 2019
    Member:
    #40480
    Messages:
    131
    Gender:
    Male
    First Name:
    Jim
    Vehicle:
    2004DC
    Definitely a maybe ;) About to hit the road for a couple of months on dog and hunting/guiding events, so I won't be able to get back to it until late May.

    One thought...the sheet wedge we discussed...any reason it couldn't be a piece of angle with one side cut down to 3/4"?
     
    richiewestside likes this.
  12. May 15, 2021 at 2:16 PM
    #12
    richiewestside

    richiewestside New Member

    Joined:
    Feb 21, 2021
    Member:
    #59423
    Messages:
    7
    Gender:
    Male
    Vehicle:
    2020 Army Green TRD Pro
    Amp power steps, land cruiser heritage wheels, Jeff Westcott lift, NSV light bar, tinted tail lights.
    Can’t wait for more in this. I just bought a first Gen and have always had Amp steps on my other trucks.
     
    Tundra2 likes this.
  13. Nov 5, 2021 at 10:49 AM
    #13
    Rampage7

    Rampage7 New Member

    Joined:
    Nov 1, 2021
    Member:
    #70109
    Messages:
    92
    Gender:
    Male
    First Name:
    James
    Vehicle:
    2004 Tundra double-cab SR5 4WD V8
    1/3 of the way to swapping out interior bits to make him an SR5+ (Swapped out radio bezel, inner door panels and center cup holder insert… just need to find NM power leather seats… likely never living the full dream of a power sunroof, but alas
    So I know it’s a been over a year and a half, but any updates? Any improvements made or considered?

    You mention that the fit may be tighter to the body with a better bracket; is that a matter of a thinner flat plate so the steps can reach closer to the body?

    You also mention that the “walking effect” on the back end of each step, which is the idler arm/~NON~motor driven arm, could likely be addressed with a longer bracket that spanned from the rear mount to the center mount, correct? So would the front brackets be roughly as shown in the PDF while the flat plate of the rear brackets extend nearly/over a foot? Also you mention the angled portion of the rear bracket being moved about 6” forward… so something like this?

    _______—__

    (That would be the extended flat plate, with the dual hyphen representing the angled portion and then the remaining 6” of flat plate behind it)

    I’m wanting to approach a local fabrication place regarding these brackets and want to make sure I understand things before trying to explain anything to them
     
  14. Nov 5, 2021 at 1:20 PM
    #14
    shifty`

    shifty` A means to an end, but the ends don't seem to meet

    Joined:
    Jun 20, 2020
    Member:
    #48239
    Messages:
    25,462
    ATL
    Vehicle:
    '06 AC Limited V8/4WD
    (see signature for truck info)
    I'm tagging @Tohopko because they haven't posted in like 16 months or something, so maybe not active and probably won't see this thread get bumped.
     
    Rampage7 likes this.
  15. Nov 10, 2021 at 11:01 AM
    #15
    Tohopko

    Tohopko [OP] New Member

    Joined:
    Dec 29, 2019
    Member:
    #40480
    Messages:
    131
    Gender:
    Male
    First Name:
    Jim
    Vehicle:
    2004DC

    Correct. The portion of the plate that attaches to the rear would span beyond the welded bracket for the idler arm, so that it could attach in the existing holes (or studs if you have them).

    As for your question on Youtube, the inner rocker surface on the Double Cabs is not at the same angle as the inner rocker on the 2007 that the kit is made for. The mounting surface has to be angled quite a bit more toward the horizontal. My thought was to make an inner plate that fastens to the rocker using the existing holes (some have studs in them), then weld a sheet metal angle (or a section of angle) with bolts for the actual AMP arms to attach to. I still haven't gotten to this, so I have the very redneck solution of using washers and a longer bolt to tip the mounts toward the horizontal. It works, but it isn't as sturdy as it should be, is subject to fatigue, and allows the torque of the "driven" arm up front to twist the mounts and bind very slightly--resulting in the "walking" motion and slightly incomplete retraction.
     
    shifty` and Rampage7[QUOTED] like this.
  16. Nov 10, 2021 at 12:57 PM
    #16
    Rampage7

    Rampage7 New Member

    Joined:
    Nov 1, 2021
    Member:
    #70109
    Messages:
    92
    Gender:
    Male
    First Name:
    James
    Vehicle:
    2004 Tundra double-cab SR5 4WD V8
    1/3 of the way to swapping out interior bits to make him an SR5+ (Swapped out radio bezel, inner door panels and center cup holder insert… just need to find NM power leather seats… likely never living the full dream of a power sunroof, but alas
    OH! So the PDF of that mounting bracket you posted (the plate with the wedge built on to part of it) was never fabricated/installed but rather just a vision of what it would have to be?

    I’ll take a peak under mine and see if I have studs or holes where you described and bring that up to a local place that I have in mind to help with the brackets

    This helps tremendously. I have no machining skills myself, but I am confident that I can work with what you’ve graciously put out there for all of us, especially if extending the rear brackets to the holes behind them solves the walking issue with the idler arm

    Also I’m planning on getting the Plug’n’Play version of the Gen2 power steps as they should work fine on the Gen1 since the OBDII port should act the same on both models of truck and would all but eliminate the daunting wiring task (daunting to me anyway, you made it seem like a walk in the park for you, hahaha)

    Do you think that the thickness of the PDF plates as they are will provide the closer fit to the body of the truck when retracted, or was that still something that may be best to shave down a 1/16” or so?
     
  17. Nov 10, 2021 at 1:27 PM
    #17
    Rampage7

    Rampage7 New Member

    Joined:
    Nov 1, 2021
    Member:
    #70109
    Messages:
    92
    Gender:
    Male
    First Name:
    James
    Vehicle:
    2004 Tundra double-cab SR5 4WD V8
    1/3 of the way to swapping out interior bits to make him an SR5+ (Swapped out radio bezel, inner door panels and center cup holder insert… just need to find NM power leather seats… likely never living the full dream of a power sunroof, but alas
    C5631E55-37F7-4F95-BCC4-F95514420DDF.jpg

    Sorry it’s crude and I’d need to use my brain-noodle to make sure that the angle of the wedge and such are correct for driver/passenger side accordingly, but is this at all close to what you are describing?
     
  18. Nov 10, 2021 at 2:04 PM
    #18
    Rampage7

    Rampage7 New Member

    Joined:
    Nov 1, 2021
    Member:
    #70109
    Messages:
    92
    Gender:
    Male
    First Name:
    James
    Vehicle:
    2004 Tundra double-cab SR5 4WD V8
    1/3 of the way to swapping out interior bits to make him an SR5+ (Swapped out radio bezel, inner door panels and center cup holder insert… just need to find NM power leather seats… likely never living the full dream of a power sunroof, but alas
    So I have the same setup that you do; upper is a stud and the lower is the M8 nut that is welded down

    Given the nature of the bracket you sketched. (Which your friend cleaned up, credit to your friend) the existing M8 studs are good to be kept as they are, correct? At least that’s what it sounds like from your earlier remark after your initial “redneck” approach since the PDF schematic mounts to the truck with the flat plate and the steps to the wedge

    The question would then be what did you do with the ~lower~ mount M8 nuts that were welded down… did you just cut those off and replace the bolt that they were on? Looks like they would also utilize the flat plate on the PDF mock-up

    And in you original doodle, you had M8 studs on the angled wedge, and in your fiends rendition it was 2 holes on the wedge

    Was the renditions’ intent to feed M8 bolts into properly angled & recessed holes in the back of the wedge to secure the power steps to?

    I think these are the last questions I have… I hope I’ve worded things well

    I feel that I’m incredibly close to being able to take these concepts and turn them into reality… that lower mount/nut may be the final piece for me to understand better
     
  19. Nov 10, 2021 at 2:12 PM
    #19
    Rampage7

    Rampage7 New Member

    Joined:
    Nov 1, 2021
    Member:
    #70109
    Messages:
    92
    Gender:
    Male
    First Name:
    James
    Vehicle:
    2004 Tundra double-cab SR5 4WD V8
    1/3 of the way to swapping out interior bits to make him an SR5+ (Swapped out radio bezel, inner door panels and center cup holder insert… just need to find NM power leather seats… likely never living the full dream of a power sunroof, but alas
  20. Nov 10, 2021 at 3:26 PM
    #20
    flyfisher

    flyfisher Member

    Joined:
    Aug 2, 2018
    Member:
    #17636
    Messages:
    316
    Gender:
    Male
    First Name:
    David
    Firestone, CO
    Vehicle:
    2005 Tundra SR5 Double Cab 4x4
    Great ideas and helpful sketches. Keep them coming! Thanks.
     
  21. Nov 11, 2021 at 8:42 AM
    #21
    Rampage7

    Rampage7 New Member

    Joined:
    Nov 1, 2021
    Member:
    #70109
    Messages:
    92
    Gender:
    Male
    First Name:
    James
    Vehicle:
    2004 Tundra double-cab SR5 4WD V8
    1/3 of the way to swapping out interior bits to make him an SR5+ (Swapped out radio bezel, inner door panels and center cup holder insert… just need to find NM power leather seats… likely never living the full dream of a power sunroof, but alas
    Well, it was OP and their friend that conceptualized those designs in the first place, I’m just making sure that I’m interpreting them correctly because sometimes I’m… what’s that word… … slow

    I see you are in Sunnyvale, CA! I used to frequent that area quite often (2010-2018). I miss that area most of all since moving, but it was the right choice for me at the time

    But yeah, I’m just seeking clarification from OP and then I feel I’ll be able to make a solid and successful go at these steps
     
  22. Dec 1, 2021 at 12:01 PM
    #22
    Rampage7

    Rampage7 New Member

    Joined:
    Nov 1, 2021
    Member:
    #70109
    Messages:
    92
    Gender:
    Male
    First Name:
    James
    Vehicle:
    2004 Tundra double-cab SR5 4WD V8
    1/3 of the way to swapping out interior bits to make him an SR5+ (Swapped out radio bezel, inner door panels and center cup holder insert… just need to find NM power leather seats… likely never living the full dream of a power sunroof, but alas
    Wow! You weren’t kidding when you said these were a virtually perfect fit for Gen1 Double Cab…. Lining up the front to the directed position has the back edge extending about an inch beyond where it’s supposed to

    I figured I’m jumping off the “will it work cliff” as it is, so I got the Plug’n’Play version.

    I’m talking to a local fabrication place regarding the fancy bracket/uni-plate and they sound like it should be pretty darn easy. We’ll see what the estimated bill is though, hahaha (I’m too far deep to stop now so it’ll be what it’ll be)

    I’m emailing them some stuff in a few minutes to get the ball officially rolling, so we’ll see what their timeline ends up being to squeeze me in.

    My set doesn’t have the same end caps as the instructions show… mine are not apparently screwed in, but rather a pop-over cap, but the T-nut inserts are already in place so that’s good.

    It’s also fine since I don’t see any need for cutting the boards themselves that lone inch shorter. I’m sure those end caps come off with some elbow-grease, but since I don’t need to, I’m not touching them one bit

    I’ll update when I have more to report. Especially if I have a proper update to the wedge plate design*

    *I simply took OP’s friends’ fantastic design and am looking to make the flat mounting plate one long piece
     
    dinosaur likes this.
  23. Dec 1, 2021 at 7:59 PM
    #23
    Understr

    Understr New Member

    Joined:
    Dec 1, 2021
    Member:
    #71327
    Messages:
    3
    Gender:
    Male
    Vehicle:
    04' DC
    Yes
    Joined this forum because of your efforts to make the AMP steps work. Thank you! Definitely looking forward to hearing more and would absolutely be interested in purchasing a set of these brackets from your fabricator.
     
  24. Dec 20, 2021 at 12:08 PM
    #24
    Rampage7

    Rampage7 New Member

    Joined:
    Nov 1, 2021
    Member:
    #70109
    Messages:
    92
    Gender:
    Male
    First Name:
    James
    Vehicle:
    2004 Tundra double-cab SR5 4WD V8
    1/3 of the way to swapping out interior bits to make him an SR5+ (Swapped out radio bezel, inner door panels and center cup holder insert… just need to find NM power leather seats… likely never living the full dream of a power sunroof, but alas
    So progress has been made in the form of initial measurements for a length-spanning plate that will have the two wedges welded onto them specific to side (driver/passenger)

    the front-to-middle spacing is slightly different than the middle-to-rear spacing when it comes to the mounting points, so even though the plates themselves will likely be the same, the orientation of the wedges will be determined by which side of the vehicle they are on if that makes sense

    I’ll take pictures of some key superficial things that will need to be done at a later date; nothing particularly invasive (details later)

    we are likely going with steel over aluminum, the place says that aluminum would be a little easier/quicker, cheaper to work with and be more resilient to weather but they said that painting the steel would take care of most any weather-based concerns and be stronger overall (I’m planning to get price quotes for both)

    it may be a week or more before they get me a ballpark quote due to the holidays/New Years and whatnot, and then lead time and all that fun as their workload allows once everything is finalized, so I won’t likely have a ton of updates, but I’m pumped regardless and I’ll keep everyone in the loop all the while

    huge thanks to OP and their limitless patience with me as well as their friend who did the initial digital design
     
  25. Dec 20, 2021 at 12:10 PM
    #25
    Rampage7

    Rampage7 New Member

    Joined:
    Nov 1, 2021
    Member:
    #70109
    Messages:
    92
    Gender:
    Male
    First Name:
    James
    Vehicle:
    2004 Tundra double-cab SR5 4WD V8
    1/3 of the way to swapping out interior bits to make him an SR5+ (Swapped out radio bezel, inner door panels and center cup holder insert… just need to find NM power leather seats… likely never living the full dream of a power sunroof, but alas
    The place said that welding the wedges onto the plate would be much much cheaper, take a lot less time and be nearly as strong as a single uni-piece
     
  26. Dec 31, 2021 at 10:04 AM
    #26
    abcinv

    abcinv OEM (+) Junkie

    Joined:
    Jan 13, 2019
    Member:
    #24407
    Messages:
    828
    Gender:
    Male
    First Name:
    Tommy
    South of ATL
    Vehicle:
    2006 Tundra 4X4 Limited Dbl Cab
    Sub'd; I'm still following along!
     
  27. Dec 31, 2021 at 1:29 PM
    #27
    BlueRhinoSix

    BlueRhinoSix New Member

    Joined:
    Dec 11, 2021
    Member:
    #71673
    Messages:
    4
    Gender:
    Male
    2005 Toyota Tundra Double Cab Limited TRD (Bluesteel Metallic) CAI: Airaid Performance Air Intake System Exhaust: Custom Magnaflow exhaust with high-flow CATs Lift: Rough Country 2.5" lift Tires: LT285/70R-17 BFG A/T KO2 33" Rims: 17X8.5 KMC KM722 TECHNIC Bedcover:BAKFlip G2 Tonneau Cover
    Rampage7, extremely interested in following where you're at with the fabricator as I'm trying to do the exact same thing right now. Tell this guy there's a few owners on this former, me being one of them, who'd buy a set of those brackets tomorrow!! Thanks for the detailed write ups.
     
  28. Jan 13, 2022 at 10:53 PM
    #28
    Rampage7

    Rampage7 New Member

    Joined:
    Nov 1, 2021
    Member:
    #70109
    Messages:
    92
    Gender:
    Male
    First Name:
    James
    Vehicle:
    2004 Tundra double-cab SR5 4WD V8
    1/3 of the way to swapping out interior bits to make him an SR5+ (Swapped out radio bezel, inner door panels and center cup holder insert… just need to find NM power leather seats… likely never living the full dream of a power sunroof, but alas
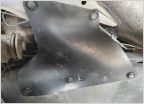
    Ok, so I don’t have pics of the underside of my truck, but since you all have pretty much the same one as me; Gen1 DBL-CAB (full 4-door) it should be the same for all of us… there are a series of 1” or so wide strips that appear to be covering welds or otherwise helping to seal the underbody… we don’t know if these strips will need to be meddled with or if the adapter plates can be adequately secured over them. I’m hoping they can be left alone, but I suppose I’ll find out in about a month

    Either way, the adapter plate final design has been confirmed as of Thursday, Jan 13, 2022 and I’m moving forward with having a set created.

    We (the place I went through and I) used the profile image of OP’s washer stack setup, which by all accounts resulted in a nice level position for ~their~ steps, as a reference to get the angle for the adapter plate wedges

    There is no guarantee that the angle is absolutely perfect, but we don’t foresee it being off by enough to make a difference in terms of practical functionality, if at all

    It would seem that it will be about 4 weeks before this first pair of adapter-plates are done and in-hand, at which point installing them and then the steps themselves shouldn’t be all that bad (reminder that I got the OBDII Plug’n’Play set)

    I ~THINK~ that the submitted design is calling for the holes in the wedges to be threaded with M8 x 1.25 bolts in mind, but I may be misreading the invoice/crude schematic (here’s hoping they are set to be threaded, but we’ll find out, hahahaha)

    The guy who went over everything with me made one great improvement; he made the middle connection point as 2 small slots so that there is no Left/Right issue; it won’t matter which side an adapter plate is on

    These aren’t cheap, at least not 1 set at a time, but I don’t have the funds for a 20 set production run, and I don’t think there are 20 of us here in need, hahaha

    So with that, I’m hoping that they will pass on to me their actual schematics/files with all the fabrication jargon and whatnot, because then I could post that here and anyone in need would have an easy way to either create them themselves or easily submit to a fabricator near them and avoid a bunch of extra steps

    It’s not a glamorous 3D model or CAD, but it does show the key upgrades to the designs I’ve previously posted (which themselves could only exist thanks to preliminary designs by OP and their friend)
     
  29. Jan 13, 2022 at 10:56 PM
    #29
    Rampage7

    Rampage7 New Member

    Joined:
    Nov 1, 2021
    Member:
    #70109
    Messages:
    92
    Gender:
    Male
    First Name:
    James
    Vehicle:
    2004 Tundra double-cab SR5 4WD V8
    1/3 of the way to swapping out interior bits to make him an SR5+ (Swapped out radio bezel, inner door panels and center cup holder insert… just need to find NM power leather seats… likely never living the full dream of a power sunroof, but alas
  30. Jan 13, 2022 at 11:11 PM
    #30
    Rampage7

    Rampage7 New Member

    Joined:
    Nov 1, 2021
    Member:
    #70109
    Messages:
    92
    Gender:
    Male
    First Name:
    James
    Vehicle:
    2004 Tundra double-cab SR5 4WD V8
    1/3 of the way to swapping out interior bits to make him an SR5+ (Swapped out radio bezel, inner door panels and center cup holder insert… just need to find NM power leather seats… likely never living the full dream of a power sunroof, but alas
    Also important to mention is that I opted for steel rather than aluminum, so I/you’d surely want to do even a basic layer of paint to help protect them from the elements… but I don’t see them succumbing to rust right away or anything, even if I don’t coat/paint them first
     

Products Discussed in

To Top