

-
Welcome to Tundras.com!
You are currently viewing as a guest! To get full-access, you need to register for a FREE account.
As a registered member, you’ll be able to:- Participate in all Tundra discussion topics
- Transfer over your build thread from a different forum to this one
- Communicate privately with other Tundra owners from around the world
- Post your own photos in our Members Gallery
- Access all special features of the site
 What adhesive is used for the camera?
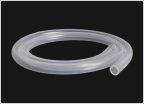 If you change your own oil, make sure you get the 5/8” hose
 First Oil Change
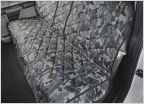 Seat Cover options for CM?
 Inbed Storage
 4D Tech - Start/Stop Eliminator 3RD Gen
Amateur Radio (Icom 7000) Installation Gen 3 Tundra 2022+
Discussion in '3rd Gen Tundras (2022+)' started by TXW5CSM, Feb 20, 2024.


