1. Welcome to Tundras.com!

    You are currently viewing as a guest! To get full-access, you need to register for a FREE account.

    As a registered member, you’ll be able to:
    • Participate in all Tundra discussion topics
    • Transfer over your build thread from a different forum to this one
    • Communicate privately with other Tundra owners from around the world
    • Post your own photos in our Members Gallery
    • Access all special features of the site

Adding Amplified/DSR-1 to JBL system

Discussion in 'Audio & Video' started by PWMDMD, Feb 25, 2020.

  1. Feb 25, 2020 at 2:38 PM
    #1
    PWMDMD

    PWMDMD [OP] New Member

    Joined:
    Nov 4, 2018
    Member:
    #21332
    Messages:
    561
    Worcester, MA
    Vehicle:
    2020 Tundra Platinum
    2020 Tundra Platinum with JBL

    Currently replaced all my speakers with aftermarket units including a sub. I want to add a JBL Stadium 5 and Maestro Rockford DSR-1. I want to keep the stock HU. I've been on here and Youtube and to be honest I'm just more confused now than when I started. Treat me like a child here...this is not in my wheelhouse.

    1. What is general setup if I want to keep my factor JBL HU and add the amp/DSR-1? I've read I have to keep the stock JBL amp and "Bypass" it? How is that achieved?

    2. Are there harnesses available to make this plug and play? If yes, which ones?

    3. How difficult would this be for a professional to get installed? Is it reasonable to assume a reputable shop should have little trouble figuring this out?

    4. Any general comments to help me understand what needs to be done is appreciated.

    Thanks in advance!
     
    _SP_ likes this.
  2. Feb 25, 2020 at 2:49 PM
    #2
    FredB32

    FredB32 New Member

    Joined:
    Sep 5, 2019
    Member:
    #35621
    Messages:
    559
    Gender:
    Male
    First Name:
    Fred
    Vehicle:
    2011 TRD RW
    You'll need some sort of line-level converter that will essentially take the outputs from the stock head unit and convert the signal into a line-level for input to the amp. I'm sure someone out there has more specific info, but an example of what you'd need: https://www.crutchfield.com/p_13698413/JL-Audio-LoC-22.html

    I would think any pro or experienced DIYer would be able to install it. What they mean by "bypassing" the factory JBL amp is you'd tap into the inputs prior to the amp, and then put your own amp in-line, then ideally have adapters to hook up your amp to the speaker outputs from the JBL amp. There's generall wiring adapters out there that you can splice together and work with various factory plugs. Crutchfield is a good place to start if you plug your vehicle into in to get an idea of the parts you'll need.
     
    PWMDMD[OP] likes this.
  3. Feb 25, 2020 at 4:17 PM
    #3
    Danimal86

    Danimal86 Looks clean even when its dirty!

    Joined:
    Aug 29, 2017
    Member:
    #9321
    Messages:
    4,877
    Gender:
    Male
    First Name:
    Daniel
    Sacramento, CA
    Vehicle:
    2017 White Tundra SR5
    Get ahold of James at tech12volt. He will set you up.

    Not very difficult to install. I believe James has a pnp harness, but you will still need to run a fused power cable from the battery.
     
    Bigolbaddy, DjSamthrax and PWMDMD[OP] like this.
  4. Feb 25, 2020 at 4:32 PM
    #4
    purplenova

    purplenova Not a new member

    Joined:
    Nov 9, 2018
    Member:
    #21513
    Messages:
    1,024
    Gender:
    Male
    First Name:
    Tom
    Ohio
    Vehicle:
    2016 Tundra Crewmax SR5
    Pillar Tape, Bullet Liner, 20% Tint, Tyger Star Armor Kenwood Amp Tech12volts JL Tweeters Dasaita G13 Head Unit Fumoto Oil Valve Driver Side Grab Handle
    What ☝ said...
     
    PWMDMD[OP] likes this.
  5. Feb 25, 2020 at 5:15 PM
    #5
    PWMDMD

    PWMDMD [OP] New Member

    Joined:
    Nov 4, 2018
    Member:
    #21332
    Messages:
    561
    Worcester, MA
    Vehicle:
    2020 Tundra Platinum
    Thanks fellas, I'm in contact with James. I just watched the Youtube video for the DSR1 and I think it now makes more sense. The TO3 harness will connect my factory HU to the DSR1. The DSR1 will then allow me to get a signal to the JBL Stadium 5 via RCA cables. My question is how does the Stadium 5 connect to the individual speakers? Does the factory harnesses that originally connected the stock amp to the speaker plug into the Stadium 5 through separate adapter?
     
  6. Feb 25, 2020 at 5:22 PM
    #6
    Cfincke

    Cfincke Mall Crawler but capable

    Joined:
    Jul 7, 2016
    Member:
    #3797
    Messages:
    1,986
    Gender:
    Male
    First Name:
    Chris
    San Antonio
    Vehicle:
    2014 Tundra 1794 CM 5.7 4x4 sunset bronze
    5.29s, Auburn LSD, 37x12.50R18, Icon coilovers and shocks, SPC UCA's, Tech 12 Volts sound system, Enve Grill
    It is not to difficult to install. I have the JBL headunit and have the DSR1 and amps.

    You will need the TO3 cable to go with the DSR1, this will make the DSR1 plug and play.
    The factory amp will be removed and can be trashed.
    The DSR1 gets connected to the factory wiring that went to the factory amp
    From the DSR1 to the amp you will need RCA cables (super easy)
    You can contact James at Tech12volts for the adapter to use the existing stock wiring. it will come with a wiring 'map' that identifies what each wire needs to connect to on the amp (left front positive, left front negative, and so on)
    If installing a new sub and box, I would recommend running heavier speaker wire
    Last thing is to run an amp power cable from the battery, thru the firewall to the amp.

    If replacing the speakers, James can get you adapter rings too.
     
    Bigolbaddy and PWMDMD[OP] like this.
  7. Feb 25, 2020 at 5:34 PM
    #7
    valut

    valut New Member

    Joined:
    Dec 2, 2019
    Member:
    #39456
    Messages:
    55
    Gender:
    Male
    yup yup ordered mine from James at Tech12volts. Will be ordering the wiring kit and amp mount next month and then doing the install myself.
     
    PWMDMD[OP] likes this.
  8. Feb 25, 2020 at 5:38 PM
    #8
    PWMDMD

    PWMDMD [OP] New Member

    Joined:
    Nov 4, 2018
    Member:
    #21332
    Messages:
    561
    Worcester, MA
    Vehicle:
    2020 Tundra Platinum
    Does the amp mount have room for both the Stadium 5 and DSR1? What's included in the wiring kit? Does it include power cable/fuse and ground wire?

    Starting to think this is something I can do!
     
  9. Feb 25, 2020 at 6:10 PM
    #9
    purplenova

    purplenova Not a new member

    Joined:
    Nov 9, 2018
    Member:
    #21513
    Messages:
    1,024
    Gender:
    Male
    First Name:
    Tom
    Ohio
    Vehicle:
    2016 Tundra Crewmax SR5
    Pillar Tape, Bullet Liner, 20% Tint, Tyger Star Armor Kenwood Amp Tech12volts JL Tweeters Dasaita G13 Head Unit Fumoto Oil Valve Driver Side Grab Handle
    Think James will have everything you need including amp wiring kit. The kit will have everything. Power cable from battery to amp, ground cable, fuse block everything. Prolly cost additional 60 to 80 bucks.

    You can do this.... Hardest part, running large red power cable from battery to pass seat side.
     
    PWMDMD[QUOTED][OP] likes this.
  10. Feb 25, 2020 at 6:58 PM
    #10
    Danimal86

    Danimal86 Looks clean even when its dirty!

    Joined:
    Aug 29, 2017
    Member:
    #9321
    Messages:
    4,877
    Gender:
    Male
    First Name:
    Daniel
    Sacramento, CA
    Vehicle:
    2017 White Tundra SR5
    James can make you an amp rack, and just secure it with Velcro. I'm not sure if they will both fit on it though. I think that stadium amp is a beast.
     
  11. Feb 25, 2020 at 9:43 PM
    #11
    Mater

    Mater New Member

    Joined:
    Feb 23, 2019
    Member:
    #26579
    Messages:
    3,177
    First Name:
    Nick
    SD
    Vehicle:
    2016 MGM Platinum
    Honestly, OP, if I had to do it again I’d probably just go through James. Yeah, I might have saved a few hundred bucks piecing things together and buying a couple things used or found good deals on this that or the other... but it’s just not worth it. Time is worth something and to have someone already have picked the equipment and programmed it (DSR1) easily makes it worth it. Not to mention everything will show up at your door all on the same day and you can do a full install next day. Just my $.02
     
  12. Feb 26, 2020 at 3:09 AM
    #12
    _SP_

    _SP_ New Member

    Joined:
    Jul 21, 2018
    Member:
    #17224
    Messages:
    126
    Gender:
    Male
    First Name:
    Shawn
    Vehicle:
    2014 1794 Edition
    de-chromed

    This is very true and what I did for the most Part. I wish James was more available though. I would like a ported single 10/12" Sub and box from him. But I have not heard back from him. ChacoTaco also has Ported boxes. But I would rather give James T a chance. My system sounds pretty good with the Factory Panasonic /JBL headhunt.

    The front and dash JBLs have to go first. The rear doors are Ok. The sail tweeters and rear doors JBLs all are ok with the power im pushing ( 200 watts per channel GAINS not maxed) But Before you go out and but all new speakers just Change the fronts and dash. Disconnect the center for now. Leave the sail tweeters.


    [​IMG]

    Tucked all wires under my amp tray (I made it).
    [​IMG]


    Kenwood 6x9's up and 3 1/2' in the dash and im done for now. Ohh I also changed out the Factory JBL sub for something that can handle more power to hold me over till I have some more $$$ to buy a Box and real Sub.

    this mod cost 20$ off Amazon! Its 10x better than stock If the box were more Rigid I think it would sound even better. But it gets muddy as the stock box flexes.

    [​IMG]

    [​IMG]
     
    Last edited: Feb 26, 2020
    PWMDMD[OP] likes this.
  13. Feb 27, 2020 at 3:22 AM
    #13
    PWMDMD

    PWMDMD [OP] New Member

    Joined:
    Nov 4, 2018
    Member:
    #21332
    Messages:
    561
    Worcester, MA
    Vehicle:
    2020 Tundra Platinum
    I've received quotes from three shops in my area - with me supplying the amp, DSR-1, mounting bracket, all wires, all harnesses, etc...just for the install...$1000-$1400.

    This is something I'll be tackling on my own once the weather gets a little nicer (at least out of the 30's). Seems like a good project to get to know my truck.
     
    _SP_ and purplenova like this.
  14. Feb 27, 2020 at 4:48 AM
    #14
    valut

    valut New Member

    Joined:
    Dec 2, 2019
    Member:
    #39456
    Messages:
    55
    Gender:
    Male
    I will be doing the same. I'll post picts of my install. I'm keeping my HU and original speakers, I'll replace the speakers later when the cash flows from my lender (bank of wife). But if you haven't already done so you should contact James at Tech12volts to see what you're gonna need.
     
    Bigolbaddy, Mater and PWMDMD[OP] like this.
  15. Feb 27, 2020 at 7:10 AM
    #15
    _SP_

    _SP_ New Member

    Joined:
    Jul 21, 2018
    Member:
    #17224
    Messages:
    126
    Gender:
    Male
    First Name:
    Shawn
    Vehicle:
    2014 1794 Edition
    de-chromed

    As long as your not in a rush...
     
  16. Feb 27, 2020 at 7:16 AM
    #16
    PWMDMD

    PWMDMD [OP] New Member

    Joined:
    Nov 4, 2018
    Member:
    #21332
    Messages:
    561
    Worcester, MA
    Vehicle:
    2020 Tundra Platinum
    All of the Youtube videos featuring the Tundra I've seen so far run the power wire through the grommet on the driver's side - I haven't even looked but I assume there's a grommet somewhere on the passenger side too? Obviously, it would be easier to run the power wire through the engine bay to the passenger's side than take apart the dash and run it through the dash from the driver's side to the passenger's side. Am I missing anything here? Any reason to not do it this way?
     
  17. Feb 27, 2020 at 8:20 AM
    #17
    Danimal86

    Danimal86 Looks clean even when its dirty!

    Joined:
    Aug 29, 2017
    Member:
    #9321
    Messages:
    4,877
    Gender:
    Male
    First Name:
    Daniel
    Sacramento, CA
    Vehicle:
    2017 White Tundra SR5
    I ended up going thru a gromet in the passenger floor pan
     
    PWMDMD[QUOTED][OP] and Mater like this.
  18. Feb 27, 2020 at 8:24 AM
    #18
    Mater

    Mater New Member

    Joined:
    Feb 23, 2019
    Member:
    #26579
    Messages:
    3,177
    First Name:
    Nick
    SD
    Vehicle:
    2016 MGM Platinum
    Each grommet has two spots to send wires through. I used one on the drivers side for front camera and one on the passenger side for pop-n-lock. Amp power wire will be going through passenger side as well.
     
    PWMDMD[OP] likes this.
  19. Feb 29, 2020 at 6:34 AM
    #19
    PWMDMD

    PWMDMD [OP] New Member

    Joined:
    Nov 4, 2018
    Member:
    #21332
    Messages:
    561
    Worcester, MA
    Vehicle:
    2020 Tundra Platinum
    Yeah...I agree. The more I look into it the more confident I am this is something I can do fairly easily.
     
  20. Feb 29, 2020 at 6:35 AM
    #20
    AZBoatHauler

    AZBoatHauler SSEM#140 / 2.5 gen plebe

    Joined:
    Aug 13, 2019
    Member:
    #34576
    Messages:
    8,177
    Gender:
    Male
    First Name:
    Adam
    So.Arizona
    Vehicle:
    2017 CrewMax 4x4, 2017 LandCruiser, 2005 Sequoia 4x4
    Demello / SOB Fab Bumpers, SuperWinch, WKOR sliders, RCI skids, Baja Designs lighting, Billy 6112 and 5160 w/ CB +2, JL Audio with Alpine HU, DD 10" Exhaust, LED headlights, Rago fab mounts, 35” BFG, HAM radio
    IMO, easier to run across the firewall inside rather than the engine compartment. Also, make sure you aren’t running the power right next to your RCAs (if you’re using any).
     
    PWMDMD[QUOTED][OP] likes this.
  21. Feb 29, 2020 at 9:51 AM
    #21
    valut

    valut New Member

    Joined:
    Dec 2, 2019
    Member:
    #39456
    Messages:
    55
    Gender:
    Male
    This is how I ran it last night at about 11:23 I think. I be posting the complete install

    Driver side and up the nice cover
    IMG_3847.jpg
    Along and behind the cover
    IMG_3847.jpg
    Out the passenger side
    IMG_3746.jpg
    Through the firewall grommet. !!!Careful if you do it this way a lot of wires on the other side.
    IMG_1716.jpg
    And into the cab
    IMG_4735.jpg

    IMG_5450.jpg
     
    PWMDMD[OP] likes this.
  22. Feb 29, 2020 at 1:15 PM
    #22
    PWMDMD

    PWMDMD [OP] New Member

    Joined:
    Nov 4, 2018
    Member:
    #21332
    Messages:
    561
    Worcester, MA
    Vehicle:
    2020 Tundra Platinum
    Much appreciated Valut! Exactly what I needed to see!
     
  23. Mar 18, 2020 at 4:16 PM
    #23
    Bigolbaddy

    Bigolbaddy New Member

    Joined:
    Oct 3, 2019
    Member:
    #36961
    Messages:
    214
    Gender:
    Male
    First Name:
    Ben
    Fort Worth
    Vehicle:
    2020 MGM 1794
    Super helpful. What kept the wire inside the cover?
     
  24. Mar 18, 2020 at 4:20 PM
    #24
    Bigolbaddy

    Bigolbaddy New Member

    Joined:
    Oct 3, 2019
    Member:
    #36961
    Messages:
    214
    Gender:
    Male
    First Name:
    Ben
    Fort Worth
    Vehicle:
    2020 MGM 1794
    I had to go the sale/used route to get my equipment. I couldn't swing what James quoted me, but I found the Kappa 5 for $300 and a DR1 for $150... this I could do. Anyway, I am in the same boat as the OP. I have the TO3, but what is the name of the harness that tech12volts sells that connects to the speakers? Thanks
     
  25. Mar 18, 2020 at 4:23 PM
    #25
    PWMDMD

    PWMDMD [OP] New Member

    Joined:
    Nov 4, 2018
    Member:
    #21332
    Messages:
    561
    Worcester, MA
    Vehicle:
    2020 Tundra Platinum
    Those black fasteners screw on over the cover to secure it and they do a very good job of securing it. I have no worry about the wire coming loose from there.
     
    Bigolbaddy[QUOTED] likes this.
  26. Mar 18, 2020 at 4:50 PM
    #26
    ZPMAN

    ZPMAN 2nd place is the 1st looser

    Joined:
    Nov 1, 2017
    Member:
    #10678
    Messages:
    1,731
    Gender:
    Male
    First Name:
    John
    Minnesota
    Vehicle:
    2016 Black Platinum Supercharged
    4" lift, 35s, Magnuson Supercharger
    I've made up a few brackets like this for electrical components.
    20190208_182146.jpg
    20190208_182238.jpg
     
  27. Mar 18, 2020 at 5:55 PM
    #27
    Bigolbaddy

    Bigolbaddy New Member

    Joined:
    Oct 3, 2019
    Member:
    #36961
    Messages:
    214
    Gender:
    Male
    First Name:
    Ben
    Fort Worth
    Vehicle:
    2020 MGM 1794
    OK - so I figured out I need the speaker harness from Tech12volts, ordered.

    Once I remove the JBL amp and replace with the DSR1, can the power and ground that were on the amp work to power and ground the DSR1?

    The rest of the stuff to get is 3 RCA cables ~10' to get from the DSR1 to the new amp (under read seat, middle), a 4awg cable for ground and 4awg cable to go to the battery with a fuse. Is this package decent? Or this one?

    Is this correct? Not trying to hijack the OP, hopefully this is on topic for him as well.

    Thanks
     
  28. Mar 18, 2020 at 6:04 PM
    #28
    Cfincke

    Cfincke Mall Crawler but capable

    Joined:
    Jul 7, 2016
    Member:
    #3797
    Messages:
    1,986
    Gender:
    Male
    First Name:
    Chris
    San Antonio
    Vehicle:
    2014 Tundra 1794 CM 5.7 4x4 sunset bronze
    5.29s, Auburn LSD, 37x12.50R18, Icon coilovers and shocks, SPC UCA's, Tech 12 Volts sound system, Enve Grill
    You will need the TO3 adapter cable for the DSR1 to plug and play with the factory plug that was in the factory JBL amp.
     
  29. Mar 18, 2020 at 6:05 PM
    #29
    PWMDMD

    PWMDMD [OP] New Member

    Joined:
    Nov 4, 2018
    Member:
    #21332
    Messages:
    561
    Worcester, MA
    Vehicle:
    2020 Tundra Platinum
    1. The DSR1 does not have a separate power supply - it's supplied by the harness.

    2. The DSR1 plugs into the harness that plugs into the stock amp under the passenger seat and will sit right next to the aftermarket amp so the RCAs need to be about 6" long.

    3. Why are you putting the amp under the rear seat?

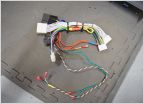
    The DSR1 plugs into the factor harnesses that currently go into the stock amp through the TO3 harness. The DSR1 then connects to the after market amp using RCAs. You will then connect speaker wires, which are also part of the TO3 harness, to the aftermarket amp which will go back into the TO3 harness to be fed to the stock harness and speaker wires. The TO3 harness is quite complicated and it's all you need to feed input into the DSR1 AND feed signal from the aftermarket amp to the speakers....if that make sense.

    4. That power cable/ground cable looks fine. Just make sure to put the fuse as close to the battery as possible. I screwed the fuse into the top of the existing plastic fuse box.
     
    Last edited: Mar 18, 2020
  30. Mar 18, 2020 at 6:17 PM
    #30
    Bigolbaddy

    Bigolbaddy New Member

    Joined:
    Oct 3, 2019
    Member:
    #36961
    Messages:
    214
    Gender:
    Male
    First Name:
    Ben
    Fort Worth
    Vehicle:
    2020 MGM 1794
    Thanks for the input.

    3 - I have the Infinity Kappa 5 Amp and it doesn't look like it will fit under the front seat. Did you get a similar sized amp (13-1/8"W x 1-3/4"H x 6-15/16"D)?
     
    PWMDMD[QUOTED][OP] likes this.

Products Discussed in

To Top