

-
Welcome to Tundras.com!
You are currently viewing as a guest! To get full-access, you need to register for a FREE account.
As a registered member, you’ll be able to:- Participate in all Tundra discussion topics
- Transfer over your build thread from a different forum to this one
- Communicate privately with other Tundra owners from around the world
- Post your own photos in our Members Gallery
- Access all special features of the site
 Power outlet fuse keeps blowing
 Fuel leak 09 Tundra
 Power Tailgate Lock: Wiring Splice > 2013 Tundra Plat
 Rear Bumper Replacement 2010 DC Tundra
 Need help with adding second monitor
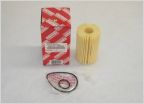 Which oil filters to use?
5.7L Valve Cover Gasket Change Process w/ Photos
Discussion in '2nd Gen Tundras (2007-2013)' started by HbbTundra08, Apr 18, 2020.
Page 2 of 2
Page 2 of 2


