1. Welcome to Tundras.com!

    You are currently viewing as a guest! To get full-access, you need to register for a FREE account.

    As a registered member, you’ll be able to:
    • Participate in all Tundra discussion topics
    • Transfer over your build thread from a different forum to this one
    • Communicate privately with other Tundra owners from around the world
    • Post your own photos in our Members Gallery
    • Access all special features of the site

3rd Gen Rear Brake Pads/Rotor Install

Discussion in '3rd Gen Tundras (2022+)' started by chrisgibbs707, Sep 28, 2024.

  1. Sep 28, 2024 at 4:30 PM
    #1
    chrisgibbs707

    chrisgibbs707 [OP] New Member

    Joined:
    Mar 30, 2024
    Member:
    #114572
    Messages:
    17
    Gender:
    Male
    First Name:
    Chris
    Vehicle:
    2022 Tundra SR5 4x4
    While rotating tires a couple weeks ago, I noticed my rear brake pads were at ~2.75mm and the rotors were mildly glazed and warped. Considering the cost of new rotors vs turning them, I opted to just get new rotors and change pads, but I wanted to write up the whole process for myself and others to reference in the future. For some more background, I bought this truck in January with 34k miles, have put >13k on it since then, but found out the truck used to be a rental, so the rear pads being toasted at 47k miles makes sense.

    What you need:
    19mm socket
    18-24” breaker bar for caliper bolts and wheel removal
    Torque wrench capable of ~150 ft lbs
    9V (or 12V) battery
    Wires with alligator clips
    Plastic deadblow hammer for taking off rotor (and used handle for pushing in caliper)
    Patience

    Rotors/pads I installed:

    NAPA Ultra-Premium Rear Brake Rotor
    UP 882853CR
    ($106 ea)
    Z36 Powerstop towing brake pads PN Z36-2439 ($80, includes hardware and grease)

    Process:
    Chock your wheels and turn off parking brake. I’ll admit I forgot to chock my wheels and quickly realized once I lifted one of the rear wheels.

    Remove wheels.

    Take off rear caliper (19mm socket)
    upload_2024-9-28_15-56-52.jpg

    Remove pads (push inward and they’ll pop out). Remove hardware.

    Clean everything up and grease where the hardware goes (or just grease up the hardware).

    Put new (or resurfaced) rotor on. I put two lug nuts on to hold it in place bc it kept sliding off. I also put anti-seize between the hub and the rotor for future me.

    Remove the caliper and put new hardware in.

    Here comes the fun part. Backing out the parking brake/caliper. This is where alligator clips come in handy - I came from the factory with only two hands, unfortunately.

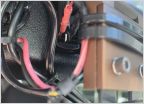
    Remove the electrical connector on the parking brake motor. When looking at the motor, hook up the positive lead to the pin on the right, negative on the left. In the image below, red is positive and black is negative.
    upload_2024-9-28_16-6-16.jpg

    Connect the leads and let the motor run for ten seconds at a time, push in the caliper, repeat for ~ 60 seconds or 6 cycles of 10 seconds. This is where I struggled the most on the first side I did. I didn’t push the caliper in enough to fit, so I put everything together after that and then realized there wasn’t enough space between the pads to fit over the rotor. On the second side I did, I remembered math exists - all you have to do is make sure the space between the caliper piston and the backstop for the pad is more than the width of the pads + rotor width. For me, the pads were 15.7 mm each, and the rotor thickness was 20mm, so I needed piston to be 51.4mm away from the face that the pad sits against. Here’s a pic of how far the piston was compressed (along with some shitty arrows showing the dimension I’m talking about):
    upload_2024-9-28_16-15-41.jpg

    Then put the new pads in and slap the caliper back on:

    upload_2024-9-28_16-17-46.jpg

    Torque the caliper bolts to 151 ft lbs. I got this from another thread on here, believe it was posted by Ryan so I could only see quotes of it:
    upload_2024-9-28_16-19-7.png

    Put the wheel back on and do the other side!

    upload_2024-9-28_16-28-13.jpg
    (this was after bedding in / 20 minute cool down drive)

    Hopefully this saves someone from having to search too hard for this info. This took me about 1hr to do the second side, about an 1.75 to the first side. Realistically, you should be able to do it in 2 hours or less.

    Lastly, after bedding in the new pads, I’m impressed with this combo’s braking power and will give an update in about 1k miles and then 50k miles.
     
  2. Sep 28, 2024 at 4:52 PM
    #2
    22whatwedo

    22whatwedo New Member

    Joined:
    Aug 6, 2022
    Member:
    #81594
    Messages:
    712
    Gender:
    Male
    The Open Road
    Vehicle:
    22 SR5 TRD OR Army Green
    Interesting note on the backing the calipers out. Good thinking!
     
    chrisgibbs707[OP] likes this.
  3. Sep 28, 2024 at 5:06 PM
    #3
    raylo

    raylo not so new member

    Joined:
    Oct 1, 2021
    Member:
    #68780
    Messages:
    2,112
    Gender:
    Male
    Frederick, MD
    Vehicle:
    2023 SR5 DC 6.5 bed Lunar Rock, TRD OR +Options
    DashCam, amp & sub, DIY rear seat delete, cat shield
    Using a 9V battery to spread the caliper has been done here before... but someone reported that the truck threw some sort of brake error afterwards. I don't remember how that resolved.
     
    chrisgibbs707[OP] likes this.
  4. Sep 28, 2024 at 10:37 PM
    #4
    chrisgibbs707

    chrisgibbs707 [OP] New Member

    Joined:
    Mar 30, 2024
    Member:
    #114572
    Messages:
    17
    Gender:
    Male
    First Name:
    Chris
    Vehicle:
    2022 Tundra SR5 4x4
    For sure wasn’t anything new - I got that from a few different threads on here. I was expecting an error code, so I was surprised when I didn’t get one. Maybe it’s dumb luck, but maybe it helped that I pumped the brakes a few times before starting the truck to get the pistons to sit in their “home”. My guess is that the error pops up if the truck turns on and the piston doesn’t “feel” any pressure. I turned off the auto e brake before starting the process and didn’t turn it back on until after I had turned it off once during my cooldown after bedding in the brakes.
     
    raylo[QUOTED] likes this.
  5. Sep 29, 2024 at 10:51 PM
    #5
    MrKABC

    MrKABC Not so new Member

    Joined:
    Sep 24, 2022
    Member:
    #83880
    Messages:
    398
    Gender:
    Male
    First Name:
    Art
    Corona, CA
    Vehicle:
    2023 Mesquite 1794 TRD OR Hybrid
    I'm too broke after buying this rig to afford mods.
    This is great info @chrisgibbs707 !!!! Subbed for future reference. Thanks for the great guide! Looking forward to heading how the parts work out for you.
     
  6. Sep 29, 2024 at 11:10 PM
    #6
    eddiefromcali

    eddiefromcali New Member

    Joined:
    Mar 14, 2022
    Member:
    #75818
    Messages:
    2,071
    Gender:
    Male
    First Name:
    Eddie
    Vehicle:
    2022 Tundra Platinum
    100% Stock
    Did this swap back in April...still stops nice and smooth...minimal dust and nice and quiet. You'll love it.
     
    chrisgibbs707[OP] and MrKABC like this.
  7. Sep 30, 2024 at 4:51 AM
    #7
    thomez

    thomez New Member

    Joined:
    Jun 30, 2024
    Member:
    #119191
    Messages:
    128
    NE Ohio
    Vehicle:
    Silver ‘24 Tundra Platinum
    Nice :thumbsup:

    I also did some brake work this weekend, but on my grandma’s Sienna. Only maybe 6-8 weeks ago we had the rear brakes apart and replaced rear pads and a rotor that was worked over. It only took a few weeks until that warped rotor feel was back in the pedal! So we pulled it apart and had all four rotors turned on Saturday and wouldn’t you know it, the brand new (AutoZone) rotor was the problem? The rotor-turner said that happens all the time …. so just beware. It was a lesson for us. If you want to avoid pulling everything apart again, you might check the new rotors before assembly or just have them turned preemptively.

    Thanks again for the write up.
     
    chrisgibbs707[OP] likes this.
  8. Sep 30, 2024 at 6:27 AM
    #8
    BlackNBlu

    BlackNBlu Justa Member

    Joined:
    Dec 27, 2023
    Member:
    #109152
    Messages:
    156
    Gender:
    Male
    First Name:
    Rich
    MN
    Vehicle:
    24 Limited CM 5.5 Blueprint TRD OR
    BAK Revolver X4S, APS I-Boards, RC bed mat, AirLift
    Also subbed for future reference.
    Great post! :cheers:
     
    chrisgibbs707[OP] likes this.

Products Discussed in

To Top