

-
Welcome to Tundras.com!
You are currently viewing as a guest! To get full-access, you need to register for a FREE account.
As a registered member, you’ll be able to:- Participate in all Tundra discussion topics
- Transfer over your build thread from a different forum to this one
- Communicate privately with other Tundra owners from around the world
- Post your own photos in our Members Gallery
- Access all special features of the site
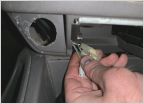 Adding USB outlet to cig lighter, wire identification help
 Remote start on first gen?
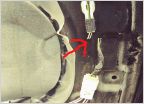 What is an inexpesive way to connect these cut wires?
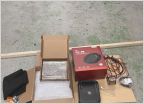 Subwoofer in an Access Cab... The Right Way
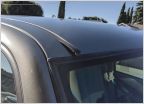 Roof moulding replacement
 Rack and Pinion
1st Gen. Lunch Table - General Discussion
Discussion in '1st Gen Tundras (2000-2006)' started by NUDRAT, Jan 18, 2020.
Page 559 of 2743
Page 559 of 2743
Products Discussed in


