1. Welcome to Tundras.com!

    You are currently viewing as a guest! To get full-access, you need to register for a FREE account.

    As a registered member, you’ll be able to:
    • Participate in all Tundra discussion topics
    • Transfer over your build thread from a different forum to this one
    • Communicate privately with other Tundra owners from around the world
    • Post your own photos in our Members Gallery
    • Access all special features of the site

06 DC Daily Driver / 2wd to 4wd Conversion

Discussion in '1st Gen Builds (2000-2006)' started by MrDirtjumper, Jun 26, 2019.

  1. Jun 26, 2019 at 12:32 PM
    #1
    MrDirtjumper

    MrDirtjumper [OP] Ol’ dickhead

    Joined:
    Jun 19, 2019
    Member:
    #32133
    Messages:
    1,053
    Gender:
    Male
    First Name:
    Josh
    Slam Angelo, Texas
    Vehicle:
    06 DC TRD, 2wd to 4wd Conv.
    Thought it was time I start a build thread just to keep up with everything. Currently there isn't too much to note but I have done a few mods that are pretty unique and figured some might be interested.

    06 DC TRD 2wd. Bought in 2012 the day after the original owner traded it in with 9X,XXX original miles. Unreal how amazingly well maintained it was with all service records. A beautiful, rust free, non-abused, West-Texas truck.


    I had a solid decade in the 12 volt industry before I decided to change my career path. I guess this explains why most of my current mods are on the electrical side of things. We'll see how much I end up spending on mods trying to keep me interested. My biggest regret is that the truck isnt 4wd but I've done tons of research and that may change in a few years.

    Wheels and tires:
    - 285/70r17 Cooper ATP (trash)
    - 285/70r17 E Falken Wildpeaks AT3w installed at 183k
    - Stock 17x7.5's and like 9000 fkn center caps
    - Spidertrax 1.25" spacers all around

    Suspension:
    - 2" unknown spacer up front when I bought it (GONE!)
    - Bilstein 5100s front and rear. Front set to 3rd notch. (179k)
    - Replaced upper and lower ball joints with OEM. (179k)
    - Replaced lower control arms. (179k)
    - Replaced inner and outer tie rod ends. (179k)
    - Hellwig 991 helper springs on rear.
    - Steering rack & sway bar bushings replaced with Energy Suspension

    Performance:
    - Charcoal filter removed from air box.
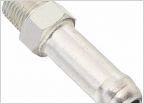
    - Extended rear diff breather
    - DuraGo/Amazon front rotors

    Exterior/lighting:
    - New CAPA TYC headlight lenses
    - Fog light mod
    - Dome light jumper mod
    - Colight mini H4 projectors. Best upgrade I’ve ever made.
    - Full LED interior bulbs
    - El Cheapo Amazon replacement tailgate handle
    - Line-X w/ Toyota logo (original owner)
    - Some terrible steps that I cant bring myself to remove (gone!)
    - Hideous bug guard that has scratched the hood so bad that I cant remove it (GONE!)
    - Plasti Dipped chrome grille strips and mirror caps.

    Interior/tunes:
    - Weathertech front/rear
    - Factory steering wheel audio controls added
    - Pioneer MVH-300EX
    - Polk Dx 6.5's F/R
    - Skar Audio IX-8 dual 2ohm
    - Parts-express.com 100w @ 1ohm Kicker factory replacement amp. $20 score

    Security/Convenience:
    - Viper 5901 Remote Start/keyless/security
    - Rear window roll down from key fob
    - DEI 2102t Proximity unlock add-on
    - Easyguard ES002-P2 Push-To-Start
    - Prius keyfob

    Other Modifications:
    - OEM 4wd conversion. :D


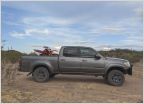
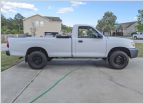
    And as she sits now:
     
    Last edited: Dec 30, 2021
  2. Jun 26, 2019 at 12:33 PM
    #2
    MrDirtjumper

    MrDirtjumper [OP] Ol’ dickhead

    Joined:
    Jun 19, 2019
    Member:
    #32133
    Messages:
    1,053
    Gender:
    Male
    First Name:
    Josh
    Slam Angelo, Texas
    Vehicle:
    06 DC TRD, 2wd to 4wd Conv.
    Reserved for Wheel/Tire upgrades:

    Currently running 285/70/R17 Cooper ATP. I had some solid rub at full lock on the frame and UCA when they were first installed. Just kinda sucked it up and lived with it because I was terrified of spacers. Made the mistake and went with some Amazon cheapos originally and ended up sending them back because of vibrations that I was unable to accept. Got 2 sets of Spidertrax and have never looked back.


    Coopers were removed 03/18/21 at 183k. Discount tire could never keep them balanced. I ended up having them warranty somewhere around 6-7 tires due to out of round/balance issues. Finally I had enough and paid the difference to have Wildpeak AT3w put on.

    Wildpeaks have eliminated all vibrations and road noise. So far I am extremely impressed with these and wish I would have done them originally.
     
    Last edited: Mar 19, 2021
  3. Jun 26, 2019 at 12:33 PM
    #3
    MrDirtjumper

    MrDirtjumper [OP] Ol’ dickhead

    Joined:
    Jun 19, 2019
    Member:
    #32133
    Messages:
    1,053
    Gender:
    Male
    First Name:
    Josh
    Slam Angelo, Texas
    Vehicle:
    06 DC TRD, 2wd to 4wd Conv.
    07/06/19

    Did the Hellwig 991 add a leaf over the weekend. I chose the Hellwig over the Wheelers due to them being adjustable. I took before pictures of the height and with the springs at their tightest, I get almost dead on 1” lift. Personally I ended up backing them off a bit in order to have the truck sit level. I didn’t really notice any difference in ride quality but I did notice that the whole rear of the truck feels stiffer.

    I think I’m going to end up hacking about an inch off of the threads on the front “shackle” just because of how ridiculous it looks.


    Replaced the factory rear shocks with KYB Gas-A-Just. They were stupid cheap and this truck doesnt really see much wheeling at the moment. Did rear shoes as well.


    KYB were trash. I replaced them with 5100s after a year. One blew and leaked all over the driveway. 06/26/21
     
    Last edited: Dec 19, 2023
    MS22 and SprinterAE86 like this.
  4. Jun 26, 2019 at 12:33 PM
    #4
    MrDirtjumper

    MrDirtjumper [OP] Ol’ dickhead

    Joined:
    Jun 19, 2019
    Member:
    #32133
    Messages:
    1,053
    Gender:
    Male
    First Name:
    Josh
    Slam Angelo, Texas
    Vehicle:
    06 DC TRD, 2wd to 4wd Conv.
    Last edited: Oct 13, 2020
  5. Jun 26, 2019 at 12:34 PM
    #5
    MrDirtjumper

    MrDirtjumper [OP] Ol’ dickhead

    Joined:
    Jun 19, 2019
    Member:
    #32133
    Messages:
    1,053
    Gender:
    Male
    First Name:
    Josh
    Slam Angelo, Texas
    Vehicle:
    06 DC TRD, 2wd to 4wd Conv.
    Reserved for exterior upgrades

    Bought a silver camper shell for $120 in Nov ‘20. Let’s paint it white!

    On the truck:


    Here you can see how bad the clear was peeling:


    Sanded and rock chips/cracks filled. Used rustoleum rattle can primer as a guide coat to help me fill in all the lows and chips. Ended up sanding every bit of it off during blocking and then using thinner to remove any that was remaining after I learned that 2Ks will cause issues with enamel based junk:


    Throwing up drop cloth to protect the brewery/neons/tv/bike ramp:


    3rd coat of Speedokote primer ready for blocking:


    I think this was the 5th and final base coat of color matched Toyota 056 Natural White:


    First clear coat:


    While on my 3rd coat of clear, I needed to hit my edges so I turned my spray pattern horizontal. At this point I’m down to like an oz of clear left so I do my walk around to find final touch ups, I pluck out a hair, and grab my gun to do a quick light coat over the hair spot... forgetting that my spray pattern is still horizontal, resulting in this nasty, nasty run:


    Here is the fixed run. Went from 600 grit, 1000, 1500, 2000, 3000 then finished it with compound. You’d have to know where it is to find it:


    Color matched pretty decent. Guess I need to do paint correction now:


    I have a little orange peel in various locations but overall I’m beyond happy with the results. There are a few Roomba hairs in it here and there but I have far more satisfaction knowing that I did this and that I developed a new skill that honestly terrified me:


    Roomba tax:


    Keep in mind that the only thing I knew about paint before this was that you need to wax it every now and then or the bird shit will leave a spot if you don’t clean it fast enough.

    @FirstGenVol is probably having a nightmare right now but at least I can use his thread to fix the rest of my truck since the camper shell looks waaaaayy better than the rest of my paint.


    I feel like I should state that I did this entire paint job with a $15 Harbor Freight pink gravity feed paint gun. Primer was done using the green siphon feed $30 gun. I have zero paint and body experience. The entire camper paint job was done in a garage with a harbor freight box fan providing negative pressure.


    08/06/19
    Replaced the headlights after I had a rock fly off a passing 18 wheeler,

     
    Last edited: Jan 16, 2021
    MS22, Sunnier, FirstGenVol and 2 others like this.
  6. Jun 26, 2019 at 12:35 PM
    #6
    MrDirtjumper

    MrDirtjumper [OP] Ol’ dickhead

    Joined:
    Jun 19, 2019
    Member:
    #32133
    Messages:
    1,053
    Gender:
    Male
    First Name:
    Josh
    Slam Angelo, Texas
    Vehicle:
    06 DC TRD, 2wd to 4wd Conv.
    Reserved for interior/tunes/keyless/convenience stuff.

    If you have any questions on how to do any of this stuff feel free to ask me. If there is enough interest in something I may look into doing a how-to later on.

    Audio:

    So the breakdown on the audio is that I scored this factory replacement amp several years ago on parts-xpress.com for $20. I believe its a direct replacement for the factory sub on a 06ish Charger/300. It has 7 wires in the plug in harness: (+) 12v, (-), 12v switched, and low level inputs. Cut the harness off, splice on some RCA cables and you have an amp thats smaller than your average book that will do 100w rms, roughly 200w max @ 1 ohm. A steal if you can find a sub that will fit in our trucks that is 1 ohm stable... Enter the Amazon special Skar. 2ohm DVC means I can parallel it to 1 ohm and its $40.

    Kicker Factory Amp:


    I pulled my carpet out of the underseat storage, Dynamatted the storage cubby sealed, build a lid that will recess the sub and boom... Solid thump for under $100. It wont win any competitions but its discrete, reliable, cheap and sounds light-years better than any of the "factory fit - powered sub" options that I installed for far too many people over the years. Oh and did I mention that the amp only needs 14a max so it can wire into the ignition harness (properly fused) and can hide behind the A/C controls?

    Skar Sub before the lid was carpeted:


    Head unit wise I have been an audio snob my entire life and set every vehicle I've had up with stupid complex EQ's and never listened to any media that wasn't loss-less blah blah blah...

    This time, I just wanted a simple head unit that would give me control of the sub, retain my steering wheel controls, and would resume playing my Spotify when I started the truck without taking my fkn phone out of my pocket. My jeans are getting tighter by the day and I hate having to do the "cant quite reach into my pocket while sitting shuffle". If you can deal with only digital music and no CD's then this Pioneer MVH-300Ex is under $200 and is an absolute steal.

    Pioneer:


    As for the steering wheel controls, I found the buttons on Ebay for $30ish, and installed them to work with the factory radio long before I changed out my head-unit. 2 bolts to remove the airbag, they plug into the wheel side of the clock spring and you need to run 3 wires from the column side of the clock spring to the factory radio. Mount them to the wheel with I think a few 10mm bolts, carefully trim some excess plastic off of the airbag cover, and its like they were meant to be there. Sorry if this is super vague, this was the very first thing I did when I got the truck back in 2012. I can dig around and see if I have any pictures as to what pins you need to connect to on the factory radio if this has any interest.

    Factory SWC w/cut airbag cover:


    Push-to-start and other convenience stuff:

    Ill explain all of this in more detail if requested but for a quick explanation, I originally installed a Viper 5901 system. For $20 the DEI add on module plugs into the D2D port of this system and you run an antenna into each of your B-pillars. These antenna detect the fob and disarm the system whenever you get within range and arm whenever it is out of range. Sticking with the whole "I dont like a lot of shit in my pockets" theme, I leaned towards only carrying the small fob and leaving my whole keychain in the center console lid. Super sweet idea... until the fob battery dies. So I tore down the DEI fob and whittled on an empty Prius fob until the entire circuit board fit inside. I had my trusty local locksmith cut the key blank to my truck and now I can never be locked out even if the battery dies. None of the buttons on the Prius fob are functional, but all I need to do is walk near the truck and my doors instantly unlock.

    DEI 2102 fob:


    Modified Prius Keyfob to house DEI remote w/ cut key:


    The push button start was the thing that I was, without a doubt, the most skeptical about doing to my truck. But after a solid year plus of use, I can honestly say that it is the single most awesome thing that I have ever done. If anyone owns another PTS vehicle they know how freaking killer this feature is. Because once again man, fucking pockets. Ill fill in a little more about what all went into this soon.

    Easyguard P-T-S:
     
    Last edited: Jun 26, 2019
    This site contains affiliate links for which the site may be compensated.
    #6
    5N0W808, Konniekay91, NUDRAT and 11 others like this.
  7. Jun 26, 2019 at 12:59 PM
    #7
    FirstGenVol

    FirstGenVol Brake Czar

    Joined:
    Dec 13, 2018
    Member:
    #22934
    Messages:
    12,911
    East TN
    Vehicle:
    2002 AC
    Very cool. I like the push button start.
     
    Konniekay91 and Tundra2 like this.
  8. Jun 26, 2019 at 12:59 PM
    #8
    TylerDurden311

    TylerDurden311 Paper Street

    Joined:
    Jan 5, 2019
    Member:
    #23997
    Messages:
    307
    Gender:
    Male
    Vehicle:
    2018 Tundra CM
    Nice upgrades!
     
  9. Jun 26, 2019 at 1:00 PM
    #9
    TokerJoker

    TokerJoker ΜΟΛΩΝ ΛΑΒΕ

    Joined:
    Sep 12, 2018
    Member:
    #19328
    Messages:
    2,223
    Gender:
    Male
    First Name:
    Travis
    Nowhere, Specific
    Vehicle:
    2014 Black SR5 4.6 Dbl Cab
    None.....yet
    Howdy from DFW and nice truck :thumbsup:
     
  10. Jun 26, 2019 at 1:03 PM
    #10
    MrDirtjumper

    MrDirtjumper [OP] Ol’ dickhead

    Joined:
    Jun 19, 2019
    Member:
    #32133
    Messages:
    1,053
    Gender:
    Male
    First Name:
    Josh
    Slam Angelo, Texas
    Vehicle:
    06 DC TRD, 2wd to 4wd Conv.
    Thanks, I bought the wife something new a while back that had the Prox key and once I got used to only having one key fob and never having to fight through pockets, I knew I had to figure out a way to do it on my own truck.

    It would be much, much easier to do it from scratch with an all in one system but since I already had the Viper RSKE, I had to get a little inventive.
     
  11. Jun 26, 2019 at 2:42 PM
    #11
    because_wumbo-truck

    because_wumbo-truck TTC#036 & 1st Degenerate

    Joined:
    Aug 19, 2018
    Member:
    #18314
    Messages:
    3,110
    First Name:
    Jon
    Houston, Texas
    Vehicle:
    2006 AC Tundra Limited 4x4 v8
    flowmaster 40, DDI injectors, sliders, bumper
    Great start and sweet upgrades
     
  12. Aug 22, 2019 at 1:11 PM
    #12
    MrDirtjumper

    MrDirtjumper [OP] Ol’ dickhead

    Joined:
    Jun 19, 2019
    Member:
    #32133
    Messages:
    1,053
    Gender:
    Male
    First Name:
    Josh
    Slam Angelo, Texas
    Vehicle:
    06 DC TRD, 2wd to 4wd Conv.
    Been a while since Ive updated this. Here is a before and after of the Spidertrax 1.25"

     
    MS22 and mcharfauros like this.
  13. Sep 7, 2019 at 1:06 AM
    #13
    MrDirtjumper

    MrDirtjumper [OP] Ol’ dickhead

    Joined:
    Jun 19, 2019
    Member:
    #32133
    Messages:
    1,053
    Gender:
    Male
    First Name:
    Josh
    Slam Angelo, Texas
    Vehicle:
    06 DC TRD, 2wd to 4wd Conv.
    Found an old pic from almost when I bought her. Co-pilot is a little bigger now.


    Dog, not the wife. Here he is illegally crossing the Rio Grande.


    Somewhere around Lajitas

     
    Last edited: Sep 7, 2019
    5N0W808, NUDRAT and mcharfauros like this.
  14. Sep 7, 2019 at 1:07 AM
    #14
    MrDirtjumper

    MrDirtjumper [OP] Ol’ dickhead

    Joined:
    Jun 19, 2019
    Member:
    #32133
    Messages:
    1,053
    Gender:
    Male
    First Name:
    Josh
    Slam Angelo, Texas
    Vehicle:
    06 DC TRD, 2wd to 4wd Conv.
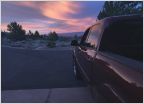
    Thought she looked pretty the other day.

     
    Konniekay91 likes this.
  15. Sep 7, 2019 at 1:30 AM
    #15
    MrDirtjumper

    MrDirtjumper [OP] Ol’ dickhead

    Joined:
    Jun 19, 2019
    Member:
    #32133
    Messages:
    1,053
    Gender:
    Male
    First Name:
    Josh
    Slam Angelo, Texas
    Vehicle:
    06 DC TRD, 2wd to 4wd Conv.
    If you aint ever spent a weekend down in old Mexico, you boys aint lived.


    Last edited: Sep 7, 2019
  16. Feb 10, 2020 at 9:46 AM
    #16
    MrDirtjumper

    MrDirtjumper [OP] Ol’ dickhead

    Joined:
    Jun 19, 2019
    Member:
    #32133
    Messages:
    1,053
    Gender:
    Male
    First Name:
    Josh
    Slam Angelo, Texas
    Vehicle:
    06 DC TRD, 2wd to 4wd Conv.
    Focusing on interior lighting, I have decided to rid the truck of all the green lighting and replace all of the old incandescent bulbs with LED's.

    For the gauges, I took a little inspiration from @Casper421 and his post in the "What have you done to your 1st gen today" thread. Located here: https://www.tundras.com/threads/wha...t-gen-tundra-today.2558/page-158#post-1058046

    Of course I didnt take any pictures while I was doing this but check out the post above and a few pages following it, several users documented it pretty well.

    My first recommendation before attempting this is to become extremely familiar with where your gauges sit at idle. Im talking voltage, oil pressure, temp, tach, all of it. You're going to have to remove the gauge needles themselves and its very important to know where to put them back. I started my truck, let it warm up and took pictures from multiple angles showing where the needles sat.

    Disassembly:
    1) Take off the gauge trim that surrounds the gauges. There are (2) Phillips screws that aim towards the roof. Then apply your parking brake, shift the truck to low gear, tilt the steering wheel down and remove this panel. The right side of the knee bolster that surrounds your key overlaps this panel so be sure to pull back on that before yanking away.

    2) (4) Phillips screws hold the actual gauge assembly in place. (2) up top and (2) in the bottom. remove those and pull the gauges towards you. At this point I usually turn my truck off and shift back to park because I don't ever like unplugging anything with the ignition on. You can then reach behind the gauge assembly and unplug the driver side first, then the longer plug closer to the radio.

    3) Now that the whole assembly is out, you'll need to remove the clear cover which is fastened down with little angled pressure clips. Simply push each one down and pull the clear cover away. Be extremely careful and try to do this uniformly as this appears to be acrylic and is likely to crack very easily. Once this is off there is another trim piece that sort of "frames" each gauge that is held on with the same style clips. Do this around the whole assembly and once that is removed now you should be down to the flimsy gauge face that needs to be sanded.

    4) This gauge face is held on by tiny little alignment tabs around the perimeter as well as the needles themselves. I thought it would be glued down but it is not. This is the thing that says "This area no visible" and "1 mile = 20xx rev". At this point I recommend angering your significant other and using a dinner fork to pry the needles off of their posts. If you're like me and get tired of reading, and feel like you can figure the rest out from here, STOP AND READ THIS. I recommend leaving the needles off until you can take the assembly back out to the truck and install them with it running. Also DO NOT push the needles back on without first inserting the fork behind them. This keeps them from rubbing on the gauge faces and also allows you to remove them easily when you don't get them lined up correctly the first time. Trust me, you wont.

    5) Remove the gauge faces and wet sand the green/white print off the backs of the ones you no longer want to be green. I used 600 grit since it was all that I had but I believe Casper used 400. Maybe it was a little tougher but it worked and I'm happy with it. I tried to get into every corner and get rid of all of the green that I could, but once I started removing some of the black, I stopped. Some slight hits of green may be left behind but I couldn't notice it once finished. Once you do it, you'll understand what I'm talking about.

    6) Clean the gauge faces up with plenty of water and let them dry thoroughly. Its much easier to make sure they are clean now than to do this over again because of that one little spot that bothers you til the day you die.

    7) Reassemble the whole gauge assembly except for the needles and the clear piece.

    8) Take it to your truck, plug it in, crank it up and re-insert your needles back on their posts. Remember to, quite literally, stick a fork behind them so that they don't rub and also for easy removal. Now repeat this step over and over again because when you push the needles down, they somehow rotate on the shafts and you know your truck isn't idling at 200 rpm.

    9) After that, pop the clear cover back on, reassemble the truck and bask in the wonder that is beautiful, white light.
     
    Last edited: Feb 10, 2020
  17. Feb 10, 2020 at 9:19 PM
    #17
    empty_lord

    empty_lord They see me rollin'

    Joined:
    Feb 1, 2019
    Member:
    #25441
    Messages:
    10,024
    Gender:
    Male
    First Name:
    Dan
    Indiana, Chicagoland
    Vehicle:
    05 rollover special
    custom body work, Billies with taco ARB springs, Icon AAL, TRD FJ trail team wheels, 2019 Toyota 86 radio, Blacked out interior, Added factory power everything, heater mirrors, ETC
    Have you replaced the bulbs in the switchs yet? im trying to find the neowedge size for the heated mirror switch and what not.
     
  18. Feb 11, 2020 at 3:50 AM
    #18
    SprinterAE86

    SprinterAE86 New Member

    Joined:
    May 19, 2018
    Member:
    #15447
    Messages:
    1,065
    Gender:
    Male
    First Name:
    Ian
    Charlottetown, PE, Canada
    Vehicle:
    2012 Toyota Sequoia Platinum
    Bilstein 5100 2.3/1.5, TRD sway bars ft/rr, Cooper Tires Discoverer AT3 XLT 295.70.18, Vision Manx 2 18x9 +12, APS side armor steps, TRD-Pro Grill and Bulge, de-chromed, blackout emblems, OEM mirror caps and flares, TRD shift knob, Leather wrapped steering wheel, All weather mats
    I am having '05/06 envy right now.
     
    Konniekay91 and MrDirtjumper[OP] like this.
  19. Mar 30, 2020 at 2:59 PM
    #19
    MrDirtjumper

    MrDirtjumper [OP] Ol’ dickhead

    Joined:
    Jun 19, 2019
    Member:
    #32133
    Messages:
    1,053
    Gender:
    Male
    First Name:
    Josh
    Slam Angelo, Texas
    Vehicle:
    06 DC TRD, 2wd to 4wd Conv.
    Nakita Back Up Camera Install

    I recently added this camera to my existing setup. I have seen other users do it and it was $40 on Amazon so I figured, eh, why the hell not?

    Before we go too in depth on this, the question has to be posed: Do you want to view picture from this camera at any time, regardless of whether the truck is in reverse or not? In my case, yes, I wanted this option. So that is how I wired mine up. Remember, your head-unit must have a function built in to be able to do this or wiring it this way does no good.

    The other option is: Do you only want this camera to be powered on only when in reverse? If so, Nakita has made this install even easier for you. I will try to point out how to do this along the way. Some cameras have been known to have a "power up lag" when powering them off of the reverse lights. I checked mine and the good news is that it did not have this lag. Good on Nakita and good for those that only want reverse functionality.

    • First step - Mounting.
    I have seen users mount this thing dead center of the tailgate handle and have issues shimming it to be able to see more than a few feet behind them. I wanted to be able to see a good clear distance behind me so I mounted mine lower in the curve on the handle. I used 5 small washers that I had lying around to fill the gap.


    If I install my trailer hitch, the picture gets about 1/4 of the ball in view. That’s more than enough to nail a hitch up.


    Second step - Tailgate Routing.
    Getting the wire through the tailgate should be relatively easy with a coat hanger and a piece of string. I simply threaded the hanger through to the drain hole closest to the center of the tailgate and pulled a piece of string through the tailgate. I then used this string to fish the male end of the camera wire through. Next, I ran this through the hole that is used to lower the spare tire and took a break to complete the next step: Wiring


    • Third step - Wiring.
    Wiring the camera to only power up during reverse: Nakita provides a video wire that should run from camera up to the head unit. The end with the Female camera end has a black and red pigtail coming off of it. These are Ground and Power respectively. Use whatever method you find acceptable (strip, poke, solder) to splice these into the reverse light and reassemble. I don't remember the wire colors but there are only 2 going to the reverse bulb and you should be testing them with a multi-meter anyways. If not, wing it, you've got a 50/50 chance at giving Amazon another $40. Hint: Don't do that.

    Wiring the camera to turn on with the key: My truck was equipped with the factory installed 7 pin trailer harness.


    Even if this was not an option on your truck, it appears that the wiring would still be in place. Therefore you should still be able to make these connections at the rear, you just will need to splice into the factory side of the harness underneath the truck. Since the 7 pin trailer harness is removable I was able to make these connections on my work table.


    On the trailer harness side, White in the 4 pin plug is ground and Black in the 3 pin plug is switched 12v. Vehicle side, White w/Blk in the 3 pin is ground and Blue in the 4 pin is switched 12v. Test these wires with a multi-meter to confirm.


    Make these connections as you please. Since these connections are exposed to the elements I recommend to strip, poke, wrap and solder. Strip approx 1/4" of jacket off of the wire. Poke a hole through the individual wire conductors. Wrap the new wire though this hole in a knot fashion. Solder the crap out of it. I usually finish it of with 3m Super33+ tape and a zip tie to prevent unraveling.

    • Fourth Step - Frame Routing.
    Run the wire along the frame with the other harnesses up to the grommet in the driver floorboard and zip-tie it frequently. I'm not gonna hold your hand on this one, zip-tie it to things that don't move, spin, or articulate. Leave some slack for anything that may flex. You can find this grommet by removing the driver door sill and kick panel, pull back the carpet and it should be staring you in the face. Its directly above the frame so its not easily visible from below but you cant miss it up top. Cut a cross in this and feed the wire through. Use some of your left over Noico to seal this up well so that moisture doesn't work its way in.

    • Fifth Step - Wiring to Head Unit.
    If you chose to wire to reverse lights, you're in luck Nakita has provided a nifty little wire next to your Yellow RCA end that connects directly to the red wire in the rear that you tied into the reverse light.


    Simply tie this into the reverse trigger input on your head unit. Put everything back together and enjoy your back up cam.

    If you chose to wire the camera to accessory power, crack another beer because you've got a few more steps to go.

    Most importantly, as pictured above, CAP OFF THE RED WIRE beside the video RCA. This wire is directly tied to your trailer accessory power now and turns on with the key. You don't want this floating around and blowing your trailer power fuse.

    Then remove your glove box and the airbag shroud behind that. 2 Phillips screws at the bottom of the glove box, and I believe 3 Phillips screws hold the shroud in place.


    Find the blue connector as pictured. The 4th pin from the bottom on the passenger side is a reverse trigger wire. This wire should be Green w/Red. Test this wire with a multi-meter to confirm.


    Splice (strip, poke, solder) into this wire and connect it to your head units reverse trigger input. Put everything back together and enjoy your backup cam.

    All in all, on a 1-6 scale, I rate it about 2 IPA's in difficulty.
     
    Last edited: Mar 30, 2020
  20. Mar 31, 2020 at 6:03 PM
    #20
    oscardog86

    oscardog86 New Member

    Joined:
    Mar 25, 2019
    Member:
    #28131
    Messages:
    663
    Gender:
    Male
    Southern California
    Vehicle:
    2001 Toyota Tundra 4x4
    Really appreciate this write up! Just got my camera in the mail today and want to start this project soon. Waiting on a double din from Amazon and then ill try to give this a shot. Thanks again! If I have any questions ill send them your way, haha
     
    Konniekay91 and mcharfauros like this.
  21. Apr 3, 2020 at 6:51 AM
    #21
    KNABORES

    KNABORES Sarcasm incoming

    Joined:
    Jan 1, 2020
    Member:
    #40572
    Messages:
    8,916
    Gender:
    Male
    Arkansas
    Vehicle:
    2000 Limited TRD AC 4X4 Thunder Grey 270k miles. 2019 Limited TRD CM 4x4 Cement Grey 75k miles
    2000: Bilstein 5100's 16x8 589's with 265/75/16 and 1.25" spacers Flowmaster 50 series over the axle dump Pioneer touchscreen with backup camera Full interior and dash LED conversion Trailer brake controller with 7 pin Bedliner coat bumpers & trim ARE topper 2019: ARE topper with full Bedrug kit and Vortex rack TRD shifter 1.25" wheel spacers (I like to live dangerously) Red tow hooks for that +15 grip bonus
    Looking good! I wired my reverse trigger into the backup lamps at the harness at the back of the truck. I also put a piece of rubber hose around the wire from the camera as it exits the tailgate drain hole and goes under the bed of the truck. Hopefully that will protect it from damage. The hose extends up into the tailgate a few inches and the other end is zip-tied under the truck to hold it in place. I think its some large vacuum hose or fuel line. Can't remember. I also put an RCA splitter on the signal line coming from the backup camera and hooked both ends of the splitter up to the radio. I had an input for reverse camera and an input for an AUX camera. The AUX camera input can be turned on anytime from the radio menu. Handy just to check on trailer connections if you hear weird noises while driving. Can also see the tie downs in the front of the trailer.
     
    Pearl-snap, MS22 and mcharfauros like this.
  22. Apr 23, 2020 at 10:33 PM
    #22
    thefish712

    thefish712 New Member

    Joined:
    Feb 2, 2020
    Member:
    #42098
    Messages:
    166
    Gender:
    Male
    First Name:
    Fish
    Thanks for sending me to this post. I've seen others put the camera hanging from under the top of the handle. If I do it the way you've done it (seems much easier drilling), does the camera simply orient to the right side up on the screen?

    Also, your third step for wiring - you mentioned using a multi-meter. I do not have one of those. I was under the impression that very simple tools could get the job done. How much time should this be taking on average?

    Were there any specific videos you watched? Between taking apart the factory harness and soldering, it sounds like there is plenty enough electrical work involved to confuse a beginner like me haha and that's just up to step 3!

    Which wire loop did you keep and which one did you cut?
     
    Last edited: Apr 23, 2020
  23. Apr 24, 2020 at 8:11 AM
    #23
    MrDirtjumper

    MrDirtjumper [OP] Ol’ dickhead

    Joined:
    Jun 19, 2019
    Member:
    #32133
    Messages:
    1,053
    Gender:
    Male
    First Name:
    Josh
    Slam Angelo, Texas
    Vehicle:
    06 DC TRD, 2wd to 4wd Conv.
    Yes the camera is off center in the handle but it can be rotated ever-so-slightly to make it not project that onto the screen. I did it this way because A) my OEM handle broke and this is a cheapo $30 Amazon one. B) it doesnt affect you grabbing the handle.

    If you plan on doing any electrical work, especially near the airbag or where the airbag connects, use a multimeter. They're less than $10 for a Harbor Freight cheapo and it is an absolutely indispensable tool. Have I hooked things up before testing it before? Well, yes, of course, but I was a registered professional that had done it many times and basically had wire colors memorized. Is it a good practice? No, absolutely not. Have I seen the exact same year, make, model, trim, and option car have a different wire color in the exact same pin location in the exact same plug? Yes. Point being, measure twice, cut once right?

    DO NOT USE A TEST LIGHT IF YOU SUSPECT THAT YOU MAY PROBE AIR BAG WIRING. I was in the 12v industry for years and many many horror stories are out there about how the resistance created from an incandescent test light is absolutely more than enough to trigger an air bag.

    If you have the trailer wiring harness, this is a breeze. It removes by unplugging it, removing one snap and then (2) 10mm hold it to the trailer hitch.

    Honestly, I cant remember which loop I cut. Its the one in broken Engrish that says to flip camera view. Worst case ontario, you splice it back together if you cut the wrong one.
     
  24. Apr 24, 2020 at 1:24 PM
    #24
    thefish712

    thefish712 New Member

    Joined:
    Feb 2, 2020
    Member:
    #42098
    Messages:
    166
    Gender:
    Male
    First Name:
    Fish
    Okay, so you had the thread on the bottom and the camera on top and the picture it put out oriented correctly? From the Natika product photo on Amazon, it looks like the camera has to be on the bottom of the thread, or else the camera's picture would show upside down on the head unit. Does that make sense?

    $7 multi-meter. Check.
    As for the airbag, what makes me have to start playing around with that?

    Not sure if I have a trailer wiring harness or not. Easy check though.
    Flip Camera view? That's for having the camera on only when in reverse, correct?
    "Broken engrish" ha!

    Thank you for your help! Remember, I am by no means a seasoned veteran here, so please explain to me like I'm a 5 y/o haha
     
  25. Apr 24, 2020 at 1:34 PM
    #25
    empty_lord

    empty_lord They see me rollin'

    Joined:
    Feb 1, 2019
    Member:
    #25441
    Messages:
    10,024
    Gender:
    Male
    First Name:
    Dan
    Indiana, Chicagoland
    Vehicle:
    05 rollover special
    custom body work, Billies with taco ARB springs, Icon AAL, TRD FJ trail team wheels, 2019 Toyota 86 radio, Blacked out interior, Added factory power everything, heater mirrors, ETC
    i may need to buy another tailgate handle just to install the camera like you did.. im starting to get annoyed by the thing being in my line of sight. oh well the handle was cheap.
     
  26. Apr 24, 2020 at 1:35 PM
    #26
    empty_lord

    empty_lord They see me rollin'

    Joined:
    Feb 1, 2019
    Member:
    #25441
    Messages:
    10,024
    Gender:
    Male
    First Name:
    Dan
    Indiana, Chicagoland
    Vehicle:
    05 rollover special
    custom body work, Billies with taco ARB springs, Icon AAL, TRD FJ trail team wheels, 2019 Toyota 86 radio, Blacked out interior, Added factory power everything, heater mirrors, ETC
    any wire loom that yellow just avoid it.. the wires youd test for the reverse signal are nowhere on a harness that would affect the airbag
     
  27. Oct 24, 2020 at 9:18 PM
    #27
    MrDirtjumper

    MrDirtjumper [OP] Ol’ dickhead

    Joined:
    Jun 19, 2019
    Member:
    #32133
    Messages:
    1,053
    Gender:
    Male
    First Name:
    Josh
    Slam Angelo, Texas
    Vehicle:
    06 DC TRD, 2wd to 4wd Conv.
    Over the last two weekends I’ve replaced:
    Upper ball joints OEM
    Lower ball joints OEM
    Inner tie rod ends
    Outer tie rod ends
    Lower control arms
    Steering rack bellows
    And installed 5100s

    This thing drives like a brand new truck and it’s only been aligned with a tape measure. I’m so stoked to finally be rid of that steering wheel shimmy that I could never find. I may have went a little nuclear trying to find it but the results are worth it. I can’t wait until I get a proper alignment.

    Edit: 177,xxx mi

    Double edit: Firestone alignment sucked. Ended up doing a driveway alignment and had mucho better results. Link to WHYDTYFGT thread below.

    https://www.tundras.com/threads/wha...t-gen-tundra-today.2558/page-799#post-2003808
     
    Last edited: Dec 19, 2023
    MS22 and empty_lord like this.
  28. Oct 24, 2020 at 9:20 PM
    #28
    empty_lord

    empty_lord They see me rollin'

    Joined:
    Feb 1, 2019
    Member:
    #25441
    Messages:
    10,024
    Gender:
    Male
    First Name:
    Dan
    Indiana, Chicagoland
    Vehicle:
    05 rollover special
    custom body work, Billies with taco ARB springs, Icon AAL, TRD FJ trail team wheels, 2019 Toyota 86 radio, Blacked out interior, Added factory power everything, heater mirrors, ETC
    but now that you went nuclear, youve got another 170k of comfort!
     
  29. Oct 24, 2020 at 9:24 PM
    #29
    MrDirtjumper

    MrDirtjumper [OP] Ol’ dickhead

    Joined:
    Jun 19, 2019
    Member:
    #32133
    Messages:
    1,053
    Gender:
    Male
    First Name:
    Josh
    Slam Angelo, Texas
    Vehicle:
    06 DC TRD, 2wd to 4wd Conv.
    Now if I could only find a local 4wd parts truck.
     
  30. Oct 24, 2020 at 9:25 PM
    #30
    empty_lord

    empty_lord They see me rollin'

    Joined:
    Feb 1, 2019
    Member:
    #25441
    Messages:
    10,024
    Gender:
    Male
    First Name:
    Dan
    Indiana, Chicagoland
    Vehicle:
    05 rollover special
    custom body work, Billies with taco ARB springs, Icon AAL, TRD FJ trail team wheels, 2019 Toyota 86 radio, Blacked out interior, Added factory power everything, heater mirrors, ETC
    donor sequoia and get your hands on a AWD transfer case... thats the ticket, AWD should be alot easier to get working in a DC since it has a similar electrical system to the sequoia
     
    NUDRAT likes this.
To Top