

-
Welcome to Tundras.com!
You are currently viewing as a guest! To get full-access, you need to register for a FREE account.
As a registered member, you’ll be able to:- Participate in all Tundra discussion topics
- Transfer over your build thread from a different forum to this one
- Communicate privately with other Tundra owners from around the world
- Post your own photos in our Members Gallery
- Access all special features of the site
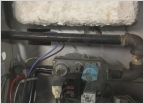 Can any HVAC guys or girls out there identify this?
 Home Security Camera System
 Cordless Impact Wrench
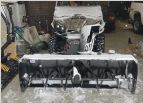 Snow blowers
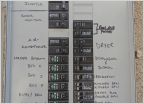 Adding some electrical to the garage for metal work
 Security cameras
What home improvement work did you do today?
Discussion in 'Home Improvement' started by atrinh15, Apr 28, 2018.
Page 479 of 539
Page 479 of 539
Products Discussed in


