

-
Welcome to Tundras.com!
You are currently viewing as a guest! To get full-access, you need to register for a FREE account.
As a registered member, you’ll be able to:- Participate in all Tundra discussion topics
- Transfer over your build thread from a different forum to this one
- Communicate privately with other Tundra owners from around the world
- Post your own photos in our Members Gallery
- Access all special features of the site
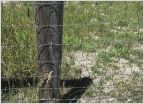 Field fencing
 Anyone have a Nest or other smart thermostat?
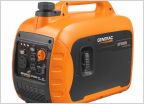 Generators
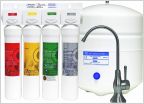 Recommendations for a water filter system
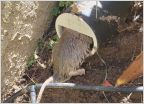 Puppy-proof gopher killer?
 Flowwall?
What home improvement work did you do today?
Discussion in 'Home Improvement' started by atrinh15, Apr 28, 2018.
Page 480 of 533
Page 480 of 533
Products Discussed in


