1. Welcome to Tundras.com!

    You are currently viewing as a guest! To get full-access, you need to register for a FREE account.

    As a registered member, you’ll be able to:
    • Participate in all Tundra discussion topics
    • Transfer over your build thread from a different forum to this one
    • Communicate privately with other Tundra owners from around the world
    • Post your own photos in our Members Gallery
    • Access all special features of the site

RainMan's 2021 Lunar Rock TRD Pro Build

Discussion in '2.5 Gen Builds (2014-2021)' started by RainMan_PNW, Oct 30, 2020.

  1. Jul 11, 2022 at 6:05 PM
    #601
    RainMan_PNW

    RainMan_PNW [OP] SSEM #82 RGBA #4 “That Guy” Vendor

    Joined:
    Oct 27, 2020
    Member:
    #54134
    Messages:
    14,885
    Gender:
    Male
    First Name:
    Casey
    Clark County, WA
    Vehicle:
    2021 Lunar Rock TRD Pro CM
    Check the build link in my signature.
    You would need to switch to painted bumpers. The chrome bumpers use a different sub-frame and the radar from the BSM will not correctly work through the chrome caps.
     
    TaquitoBandito, bulldog93 and reywcms like this.
  2. Jul 11, 2022 at 6:07 PM
    #602
    Bradyboyy88

    Bradyboyy88 New Member

    Joined:
    Apr 15, 2021
    Member:
    #61867
    Messages:
    126
    Gender:
    Male
    First Name:
    Shaun
    Are the parking sensors attached to the chrome bumper or do you think it will be a easy swap and won’t need to touch those?
     
  3. Jul 11, 2022 at 6:12 PM
    #603
    RainMan_PNW

    RainMan_PNW [OP] SSEM #82 RGBA #4 “That Guy” Vendor

    Joined:
    Oct 27, 2020
    Member:
    #54134
    Messages:
    14,885
    Gender:
    Male
    First Name:
    Casey
    Clark County, WA
    Vehicle:
    2021 Lunar Rock TRD Pro CM
    Check the build link in my signature.
    Two are mounted into the chrome end caps, and two into the center plastic part. They clip in, but I think they require a different clip or something for the resin/painted end caps. Changing out the rear chrome end caps to resin takes several additional parts (you'd have to check the Ultimate Parts Thread by Roman to get the exact details). I'm satisfied not having the parking sensors - I've never had them before and use my camera and fish-eye lower mirrors (and front camera) for parking.
     
    TaquitoBandito, bulldog93 and reywcms like this.
  4. Jul 11, 2022 at 6:15 PM
    #604
    Bradyboyy88

    Bradyboyy88 New Member

    Joined:
    Apr 15, 2021
    Member:
    #61867
    Messages:
    126
    Gender:
    Male
    First Name:
    Shaun
    For the same price I can get a US sr5 tundra with the rtca and parking sensors but no sunroof . The Canadian one I’m looking at is also sr5 and has half the miles but has parking sensors, chrome bumper, heated seats and a sunroof . Kind of torn. Didn’t realize that adding the rtca to the Canadian version would be so expensive.
     
  5. Jul 11, 2022 at 6:19 PM
    #605
    RainMan_PNW

    RainMan_PNW [OP] SSEM #82 RGBA #4 “That Guy” Vendor

    Joined:
    Oct 27, 2020
    Member:
    #54134
    Messages:
    14,885
    Gender:
    Male
    First Name:
    Casey
    Clark County, WA
    Vehicle:
    2021 Lunar Rock TRD Pro CM
    Check the build link in my signature.
    Don't know where you live, and how much you love the sunroof...for me - if it wasn't part of the package in the TRD Pro, I wouldn't have bothered with the sun roof. I can't put patches on 1/2 of my headliner because of it and I rarely open it because it's either raining or I'll get a sunburn on my bald head. And if I want to put a roof rack on (which part of me does and part of me doesn't), the sunroof is potentially another headache to deal with. Also not sure on the mileage different - half the miles but is that 10k vs 20k or 120k vs 240k miles.
     
    TaquitoBandito and bulldog93 like this.
  6. Jul 11, 2022 at 6:23 PM
    #606
    Bradyboyy88

    Bradyboyy88 New Member

    Joined:
    Apr 15, 2021
    Member:
    #61867
    Messages:
    126
    Gender:
    Male
    First Name:
    Shaun
    I’m in maryland so it rains here and there but not a ton. I go back and forth on it. I’ve never had one but I read a lot of people here wouldnt live without one but I also don’t know what it’s like either lol. 8k vs 15k.
     
  7. Jul 11, 2022 at 6:29 PM
    #607
    RainMan_PNW

    RainMan_PNW [OP] SSEM #82 RGBA #4 “That Guy” Vendor

    Joined:
    Oct 27, 2020
    Member:
    #54134
    Messages:
    14,885
    Gender:
    Male
    First Name:
    Casey
    Clark County, WA
    Vehicle:
    2021 Lunar Rock TRD Pro CM
    Check the build link in my signature.
    OK - those miles are just getting warmed up and broken in either way.
    Ultimately, your call. Personally, I use BSM/RCTA way more than my moon roof. Or get the Canadian one and swap out the bumper.
     
    TaquitoBandito and bulldog93 like this.
  8. Jul 11, 2022 at 6:48 PM
    #608
    Bradyboyy88

    Bradyboyy88 New Member

    Joined:
    Apr 15, 2021
    Member:
    #61867
    Messages:
    126
    Gender:
    Male
    First Name:
    Shaun
    just a rough estimate what do you think cost of swapping out bumper will be parts wise? Never done anything like this so just curious.
     
  9. Jul 11, 2022 at 7:11 PM
    #609
    RainMan_PNW

    RainMan_PNW [OP] SSEM #82 RGBA #4 “That Guy” Vendor

    Joined:
    Oct 27, 2020
    Member:
    #54134
    Messages:
    14,885
    Gender:
    Male
    First Name:
    Casey
    Clark County, WA
    Vehicle:
    2021 Lunar Rock TRD Pro CM
    Check the build link in my signature.
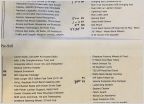
    Ultimate OEM Toyota Parts Thread for 2nd gens (2007-21) | Toyota Tundra Forum (tundras.com)
    Half-way down the first post are the part numbers. I think that Toyota of Cool Springs is shutting down their parts site, but you can take those part numbers to any toyota parts store and order them.
    The part number is the very last set of numbers/letters in each link. For instance, the first item in that list the part number is 521220C903upload_2022-7-11_19-10-25.jpg
     
  10. Jul 11, 2022 at 7:48 PM
    #610
    RainMan_PNW

    RainMan_PNW [OP] SSEM #82 RGBA #4 “That Guy” Vendor

    Joined:
    Oct 27, 2020
    Member:
    #54134
    Messages:
    14,885
    Gender:
    Male
    First Name:
    Casey
    Clark County, WA
    Vehicle:
    2021 Lunar Rock TRD Pro CM
    Check the build link in my signature.
    Father's Day was the day. I had a free afternoon, and I wanted to get the piece of powder-coated steel out of my garage. What piece of powder-coated steel? My CBI Offroad Rear Bumper!
    CBI Offroad Fab - 2nd Gen Toyota Tundra Rear Bumper | 2014-2021 -
    I bought it bare, and had a local place PC it in a smooth black "semi-gloss" (I got a screaming deal on it).

    So, first came the process of tearing down the old bumper. CBI has a video on their website that does a good job of covering the process. My only irk is that they keep calling bolts out by the head size (which is not correct) - but it does at least make it easy to get the right size wrenches. Below, you can see the pitch still on my rear bumper where I backed into the tree last summer...
    upload_2022-7-11_19-30-28.jpg

    Piles of parts starting to accumulate...
    5D841F58-2139-4DAC-8EFC-6B6663BCE4C7.jpg

    A close up of how the BSM monitor sits in the factory bracket. The metal bushings for the bolts on one hole is slotted and another hole is oversized, but when it is on the three studs it does not wiggle/move at all. I do think that the oval and oversized hole would allow for SOME adjustment using washers behind as shims, but the factory bracket and setup had worked perfectly "out of the box" for me.
    362C0753-6AEB-49A0-91B1-83B371D5CBAB.jpg

    A view of the dent in the outer sub-frame of the rear bumper where I hit the tree last summer. I was barely moving, and it creased it pretty good!
    B3E99436-52C3-45D7-9712-B584727B7CED.jpg

    The naked ass-end of a 2021 TRD Pro
    D1CF4D9A-5328-4782-829D-D0D1E2A62A1A.jpg

    Getting things put back together. My only complaint is the mix of SAE and metric fasteners. Everywhere that you bolt to factory threaded holes, they use metric, but then the main bolts of the bumper to their frame mounting brackets are SAE and so are the BSM mounting bolts, so I had to make about four trips down to the basement workshop to get different wrenches.

    88A71FA7-816F-40D4-84F6-A3042C566F02.jpg

    I also had one factory threaded hole that was cross-threaded (from the factory) and required me to chase it with a tap. I got damn lucky that I happened to have that particular metric tap on hand (M8 x something or other).
    07706024-6E50-4EE4-B584-7707754A3273.jpg

    That was as far as I got on Father's Day, other than putting my license plate back on.

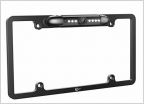
    Next up was getting the license plate light installed. The CBI video instructions simply stated to cut off the factory wires and butt-splice the LED they supply. I don't roll that way, so I wanted to go with factory (or as close as possible). The issue I ran into was that the factory plug that goes to the license plate lights doesn't have an easily found mating connector (it is the bulb socket itself). So, instead, I decided to use the same factory terminals and swap over to a new connector that I could get a mating connector for.

    So, I headed back over to one of my favorite wire connector sites, Corsa Technic, and picked up some more goodies:
    I first de-terminated the female terminals from the factory connectors, and then clipped them back into the new female connectors.
    upload_2022-9-4_21-25-16.jpg

    Then, terminate the wires for the light from CBI and clip them into one of the mating male connectors.

    upload_2022-9-4_21-26-26.jpg

    upload_2022-9-4_21-29-23.jpg

    The other male connector I simply plugged the two back holes with two of the plugs and connected it into the harness where the other factory license plate light is (the CBI only uses one light).

    Next came rough-setting the BSM monitors. The hardware bag was missing bolts for these (the nuts where there, and they were 1/4-20 thread), so I grabbed some spare basic bolts I had at the house. Using the probe end of a dial caliper, I set these to 0.85" at the top flange (toward the rear of the truck) and 0.65" for the lower two (at the outboard sides). I wanted to run a few days without covers just to confirm I wasn't getting any odd readings before clipping the covers on. And I also wanted to get some different hardware instead of the plain bolts.
    upload_2022-9-4_21-32-28.jpg

    Next on the agenda was cleaning up how the wire harness was secured - the factory bumper has little spots all over to clip in little wire-tie mounts, but the CBI has nothing of the sort. Since I wanted to get some stainless hardware for the license plate mount, I opted to also pick up nylock nuts for the license plate and a couple of 1/2"W x 3/4" DIA cushioned electrical cable clamps to hold the harness across the middle of the back of the bumper.
    upload_2022-9-4_21-38-0.jpg

    Finally, I picked up some 1/4-20 flange-head bolts to use for mounting the BSM monitors. I set them back at the same measurements as above and put a dab of red lock-tite on each (though I still plan on coming back and doing a check against factory measurements for these).
    upload_2022-9-4_21-39-23.jpg

    I hadn't had any notable issues with the BSM or RCTA going off when it shouldn't, or NOT going off when it should, so I decided to put the side covers on for now.
    upload_2022-9-4_21-40-24.jpg

    upload_2022-9-4_21-40-38.jpg

    That was the week after Father's Day, and I still haven't gotten around to pulling the covers and checking the BSM against factory angles. I occasionally get an odd light-up of one side when going down my driveway (dense woods) but otherwise have not had any issues with them so far...though I am curious to open things up and check the angles and see how the spring mount setup is faring. I may look at hard-shimming them when I open things up if I need to do much adjustment to match the factory angles.

    Update 10/23/22:
    Swapped out the zinc plated button head screws that came with the CBI bumper (holding down the step plates) for some M8-1.25 x 30mm flanged button head black stainless screws. One of the original zinc ones was corroding badly already, and the flange heads on these seem to finish it out a little better.
    https://www.amazon.com/dp/B09N6PBL2M

    97480D98-1E93-45B2-B41D-308BE1741C85.jpg
    Note that in the original hardware, there are 6 screws this length that bolt down to the factory bumper mounts and 9 that are shorter (M8-1.25 x 16mm) that just go through the step plate, bumper steel, and a nylock nut. Of the 9 shorter ones, 8 of those have plenty of room to just use these longer screws. But there is ONE (middle front of the lower bumper section) that cannot be any longer or it will hit the tow hitch frame. I plan to just cut off the last of the 15 longer screws to that length rather than buy a whole pack of the shorter ones.
     
    Last edited: Oct 23, 2022
  11. Jul 11, 2022 at 8:08 PM
    #611
    Bradyboyy88

    Bradyboyy88 New Member

    Joined:
    Apr 15, 2021
    Member:
    #61867
    Messages:
    126
    Gender:
    Male
    First Name:
    Shaun
    in your write up for the bsm and rtca addition you mentioned all the wiring was there for these sensors for the trd pro. Do you think they would be there as well for the sr5?
     
  12. Jul 11, 2022 at 10:40 PM
    #612
    RainMan_PNW

    RainMan_PNW [OP] SSEM #82 RGBA #4 “That Guy” Vendor

    Joined:
    Oct 27, 2020
    Member:
    #54134
    Messages:
    14,885
    Gender:
    Male
    First Name:
    Casey
    Clark County, WA
    Vehicle:
    2021 Lunar Rock TRD Pro CM
    Check the build link in my signature.
    I’m not 100% certain and would have to dig a little deeper. It seems that when I was researching before, there was only one primary interior instrument/dash wiring harness regardless of truck trim level, and that was the deciding factor that made me try the mod out. Popping the C-pillar trim on the drivers side revealed the plug for the RCTA buzzer, and that was what I used to determine the wiring was there in the cabin. The main harness down the truck did not have the wires (though if it had parking sonar it might), and obviously my bumper harness did not have the wires either.
     
  13. Jul 19, 2022 at 4:15 PM
    #613
    Bradyboyy88

    Bradyboyy88 New Member

    Joined:
    Apr 15, 2021
    Member:
    #61867
    Messages:
    126
    Gender:
    Male
    First Name:
    Shaun
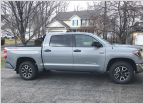
    Decided rtca and bsm were more important and bought my first tundra. Man it feels good.

    609BA6BE-C7FF-4000-A07F-2EE0884CB2F5.jpg
     
  14. Jul 19, 2022 at 4:18 PM
    #614
    RainMan_PNW

    RainMan_PNW [OP] SSEM #82 RGBA #4 “That Guy” Vendor

    Joined:
    Oct 27, 2020
    Member:
    #54134
    Messages:
    14,885
    Gender:
    Male
    First Name:
    Casey
    Clark County, WA
    Vehicle:
    2021 Lunar Rock TRD Pro CM
    Check the build link in my signature.
    :fistbump::headbang:
    congrats
    Love the silver sky - my first Tundra was that color.
     
    TaquitoBandito likes this.
  15. Jul 19, 2022 at 4:21 PM
    #615
    Bradyboyy88

    Bradyboyy88 New Member

    Joined:
    Apr 15, 2021
    Member:
    #61867
    Messages:
    126
    Gender:
    Male
    First Name:
    Shaun
    Oh it’s cement but in that light it does look like it ha! Glad I went cement though as I was torn between that and silver. Both good choices.
     
    TaquitoBandito likes this.
  16. Jul 19, 2022 at 6:48 PM
    #616
    RainMan_PNW

    RainMan_PNW [OP] SSEM #82 RGBA #4 “That Guy” Vendor

    Joined:
    Oct 27, 2020
    Member:
    #54134
    Messages:
    14,885
    Gender:
    Male
    First Name:
    Casey
    Clark County, WA
    Vehicle:
    2021 Lunar Rock TRD Pro CM
    Check the build link in my signature.
    DERP - yes it is, I can see that now. Cement is also an awesome choice.
     
    TaquitoBandito likes this.
  17. Aug 14, 2022 at 6:02 AM
    #617
    AGTundra

    AGTundra New Member

    Joined:
    Mar 9, 2022
    Member:
    #75627
    Messages:
    195
    Gender:
    Male
    First Name:
    Miguel
    North Carolina
    Vehicle:
    21 CM TRD Off-road
    Looks great! When the cover is closed does the blue light still bleed thru??…in my 21 CM I love the dual charger for the kiddos but really dislike the blue light that reflects against rear glass.
    Always makes me check the rearview!
    :burnrubber:
     
  18. Aug 14, 2022 at 6:22 AM
    #618
    RainMan_PNW

    RainMan_PNW [OP] SSEM #82 RGBA #4 “That Guy” Vendor

    Joined:
    Oct 27, 2020
    Member:
    #54134
    Messages:
    14,885
    Gender:
    Male
    First Name:
    Casey
    Clark County, WA
    Vehicle:
    2021 Lunar Rock TRD Pro CM
    Check the build link in my signature.
    I don’t notice it too bad. I’m fixing to swap it out with one that has USB-C and USB-A slots and no lights, just haven’t found the time.
     
  19. Aug 14, 2022 at 6:27 AM
    #619
    AGTundra

    AGTundra New Member

    Joined:
    Mar 9, 2022
    Member:
    #75627
    Messages:
    195
    Gender:
    Male
    First Name:
    Miguel
    North Carolina
    Vehicle:
    21 CM TRD Off-road
    Copy!
    Love your build and will keep a eye out!
     
  20. Sep 4, 2022 at 9:45 PM
    #620
    RainMan_PNW

    RainMan_PNW [OP] SSEM #82 RGBA #4 “That Guy” Vendor

    Joined:
    Oct 27, 2020
    Member:
    #54134
    Messages:
    14,885
    Gender:
    Male
    First Name:
    Casey
    Clark County, WA
    Vehicle:
    2021 Lunar Rock TRD Pro CM
    Check the build link in my signature.
    Updated the CBI rear bumper post with the rest of the write up (so far)...
     
    TaquitoBandito and bulldog93 like this.
  21. Sep 4, 2022 at 9:57 PM
    #621
    RainMan_PNW

    RainMan_PNW [OP] SSEM #82 RGBA #4 “That Guy” Vendor

    Joined:
    Oct 27, 2020
    Member:
    #54134
    Messages:
    14,885
    Gender:
    Male
    First Name:
    Casey
    Clark County, WA
    Vehicle:
    2021 Lunar Rock TRD Pro CM
    Check the build link in my signature.
    Friday. June 24.
    Was working late the night before and so I slept in a little before heading into the office - left the house about 7:30a instead of 6:45a that I was normally doing at that time.
    About 4 miles from the house the road twists down a hill, with a pretty steep brushy drop to the right (as you are going down) and a thick stand of trees to the left. It's an easy 45 mph down that hill, and that's what I was doing when, out of nowhere, I see a mass of brown spring up from down the right hand hillside out of the bushes, up over the guard rail, and was pretty sure it was going to land squarely on my hood. I had about enough time to move my foot to the brake pedal before the doe landed and I hit it squarely with the front end.

    upload_2022-9-4_21-49-42.jpg

    upload_2022-9-4_21-49-52.jpg

    upload_2022-9-4_21-50-38.jpg

    It took 3 weeks to get an appointment to even get an estimate, and thankfully they were able to get parts coming and get it into the shop a week after that. Then it was nearly three weeks for them to get it all fixed up - basically everything forward of the radiator except the actual fog lights, and the passenger headlight were replaced. This includes the AC condenser, AC hard lines, and all of the bumper components plus fender liner parts and grill. The airbag never went off - I think because the mass of the deer was higher than the main bumper crash bar, and instead smashed the grill. Yes - that is hair stuck in the grill surround.

    Worst part - my SSO Hybrid front bumper literally shipped the day before (not that it would have prevented all the damage that occured).

    I got her back on August 5, and after 3 weeks of driving my daughter's 2008 Forester, I was so glad to have my truck back!
    upload_2022-9-4_21-56-19.jpg
     
    Last edited: Sep 4, 2022
  22. Sep 4, 2022 at 9:58 PM
    #622
    RainMan_PNW

    RainMan_PNW [OP] SSEM #82 RGBA #4 “That Guy” Vendor

    Joined:
    Oct 27, 2020
    Member:
    #54134
    Messages:
    14,885
    Gender:
    Male
    First Name:
    Casey
    Clark County, WA
    Vehicle:
    2021 Lunar Rock TRD Pro CM
    Check the build link in my signature.
    August 10, 2022 - turned 37773 miles.
    upload_2022-9-4_21-58-37.jpg
     
    TaquitoBandito, Fotnot and bulldog93 like this.
  23. Sep 4, 2022 at 10:06 PM
    #623
    RainMan_PNW

    RainMan_PNW [OP] SSEM #82 RGBA #4 “That Guy” Vendor

    Joined:
    Oct 27, 2020
    Member:
    #54134
    Messages:
    14,885
    Gender:
    Male
    First Name:
    Casey
    Clark County, WA
    Vehicle:
    2021 Lunar Rock TRD Pro CM
    Check the build link in my signature.
    August 21, 2022 - Started to finally plan out my power delivery system. My plan is to use a Rago Fabrication Air Compressor Mount (I came across it before I had ever seen the Power Trays and SD Offroad MT solutions). I started laying things out and playing with spacing to make it all fit.
    upload_2022-9-4_22-2-44.jpg

    upload_2022-9-4_22-3-11.jpg

    Then drilled and tapped mounting holes and saw cut out some slots to route wires down from different parts.
    upload_2022-9-4_22-4-2.jpg

    Dolled it up with the sander with some 100 grit paper and put it back in the truck.
    upload_2022-9-4_22-4-39.jpg

    upload_2022-9-4_22-4-46.jpg

    Then I mounted everything and promptly realized I had forgotten the two 40A lines needed for my twin air compressor. :censored::frusty:
    upload_2022-9-4_22-5-42.jpg
     
    Last edited: Sep 4, 2022
  24. Sep 4, 2022 at 10:07 PM
    #624
    RainMan_PNW

    RainMan_PNW [OP] SSEM #82 RGBA #4 “That Guy” Vendor

    Joined:
    Oct 27, 2020
    Member:
    #54134
    Messages:
    14,885
    Gender:
    Male
    First Name:
    Casey
    Clark County, WA
    Vehicle:
    2021 Lunar Rock TRD Pro CM
    Check the build link in my signature.
    August 27, 2022 - after waiting for some parts to arrive, I returned to the power distribution with a new plan... so this is the "official" accessory power distribution post.

    First off, the foundation of the system is the . This sits above the engine fuse box so that I don't have to drill holes in the main fuse box lid or relay on plastic to hold all this up (it isn't light when it's all made up). It does take a few extra steps to remove to access the lid, but that is OK with me - I'm planning all the wiring such that it should be pretty easy to disconnect and remove...

    Main power distribution is handled by a Blue Sea SafetyHub 150. This thing has four high-amperage connections (up to 200A) using AMI or MIDI fuses, and six "standard" amperage (up to 30A) connections using ATC/ATO fuses. It's also got a ground bus on one end, and it can store two spare AMI and two spare ATC fuses in the lid (which seals down as ignition-proof).

    Next, I'm putting in a Switch Pros 9100 (sourced from @memario1214 ) that will be used to trigger my front light bar, eventually ditch lights and whatever else I dream up along the way.

    Finally, for now, is a Blue Sea ML-RBS 770 remote switch that will be used to power/disconnect the winch. It is rated at 500A (continuous) and uses a two-way momentary latching switch to connect or disconnect the circuit. I've got a custom-made switch I'll be using with it, but details of that will be when I write up about the front winch install.

    These things use a lot of juice, so it was back to the drawing board for figuring out mounting locations. The Switch Pro is mounted to a piece of 2x2x1/8 aluminum angle, and that is drilled/tapped on the bottom for two small stainless 10-32 x 1/4" button head cap screws to hold it to the main tray. The power lead to the Safety Hub is a piece of 4/0 welding cable. This is where the SDHQ battery terminal kit starts to show its worth.
    upload_2022-9-4_22-22-36.jpg

    Before capping things off and making it difficult to get into the fuse box, I routed the add-a-circuit taps for the Switch Pro triggers and controls. I picked up low-profile mini add-a-fuse taps and soldered them to lead wires for the Switch Pro and routed out through the factory bulkhead on the fuse box. Then I terminated them into an OEM 4-pin weatherproof connector that I had (my plan is to do all of the Switch Pro connections with weatherproof connector housings). The connector is a TS090-4P-4 with terminals and seals for 16 AWG from Corsa Technic.

    Fuse taps are:
    White Wire - 10A LED Headlight Right Low
    Pink Wire - 10A LED Headlight Left High
    Blue Wire - 7.5A USB (I need to double check this, as I am 99% sure I actually have it plugged into the 10A Ignition fuse).
    upload_2022-9-4_22-35-51.jpg

    Then comes mounting it back in place. I drilled/tapped new holes in the plate for the SafetyHub 150 (using 1/4-20 holes and 3/4" long stainless button-head cap screws to mount it). The winch switch also got moved slightly and new holes drilled and tapped for it (10-32 holes and 1/2" long stainless button-head cap screws). I also made some new/different openings for routing wires from above to underneath.
    upload_2022-9-4_22-39-23.jpg

    upload_2022-9-4_22-39-28.jpg

    upload_2022-9-4_22-39-34.jpg

    The winch switch has a 5-pin waterproof connector on it (Corsa Technic TS090-5S with 20AWG terminals/seals). The power lead to the winch switch is another 4/0 welding cable jumper.

    The small wire coming off the stud of the Switch Pro power is just temporary - it goes to the Gecko under-hood lights until I get an ATC fuse and get it hooked up permanently. Also, the hole to the right in the main tray (above the SP power feed and near the ground lug) is where the Gecko light switch will mount - I just need to get it finished up.

    And one more picture of how it looks as of 8/28/22 when I got my JBL DSP amp installed (it uses a 60A fuse). The other two high-amp posts will be for the separate power feeds to the twin air compressor.
    upload_2022-9-4_22-43-44.jpg

    Updated 9/5/22 to show the current wiring. The Gecko under-hood lights are now wired in (3A fuse in the upper section) and the ARB air compressor is wired to the middle two 40A MIDI fuses in the lower section. I still need to run a lead from the negative to the ground bus bar, but I want to get some 1/0 wiring to do that with.
    upload_2022-9-5_21-6-1.jpg

    upload_2022-9-5_21-6-14.jpg

    Edit 10/6/22:
    Current progress on the power distribution "system." And I've got a few changes coming this weekend if I can get some time...
    upload_2022-10-6_14-55-52.jpg
     
    Last edited: Feb 25, 2024
  25. Sep 4, 2022 at 10:57 PM
    #625
    RainMan_PNW

    RainMan_PNW [OP] SSEM #82 RGBA #4 “That Guy” Vendor

    Joined:
    Oct 27, 2020
    Member:
    #54134
    Messages:
    14,885
    Gender:
    Male
    First Name:
    Casey
    Clark County, WA
    Vehicle:
    2021 Lunar Rock TRD Pro CM
    Check the build link in my signature.
    August was a busy month... I got started on installing the ARB Twin Air Compressor (also sourced from @memario1214 ). After seeing the setup @reywcms did, I decided I liked that method and so I grabbed the Desert Does It Under Seat Compressor Mount (with fittings).

    The basic install was pretty easy - the DDI instructions were clear and their fitting kit makes it easy to route to the bulkhead on the side of their mount. I did, however, run into one minor issue with fitment:
    upload_2022-9-4_22-50-43.jpg upload_2022-9-4_22-51-47.jpg

    On my truck, there is a bracket and bolt under the carpet from the B-pillar that was interfering with the rear of the DDI plate from sitting correctly over the seat bolt holes.
    Not to be deterred, I sketched a couple marks with a sharpie and hit it with the cut-off wheel, then spritzed it with some flat black (it hadn't dried yet in this picture) paint. Roughly 1-1/4" wide and 3/4" back (toward passenger side) was what I had to remove.
    upload_2022-9-4_22-53-3.jpg

    Now it fits perfect.
    upload_2022-9-5_21-7-39.jpg

    The factory switch wiring harness from ARB is a hot mess if you aren't going to be using air lockers and will have your switch so close to the compressor, so I hacked that up to salvage the connectors (I didn't have any others laying around to make my own with) and got the switch wired up and mounted, and then bolted everything down.
    upload_2022-9-4_22-55-52.jpg

    upload_2022-9-4_22-56-11.jpg

    The wire arrived this morning to extend the harness to get the power finished up. I started by pulling back the factory sleeve and cutting the wires near the connector where the ground was still two separate 10AWG leads. Then, I used the heat-gun solder/seal connectors to slice four pieces of 10AWG wiring to the connector and extend each lead by about 4 feet.
    upload_2022-9-5_20-40-18.jpg

    Routed the wires under the carpet into the side gutter, along with the ignition and backlight wires from the switch.
    upload_2022-9-5_21-0-14.jpg

    Then up the gutter and out the firewall (except the two small wires for the switch). My splice back to the factory harness ends up just inside the firewall so that everything in the engine bay is uninterrupted original wire inside the factory loom. Getting two 10AWG and one 8AWG wire inside the factory sleeve through the grommet in the firewall was a grade-A bitch.
    upload_2022-9-5_21-1-53.jpg

    Then routed things tucked along the side of the fuse box and around the front to come up and land on the two 40A MIDI fuses in the SafetyHub fuse box, and land the ground directly to the battery.
    upload_2022-9-5_21-2-57.jpg

    I gave her a quick test by firing her on and hooking up an 18GA brad nailer to it and cycling some nails through it - she worked like a charm!
     
    Last edited: Sep 5, 2022
  26. Sep 4, 2022 at 10:59 PM
    #626
    RainMan_PNW

    RainMan_PNW [OP] SSEM #82 RGBA #4 “That Guy” Vendor

    Joined:
    Oct 27, 2020
    Member:
    #54134
    Messages:
    14,885
    Gender:
    Male
    First Name:
    Casey
    Clark County, WA
    Vehicle:
    2021 Lunar Rock TRD Pro CM
    Check the build link in my signature.
    Also added the Desert Does It Multi Mount Panel to the front of my Seat Jackers while I was down there working on stuff. Not sure what I'll mount to it yet (along with the air compressor side panel), but probably a small fire extinguisher (maybe an Element 50) and maybe a flashlight.
    upload_2022-9-4_22-58-53.jpg
     
    Last edited: Sep 4, 2022
  27. Sep 4, 2022 at 11:11 PM
    #627
    RainMan_PNW

    RainMan_PNW [OP] SSEM #82 RGBA #4 “That Guy” Vendor

    Joined:
    Oct 27, 2020
    Member:
    #54134
    Messages:
    14,885
    Gender:
    Male
    First Name:
    Casey
    Clark County, WA
    Vehicle:
    2021 Lunar Rock TRD Pro CM
    Check the build link in my signature.
    Got one more installed last weekend - The JBL 8 Channel DSP4086 Amp from Tech12Volts.
    I've been wanting something to improve the sound for a while, but I like keeping the factory look (for now at least). When this amp came on my radar and James started offering it, I knew that I'd end up going this route eventually... and now I have.

    The install is pretty straightforward using the instructions (attached)

    Rather than using the fuse holder that came with it (James includes a full power wiring kit with the amp), I opted to route it to the power distribution mentioned above.
    upload_2022-9-4_23-6-43.jpg

    Then around the back of the engine following the main harness, and through the firewall.
    upload_2022-9-4_23-7-0.jpg

    Down the passenger gutter, then under the carpet and up with the rest of the wires.
    upload_2022-9-4_23-7-30.jpg

    In the instructions, it is mentioned to ground the amp using one of the factory bolts you removed. However, on my truck, under the carpet roughly where the left (driver side) drywall screw is located there is actually a factory ground point, so I used that spot instead. If you place this just right, the drywall screws go through the carpet (which has a stiff/hard backing) and down into two holes in the cab frame - if you miss them then the thing doesn't sit right.
    upload_2022-9-4_23-8-41.jpg

    The wiring is a bit of a rat's nest, but it is under the seat and out of sight. I might try to tidy a few things up at some point, but for now, I'm just enjoying actually being able to hear my music and the different range.
    upload_2022-9-4_23-10-30.jpg

    I routed the subwoofer controller up into the console and used some 3M tape to mount it.
    upload_2022-9-4_23-11-9.jpg

    upload_2022-9-4_23-17-34.jpg
     

    Attached Files:

    Last edited: Sep 4, 2022
  28. Sep 5, 2022 at 8:35 PM
    #628
    RainMan_PNW

    RainMan_PNW [OP] SSEM #82 RGBA #4 “That Guy” Vendor

    Joined:
    Oct 27, 2020
    Member:
    #54134
    Messages:
    14,885
    Gender:
    Male
    First Name:
    Casey
    Clark County, WA
    Vehicle:
    2021 Lunar Rock TRD Pro CM
    Check the build link in my signature.
    Quick and easy mod while waiting for a roast to cook for dinner - I relocated the Tow/Haul button to the 3-switch panel behind the shifter.

    First off, you need two connectors:
    • 90980-12365 5-way male 0.64II connector
    • 90980-12366 5-way female 0.64II connector

    Then, you'll need some terminals (four of each to be exact). The Toyota part numbers below come with a short pigtail. Instead, I prefer to buy them in larger quantities from hi-1000ec.com without the pigtail so I can make them up myself without butt splices or solder joints.
    • 82998-24270 0.64II male terminal
    • 82998-24290 0.64II female terminal
    Finally, you need four pieces of wire about 38-40" long. I had some leftover 20AWG primary wire that I used - colors don't matter as long as you get the two ends in the same position.

    On the factory connector (J23) there are wires in pins 1, 2, 3, and 4 (this is a view looking at the connector end, not the end the wires enter).
    upload_2022-9-5_20-31-49.jpg

    So just match those up and get terminals mounted into the connectors.
    upload_2022-9-5_20-30-29.jpg

    Then I wrapped it up with electrical tape to make a small loom of it.
    upload_2022-9-5_20-32-49.jpg

    I routed it along the same path as my rear window switch, through the cavity under the center area by the shifter and up into the space behind the shifter.
    upload_2022-9-5_20-34-5.jpg

    And here's the finished product.
     
  29. Sep 5, 2022 at 8:39 PM
    #629
    TRDFerguson

    TRDFerguson SSEM #99/RGBA #8-ish?/It’s a funny name.

    Joined:
    Oct 18, 2018
    Member:
    #20730
    Messages:
    9,115
    Gender:
    Male
    First Name:
    Jake
    Southeast Greater Basin, AZ
    Vehicle:
    2018 MGM CrüeMax
    Bookmarked for later. Thanks for the part numbers!
     
  30. Sep 5, 2022 at 8:44 PM
    #630
    PNW_Husky

    PNW_Husky New Member

    Joined:
    Nov 11, 2017
    Member:
    #10905
    Messages:
    478
    Great Pacific Northwest
    Vehicle:
    2018 MGM CM Platinum
    Nice work, Casey. Where are you mounting your switch pros panel? Overhead?
     

Products Discussed in

To Top