1. Welcome to Tundras.com!

    You are currently viewing as a guest! To get full-access, you need to register for a FREE account.

    As a registered member, you’ll be able to:
    • Participate in all Tundra discussion topics
    • Transfer over your build thread from a different forum to this one
    • Communicate privately with other Tundra owners from around the world
    • Post your own photos in our Members Gallery
    • Access all special features of the site

It Starts - DC Audio Build on the cheap

Discussion in 'Audio & Video' started by birdman076, Jul 8, 2017.

  1. Jul 8, 2017 at 4:17 AM
    #1
    birdman076

    birdman076 [OP] Bird, bird, bird...bird is the word

    Joined:
    Jun 18, 2017
    Member:
    #8174
    Messages:
    496
    Gender:
    Male
    First Name:
    Chuck
    Montana
    Vehicle:
    2015 Brown Tundra Crew Max Limited
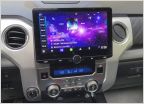
    Airbox with K&N Filter, 2" lift on 33's, Alpine iLX-F309 head unit, Pull out bed tool boxes, brown with black trim, rims, etc, black leather interior, matching topper. Muffler delete (too loud..) 62k miles!!!
    Pictured is about 1/2 of the hardware at this point. Whats not pictured is the 50ft of sound deadener, wiring, sub (which I pick up today) and the 2nd set of infinity speakers which I just got. The MB Quart is a 4 channel and will power the front and rear, if it turns out not to be enough for some reason then I will get an additional amp and relegate the MB quart to front or rear.

    The bolded items I picked up second hand, cost associated thus far:

    MB Quart Amp - $45
    LC7i - $110
    Infinity 60.11cs - $100
    Infinity 6.5 component speakers - $75
    Kicker CVR-T 10" Sub - $30 (Getting 2 for $60)
    Noice Sound Deadener - $68
    Wire Harness to interface to factory amp: $16
    Small amp wiring kit - $34
    12 gauge speaker wire 50' - $28.99
    Speaker Adapters - $20
    JBL Tundra Crew Max (Tweeter opening) Sail Panels - $44.00 with shipping (Part numbers #67491-0C060 RH , #67492-0C060 LH respectively.)
    Brightstar Audio single 10" under seat sub box (For Double cab) $105.00 See my review here

    The kicker 500.1 didn't pan out...however I ended up with a Crunch 1500 watt mono amp and 2.0 farad capacitor with LED readout for $75

    Grand total thus far: $750.99

    I went with 6.5 component speakers front and rear so the adapters shown are for that type of setup. Just about any other setup can be found with minimal effort on Amazon or Ebay.
    Rear Speaker Adapters
    Front Speaker Adapters

    NOTES: At the bottom of this post is a video by audio control on how to level match your LOC which takes away the hiss and other noise and gets the cleanest possible signal from the head unit. Factory head units do not have a high voltage signal out so the signal will not be as clean as an aftermarket unit, however the signal should be just fine for a moderate system build.

    When looking at used speakers the easiest way to tell if a woofer is bad (other than visual inspection) is to gently push down on the woofer cone, if it makes a scraping sound the voice coil is bad. Also check the rubber or foam surround as that is the area that usually is damaged or worn.

    When looking at user amplifiers here are a few things to pay attention to:
    1. fuse(s) are they present? are they the correct rating?
    2. Rust, corrosion. If present could mean the amp has seen water or moisture to some extent that I would personally be leery of.
    3. Overall condition of the amp. Scratched up? Beat up? Dented? pieces missing?
    4. Connectors all there and intact?
    5. If there is wiring present what condition is it in? Does it looking like it was cut or chewed through? Corroded or aged?
    6. Is the seller willing to let you test the amp?


    Some items I already had so I don't count those towards total cost:

    1 gauge Red marine grade tinned power cable 10' run from battery to distribution block in interior
    1 gauge Black marine grade tinned 1' ground
    3 output distribution block
    Inline fuse for power cable
    Speaker wire

    33my6wl_a0af9bae77132047a8f2f93bb64dd99c89445163.jpg

    LOC tuning to get rid of hiss and noise.

     
    Last edited: Nov 15, 2017
    This site contains affiliate links for which the site may be compensated.
    #1
  2. Jul 8, 2017 at 4:25 AM
    #2
    MikeyMTBs

    MikeyMTBs New Member

    Joined:
    May 30, 2017
    Member:
    #7924
    Messages:
    359
    Sweet! Subscribed to follow!
     
  3. Jul 8, 2017 at 5:04 AM
    #3
    birdman076

    birdman076 [OP] Bird, bird, bird...bird is the word

    Joined:
    Jun 18, 2017
    Member:
    #8174
    Messages:
    496
    Gender:
    Male
    First Name:
    Chuck
    Montana
    Vehicle:
    2015 Brown Tundra Crew Max Limited
    Airbox with K&N Filter, 2" lift on 33's, Alpine iLX-F309 head unit, Pull out bed tool boxes, brown with black trim, rims, etc, black leather interior, matching topper. Muffler delete (too loud..) 62k miles!!!
    Small update since I'm taking stock of all I have and doing an inventory I found my 20+ year speaker wire to be a bit "dated". By dated I mean its got some oxidation on it and I'm not going to take a chance with it.

    Silly observation though...when looking for speaker wire I am finding it difficult to locate "Pure Copper" wiring. Seems everything is aluminum based with copper coating. Is that the new norm??? I would think process would be more difficult necessitating 2 processes for the cable now instead of 1 with pure copper and the cost savings from using Aluminum would be negligible at best.

    In any event, here is a nice read on the subject. I will not be using CCA (Copper Clad Aluminum) for any automotive or audio based application period. The author states what I already knew having been an electronics technician for 30 years now.

    https://sewelldirect.com/learning-center/cca-facts

    For those that don't care to read the article, in a nutshell the CCA is "OK" in some applications where the signal being transferred is powerful enough to overcome the higher resistance the Aluminum brings to the table.


    And another nice article with some graphs & charts for general comparisons of resistance vs wire length/size recommendations.

    http://www.roger-russell.com/wire/wire.htm
     
    Filthy13 and Black Wolf like this.
  4. Jul 8, 2017 at 5:54 AM
    #4
    Black Wolf

    Black Wolf Bigfoot Hunter, Sasquatch too, but not Yeti

    Joined:
    Apr 20, 2014
    Member:
    #378
    Messages:
    39,968
    Gender:
    Male
    First Name:
    Matt
    Aurora CO
    Vehicle:
    2022 Nissan Frontier SV 4X4
    TuwaPro rack, Z1 Offroad stuff, NISMO suspension stuff, FlowmasterFX Extreme exhaust, AIS, OVS, J&L can, other goodies on the way
    Both good reads. I've noticed the transition to CCA wiring in a lot of the hi freq test equipment that I work with on a daily basis. Some up to 50 GHz but rarely over +20dBm out with low internal current requirements. Naturally some of the hi end system power supplies we calibrate are hi power/hi current hence the use of solid copper conductors. Thanks for you post.
     
    Last edited: Jul 8, 2017
  5. Jul 9, 2017 at 9:06 AM
    #5
    birdman076

    birdman076 [OP] Bird, bird, bird...bird is the word

    Joined:
    Jun 18, 2017
    Member:
    #8174
    Messages:
    496
    Gender:
    Male
    First Name:
    Chuck
    Montana
    Vehicle:
    2015 Brown Tundra Crew Max Limited
    Airbox with K&N Filter, 2" lift on 33's, Alpine iLX-F309 head unit, Pull out bed tool boxes, brown with black trim, rims, etc, black leather interior, matching topper. Muffler delete (too loud..) 62k miles!!!
    Doing some research on a potential box solution for us DC folks. Any resident box builders among us I can pick the brain of?

    I've done some measuring of the behind the seat area without pulling the seat and it looks like 9" to the seat bottom when in the folded position and 9" to the plastic storage bin under the seat. Given those measurements I've come up with a triangle design which will give me a 12.73" face which to mount a 10" shallow sub that calls for .8ft. With the dimensions shown i'm going to have to get the additional 20% of box size via polyfil which is doable from everything i'm reading.

    148f6s6_3a0cd17adbe1ddeda02f33f3a825123ae510f50b.jpg

    As you can see my wood spec is only .25 and not the usual .75. I'm going to use fiberglass on the outside of the box to compensate for the lack of material and add strength and if necessary I have access to have it Line-X coated as well but I think with the fiberglass that shouldn't be necessary.

    A little read about polyfil. Pulled from http://www.soundsolutionsaudio.com/forum/topic/7168-a-technical-understanding-of-polyfill/

    Have you ever completed an enclosure that was a touch too small? Your low end sounds cramped but you don't want to or can't build a brand new enclosure. You throw in some polyfill and are blown away by the improvements. Then you go online to talk about it and everything gets confusing. You don't know why it works or what it really did, but you know that it sounds better. Maybe it's time you learned more about it!

    Firstly, there are a few primary types of fill that are used. This includes polyester fiberfill, fiberglass insulation, and long-fiber wool. Of these three, polyester fiberfill is perhaps the best option, and also the origination of the term "polyfill". These products can easily be found in several stores, including Wal-Mart, Home Depot, or a local crafts and fabrics store, and all are extremely affordable (typically less than $2/pound). It is also very easy to apply to the inside of your enclosure: simply staple or glue it to the inside of your enclosure. How does it work?

    Stuffing a box with polyfill makes it seem larger and it all relates to thermodynamics. When polyfill is added to an enclosure, it changes the behaviour of the airspring in the enclosure from "adiabatic" to "isothermal". The term "adiabatic" implies that there is no heat transfer occurring. An isothermal process occurs once the polyfill has been added. As the air passes through the polyfill, the fibers wiggle and cause some of the energy created by the airspring to be dissipated as heat. This heats the surrounding air molecules warmer, causing the air to become less dense. Being that sound passes easier through a denser medium, the speaker interacts with your enclosure as if it is larger than it actually is. The effective increase in enclosure size can be as much as 40%!

    This has some very obvious benefits that are inherent of a larger enclosure. Firstly, it becomes more efficient (a larger enclosure is always more efficient than a smaller one for any given driver). Second, the f3 (or the frequency at which SPL is down by 3dB) will be lower, providing a little bigger bottom end. While these are both great advantages, they decrease the effective damping of the speaker as well, meaning the speaker can be more likely to bottom out or over-excurt itself. Naturally, this is speaker, frequency, and power dependent. If used in a ported enclosure, you will also see the Fb (or the resonant frequency of your port) drop lower.

    There are some additional worthy considerations. Adding polyfill to an enclosure can be a great choice. However, too much polyfill can be a bad thing. At a certain point, the stuffing becomes too dense and the fibers no longer wiggle. At this point, not only have you taken away the size benefit of adding polyfill, you have actually decreased the effective volume as the polyfill is now taking up room inside your enclosure. It is also worth mentioning that polyfill is not as effective in a large enclosure. Let's combine these two thoughts into two simple rules:

    1. If the enclosure is less than 2.5 - 3.0 cubic feet in size, you should use no more than one and a half pound of polyfill per cubic foot available in your enclosure.

    2. If the enclosure is greater than 2.5 - 3.0 cubic feet in size, you should use no more than one pound of polyfill per cubic foot available in your enclosure.

    Specific examples of polyfill's effects on various enclosure sizes (with varying amounts of polyfill in each size) can be found in The Loudspeaker Cookbook by Vance Dickason or in an article written by Tom Nousaine for the March/April 1995 edition of "Car Stereo Review".

    There is one last point that you will hear from time to time regarding polyfill: that polyfill stops standing waves in an enclosure. When referencing an enclosure for a subwoofer playing a fundamental frequency that falls in the typical range, this is simply false. A standing wave in this range of frequencies would be several feet long and, thus, unlikely to occur. However, higher order harmonic distortion is possible, and can potentially colour music. Being that these higher order harmonics will be progressively shorter (in terms of wavelength), polyfill can be effective for this purpose. However, audibility, particularly at high SPL, can be quite minimal. Using polyfill in an effort to absorb standing waves or various distortion is most effective in large enclosures for your midrange and is not particularly effective for a subwoofer.

    Hopefully you now have a greater understanding of what polyfill does and doesn't do, while also enjoying the opportunity to absorb some scientific content as well. If you're still undecided, be wild and adventurous: put some polyfill in your enclosure right this minute!
     
    Eclipsed & Floating and GNTundra like this.
  6. Jul 14, 2017 at 7:53 PM
    #6
    birdman076

    birdman076 [OP] Bird, bird, bird...bird is the word

    Joined:
    Jun 18, 2017
    Member:
    #8174
    Messages:
    496
    Gender:
    Male
    First Name:
    Chuck
    Montana
    Vehicle:
    2015 Brown Tundra Crew Max Limited
    Airbox with K&N Filter, 2" lift on 33's, Alpine iLX-F309 head unit, Pull out bed tool boxes, brown with black trim, rims, etc, black leather interior, matching topper. Muffler delete (too loud..) 62k miles!!!
    Won't be updating for a bit, i've got 2 weeks of job travel and then a week of vacation. I was really hoping to have this done before vacation...oh well its going to be a long ride with the factory sound system lol.
     
    4x4_Angel and GNTundra like this.
  7. Jul 21, 2017 at 2:02 PM
    #7
    birdman076

    birdman076 [OP] Bird, bird, bird...bird is the word

    Joined:
    Jun 18, 2017
    Member:
    #8174
    Messages:
    496
    Gender:
    Male
    First Name:
    Chuck
    Montana
    Vehicle:
    2015 Brown Tundra Crew Max Limited
    Airbox with K&N Filter, 2" lift on 33's, Alpine iLX-F309 head unit, Pull out bed tool boxes, brown with black trim, rims, etc, black leather interior, matching topper. Muffler delete (too loud..) 62k miles!!!
    Back home and back on it! Well at least until Tuesday lol.

    x41bgi_2ae9977fa35d7ff3774e06f31dbc862e5fa9609e.jpg

    2cdewd0_d75460d70a847881e43eb69598c169e6aeb2f3a7.jpg

    2be2rl_bd7dcfda2b1d2d910e46b5b231b2a87d6765eedb.jpg

    v2s46b_3d81ec76748c6de700af4f1e08232146ec6417de.jpg
     
    PaRunnerd likes this.
  8. Aug 5, 2017 at 7:11 PM
    #8
    birdman076

    birdman076 [OP] Bird, bird, bird...bird is the word

    Joined:
    Jun 18, 2017
    Member:
    #8174
    Messages:
    496
    Gender:
    Male
    First Name:
    Chuck
    Montana
    Vehicle:
    2015 Brown Tundra Crew Max Limited
    Airbox with K&N Filter, 2" lift on 33's, Alpine iLX-F309 head unit, Pull out bed tool boxes, brown with black trim, rims, etc, black leather interior, matching topper. Muffler delete (too loud..) 62k miles!!!
    12 hours later...I have the rear door speakers and the sub install left to do.

    NOTE: The "hard styrofoam" filler pieces are easily removed by unscrewing the big plastic holder. I thought they popped off, luckily I didn't damage the first one.

    Interior Stripped down the carpet.
    [​IMG]


    Sound deadener prep
    [​IMG]

    Front drivers side
    [​IMG]

    Front Passenger Side
    [​IMG]

    Front complete
    [​IMG]

    Rear Fire wall
    [​IMG]
     
    Last edited: Oct 7, 2017
    NewImprovedRon likes this.
  9. Oct 7, 2017 at 11:03 PM
    #9
    birdman076

    birdman076 [OP] Bird, bird, bird...bird is the word

    Joined:
    Jun 18, 2017
    Member:
    #8174
    Messages:
    496
    Gender:
    Male
    First Name:
    Chuck
    Montana
    Vehicle:
    2015 Brown Tundra Crew Max Limited
    Airbox with K&N Filter, 2" lift on 33's, Alpine iLX-F309 head unit, Pull out bed tool boxes, brown with black trim, rims, etc, black leather interior, matching topper. Muffler delete (too loud..) 62k miles!!!
    Sub box installed.
    [​IMG]

    Seat lifted view
    [​IMG]

    Seat lifted, front view to see how far under it goes (it bottoms out against the seat belt winding mechanism)
    [​IMG]

    Closer look at underneath
    [​IMG]
     
    NewImprovedRon likes this.
  10. Oct 7, 2017 at 11:42 PM
    #10
    birdman076

    birdman076 [OP] Bird, bird, bird...bird is the word

    Joined:
    Jun 18, 2017
    Member:
    #8174
    Messages:
    496
    Gender:
    Male
    First Name:
    Chuck
    Montana
    Vehicle:
    2015 Brown Tundra Crew Max Limited
    Airbox with K&N Filter, 2" lift on 33's, Alpine iLX-F309 head unit, Pull out bed tool boxes, brown with black trim, rims, etc, black leather interior, matching topper. Muffler delete (too loud..) 62k miles!!!
    Loving everything! Just need to circle back around to the crossovers for the tweeters. I installed them in the doors and used double sided vhb tape, I should have screwed them down instead so i'll have to pop the door panels again as the rear passenger side came loose....teens do not know how to close doors without slamming them lol. Its no biggy, I was going back into the rear doors anyways as I ran out of sound deadener when i did the rear area behind the back seat that took up what was supposed to be for the rear doors. It does make a huge difference though, even with the rear doors not being done. Still debating dropping the headliner to the the top as well.
     
    NewImprovedRon likes this.
  11. Oct 9, 2017 at 1:57 PM
    #11
    birdman076

    birdman076 [OP] Bird, bird, bird...bird is the word

    Joined:
    Jun 18, 2017
    Member:
    #8174
    Messages:
    496
    Gender:
    Male
    First Name:
    Chuck
    Montana
    Vehicle:
    2015 Brown Tundra Crew Max Limited
    Airbox with K&N Filter, 2" lift on 33's, Alpine iLX-F309 head unit, Pull out bed tool boxes, brown with black trim, rims, etc, black leather interior, matching topper. Muffler delete (too loud..) 62k miles!!!
    The MB Quart DSC480 4 channel amplifier is a big amp, i've got it riding the front "hump" area of the seat and slightly covering the under seat vent. Its been running this way for a couple of months with no issues and the kids climb in the back all the time. I am thinking of getting some 90 degree speaker terminals and routing the speaker wires closer to the amp just because. You can see the power distribution block as well. Both the amp and the block are velcro'd down, it would take a hard hit to unseat either one. I hated installing the sub amp because I had to pull the distribution block to run the cable for it and the velcro was a PIA to get to let go lol. My LC7i is under the passenger seat, velcro'd as well but I will be moving that more towards the front when I order some RCA extension cables to relocate it. I haven't decided yet but the OCD in me would really hate extensions and I may just order cables a foot or so longer than what I have currently and re-pull them under the carpet. It shouldn't be too bad and i'd be happy at that point...

    Seat all the way forward
    [​IMG]

    Seat in driving position
    [​IMG]

    Under Seat view
    [​IMG]

    Ground level view
    [​IMG]
     
    NewImprovedRon likes this.
  12. Nov 15, 2017 at 1:45 PM
    #12
    darthmorphling

    darthmorphling New Member

    Joined:
    Sep 3, 2017
    Member:
    #9427
    Messages:
    6
    Gender:
    Male
    Would you mind sharing the dimensions for your box? I have one designed and would like to get verification on the measurements.

     
  13. Nov 15, 2017 at 3:41 PM
    #13
    Masshole

    Masshole Lovin' The Great North Woods

    Joined:
    Sep 27, 2017
    Member:
    #9943
    Messages:
    156
    Gender:
    Male
    New England
    Vehicle:
    2014 DC MGM 4X4 SR5 TRD
    :eek:
     
    JC303 and T-Rex266 like this.
  14. Nov 15, 2017 at 6:57 PM
    #14
    birdman076

    birdman076 [OP] Bird, bird, bird...bird is the word

    Joined:
    Jun 18, 2017
    Member:
    #8174
    Messages:
    496
    Gender:
    Male
    First Name:
    Chuck
    Montana
    Vehicle:
    2015 Brown Tundra Crew Max Limited
    Airbox with K&N Filter, 2" lift on 33's, Alpine iLX-F309 head unit, Pull out bed tool boxes, brown with black trim, rims, etc, black leather interior, matching topper. Muffler delete (too loud..) 62k miles!!!
    LMFAO
     
  15. Nov 15, 2017 at 6:58 PM
    #15
    birdman076

    birdman076 [OP] Bird, bird, bird...bird is the word

    Joined:
    Jun 18, 2017
    Member:
    #8174
    Messages:
    496
    Gender:
    Male
    First Name:
    Chuck
    Montana
    Vehicle:
    2015 Brown Tundra Crew Max Limited
    Airbox with K&N Filter, 2" lift on 33's, Alpine iLX-F309 head unit, Pull out bed tool boxes, brown with black trim, rims, etc, black leather interior, matching topper. Muffler delete (too loud..) 62k miles!!!
  16. Nov 15, 2017 at 7:10 PM
    #16
    birdman076

    birdman076 [OP] Bird, bird, bird...bird is the word

    Joined:
    Jun 18, 2017
    Member:
    #8174
    Messages:
    496
    Gender:
    Male
    First Name:
    Chuck
    Montana
    Vehicle:
    2015 Brown Tundra Crew Max Limited
    Airbox with K&N Filter, 2" lift on 33's, Alpine iLX-F309 head unit, Pull out bed tool boxes, brown with black trim, rims, etc, black leather interior, matching topper. Muffler delete (too loud..) 62k miles!!!
    I've had the sub installed for about a month and a half now. I haven't made "final" adjustments yet partially because of being lazy and partially because i'm waiting until I pop the door panels off the rear doors to add sound deadener since I ran out during the install. The sub amp is turned down to about 1/4 power right now and it fuggin pounds. I think a small adjustment to frequency is needed for very low volume but other than that it sounds damn good for just about any type of music which is what I was hoping for. My mainstay is rock but I listen to anything from early 30s to present and across an genre's of music. I think the last edition and yet another reason I haven't done final adjustments is i'm still up in the air considering a bass knob for quicker adjustments. I haven't even "Secured" the sub box with L brackets, velcro, or other and it still hits extremely hard t 1/4 power. Needless to say I'm very impressed.

    Same goes for the infinity ear bleeders as I call them now. They will flat run you out of the truck with the sound turned up to about 30.

    As for the sound deadener. It made all the difference in the world just doing the inside of the door skin and floor area. The doors sound more "solid" when closing or washing/waxing for that matter and the sound outside of the truck is very minimal.
     
    JC303 likes this.
  17. Nov 16, 2017 at 9:32 AM
    #17
    darthmorphling

    darthmorphling New Member

    Joined:
    Sep 3, 2017
    Member:
    #9427
    Messages:
    6
    Gender:
    Male

Products Discussed in

To Top