1. Welcome to Tundras.com!

    You are currently viewing as a guest! To get full-access, you need to register for a FREE account.

    As a registered member, you’ll be able to:
    • Participate in all Tundra discussion topics
    • Transfer over your build thread from a different forum to this one
    • Communicate privately with other Tundra owners from around the world
    • Post your own photos in our Members Gallery
    • Access all special features of the site

1794 on the inside, pro on the outside

Discussion in '2.5 Gen Tundras (2014-2021)' started by Echoesineternity, Mar 10, 2019.

  1. Jan 13, 2020 at 5:46 AM
    #61
    Doylfish

    Doylfish New Member

    Joined:
    Feb 25, 2018
    Member:
    #13144
    Messages:
    204
    Gender:
    Male
    Vehicle:
    2016 Tundra 1794 Crewmax

    I cant remember if it was the left front bolt or right front bolt, but one of them I did not have to drill out any additional plastic and just threaded the nut on the end of the screw .. so far so good .. it’s not the most direct fitting piece, but it looks good when done. With my cup holder replacement trim there was one tab along the right side that would not snap into place. When I reached out to AJT he said that’s what the tape strips on the underside were for, but I did not have any tape under there .. did you? I’m worried about rattling over time, but so far so good. The shifter trim is snug. The cup holder not as much
     
  2. Jan 13, 2020 at 12:59 PM
    #62
    TundraCoast

    TundraCoast Member In Good Standing

    Joined:
    Feb 25, 2018
    Member:
    #13151
    Messages:
    593
    Gender:
    Male
    First Name:
    Ian
    California
    Vehicle:
    1794 4x4
    1794 on the inside - PRO on the outside
    I got the set off eBay, since then I have had several Tundra friends look for them with no luck.
     
    This site contains affiliate links for which the site may be compensated.
    #62
    Rica25 likes this.
  3. Jan 13, 2020 at 1:13 PM
    #63
    TundraCoast

    TundraCoast Member In Good Standing

    Joined:
    Feb 25, 2018
    Member:
    #13151
    Messages:
    593
    Gender:
    Male
    First Name:
    Ian
    California
    Vehicle:
    1794 4x4
    1794 on the inside - PRO on the outside
    Mine had 2 tiny tape strips (prob won't hold), the built in clips on mine didn't hold either, it has to do with the placement of the how the piece fits into the grove of the main console. Overall the AJT parts are good products, they need a little more tweaking. The hex bolts seem just a smidge short too.

    Im surprised know one has commented on the front 2 hex bolts for the shifter trim plate (platinum & 1794). I literally had no tabs or plastic for those bolts to secure to, I went really easy on drilling out the plastic rivets to not damage the plastic underneatch.
     
  4. Feb 12, 2020 at 7:45 PM
    #64
    TundraCoast

    TundraCoast Member In Good Standing

    Joined:
    Feb 25, 2018
    Member:
    #13151
    Messages:
    593
    Gender:
    Male
    First Name:
    Ian
    California
    Vehicle:
    1794 4x4
    1794 on the inside - PRO on the outside
    More 1794 on the inside Pro on the outside...finally got my 12.1 android headunit installed, took it apart when I received it and had a bodyshop paint the bezel "trim satin black" (shout out to @JoshuaA for the inspiration and tips) Added the AJT 4x4 selector trim piece while I was installing the headunit. So far I am really impressed with it, I have the OEM Audio+ JBL enhancment system includes (2) subs, (4) tweeters, amp, sub level control. My system sounds damn good, crisp highs, deep bass, Android unit seems to have woke up the JBL 6x9 & 6.5 door speakers. Better pictures to come, quick snap for now.

    IMG_6759.jpg

    IMG_6760.jpg

    IMG_6774.jpg
     
    Last edited: Feb 12, 2020
  5. Feb 12, 2020 at 8:13 PM
    #65
    Bigolbaddy

    Bigolbaddy New Member

    Joined:
    Oct 3, 2019
    Member:
    #36961
    Messages:
    214
    Gender:
    Male
    First Name:
    Ben
    Fort Worth
    Vehicle:
    2020 MGM 1794
    This thread is going to make me poor
     
    GODZILLA and ZappBrannigan like this.
  6. Feb 13, 2020 at 12:42 PM
    #66
    TundraCoast

    TundraCoast Member In Good Standing

    Joined:
    Feb 25, 2018
    Member:
    #13151
    Messages:
    593
    Gender:
    Male
    First Name:
    Ian
    California
    Vehicle:
    1794 4x4
    1794 on the inside - PRO on the outside
  7. Feb 13, 2020 at 12:48 PM
    #67
    TundraCoast

    TundraCoast Member In Good Standing

    Joined:
    Feb 25, 2018
    Member:
    #13151
    Messages:
    593
    Gender:
    Male
    First Name:
    Ian
    California
    Vehicle:
    1794 4x4
    1794 on the inside - PRO on the outside
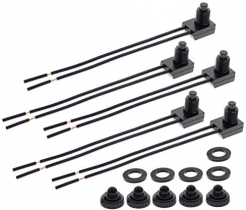
    I added security hex-bolts and a flush mount dash switch like the other Toyota switches (both from Amazon)
     
  8. Feb 18, 2020 at 11:03 AM
    #68
    Bigolbaddy

    Bigolbaddy New Member

    Joined:
    Oct 3, 2019
    Member:
    #36961
    Messages:
    214
    Gender:
    Male
    First Name:
    Ben
    Fort Worth
    Vehicle:
    2020 MGM 1794
    full transparency: I am copying your idea of wrapping these faux wood pieces. Curious about how you did the ones on the door. Are they clipped into place and just need to be carefully pried off or did you have to wrap it place?
     
  9. Feb 19, 2020 at 7:01 PM
    #69
    cfdhickey231

    cfdhickey231 New Member

    Joined:
    Oct 18, 2018
    Member:
    #20710
    Messages:
    13
    Gender:
    Male
    First Name:
    Merek
    Dallas, TX
    Vehicle:
    2015 White Tundra 1794
    I would love to know how you did the ones in the door as well! That’s the only faux wood I have left to wrap, just haven’t figured out how to tackle them yet! Thanks for help in advance!
     
  10. Feb 19, 2020 at 7:35 PM
    #70
    MT1794PRO

    MT1794PRO New Member

    Joined:
    Mar 28, 2018
    Member:
    #13955
    Messages:
    130
    Gender:
    Male
    First Name:
    Paul
    Vehicle:
    2014 MGM 1794 CM
    Debadge, Dechrome, TRD Pro Grille, 2018 Headlights, Amber Grill Lights, Carbon Wrapped Wood Trim, Pace Edwards Switchblade Tonneau....
    You’ll need to remove the door panels and drill out the heat stakes holding the wood panels on. I want to say there are maybe 6 each. Don’t drill too deep obviously as you could go right through. I think I used a small drill bit and then stepped up to a 1/2” drill bit. You want to keep enough of the stakes so you can easily reinstall the part. So go easy. Once the heat stakes are out, the part comes right off. I then wrapped them making sure to have some overlap on the back to secure the wrap. Reinstalled and used some globs of 5 min epoxy to secure the panels back to the door panels.

    Let me know if you have further questions.
     
    Bigolbaddy[QUOTED] likes this.
  11. Feb 21, 2020 at 4:16 PM
    #71
    Bigolbaddy

    Bigolbaddy New Member

    Joined:
    Oct 3, 2019
    Member:
    #36961
    Messages:
    214
    Gender:
    Male
    First Name:
    Ben
    Fort Worth
    Vehicle:
    2020 MGM 1794
    what did you do to overcome the extra leather when wrapping g your steering wheel when covering the faux wood? There is about 1/8-1/4” too much.
     
  12. Feb 22, 2020 at 11:07 AM
    #72
    cfdhickey231

    cfdhickey231 New Member

    Joined:
    Oct 18, 2018
    Member:
    #20710
    Messages:
    13
    Gender:
    Male
    First Name:
    Merek
    Dallas, TX
    Vehicle:
    2015 White Tundra 1794
    Hey MT1794PRO, appreciate the feedback and instructions! That's a big help! Gotta admit, i honestly have no idea what "heat stakes" are, but i imagine ill find out as soon as i pull the door panel off lol. Do the door panels come off pretty easy? I was just about to youtube it as i have never done this before. Thanks man!
     
  13. Feb 22, 2020 at 11:12 AM
    #73
    MT1794PRO

    MT1794PRO New Member

    Joined:
    Mar 28, 2018
    Member:
    #13955
    Messages:
    130
    Gender:
    Male
    First Name:
    Paul
    Vehicle:
    2014 MGM 1794 CM
    Debadge, Dechrome, TRD Pro Grille, 2018 Headlights, Amber Grill Lights, Carbon Wrapped Wood Trim, Pace Edwards Switchblade Tonneau....
    It was a good bit ago but I believe I was able to just fold it in and stitch it down as I went around.
     
  14. Feb 22, 2020 at 11:21 AM
    #74
    MT1794PRO

    MT1794PRO New Member

    Joined:
    Mar 28, 2018
    Member:
    #13955
    Messages:
    130
    Gender:
    Male
    First Name:
    Paul
    Vehicle:
    2014 MGM 1794 CM
    Debadge, Dechrome, TRD Pro Grille, 2018 Headlights, Amber Grill Lights, Carbon Wrapped Wood Trim, Pace Edwards Switchblade Tonneau....
    This should help...

    https://m.youtube.com/watch?v=2KHUaUM_q28

    Heat stakes are just melted plastic posts that make permanent assemblies in mass manufacturing quicker then a fastener. Just some melted plastic rolled over to form a “head”. I believe they were white-ish but should be very obvious on the back of the panel.
     
    Bigolbaddy likes this.
  15. Feb 22, 2020 at 11:35 AM
    #75
    cfdhickey231

    cfdhickey231 New Member

    Joined:
    Oct 18, 2018
    Member:
    #20710
    Messages:
    13
    Gender:
    Male
    First Name:
    Merek
    Dallas, TX
    Vehicle:
    2015 White Tundra 1794
    Perfect, thanks again for all the help man.
     
  16. Feb 22, 2020 at 12:28 PM
    #76
    Bigolbaddy

    Bigolbaddy New Member

    Joined:
    Oct 3, 2019
    Member:
    #36961
    Messages:
    214
    Gender:
    Male
    First Name:
    Ben
    Fort Worth
    Vehicle:
    2020 MGM 1794
    i went on Amazon and searched the comments there are someone said they used an inner tube. Grabbed one from Walmart and that is the ticket. It’s adds just the right amount around the faux wood to make the leather come out even. Will add some pics when I finish.
     
  17. Mar 12, 2020 at 7:20 PM
    #77
    Jcmf52

    Jcmf52 New Member

    Joined:
    Feb 8, 2020
    Member:
    #42353
    Messages:
    296
    Gender:
    Male
    First Name:
    Rob
    Vehicle:
    2018-1794 S/C
    Shorty antenna Trifold hard top tonneau cover Center console safe Center console tray Rhino liner TRD air filter TRD rear sway bar TRD front sway bar Center console wireless charger kit Remote start Black 4x4 emblem swap
    Looks great!

    Which headunit is that?
     
  18. Mar 12, 2020 at 7:34 PM
    #78
    TundraCoast

    TundraCoast Member In Good Standing

    Joined:
    Feb 25, 2018
    Member:
    #13151
    Messages:
    593
    Gender:
    Male
    First Name:
    Ian
    California
    Vehicle:
    1794 4x4
    1794 on the inside - PRO on the outside
    Phoenix Android 12.1 PX6 (latest gen)

    Here’s a pic with a few more details I’ve added, AJT 4X4 selector bezel, anodized black dials for the android headunit (replaces the cheap plastic dials)
    AJT vent trim rings, all black TRD shifter handle

    26932545-B21D-45FA-B523-5C723BB52B13.jpg

    9A5368AF-EEB9-49AB-B7DD-52287C8EC3B1.jpg
     
    Last edited: Mar 13, 2020

Products Discussed in

To Top