1. Welcome to Tundras.com!

    You are currently viewing as a guest! To get full-access, you need to register for a FREE account.

    As a registered member, you’ll be able to:
    • Participate in all Tundra discussion topics
    • Transfer over your build thread from a different forum to this one
    • Communicate privately with other Tundra owners from around the world
    • Post your own photos in our Members Gallery
    • Access all special features of the site

How to take apart this...

Discussion in '2.5 Gen Tundras (2014-2021)' started by paradizecityz, Sep 7, 2019.

  1. Sep 7, 2019 at 10:00 AM
    #1
    paradizecityz

    paradizecityz [OP] New Member

    Joined:
    Jan 28, 2019
    Member:
    #25222
    Messages:
    829
    Gender:
    Male
    Richmond, TX
    Vehicle:
    2022 Tundra TRD Off Road
    7CEAA2B3-2DC6-4C97-B8B3-FB86763D0049.jpg

    Going to wire up my light bar and put the switch in this blank but how do I access it? Does that entire panel pop out?
     
  2. Sep 7, 2019 at 10:30 AM
    #2
    Toyotoholic

    Toyotoholic -4Life-

    Joined:
    May 17, 2017
    Member:
    #7754
    Messages:
    1,918
    Gender:
    Male
    First Name:
    Jmz
    Vehicle:
    17' MGM
    Pro suspension, sways
    Bottom panel first, then it will pop off but you will probably need some small plastic pry tools.
     
  3. Sep 7, 2019 at 10:31 AM
    #3
    Makoy339

    Makoy339 Simplicity = Reliability !!!

    Joined:
    Jun 22, 2018
    Member:
    #16360
    Messages:
    520
    Gender:
    Male
    Vehicle:
    Super White TRD
    TRD parts
    Yes, you can pop it out. Its held by plastic clips.
     
    paradizecityz[OP] likes this.
  4. Sep 7, 2019 at 10:57 AM
    #4
    T-Rex266

    T-Rex266 Elon approved Staff Member

    Joined:
    Jan 5, 2014
    Member:
    #6
    Messages:
    156,573
    Gender:
    Male
    Yep. Just clips. Plastic pry bar helps some
     
    paradizecityz[OP] likes this.
  5. Sep 7, 2019 at 11:16 AM
    #5
    sr5shark

    sr5shark Shop smart. Shop S-Mart.

    Joined:
    Feb 25, 2018
    Member:
    #13133
    Messages:
    1,176
    Gender:
    Male
    First Name:
    Alan
    Walnut Creek, CA
    Vehicle:
    2016 SR5
    Fox & ADS | SCS SR8 | Nitto RG
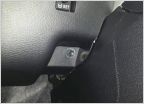
    There are a couple bolts on lower kick panel that need to be removed before you try taking it off.
     
    paradizecityz[OP] likes this.
  6. Sep 19, 2019 at 7:42 AM
    #6
    paradizecityz

    paradizecityz [OP] New Member

    Joined:
    Jan 28, 2019
    Member:
    #25222
    Messages:
    829
    Gender:
    Male
    Richmond, TX
    Vehicle:
    2022 Tundra TRD Off Road
    Thanks guys...easy to take that out. But now, how do you take the below apart? I tried using a pry tool but it wouldn’t budge and I didn’t want to break anything...

    AB61A1CB-EC5C-4BB1-8FB7-CDF3A7D1A7D6.jpg
     
  7. Sep 19, 2019 at 9:00 AM
    #7
    jordan0317

    jordan0317 Just hoodrat things...

    Joined:
    Jun 30, 2019
    Member:
    #32641
    Messages:
    481
    Gender:
    Male
    First Name:
    Jordan
    Martin, TN
    Vehicle:
    2017 White Tundra XP 4x4
    The seam at the top of that pic, if you put your pry tool in there and start working on it you'll be able to get it out enough to see where the clips are, then just apply pressure and it will pop off. Just did mine and removed the head unit to mount a ram mount on the dash. It takes more pressure than you think to get that one out
     
    paradizecityz[OP] likes this.
  8. Sep 19, 2019 at 9:05 AM
    #8
    paradizecityz

    paradizecityz [OP] New Member

    Joined:
    Jan 28, 2019
    Member:
    #25222
    Messages:
    829
    Gender:
    Male
    Richmond, TX
    Vehicle:
    2022 Tundra TRD Off Road

    Yea, that's where I put my pry tool...maybe didn't give it enough force...thanks!
     
    jordan0317[QUOTED] likes this.
  9. Sep 19, 2019 at 8:32 PM
    #9
    silverhack

    silverhack New Member

    Joined:
    Sep 18, 2017
    Member:
    #9737
    Messages:
    623
    Gender:
    Male
    First Name:
    Adam
    Sacramento, CA
    Vehicle:
    2018 CrewMax Inferno
    There are three ways to get at that one.

    1) use your plastic pry tool at the top of it to pull it out. *I can never get this to work, so I use method 2 now. I used to use method 3 until I saw someone do 2 and it’s much easier

    2) use your plastic pry tool at the top of the climate control section (between the radio) and pry the climate control area off, this is also connected to that bottom piece and will help pull it out.

    3) this was the first method I learned from watching a YouTube video of a radio install. It’s the most work, but also I think has the least change of scratching things up....
    Unscrew the gear shift knob. Open the center console arm rest. Using plastic pry tool near the center console, lift up and remove the entire plastic piece that connects to center console, has the cup holders and cover for gear shifter. Take that whole thing out. Now you can pull off that bottom piece you are interested in from the bottom of it.
     
  10. Sep 19, 2019 at 8:34 PM
    #10
    paradizecityz

    paradizecityz [OP] New Member

    Joined:
    Jan 28, 2019
    Member:
    #25222
    Messages:
    829
    Gender:
    Male
    Richmond, TX
    Vehicle:
    2022 Tundra TRD Off Road

    Appreciate it...will definitely try #2...too much on #3 lol
     
  11. Sep 19, 2019 at 8:36 PM
    #11
    silverhack

    silverhack New Member

    Joined:
    Sep 18, 2017
    Member:
    #9737
    Messages:
    623
    Gender:
    Male
    First Name:
    Adam
    Sacramento, CA
    Vehicle:
    2018 CrewMax Inferno
    #3 really isn’t that much work. And I think it’s the ‘safest’ way to go without scratching things up, so it’s definitely a good way to start with the first time.
     

Products Discussed in

To Top