

-
Welcome to Tundras.com!
You are currently viewing as a guest! To get full-access, you need to register for a FREE account.
As a registered member, you’ll be able to:- Participate in all Tundra discussion topics
- Transfer over your build thread from a different forum to this one
- Communicate privately with other Tundra owners from around the world
- Post your own photos in our Members Gallery
- Access all special features of the site
 Headlight install. Few questions. Broken piece
 Idler pulley bearing
 Another JBL bypass question
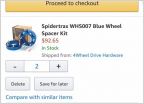 Price alert: spider Trax wheel spacers smoking deal on bigg guuurl
 Transmission cooler line leak?
 VHF/UHF Radios
PCV Valve Replacement Instructions-4.7L
Discussion in '1st Gen Tundras (2000-2006)' started by FirstGenVol, Jan 14, 2019.
Page 1 of 4
Page 1 of 4


