

-
Welcome to Tundras.com!
You are currently viewing as a guest! To get full-access, you need to register for a FREE account.
As a registered member, you’ll be able to:- Participate in all Tundra discussion topics
- Transfer over your build thread from a different forum to this one
- Communicate privately with other Tundra owners from around the world
- Post your own photos in our Members Gallery
- Access all special features of the site
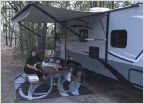 Bought our first trailer! Couple questions.
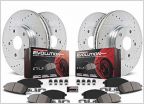 Has anyone installed the Power Stop Front & Rear Brake Pads & Rotors
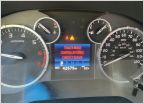 Tekonsha P3 error message
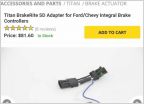 2018 trailer brake controller issues and hopefully a fix
 Cryo rotors/TRD brake kit worth it?
 Suspension Air Bags
Trailer Axle Maintenance
Discussion in 'Towing & Hauling' started by ColoradoTJ, May 9, 2018.


