

-
Welcome to Tundras.com!
You are currently viewing as a guest! To get full-access, you need to register for a FREE account.
As a registered member, you’ll be able to:- Participate in all Tundra discussion topics
- Transfer over your build thread from a different forum to this one
- Communicate privately with other Tundra owners from around the world
- Post your own photos in our Members Gallery
- Access all special features of the site
 Next project. Stereo and speakers
 On board air, whos got it and what's your system?
 Another JBL bypass question
 Adding fog lights to a 2006 Gen 1 base model V6
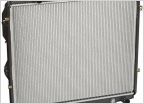 Factory Radiator Thickness
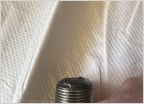 Differential Oil Change, Metal on Plug(s). How Concerning?
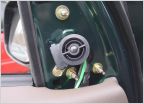
Upper ball joint removal ?
Discussion in '1st Gen Tundras (2000-2006)' started by growit, Mar 14, 2019.
Page 2 of 2
Page 2 of 2


