1. Welcome to Tundras.com!

    You are currently viewing as a guest! To get full-access, you need to register for a FREE account.

    As a registered member, you’ll be able to:
    • Participate in all Tundra discussion topics
    • Transfer over your build thread from a different forum to this one
    • Communicate privately with other Tundra owners from around the world
    • Post your own photos in our Members Gallery
    • Access all special features of the site

Eibach Pro Stage 2R review

Discussion in 'Suspension' started by Kojack, Jun 11, 2024.

  1. Mar 3, 2025 at 10:57 AM
    #61
    Iamsecond

    Iamsecond New Member

    Joined:
    Dec 13, 2021
    Member:
    #71749
    Messages:
    241
    Gender:
    Male
    First Name:
    Kevin
    Vehicle:
    2019 Limited Tundra
    You don’t need them necessarily. However, it’s really a good time to do them if you can. It really gives a lot of room for adjustment during alignment. I just did the lift that comes for these and did the dirt kings. Also if you go ahead it future proofs you. And your going yo have everything out anyway it’s one of those things if your tight on money you don’t have to but if you can swing it you will not regret it.
     
  2. Mar 3, 2025 at 11:12 AM
    #62
    1G3 Tundra

    1G3 Tundra New Member

    Joined:
    Feb 27, 2025
    Member:
    #131061
    Messages:
    9
    Gender:
    Male
    @Iamsecond thanks for the reply man. All I needed to hear was that it makes alignment easier. Ill likely go with the dir kings as well, seems to be the common pairing for tundras with eibachs
     
  3. Mar 3, 2025 at 11:58 AM
    #63
    Panda21MGMcMax

    Panda21MGMcMax New Member

    Joined:
    Mar 2, 2025
    Member:
    #131208
    Messages:
    6
    Gender:
    Male
    San Diego
    Vehicle:
    2021 MGM 4x4 CrewMax Limited
    I just hit up Colton at HotShots. …… he is a world of help…….. he just got me setup with

    Bilstein 6110/5160s, dirt kings UCAs and coach builders rear shackles …… I wish I knew a way to tag Colton’s forum handle …..….. @memario1214 U DA MAN……. And guys in the forum you guys are great as well
     
    Last edited: Mar 3, 2025
    Thumper_6119, The Dude and 1G3 Tundra like this.
  4. Mar 4, 2025 at 9:08 AM
    #64
    memario1214

    memario1214 Hotshot Offroad Staff Member Vendor

    Joined:
    Dec 13, 2015
    Member:
    #2252
    Messages:
    12,731
    Gender:
    Male
    First Name:
    Colton
    Missoula, MT
    Vehicle:
    '21 Limited MGM CrewMax
    :anonymous: apparently our SEO is working. With how small we are I'm not gonna complain about that!
    You're a good man, Charlie Brown. :fistbump:
    As mentioned previously, the UCAs are not required for that amount of lift. Sure, they have their advantages for strength, ability to dial in alignment, etc. Happy to help whenever you're ready!
    I'm right here! :wave: Colton is also memario1214. The Toyota folks get dedicated service here on the forums since I have been hanging around here and TacomaWorld forever!
     
  5. Jun 3, 2025 at 9:32 AM
    #65
    amc_

    amc_ New Member

    Joined:
    Mar 11, 2025
    Member:
    #131703
    Messages:
    16
    Gender:
    Male
    Washington
    Vehicle:
    2018 Tundra Platinum CrewMax 4x4
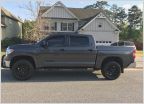
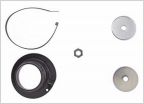
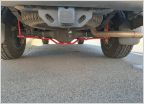
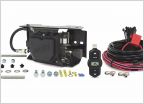
    I figured this was a good place to add. I purchased the Eibach Pro 2r kit and f/r Durobump bumpstop replacements from Hotshot Offroad and just finished the install. This was to replace my stock Hitachi shocks/struts on a 2018 Platinum Crewmax with ±116,000 miles. Overall, the install was straightforward with no issues. I soaked everything with PB blaster for a couple days before I started, and thankfully I didn't have any issues with the front bumpstops like a lot of folks. They were definitely rusty, but came off clean with a little finesse.

    I tackled the rear end first. Didn't have to remove the tires, just jacked it up high enough to get full-droop on the leafs and then coaxed the shocks into place. I loosely threaded the upper mounts on and then lined up the lowers. I did the rear bumpstops with the truck fully back on the ground, and then snugged everything up. Drove it like this for 2 days before I installed the front coilovers and already hugely improved the ride quality and handling.

    Last night I installed the front coilovers. They went in more or less exactly like the instructions/youtube videos show. I do have a couple of comments specific to my install that might help others. I only had one side up on jackstands at a time. I removed the lower front sway bar bolts before lifting it up and removing the front tire. Then I loosened the upper and lower strut bolts, popped the tie rod out of the knuckle and removed the bolt holding the ABS wire bracket to the upper control arm. This allowed plenty of flexibility to pull the knuckle out of the way. I decided to leave the brake caliper/disc on just to simplify things and had no issues like that. Once I removed the jack from the lower control arm I was able to pop the ball joint off the knuckle (with a pittman arm tool - mine were definitely not loose like in the video) and lean it out of the way. The original struts came out pretty easy with a 36" pry bar under the lower mount.

    I wanted to keep the factory ride height (roughly) due to garage clearances at home/work so I lowered the collar 8 full turns (1/8" per turn) on the bench before I installed them on the truck. I put the lower mount in a vise and held the top mount, sprayed a little lube on the threads and marked a reference line on the collar. Then I just used the spanner wrench included in the kit. This worked out great, and barring any settling as they break in I am roughly 1/2-3/4" higher in front than before, likely due to the well-loved factory springs. Even with the preload collar lowered about an inch these were still quite a bit longer than the factory struts and took some effort to get into the lower perch. I had to use the pry bar and a dead-blow hammer on both sides, but once I figured out the correct approach they went right in. Once the lower bolt was back in with the nut loosely threaded, I snugged up the top nuts and reinstalled the tie rod at the knuckle. I had to jack up the lower control arm a bit before I could use the pry bar to pull the upper control arm/ball joint down enough to thread on the nut. Once it was snugged up, I went back and torqued everything down. Then sprayed the rearward front bumpstop with PB Blaster again and used large channel lock pliers to remove them. I had to use a flex-knuckle socket adapter to have clearance to install the new bumpstops but they went on easy. Then, I put the wheel back on and lowered the truck back on the ground. Basically the same on both sides. Once both wheels were down I reinstalled the sway bar end link bolts and double-checked torque on everything. I'll probably check it all again in a few days too.

    Before install, the front was sitting at 37" from ground to fender and the rear was 39". After, the front is sitting at 38" on both sides so just about an inch of rake. TBD if the springs settle at all but I'll recheck after a couple-hundred miles. Going to get it in for an alignment next week, but so far it tracks straight with just a slightly vague steering feel over uneven ground. The ride improvement is dramatic. It actually rides like a truck now - but in a good way. Firm but forgiving, definitely not supple, but it feels like higher speed bumps are totally smoothed out and the truck feels solid again. Honestly the most noticeable improvement is over the lane marking turtles at 25-30mph. Those used to shake the entire truck (definitely needed to do this 60k miles ago) and now I don't even feel them.

    Side note - I noticed that both front sway bar end links have play where they attach to the TRD sway bar. They are Moog end links, with less than 10k miles on them and the bolts are completely rusted/frozen. Sadly, I suspect I am going to have to replace the sway bar if the holes are wallowed out. I still have the original end links in the garage, so I'll try swapping them out first when I have time. Definitely explains the creak/clunk I've heard lately. Hopefully the sway bar is ok, and its just junk end links. Too bad, moog used to make quality stuff but these are definitely garbage. Seems like the steep price for the OEM ones is the way to go.

    Anyway, here's a few photos. Sorry for the potato camera, I was doing this mostly solo and photos were an afterthought.
    1.jpg

    3.jpg

    4.jpg

    5.jpg
     
  6. Jun 3, 2025 at 9:42 AM
    #66
    memario1214

    memario1214 Hotshot Offroad Staff Member Vendor

    Joined:
    Dec 13, 2015
    Member:
    #2252
    Messages:
    12,731
    Gender:
    Male
    First Name:
    Colton
    Missoula, MT
    Vehicle:
    '21 Limited MGM CrewMax
    Looking really good! Thanks for the support, and the write-ups are always a welcome sight!
     
    RobertD and amc_[QUOTED] like this.
  7. Jun 3, 2025 at 9:46 AM
    #67
    Tundra Texan

    Tundra Texan New Member

    Joined:
    Dec 21, 2024
    Member:
    #127669
    Messages:
    1,066
    Gender:
    Male
    First Name:
    Todd
    Vehicle:
    2016 Tundra
    None at this point.
    I'm really torn about lifting the Tundra.
    While yes the added clearance would be nice I also dont want to bring the center of gravity higher with the SuperCharger because I know myself well enough to know I'd want to be able to take the corners a little hotter.
    Guess a couple of inches wouldnt be too bad as long as the suspension is an improvement over the stock suspension as in stiffer.
     
  8. Jun 3, 2025 at 10:38 AM
    #68
    amc_

    amc_ New Member

    Joined:
    Mar 11, 2025
    Member:
    #131703
    Messages:
    16
    Gender:
    Male
    Washington
    Vehicle:
    2018 Tundra Platinum CrewMax 4x4
    Yeah, I hear ya. I don't need any lift 95% of the time so dialed these as close to factory height as I could and am really happy so far. The nice thing with the Eibach kit is that it can be adjusted down the road as needed so you could try it and go back to stock height if you don't like it.
     
  9. Jun 3, 2025 at 2:25 PM
    #69
    YeOldeRusty

    YeOldeRusty New Member

    Joined:
    Mar 10, 2025
    Member:
    #131650
    Messages:
    21
    First Name:
    Mac
    Vehicle:
    2022 Silver CrewMax Limited
    Good writeup. Funny enough I just finished up installing the same kit from Hotshot. I did the same thing where I installed the rear last week and finished up the front today. I went about disassembling the front end a little differently. I left everything from the UCA to the brake disc alone. I only disconnected the bracket securing the bracket to the LCA and disconnected the swaybar links. Then I loosened the cam bolts on the LCA and let it drop down.

    Shock install was easy enough. I only had to text @memario1214 a couple times :thumbsup:. After telling him the pain of reconnected the swaybar, he made the suggestion of just taking it out. So that's what I did. From there the hardest part was getting the lower bracket to line up to the hub assembly. That took a bit of encouragement.

    So far I've only tested it out around the block for about 30 minutes. On the small street stuff, it's identical to stock. Which isn't a bad thing to me at all. As I got more bold I decided to hit a speed bump with sufficient momentum. When I say it's not comparable to stock, I mean it. I really was not expecting it to eat speed bumps as well as it does. I'm now worried I will start to aim for potholes just to see what happens.
     
    The Dude and memario1214 like this.
  10. Jun 16, 2025 at 10:07 PM
    #70
    1G3 Tundra

    1G3 Tundra New Member

    Joined:
    Feb 27, 2025
    Member:
    #131061
    Messages:
    9
    Gender:
    Male
    Just picked up the eibach stage 2r kit and UCAs directly from their headquarters location in California as I’m local to them. FYI they do offer a nice mil/first responder discount.

    does anyone have a recommendation for how much I should adjust the front coil overs if I want it to be leveled with the rear? Thanks in advance.
     
    Last edited: Jun 16, 2025
    The Dude likes this.
  11. Jun 16, 2025 at 10:09 PM
    #71
    1G3 Tundra

    1G3 Tundra New Member

    Joined:
    Feb 27, 2025
    Member:
    #131061
    Messages:
    9
    Gender:
    Male
    Also, the Eibach UCAs for 2nd gen tundras are just rebranded SPCs.
     
    The Dude likes this.
  12. Jun 18, 2025 at 2:04 PM
    #72
    Thumper_6119

    Thumper_6119 I've seen things you people wouldn't believe.

    Joined:
    Oct 14, 2019
    Member:
    #37365
    Messages:
    315
    Gender:
    Male
    Texas
    Vehicle:
    2011 Toyota Tundra SR5 Texas Edition (Crewmax) 4x4
    The front coilovers come set at 2.5" out of the box. (You should confirm that with yours, just to be sure). Before I installed my set (both front and back), the top of my tires were 5" from the fenders in the front, and 8" in the back. After installation, front was at 7.5", and the back was at 8.5".

    Still a slight rake, but much more level than it was. If that helps.
    IMG_8544.jpg
     
    1G3 Tundra[QUOTED] and The Dude like this.
  13. Jun 18, 2025 at 3:15 PM
    #73
    The Dude

    The Dude New Member

    Joined:
    Jan 25, 2020
    Member:
    #41747
    Messages:
    334
    Gender:
    Male
    Chandler, AZ, not anymore :(
    What size tires are those?
     
  14. Jun 18, 2025 at 3:17 PM
    #74
    Thumper_6119

    Thumper_6119 I've seen things you people wouldn't believe.

    Joined:
    Oct 14, 2019
    Member:
    #37365
    Messages:
    315
    Gender:
    Male
    Texas
    Vehicle:
    2011 Toyota Tundra SR5 Texas Edition (Crewmax) 4x4
    33x12.5x20
     
    The Dude[QUOTED] likes this.
  15. Jun 19, 2025 at 10:37 AM
    #75
    1G3 Tundra

    1G3 Tundra New Member

    Joined:
    Feb 27, 2025
    Member:
    #131061
    Messages:
    9
    Gender:
    Male
    Thanks! That’s a huge help
     
    Thumper_6119[QUOTED] likes this.
  16. Jun 19, 2025 at 2:30 PM
    #76
    Thumper_6119

    Thumper_6119 I've seen things you people wouldn't believe.

    Joined:
    Oct 14, 2019
    Member:
    #37365
    Messages:
    315
    Gender:
    Male
    Texas
    Vehicle:
    2011 Toyota Tundra SR5 Texas Edition (Crewmax) 4x4
    :thumbsup:

    Every full turn of the collar will adjust the height by 1/8". So you can dial in each coilover until you get what you want.
     
    amc_ and RobertD like this.
  17. Jun 20, 2025 at 7:11 AM
    #77
    amc_

    amc_ New Member

    Joined:
    Mar 11, 2025
    Member:
    #131703
    Messages:
    16
    Gender:
    Male
    Washington
    Vehicle:
    2018 Tundra Platinum CrewMax 4x4
    I’ll add that they aren’t hard to adjust once installed. Just jack up and get it to full droop then you use the collar wrench to turn the collar up or down. I used a sharpie to make a reference mark to count the full turns and set mine to about 1/2” higher than it sat stock. Took an extra 2 full turns to get the driver side even with the passenger side.
     
    The Dude, RobertD and Thumper_6119 like this.
  18. Jun 20, 2025 at 9:57 AM
    #78
    Thumper_6119

    Thumper_6119 I've seen things you people wouldn't believe.

    Joined:
    Oct 14, 2019
    Member:
    #37365
    Messages:
    315
    Gender:
    Male
    Texas
    Vehicle:
    2011 Toyota Tundra SR5 Texas Edition (Crewmax) 4x4
    This!! I did the sharpie mark on the collar as well so I'd have a reference point. (I originally lowered the height by 1/2" on each side, but then set it back to 2.5" like the shocks were out of the box, and I was happy with it there. I did adjust the driver's side up about 1/4" to even it up with the passenger side). It is very easy to adjust as @amc_ noted above.
     
    RobertD and memario1214 like this.
  19. Jun 20, 2025 at 5:11 PM
    #79
    The Dude

    The Dude New Member

    Joined:
    Jan 25, 2020
    Member:
    #41747
    Messages:
    334
    Gender:
    Male
    Chandler, AZ, not anymore :(
    So you're saying slam a CB shim on driver's side :D
     
  20. Jun 23, 2025 at 3:04 PM
    #80
    amc_

    amc_ New Member

    Joined:
    Mar 11, 2025
    Member:
    #131703
    Messages:
    16
    Gender:
    Male
    Washington
    Vehicle:
    2018 Tundra Platinum CrewMax 4x4
    I mean, yeah you sure could but the coilovers have plenty of threaded adjustment to the preload collar so the shims shouldn't be necessary. Personally I found it pretty simple to just measure, unload one side at a time and turn the collar, then set it back down and measure again. I only needed 1 full turn higher on the driver side to make them perfectly level.
     

Products Discussed in

To Top