

-
Welcome to Tundras.com!
You are currently viewing as a guest! To get full-access, you need to register for a FREE account.
As a registered member, you’ll be able to:- Participate in all Tundra discussion topics
- Transfer over your build thread from a different forum to this one
- Communicate privately with other Tundra owners from around the world
- Post your own photos in our Members Gallery
- Access all special features of the site
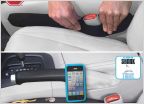 Gap filler for driver and passenger seats
 Options for glove box and footwell lighting
 Headlight wiring help
 Tailgate came off the right side hinge as I was closing it
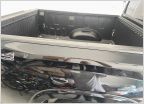 Leak underneath bed-rail cover??
 Which running boards to go with?--Pictures requested
Dash Cam
Discussion in '3rd Gen Tundras (2022+)' started by chiefbob, Apr 18, 2022.
Page 4 of 5
Page 4 of 5
Products Discussed in


