

-
Welcome to Tundras.com!
You are currently viewing as a guest! To get full-access, you need to register for a FREE account.
As a registered member, you’ll be able to:- Participate in all Tundra discussion topics
- Transfer over your build thread from a different forum to this one
- Communicate privately with other Tundra owners from around the world
- Post your own photos in our Members Gallery
- Access all special features of the site
Quick Links: Help with Nerf Bars on newly lifted Tundra
  Undercarriage Treatment?! Yay or Nay?! Pros & Cons?!
  Question about OEM Metal Oil Filter Canister on 2021 Model
  Rack systems that line up level with an over cab rack for 8’+ boards?
  Best iPhone holder
 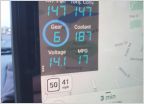 Best Way to Read Coolant/Trans Temps Real Time?
Anyone Replacing Their Steering Rack Bushings w/ 35's?
Discussion in '2.5 Gen Tundras (2014-2021)' started by InfernoPRO, Feb 1, 2020.
Page 5 of 5
Page 5 of 5

