1. Welcome to Tundras.com!

    You are currently viewing as a guest! To get full-access, you need to register for a FREE account.

    As a registered member, you’ll be able to:
    • Participate in all Tundra discussion topics
    • Transfer over your build thread from a different forum to this one
    • Communicate privately with other Tundra owners from around the world
    • Post your own photos in our Members Gallery
    • Access all special features of the site

OEM bed step install without changing out the bracket

Discussion in 'General Tundra Discussion' started by lehminh, Mar 26, 2017.

  1. Mar 18, 2022 at 3:45 PM
    #61
    Jtundra81

    Jtundra81 Just a member

    Joined:
    Mar 21, 2019
    Member:
    #27906
    Messages:
    506
    Gender:
    Male
    First Name:
    Joe
    Vehicle:
    2019 cement tundra crewmax
    I would leave it as is , emailed sparks parts and their technician confirmed that it is like that .
    Now being me , I removed everything and grind the shim in a 45 angle , it helped a bit .
     
  2. May 1, 2022 at 4:39 PM
    #62
    Carpentercarguy

    Carpentercarguy New Member

    Joined:
    May 1, 2022
    Member:
    #77834
    Messages:
    1
    Gender:
    Male
    Vehicle:
    2021 Tundra Crewmax
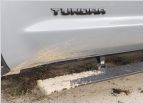
    I just did a bedstep for 2021. It took about 3 hours taking my time. I swapped the bracket out for the new one. I wanted it done how the dealership is "supposed to do it". If you dont want to be cutting on your take your time with the bumper retaining clips. A long set of double hindged needle nose did the trick no problem. The bumper cover only needed to be disengaged from driver side to hitch. That gives you enough room to get the bolts out. It turned out nice. I was happy i didnt cut any corners. To each his own on there truck. One last thing i need two different size torque wrenches. Its close quarters in there. This is how it turned out in case anyone wanted to do this way.

    20220501_104131.jpg
    20220501_101420.jpg
    20220501_080055.jpg
    16514482766958723782802744144024.jpg
     
  3. May 25, 2022 at 1:26 PM
    #63
    rdiddy5

    rdiddy5 New Member

    Joined:
    Jan 5, 2022
    Member:
    #72677
    Messages:
    436
    First Name:
    Ryan
    Arizona
    Vehicle:
    2018 Crewmax 1794 4x4
    I ordered an OEM step for my 2018 today. Having a hard time getting into the bed now that its lifted.
     
  4. Jun 2, 2022 at 3:57 PM
    #64
    Old.Ski.Bum

    Old.Ski.Bum New Member

    Joined:
    Oct 19, 2020
    Member:
    #53773
    Messages:
    38
    Gender:
    Male
    First Name:
    Paul
    Vehicle:
    2021 Luna Rock TRD PRO
    Installed mine today by cutting the existing bracket. I figured if I didn’t like it that way I could always install the bracket that came with the kit. Being really anal, my step isn’t perfectly parallel to the ground; a little crooked. But I haven’t torqued anything yet, so I’ll loosen the bolts on the frame and readjust it. I think there’s a little play there to straighten it a bit! At the end of the day, pulling the bumper apart would have been a bitch. My truck is coated in crude underneath since I had NH Oil treatment sprayed the last two falls. What a mess; may skip it this year!
     
  5. Oct 19, 2022 at 1:05 PM
    #65
    1lowlife

    1lowlife Toxic prick and pavement princess..

    Joined:
    May 4, 2016
    Member:
    #3296
    Messages:
    10,657
    First Name:
    DADA
    THE GREAT STATE OF TEXAS
    Vehicle:
    2014 MGM DC SR5
    I installed my Amp bed step yesterday.
    I got it for Xmas, but Toyota had my truck from November to July.

    Having my casual OCD issues, my first thought would be to use the bumper part that came with the step.
    But being I've taken all that off before, I can't remember why, I decided to do the "cut the existing bracket" method.

    Thanks to @lehminh for starting this thread.

    OEM bed step install without changing out the bracket | Toyota Tundra Forum (tundras.com)

    I laid out and made a pattern of what the Amp bracket looked like.
    Compared that to the existing one so I knew what to cut.
    I first tried my jigsaw, epic fail, and then the Sawzall.
    Dulled the sharp cut edges with my Dremel and painted the cut.
    It saved A LOT of time not taking the rear bumper apart.

    I would have liked the step to be more even/level with the angle of the bumper, but oh well..
    It certainly does make getting in and out of the bed easier, especially with bone-on-bone knees.

    And whoever mentioned needing a breaker bar to get the 19MM bolts out, thank you.
    I picked up an iron pipe just in case, and I did need it..


    pr24nwdk_96026ff36efd74b6707fe3e35f673edbb4d30272.jpg


    lx0ahihc_bed9f06a018ed3d6ea009f9ee134c4af00f29c94.jpg
     
  6. Nov 11, 2022 at 6:14 PM
    #66
    Maddog94

    Maddog94 New Member

    Joined:
    Jul 25, 2016
    Member:
    #3987
    Messages:
    184
    Gender:
    Male
    Bumping this thread and hoping to get a response by tomorrow because I plan to install mine!

    I absolutely 100% will use the cutting method on the existing bracket. What is unclear to me is, how much more of the installation instructions can be disregarded now? Do you still have to take off the bumper cap up top to access anything? The license plate light? Tow hitch plug?

    Or do you literally just climb under and bolt it up after cutting the needed section(s)?

    It's raining here tonight and possibly tomorrow so maybe I will get to it Sunday but I'm hoping to do it tomorrow if possible. I already assembled the first part in the vice. Can't wait to have this thing on the truck!
     
    1lowlife likes this.
  7. Nov 11, 2022 at 8:59 PM
    #67
    lehminh

    lehminh [OP] New Member

    Joined:
    Aug 19, 2016
    Member:
    #4245
    Messages:
    302
    Gender:
    Male
    First Name:
    Mike
    Vehicle:
    2016 Tundra SR5 CrewMax 5.7L 2WD Front Bench Seats
    Nothing needs to be removed. Just cut and bolt on.
     
    Maddog94 and 1lowlife like this.
  8. Nov 11, 2022 at 9:30 PM
    #68
    Maddog94

    Maddog94 New Member

    Joined:
    Jul 25, 2016
    Member:
    #3987
    Messages:
    184
    Gender:
    Male
    That's incredible, thank you!
     
  9. Nov 12, 2022 at 7:34 AM
    #69
    Maddog94

    Maddog94 New Member

    Joined:
    Jul 25, 2016
    Member:
    #3987
    Messages:
    184
    Gender:
    Male
    Wow, that was unbelievably easy! All done and it's perfect. Thank you so much to the OP and everyone that contributed in this thread.
     
    lehminh[OP] and 1lowlife like this.
  10. Jan 21, 2023 at 2:30 PM
    #70
    Tigereye

    Tigereye New Member

    Joined:
    Feb 1, 2020
    Member:
    #42014
    Messages:
    140
    Gender:
    Male
    First Name:
    Eric
    Vehicle:
    2019 SSM Limited
    bed liner, diamondback se, level kit, nitto ridge grapplers,tufskinz letters, grab handle
    Totally agree with Maddog94. This would have been so much more difficult dealing with the bumper and new bracket. I cut the existing bracket and used the OEM installation instructions. Easy peazy. Thank you guys for this thread.
     
    Maddog94[QUOTED] likes this.
  11. Feb 12, 2023 at 10:48 AM
    #71
    CanTundra

    CanTundra New Member

    Joined:
    Nov 16, 2021
    Member:
    #70708
    Messages:
    132
    Vehicle:
    2021 Tundra TRD Off Road
    if I am understanding correctly. The oem way is to unbolt and completely disregard the oem bracket at which point you are suppose to install the supplied bracket to reinforce?

    but if you are going about it with the cutting method. This is where you do not remove oem bracket you just cut it but at the same time you do not use the supplied bracket in this case. Am I following correctly?
     
  12. Feb 12, 2023 at 3:30 PM
    #72
    lehminh

    lehminh [OP] New Member

    Joined:
    Aug 19, 2016
    Member:
    #4245
    Messages:
    302
    Gender:
    Male
    First Name:
    Mike
    Vehicle:
    2016 Tundra SR5 CrewMax 5.7L 2WD Front Bench Seats
    That’s right! You can put it side by side and see that it’s basically the same except for the section you are cutting off.
     

Products Discussed in

To Top