1. Welcome to Tundras.com!

    You are currently viewing as a guest! To get full-access, you need to register for a FREE account.

    As a registered member, you’ll be able to:
    • Participate in all Tundra discussion topics
    • Transfer over your build thread from a different forum to this one
    • Communicate privately with other Tundra owners from around the world
    • Post your own photos in our Members Gallery
    • Access all special features of the site

ToyoD's 2021 SR5 DC Cement (One of the last 2.5 Gens) build

Discussion in '2.5 Gen Builds (2014-2021)' started by ToyoD, Dec 9, 2021.

  1. Dec 9, 2021 at 2:29 AM
    #1
    ToyoD

    ToyoD [OP] New Member

    Joined:
    Jul 9, 2021
    Member:
    #65325
    Messages:
    40
    Gender:
    Male
    First Name:
    Drew
    Vehicle:
    2021 SR5 DC
    Build page link in signature
    Build page currently under construction.... Links to be added as soon as possible.

    RCI Engine & Transmission skid plates
    DIY: Rear Differential Breather Mod
    Rearview Mirror Riser (BirdDawg Industries)
    FRAC Install
    Rago fab dash plate + ICS under support plate
    Vinyl wrap:
    Chrome cup holder
    Shifter surround
    Steering Wheel trim
    Grille surround & Nose​
    Diamondback HD bed cover
    Wet Okole Seat covers
    Total Chaos bed stiffeners
    De-badged
    Driver's grab handle
    Front Bumper removal & Line-x end caps
    Weathertech Floor mats, window wind deflectors, & sunshades
    Original pics (freshly delivered)
     
    Last edited: Sep 10, 2022
  2. Dec 9, 2021 at 6:21 AM
    #2
    Charvonia Design

    Charvonia Design Enthusiast-Owned Small Business Vendor

    Joined:
    Feb 18, 2019
    Member:
    #26282
    Messages:
    674
    Gender:
    Male
    First Name:
    Keith
    Huntersville, NC
    Vehicle:
    2024 TRD Off Road Solar Octane
    Pics pics pics!
     
    ToyoD[OP] likes this.
  3. Dec 19, 2021 at 11:23 AM
    #3
    ToyoD

    ToyoD [OP] New Member

    Joined:
    Jul 9, 2021
    Member:
    #65325
    Messages:
    40
    Gender:
    Male
    First Name:
    Drew
    Vehicle:
    2021 SR5 DC
    Build page link in signature
    Ok so I'm a little behind on posting my mods but I've been pretty busy working on the truck to get things installed around life stuff. I plan on getting these caught up and hopefully hyperlinked at the top post like a table of contents somewhat like @RainMan_PNW (you're my hero on here man).

    In just a few months everyone has been so extremely helpful and the info on this forum has been priceless. My only hopes for this build page is that it could help someone else like me down the road and help contribute back to the community.

    12/31/21 update:
    My posts might be long winded but my goal is to include my approach to the decisions I made as well as any research I came across that was helpful in my pursuit. So if you decide to check anything out take what you'd like and leave the rest to be helpful for others. I'll work on hyperlinking things to keep it streamlined as possible.

    Thanks in advance for checking out my build page and feel free to leave a comment if something helps you, or you have additional help to add, or you just feel compelled to.

    So here we go!.....
     
    Last edited: Dec 31, 2021
    RainMan_PNW likes this.
  4. Dec 19, 2021 at 12:13 PM
    #4
    ToyoD

    ToyoD [OP] New Member

    Joined:
    Jul 9, 2021
    Member:
    #65325
    Messages:
    40
    Gender:
    Male
    First Name:
    Drew
    Vehicle:
    2021 SR5 DC
    Build page link in signature
    9/2/2021:
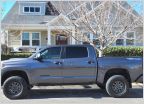
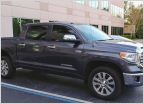
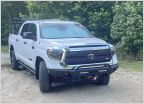
    Here are the original pics of the truck the day it was delivered to the dealership and I picked it up becoming a proud truck owner once again :yay: after having been without one for over 6 years (never doing that again :facepalm:)

    OG pic1.jpg OG pic2.jpg


    Back to Table of contents
     
    Last edited: Dec 31, 2021
    Charvonia Design and RainMan_PNW like this.
  5. Dec 21, 2021 at 9:13 AM
    #5
    ToyoD

    ToyoD [OP] New Member

    Joined:
    Jul 9, 2021
    Member:
    #65325
    Messages:
    40
    Gender:
    Male
    First Name:
    Drew
    Vehicle:
    2021 SR5 DC
    Build page link in signature
    9/5/21:
    Three days old I had plans to have the bed and the front bumper caps line-x'd as part of my chrome delete project so I had to figure out how to take the front bumper off. I found a thread on here that went through one person's steps which included removing the grille. I was terrified that I would mess up the TSS sensor and need to have it re-calibrated so I wanted to avoid removing the grille if at all possible (plus wanted to save time).

    Fortunately I found a youtube video by CBI Offroad about how to remove just the bumper. It was super easy and just took a little finesse once all the bolts were out to get the bumper under and out of the grille and side caps. I posted some info about what I did in this thread How to remove front and rear bumper caps 2017 and reinstall.

    Video re-posted along with my pics below:
    https://youtu.be/xq0YrxV53O8

    Bumper removed and grille/ side caps taped off to prevent scratching during re-install.
    IMG_9493.jpg
    IMG_9494.jpg

    The shop I used recommended the "Line-x Ultra" https://linex.com/ultra because it is a thin application. I have the front parking sensors in my front chrome bumper caps so I wanted to make sure they would still fit after being coated. the shop was a little concerned about adhesion on the chrome but were able to have them sand blasted enough to be comfortable with the application and made sure to spray even the insides to prevent the possibility of peeling down the road.
    When I got them back I thought they looked AMAZING! The line-x Ultra has a lot smoother texture than the regular bedliner and looks similar to a textured powder coat.
    IMG_9500.jpg
    Pic showing the 4 bolts used to re-install the end caps to the center piece of the bumper as well as the fog light and parking sensor re-installed (with no fitment issues :thumbsup:).
    IMG_9503.jpg

    Finished look after re-install. Need to address that chrome grille but we're getting started.
    IMG_9506.jpg

    Back to Table of contents
     
    Last edited: Dec 31, 2021
    RainMan_PNW likes this.
  6. Dec 21, 2021 at 9:20 AM
    #6
    ToyoD

    ToyoD [OP] New Member

    Joined:
    Jul 9, 2021
    Member:
    #65325
    Messages:
    40
    Gender:
    Male
    First Name:
    Drew
    Vehicle:
    2021 SR5 DC
    Build page link in signature
    Last edited: Dec 31, 2021
    RainMan_PNW likes this.
  7. Dec 21, 2021 at 10:37 AM
    #7
    ToyoD

    ToyoD [OP] New Member

    Joined:
    Jul 9, 2021
    Member:
    #65325
    Messages:
    40
    Gender:
    Male
    First Name:
    Drew
    Vehicle:
    2021 SR5 DC
    Build page link in signature
    10/2/21: Got the time to de-badge the chrome emblems today. I decided to leave the "Tundra" for now because I may buy the blackout cover for it. (Update: I ended up deciding to take the "Tundra" badge off too and go with the clean side profile.

    I would strongly recommend just putting up the extra $25 to get the 3M brand rubber wheel https://www.amazon.com/Adhesive-Remover-Graphics-diameter-threaded/dp/B00063VT0G?crid=15G3D3SI5FFB&keywords=3m+badge+remover&qid=1640110358&sbo=RZvfv%2F%2FHxDF+O5021pAnSA%3D%3D&sprefix=3m+badge+remover%2Caps%2C114&sr=8-1. After watching this video I found that compares some factors with 3 different wheels I think it was the best choice for protecting my paint from overheating (my biggest concern on a brand new truck). Then after actually getting and using the wheel it confirmed I made the right decision. The wheel also has threads all the way through so you can make better use of the whole wheel by flipping it over and not have one that looks like a cone shape with wasted material .
    https://youtu.be/7Y_2DYBwoTU

    The 3M wheel easily removed a TON of left behind foam tape from the badges by itself with no heating of the paint.
    There's plenty of youtube videos but here's what I did:

    1. Used soap & water on a wet rag to wash the badge & surrounding paint paying special attention to the tops of the badges to remove as much resting dirt as possible (you'll see why below).

    2. Gathered tools (see pic below): Heat gun (basic one from Harbor Freight worked great), Fishing line (no less than 30# test or it breaks too much), 3M removal wheel and coordless drill (set to less than 4000 RPM per wheel mfg.)
    IMG_9639.jpg

    3. I took the heat gun and gradually heated up the first badge. I Tried to get the heat only on the badge and not so much on the paint. I used my free hand to touch around the badge as a gauge to see how hot the badge was getting all over to make sure it was uniform as possible and also to see how the surrounding paint was doing. I didn't get it too hot. It was close to not being able to keep my hand on the badge when I touched it but not so hot that I couldn't. It seems like it really only needs a little heat to soften the foam tape underneath. It's possible on a hot summer day in direct sun you wouldn't even need the heat gun. I did try one without heating (about 70deg F ambient temp) and it was very stiff and broke the line a lot so the heat does help.

    4. I unrolled about 1.5ft of fishing string off the spool but didn't cut it. The string will break a few times during this process and the spool makes for a good handle to use for pulling. I wrapped the free end around my fingers (might want to use gloves if you no longer have man hands from being a desk jockey like me :wave:) and used a sawing motion to get in behind the badges and cut the foam tape. Try to go at an angle from the bottom to top to prevent any sand/ dirt stuck in the top of the foam/badge from being dragged down into where you're pulling the string and scratch your paint. After I made it all the way through behind the badge it was still stuck on the truck so I just went behind (much faster & easier) once or twice more. It either fell off or was barely hanging on after this.

    5. I pulled the badge straight off evenly so I didn't bend one side up and risk scratching the paint with the edge/ corner of the badge.

    6. Some videos online showed people peeling some of the foam tape residue off by hand before using the 3M wheel but I tried using the wheel first and it took everything right off. I found that if I started at one side and moved the wheel up and down as I went across it would just roll the foam off into itself. After I got the large pieces off I brushed any rubber residue off the paint from the wheel and looked for any remaining foam or adhesive and hit those spots as needed.
    IMG_9637.jpg IMG_9638.jpg IMG_9641.jpg
    All in all I'm glad I tried this myself and would recommend to anyone interested in trying this on their own. :thumbsup:

    IMG_9636.jpg IMG_9640.jpg

    Back to Table of contents
     
    Last edited: Dec 31, 2021
  8. Dec 21, 2021 at 12:02 PM
    #8
    ToyoD

    ToyoD [OP] New Member

    Joined:
    Jul 9, 2021
    Member:
    #65325
    Messages:
    40
    Gender:
    Male
    First Name:
    Drew
    Vehicle:
    2021 SR5 DC
    Build page link in signature
    11/1/21: @TOTAL CHAOS Bed Stiffeners Install

    I decided to get these as a preventative measure seeing as how I read about so many people having their bed welds crack over time (Bed Stiffeners - What do they do? Do I need them?)
    I plan on keeping this truck for the long haul so let's help get it there in as good of shape as possible. I also planned on getting a Diamondback HD cover so I never know what might end up getting hauled up there. I'm not planning on hauling ATVs but why not be ready for it just in case :muscleflexing: (better to have it and not need it or something like that right :notsure:;))?
    I know Total Chaos started the thread but there were also a lot of people in there talking about a couple different brands and I decided to go with the OG's as a way to give credit where I feel it's due and because the Total Chaos stiffeners looked like the ones with minimal interference in using the bed (Like being able to slide sheets of plywood in between the brackets without damaging the wood). With all that said I don't think any of the other brands are bad either.


    I'm glad I did get these early because in the directions it talks about the bed not touching at the top of the bracket and it would be pulled in place during the tightening of the top bolts, but when I was doing the test fitting mine touched so I was taking this as they were (and should be, the truck is only 2mo old) still straight from the factory and I plan on keeping them this way. I think they were a good investment in keeping the integrity of the bed intact. I'm also just glad that a company was pro-active in making a product like this to fix this issue for people like me who don't know how to weld but are mechanically inclined. Thanks for that @TOTAL CHAOS

    I ended up picking mine up with a discount from @sdhq_offroad and they were shipped same day :hattip:they came packaged really well and kept safe in transit. It was my first time buying from them and all around great customer experience in case you haven't shopped with them yet.

    The install instructions were easy to follow.

    Before pics
    IMG_9790.jpg IMG_9791.jpg

    Tail light removed (passenger side)
    IMG_9792.jpg

    Underneath view of hole on floor of bed (in case you want to see where it comes through)
    IMG_9797.jpg

    Bottom-side hole
    IMG_9796.jpg

    Top-side hole
    IMG_9795.jpg

    I used spray paint and sprayed it on the end of a q-tip to coat the inside of the drilled holes and let it dry before installing the bolts in order to protect the bare metal. FYI that stone gray color is NOT even close to the Cement gray in real life :oops:. It served it's purpose but good thing no one will ever see it ;)
    IMG_9801.jpg IMG_9799.jpg IMG_9800.jpg

    One user in the forum said they had a hard time about getting access to where the holes were placed on the sides for installing and tightening the nuts. I had no issues with the bottom hole and the top, while a little difficult to reach was not impossible. I also have a pretty good selection of tools to choose from so maybe that helped a bit :notsure:.
    IMG_9802.jpg

    And the completed project
    IMG_9805.jpg IMG_9803.jpg IMG_9809.jpg

    Back to Table of contents
     
    Last edited: Dec 31, 2021
    WXman, TOTAL CHAOS and COTundra23 like this.
  9. Dec 22, 2021 at 6:10 AM
    #9
    ToyoD

    ToyoD [OP] New Member

    Joined:
    Jul 9, 2021
    Member:
    #65325
    Messages:
    40
    Gender:
    Male
    First Name:
    Drew
    Vehicle:
    2021 SR5 DC
    Build page link in signature
    11/7/21: Wet Okole seat covers

    I was really torn between this brand and the Coverking (Both being the genuine neoprene not neosupreme) but the things that pulled me to Wet Okole were;
    • Although I found generally good reviews on Coverking, after a lot of reading I found a slight underlying theme that they had pretty terrible customer service especially with warranty claims. If you're someone with the Coverking neoprene seat covers with a great experience I'd love to hear about it and I'm not saying they're completely bad or you made a bad decision. I was just nervous about spending $500+ dollars and having to deal with hassle about a claim and these are the things that mattered to me.
    • I ordered samples of the Coverking genuine neoprene and the neoprene was really thin and all 4 samples I ordered (different colors) absorbed water when dripped on them and also allowed the water through the back side so I don't know what was going on with that. There is a chance they shipped me the neosupreme samples instead of the neoprene ones I requested but it didn't help give me the warm & fuzzies.
    • A really good friend of mine has owned the Wet Okole for over 10 years (he's a plumber in FL with kids and dogs) and has been really pleased with them and said they were really durable, did not make him sweat in the summer and he would totally buy them again.
    • Wet Okole has a policy where you can return any panel and get a replacement for $15 (you pay shipping to send yours in) and I thought that was pretty reasonable in case I damaged any down the road.
    Now I know this might be heresy but I'm not a fan of leather seats. I can't stand sliding around (especially in synthetic clothing) in turns or if I have to stop suddenly. I like as much friction as possible between me and the seat no matter what. So I purposefully got the SR5 with cloth seats (they would work by themselves but also stick better to a Neoprene seat cover IMO) and also planned to get the neoprene seat covers as a way to accomplish my goal. I wasn't completely sure how this would all play out (would the seat covers stick to the fabric enough and to me when sitting in the seats. But once the covers arrived and I was able to install them I have to say it is exactly what I was looking for. I feel like I'm sitting in a racing seat or something and really love it. I also think they look great.#MissionAccomplished :yes:

    Sweat factor: I just put them on and so haven't had a taste of them in the summer as far as sweating goes but I have done a couple hour drive with the heat on and not been the least bit sweaty between me and the seats. I plan to update this section when the summer comes and I have some data. Also the only reason I was ok with going all black was because I ended up getting the Autobahn i3 ceramic tint https://drive.google.com/file/d/1ey_nzaJ8X9QcRA0ARqs58eIcNLvTIgBg/view and it blocks 93% of IR rays keeping the interior super cool compared to normal tint.

    65785683536__F83038C1-475B-4AD6-92FB-CA57637CFF98.jpg IMG_9859.jpg IMG_9860.jpg IMG_9878.jpg

    Edit 12/31/21: I would also add that when you get these in and inspect them for missing pieces/ damage before putting them on (everyone does that right?) I would recommend laying all the pieces out separately somewhere to air out/ off-gas for up to a week. I didn't do this and it took at least 2 weeks for the smell to come down enough that it didn't blast me in the nose when I first opened the door.

    Back to Table of contents
     
    Last edited: Dec 31, 2021
    TOTAL CHAOS likes this.
  10. Dec 22, 2021 at 8:34 AM
    #10
    RainMan_PNW

    RainMan_PNW SSEM #82 RGBA #4 “That Guy” Vendor

    Joined:
    Oct 27, 2020
    Member:
    #54134
    Messages:
    14,885
    Gender:
    Male
    First Name:
    Casey
    Clark County, WA
    Vehicle:
    2021 Lunar Rock TRD Pro CM
    Check the build link in my signature.
    I had the swamp ass (wet okole) covers on my 2008 DC SR5 for nearly 300k miles. They were great seat covers. Added a little extra padding in the seat, withstood miles of kids, dogs, and road trips with both, and they weren't TOO bad to pull off and run through the wash machine when they started looking really bad. The only mistake I made was getting the piping on the sides of the front seats - that didn't last very long. But they were still in great shape when I sold the truck.

    I am a fan of leather, but also don't find it "slippery" - but if I find that it looks a little too worse for wear at some point I'll probably put WOs on again.
     
    ToyoD[QUOTED][OP] likes this.
  11. Dec 22, 2021 at 6:44 PM
    #11
    ToyoD

    ToyoD [OP] New Member

    Joined:
    Jul 9, 2021
    Member:
    #65325
    Messages:
    40
    Gender:
    Male
    First Name:
    Drew
    Vehicle:
    2021 SR5 DC
    Build page link in signature
    Man I hope they’re not too bad in the summer. Glad to hear another good customer review on the WOs, and also for the info on the piping. Thanks!
     
    RainMan_PNW[QUOTED] likes this.
  12. Dec 22, 2021 at 7:57 PM
    #12
    RainMan_PNW

    RainMan_PNW SSEM #82 RGBA #4 “That Guy” Vendor

    Joined:
    Oct 27, 2020
    Member:
    #54134
    Messages:
    14,885
    Gender:
    Male
    First Name:
    Casey
    Clark County, WA
    Vehicle:
    2021 Lunar Rock TRD Pro CM
    Check the build link in my signature.
    I never noticed them to be too hot, but I don’t live in the south either. Though we did vacation few times in PHX area when I had that truck and never had a problem
     
    ToyoD[QUOTED][OP] likes this.
  13. Dec 22, 2021 at 9:07 PM
    #13
    GreatBasinTundra

    GreatBasinTundra Beer Me!

    Joined:
    Aug 18, 2020
    Member:
    #50996
    Messages:
    283
    Gender:
    Male
    First Name:
    Mike
    Reno, NV
    Vehicle:
    2020 Tundra SR5 DC
    Kings f/r, TC UCAs, RCI skids, RCI sliders, C4 bumpers f/r, Warn 12s winch, 35s on 17” Rebounds, softopper, wet okole covers
    I don’t think that WOs are bad in summer. Not any worse than other options anyway. I have have had them on a 4Runner, Ford Ranger, Tacoma and Tundra. Love the Cement DC. Here is mine (shameless plug):
    46A79AD4-0015-483E-B34B-9DA24FF74093.jpg
     
  14. Dec 23, 2021 at 7:27 AM
    #14
    ToyoD

    ToyoD [OP] New Member

    Joined:
    Jul 9, 2021
    Member:
    #65325
    Messages:
    40
    Gender:
    Male
    First Name:
    Drew
    Vehicle:
    2021 SR5 DC
    Build page link in signature
    Thanks for the input Mike and nice truck man! Love to see another Cement DC!
    I also like the soft topper

    Ok so do you have a lift and what wheels/ tires are you running? I’m going to do lift, wheels, & tires after my stock tires wear out or the 3yr warranty expires (whatever is longer) and researching options now to be ready.

    What rock sliders did you go with?

    What front bumper?

    sorry for all the questions but it’s your fault for posting the pic ;)
     
  15. Dec 23, 2021 at 7:51 AM
    #15
    GreatBasinTundra

    GreatBasinTundra Beer Me!

    Joined:
    Aug 18, 2020
    Member:
    #50996
    Messages:
    283
    Gender:
    Male
    First Name:
    Mike
    Reno, NV
    Vehicle:
    2020 Tundra SR5 DC
    Kings f/r, TC UCAs, RCI skids, RCI sliders, C4 bumpers f/r, Warn 12s winch, 35s on 17” Rebounds, softopper, wet okole covers
    Thanks. I have Kings front and rear with TC 3/4” shackles. The front has about 2” of lift. The wheels are 17” Icon Rebound with BFG KO2 in 35x12.5. Front bumper is the C4 overland with a Warn 12k lbs winch. The sliders and belly skids are RCI
     
    ToyoD[OP] likes this.
  16. Dec 23, 2021 at 8:06 AM
    #16
    ToyoD

    ToyoD [OP] New Member

    Joined:
    Jul 9, 2021
    Member:
    #65325
    Messages:
    40
    Gender:
    Male
    First Name:
    Drew
    Vehicle:
    2021 SR5 DC
    Build page link in signature
    So you only did a level and can fit 35’s up front? Did you have to do a BMC or any mods to keep them from rubbing? What width & offset are the rims?
     
  17. Dec 23, 2021 at 8:22 AM
    #17
    GreatBasinTundra

    GreatBasinTundra Beer Me!

    Joined:
    Aug 18, 2020
    Member:
    #50996
    Messages:
    283
    Gender:
    Male
    First Name:
    Mike
    Reno, NV
    Vehicle:
    2020 Tundra SR5 DC
    Kings f/r, TC UCAs, RCI skids, RCI sliders, C4 bumpers f/r, Warn 12s winch, 35s on 17” Rebounds, softopper, wet okole covers
    The wheels are 17x8.5 +25 offset. I did a BMC. I had to remove the mud flaps and when I had the stock bumper had to remove the plastic. I would rub a little on the stock front when flexing the suspension, but with the current setup have no rubbing at all.
     
    ToyoD[OP] likes this.
  18. Dec 23, 2021 at 8:25 AM
    #18
    vl184009

    vl184009 Cheers Boys!

    Joined:
    Jun 29, 2017
    Member:
    #8326
    Messages:
    1,172
    Gender:
    Female
    First Name:
    Vicky
    Southern, Ca.
    Vehicle:
    2016 MGM CM SR5 4x4 w/Tow Pkg
    Wow, those bumper caps look amazing!
     
    ToyoD[QUOTED][OP] likes this.
  19. Dec 23, 2021 at 8:42 AM
    #19
    ToyoD

    ToyoD [OP] New Member

    Joined:
    Jul 9, 2021
    Member:
    #65325
    Messages:
    40
    Gender:
    Male
    First Name:
    Drew
    Vehicle:
    2021 SR5 DC
    Build page link in signature
    Any technical reasons you didn’t choose to go with a higher lift for wheel/ tire clearance? I’m new to the off-roading side of things so trying to learn what I can.

    Thanks Vicky!
     
  20. Dec 23, 2021 at 8:53 AM
    #20
    GreatBasinTundra

    GreatBasinTundra Beer Me!

    Joined:
    Aug 18, 2020
    Member:
    #50996
    Messages:
    283
    Gender:
    Male
    First Name:
    Mike
    Reno, NV
    Vehicle:
    2020 Tundra SR5 DC
    Kings f/r, TC UCAs, RCI skids, RCI sliders, C4 bumpers f/r, Warn 12s winch, 35s on 17” Rebounds, softopper, wet okole covers
    I like small lift with big tires. Taller lifts will raise COG. The drop bracket kits can limit overall travel if you rely on spacers and bump stop extensions. Also, if actually off-roading and want to get the most out of your suspension the tire should fit regardless of lift. That is why BMC, plastic reshaping and PWM are typically done. There is a lot of good info on this site.
     
    ToyoD[QUOTED][OP] likes this.
  21. Dec 23, 2021 at 9:19 AM
    #21
    ToyoD

    ToyoD [OP] New Member

    Joined:
    Jul 9, 2021
    Member:
    #65325
    Messages:
    40
    Gender:
    Male
    First Name:
    Drew
    Vehicle:
    2021 SR5 DC
    Build page link in signature
    Ok awesome, good to know thank you sir!
     
  22. Dec 31, 2021 at 6:53 PM
    #22
    ToyoD

    ToyoD [OP] New Member

    Joined:
    Jul 9, 2021
    Member:
    #65325
    Messages:
    40
    Gender:
    Male
    First Name:
    Drew
    Vehicle:
    2021 SR5 DC
    Build page link in signature
    11/17/21;
    Received in my Diamondback HD cover & 8" (shallow) cross bin :bananadance:
    IMG_9900.jpg

    I was a little nervous when I first saw the boxes and the pallet they came in on because I used to work with LTL shipping and know how things can get damaged, but when I opened the box I have to say the guys at Diamondback know how to pack! They also use premium boxes that are super thick and it helped prevent ANY damage from happening (Yayy no returns and I get to install!)
    IMG_9923.jpg

    and a few days later was able to do the install. Honestly these things are so easy to install & remove. I did have a neighbor help me and while I think 1 person could do it, 2 people are definitely easier for aligning the panels and getting things set up when you're not familiar with it. Now that I've had it for several months I am really happy with my decision.
    IMG_9940.jpg

    I spent several years (wayy before getting the truck) on researching the cover I would get when I finally got a truck again and for a very long time I was sold on the Retrax (and more recently the Retrax Pro MX,). I really thought the MX would fill all the needs and since I was getting the premium one that I could put things on top and sit on it when needed, etc... I used to have a truck box in my first vehicle (88' Toyo pickup) and really liked it and had also seen a company that had a truck box with a retractable cover built in and while I considered that I was also a little worried about reading that many people who got less expensive retractable covers having issues with the covers not rolling & hanging up over time, rust, and not doing a good job at keeping things in the bed dry when closed. I live on the East coast so plenty of rain and all these things had to be considered for my application.

    I had honestly forgotten about the Diamondback covers and literally about 2 weeks before being ready to order the Retrax I saw an add on social media for the diamondback and started looking at them "Just in case". I had remembered that I helped a friend install one about 10 years ago so I reached out to him since he still has the same truck and cover. He said he was really happy with it and would choose it again without hesitation. He's a friend that I really respect his opinion on and is a big researcher himself so that was a big factor in my decision. I knew there would be "unknowns" that I didn't think of that would probably come into play that he's run into over the last 10 years with the cover. Back then there was only diamond plate and it wasn't the look I was really trying to go for (personal preference) but it also wasn't going to be a deal breaker. Fortunately they now have a smooth option and I was really glad about that.

    Diamondback has the cross bins now (8" vs 13" was a whole separate research topic for me :notsure:) and that suited my desire for the "truck box". After reading ALL of the reviews from each cross bin on their website and most of the Diamondback Tonneau Cover thread I decided to go with the 8" bin. My mindset was I could store common use items up in the bin and have more room for low-use storage underneath. I had also read about people not being able to reach everything in the bottom of the 13" bin. I'm tall but I still could see how this would happen and I haven't even done a lift or level yet. And I wanted to have the room underneath for long cargo/ lumber/ being able to camp in the back of the truck bed and (watched one youtube video about a guy camping in his bed with the diamondback cover and the 8" bin would give me foot room).
    https://youtu.be/ZqRanXHfppg

    I also read about the common issue with aluminum truck boxes and remember it with mine about the grey dust that gets on everything (aluminum oxide apparently) so I taped it off and put 2 coats of the bedliner in a can on the cross bin.
    Now you may be asking why I didn't coat the whole thing...? Well I really just wanted the storage area covered because that's all that was needed to keep the aluminum dust from forming. I did a little wrap around to keep the lines as uniform as I could and hopefully prevent peeling (I'm not an expert with this stuff). And fortunately I decided to do this because I had to go to 6 different Walmart stores to find a 2nd can (took me exactly 2 cans to get 2 coats on the area I sprayed). If you haven't used the bedliner in a can before the texture is different than the Line-x I have in my bed or on my bumper caps. Best way I can describe it is almost a matte paint with small rubber particles in it. It almost feels fuzzy. I may or may not have pet it a couple times... you know for research purposes for the forum...:notsure:. Regardless it did the job for only about $25 total (minus the time/ gas driving all over town to get the second can, but whatever I was committed at that point...:facepalm:) and it looks/ works great for me.
    IMG_0193.jpg IMG_0194.jpg IMG_0198.jpg IMG_0199.jpg IMG_0202.jpg

    Back to Table of contents
     
    Last edited: Dec 31, 2021
  23. Jul 21, 2022 at 11:49 AM
    #23
    ToyoD

    ToyoD [OP] New Member

    Joined:
    Jul 9, 2021
    Member:
    #65325
    Messages:
    40
    Gender:
    Male
    First Name:
    Drew
    Vehicle:
    2021 SR5 DC
    Build page link in signature
    Sorry it's been a while since I've updated the thread. Life got a hold of me and here we are...
     
  24. Jul 21, 2022 at 12:27 PM
    #24
    ToyoD

    ToyoD [OP] New Member

    Joined:
    Jul 9, 2021
    Member:
    #65325
    Messages:
    40
    Gender:
    Male
    First Name:
    Drew
    Vehicle:
    2021 SR5 DC
    Build page link in signature
    Here are some of my vinyl wrapping adventures. I bought some 3M wrap online and a basic tool kit to try my hand at a few small interior pieces before attempting to tackle my front grille.

    This work was done earlier in the year, so I have some time to see how they all panned out and here's a summary:
    Center Console pieces: The cup holder surround is holding up well. That was the very first piece I attempted to wrap. The shifter surround and inner shift select piece are starting to peel away in the corners. I semi-expected this with the shift select piece because it has so many tight bends it's not really a good application for vinyl wrapping from what I've researched (but hey it was worth a shot). The shift select I didn't expect it to peel away but I'm thinking it's because I didn't get it hot enough to kill the memory when putting the final heat into it.
    It's possible I'll end up going with AJT or Meso customs center console kit to replace these components with black injection molded parts (in Black).

    Steering Wheel Trim: These pieces are holding up surprisingly well! They get a lot of handling with driving but still look great and I'm very happy with the results!

    Front Grille: I semi-successfully wrapped the top nose piece (the one that attaches to the hood) myself, but man it took a LOT of work and had to have a second set of hands help me keep the material off until I was ready to smooth it down. I attempted the bottom lip piece and accidentally ripped the vinyl in half RIGHT IN THE MIDDLE :annoyed::homer::facepalm: At this point I didn't have enough wrap to attempt this again, so I ended up deciding to have it done by a professional. They did a great job and even coached me a little on the work I had done myself so that was nice too.
    Overall I am happy and confident in doing more small interior pieces in the future (may try the trim on either side of the radio one day), but I'll likely leave the large exterior work to the pros from now on.

    Center console1.jpg
    Center console2.jpg
    Center console4.jpg
    Center console5.jpg
    Steering wheel before.jpg
    Steering wheel, during.jpg
    Steering wheel, after.jpg
    Front grille before.jpg
    Front grille before, removed.jpg
    Front grille1.jpg
    Front grille2.jpg

    Back to Table of contents
     
    Taco-Spike likes this.
  25. Jul 21, 2022 at 12:40 PM
    #25
    Taco-Spike

    Taco-Spike Gateway from Tacoma World ~ ended up here

    Joined:
    Apr 25, 2021
    Member:
    #62293
    Messages:
    4,666
    Gender:
    Male
    512
    Vehicle:
    16 Tacoma TRD Sport DCSB / 17 Tundra 5.7L 4X4 CM
    Two Trucks
    Nice work!
     
    ToyoD[QUOTED][OP] likes this.
  26. Jul 21, 2022 at 1:19 PM
    #26
    ToyoD

    ToyoD [OP] New Member

    Joined:
    Jul 9, 2021
    Member:
    #65325
    Messages:
    40
    Gender:
    Male
    First Name:
    Drew
    Vehicle:
    2021 SR5 DC
    Build page link in signature
    12/2/2021: Rago Dash Plate & ICS Support plate install

    I was a little nervous about doing this install so early on because of having to drill into the middle of the dash of a BRAND NEW TRUCK :eek2:. After I got over the mental aspect of it and realized I'm just putting holes in some plastic and I just need to pay attention before getting started (measure twice drill once kind of thing) I was really excited!!!
    Before Install pic.jpgInstall pic2.jpg

    I did a lot of pre-research and talking with other people in several forums and was talked into buying the ICS fab support plate for underneath. I drilled all the holes needed to fit the Rago plate and painted it just to prevent any future rust.
    Install pic1.2.jpg

    I also decided to extend the wire leads off of the charger so I could tap into power somewhere. I Decided on the 12V outlet at the bottom of the dash because I didn't expect to use it that much so wouldn't have to worry about over-loading the circuit.
    Install pic1.jpg

    And after it was finished I am really happy with how it came out and now I just get to enjoy it that much longer now that it's done :thumbsup:
    I also decided to hit up the local hardware store and upgrade the top plate screws with black ones to finish out the look.

    Install pic3.jpg Install pic4.jpg Install pic5.jpg Install pic6.jpg Install pic8.jpg Install pic9.jpg

    Back to Table of contents
     
    RainMan_PNW likes this.

Products Discussed in

To Top