1. Welcome to Tundras.com!

    You are currently viewing as a guest! To get full-access, you need to register for a FREE account.

    As a registered member, you’ll be able to:
    • Participate in all Tundra discussion topics
    • Transfer over your build thread from a different forum to this one
    • Communicate privately with other Tundra owners from around the world
    • Post your own photos in our Members Gallery
    • Access all special features of the site

Grille tab release clips help

Discussion in '2.5 Gen Tundras (2014-2021)' started by mahmer09, Jan 13, 2020.

  1. Jan 13, 2020 at 3:35 PM
    #1
    mahmer09

    mahmer09 [OP] SR5 4x4

    Joined:
    Jan 4, 2018
    Member:
    #11959
    Messages:
    101
    I am trying to remove the TRD grille insert, the black part, from the color match surround. There are 13 tabs and I’m at a loss on how to release them without breaking them. Any tips?
     
  2. Jan 13, 2020 at 3:40 PM
    #2
    15whtrd

    15whtrd Mr. Blonde

    Joined:
    Sep 20, 2015
    Member:
    #1829
    Messages:
    9,387
    Gender:
    Male
    First Name:
    Sean
    SoCal
    Vehicle:
    White 2015 Tundra DC SR5 TRD 4x4 5.7L, White 2003 Sequoia 2WD
    TRD Pro suspension, +2 Coachbuilder shackles, 2015 TRD Pro headlights, 20% ceramic tinted windows, clear ceramic tinted front windshield, aFe drop in pro s dry air filter, TRD airflow accelerator, TRD oil fill cap, TRD 18 psi radiator cap, BDX Bullydog tuner, Weathertech floor mats front and rear, rear seat fold down mod, DNA hard trifold tonneau cover, Linex with uv protection, TRD rear swaybar, TRD center caps, TRD Pro grille insert with color matching surround and bulge, TRD PRO headlights, aluminum oil filter canister, Real truck tailgate seal, Pop-n-lock tailgate lock actuator, rear diff breather relocate, RCI front skid plate. 275/70 R18 BFG KO2s
    It’s very likely you will break one at least. You will need a very small screwdriver to pop them out. Lift the surrounding tab up above the little male part. You will have to get a few started otherwise they tend to snap back into place as you’re taking it apart. I was pretty lucky, I removed my old insert as well as the new insert from the new surround. I only broke one tab. But it still functions. Breaking a few won’t even be a real issue.
     
    831Tun likes this.
  3. Jan 13, 2020 at 3:41 PM
    #3
    ZPMAN

    ZPMAN 2nd place is the 1st looser

    Joined:
    Nov 1, 2017
    Member:
    #10678
    Messages:
    1,720
    Gender:
    Male
    First Name:
    John
    Minnesota
    Vehicle:
    2016 Black Platinum Supercharged
    4" lift, 35s, Magnuson Supercharger
    You will break a few and they are a PITA, I will see if I can find a few phots when I did mine.
     
    NewImprovedRon and 15whtrd like this.
  4. Jan 13, 2020 at 3:43 PM
    #4
    15whtrd

    15whtrd Mr. Blonde

    Joined:
    Sep 20, 2015
    Member:
    #1829
    Messages:
    9,387
    Gender:
    Male
    First Name:
    Sean
    SoCal
    Vehicle:
    White 2015 Tundra DC SR5 TRD 4x4 5.7L, White 2003 Sequoia 2WD
    TRD Pro suspension, +2 Coachbuilder shackles, 2015 TRD Pro headlights, 20% ceramic tinted windows, clear ceramic tinted front windshield, aFe drop in pro s dry air filter, TRD airflow accelerator, TRD oil fill cap, TRD 18 psi radiator cap, BDX Bullydog tuner, Weathertech floor mats front and rear, rear seat fold down mod, DNA hard trifold tonneau cover, Linex with uv protection, TRD rear swaybar, TRD center caps, TRD Pro grille insert with color matching surround and bulge, TRD PRO headlights, aluminum oil filter canister, Real truck tailgate seal, Pop-n-lock tailgate lock actuator, rear diff breather relocate, RCI front skid plate. 275/70 R18 BFG KO2s
    I think I may have used a thin plastic putty knife and maybe a Percision flat head screwdriver. You can pop one tab and leave the tool slightly inserted so it doesn’t pop back in, then start the next one with your other tool. Once you get a few Undone, slowly work your way around. I did notice the chrome surround is a little more sturdy than a painted surround. The painted one is the one I cracked a tab on. I suggest bringing it in the house and laying down on the carpet. Let it warm up a little if it was cold outside. This may help in keeping them from cracking.
     
    Last edited: Jan 13, 2020
    NewImprovedRon and ZPMAN like this.
  5. Jan 13, 2020 at 3:45 PM
    #5
    mahmer09

    mahmer09 [OP] SR5 4x4

    Joined:
    Jan 4, 2018
    Member:
    #11959
    Messages:
    101
    Thanks! I’m just not sure where to apply pressure. Behind the tab where it’s flat or in front at the bulge?
     
  6. Jan 13, 2020 at 3:50 PM
    #6
    15whtrd

    15whtrd Mr. Blonde

    Joined:
    Sep 20, 2015
    Member:
    #1829
    Messages:
    9,387
    Gender:
    Male
    First Name:
    Sean
    SoCal
    Vehicle:
    White 2015 Tundra DC SR5 TRD 4x4 5.7L, White 2003 Sequoia 2WD
    TRD Pro suspension, +2 Coachbuilder shackles, 2015 TRD Pro headlights, 20% ceramic tinted windows, clear ceramic tinted front windshield, aFe drop in pro s dry air filter, TRD airflow accelerator, TRD oil fill cap, TRD 18 psi radiator cap, BDX Bullydog tuner, Weathertech floor mats front and rear, rear seat fold down mod, DNA hard trifold tonneau cover, Linex with uv protection, TRD rear swaybar, TRD center caps, TRD Pro grille insert with color matching surround and bulge, TRD PRO headlights, aluminum oil filter canister, Real truck tailgate seal, Pop-n-lock tailgate lock actuator, rear diff breather relocate, RCI front skid plate. 275/70 R18 BFG KO2s
    All the work on the tabs need to be done from behind the grille. The tabs themselves are circular and the part from the grille is shaped to snap into them. You’re going to want to pry up on the circular part. Very very very carefully. It will be frustrating and snap back into place on you until you get it started.Have a couple of tools ready. You can leave one inserted in the first tab and then work on the next tab over. You may need to leave the tool inserted in that one as well while you work on the third to the other side of your starter.
     
    NewImprovedRon and ZPMAN like this.
  7. Jan 13, 2020 at 3:51 PM
    #7
    BROGAN

    BROGAN FNG

    Joined:
    Jun 11, 2018
    Member:
    #16057
    Messages:
    389
    Gender:
    Male
    First Name:
    Logan
    East TX
    Vehicle:
    2015 TRD Pro CM Inferno Fast
    Just ceck out build thread in sig
    I have a piggyback question similar to this. I'm having issues with my nose panel, or hood bulge, that attaches to the hood. That's probably not the right name. Anyway, when I'm driving the wind causes the clips to back out. Does anyone else have issues with this? How'd you fix it? My guess is aftermarket clips, does anyone have any suggestions or a link to some better clips that prevent this?

    20200113_174837.jpg
     
    TXRailRoadBandit73 likes this.
  8. Jan 13, 2020 at 3:53 PM
    #8
    ZPMAN

    ZPMAN 2nd place is the 1st looser

    Joined:
    Nov 1, 2017
    Member:
    #10678
    Messages:
    1,720
    Gender:
    Male
    First Name:
    John
    Minnesota
    Vehicle:
    2016 Black Platinum Supercharged
    4" lift, 35s, Magnuson Supercharger
    I think that's wear I started, and as I remember there are 2 screws on each side. I believe the yellow screwdriver is keeping force out as you move along.Screenshot_20200113-174852_Gallery.jpg
     
    15whtrd likes this.
  9. Jan 13, 2020 at 3:54 PM
    #9
    mahmer09

    mahmer09 [OP] SR5 4x4

    Joined:
    Jan 4, 2018
    Member:
    #11959
    Messages:
    101
    Thanks. The circle part? They are flat with a bulge towards the inside of the insert. I’m just not sure what to pry.
     
  10. Jan 13, 2020 at 4:26 PM
    #10
    15whtrd

    15whtrd Mr. Blonde

    Joined:
    Sep 20, 2015
    Member:
    #1829
    Messages:
    9,387
    Gender:
    Male
    First Name:
    Sean
    SoCal
    Vehicle:
    White 2015 Tundra DC SR5 TRD 4x4 5.7L, White 2003 Sequoia 2WD
    TRD Pro suspension, +2 Coachbuilder shackles, 2015 TRD Pro headlights, 20% ceramic tinted windows, clear ceramic tinted front windshield, aFe drop in pro s dry air filter, TRD airflow accelerator, TRD oil fill cap, TRD 18 psi radiator cap, BDX Bullydog tuner, Weathertech floor mats front and rear, rear seat fold down mod, DNA hard trifold tonneau cover, Linex with uv protection, TRD rear swaybar, TRD center caps, TRD Pro grille insert with color matching surround and bulge, TRD PRO headlights, aluminum oil filter canister, Real truck tailgate seal, Pop-n-lock tailgate lock actuator, rear diff breather relocate, RCI front skid plate. 275/70 R18 BFG KO2s
    @TXRailRoads73
    Dealt with this at some point. Maybe he can help you out.
     
    TXRailRoadBandit73 likes this.
  11. Jan 13, 2020 at 4:38 PM
    #11
    15whtrd

    15whtrd Mr. Blonde

    Joined:
    Sep 20, 2015
    Member:
    #1829
    Messages:
    9,387
    Gender:
    Male
    First Name:
    Sean
    SoCal
    Vehicle:
    White 2015 Tundra DC SR5 TRD 4x4 5.7L, White 2003 Sequoia 2WD
    TRD Pro suspension, +2 Coachbuilder shackles, 2015 TRD Pro headlights, 20% ceramic tinted windows, clear ceramic tinted front windshield, aFe drop in pro s dry air filter, TRD airflow accelerator, TRD oil fill cap, TRD 18 psi radiator cap, BDX Bullydog tuner, Weathertech floor mats front and rear, rear seat fold down mod, DNA hard trifold tonneau cover, Linex with uv protection, TRD rear swaybar, TRD center caps, TRD Pro grille insert with color matching surround and bulge, TRD PRO headlights, aluminum oil filter canister, Real truck tailgate seal, Pop-n-lock tailgate lock actuator, rear diff breather relocate, RCI front skid plate. 275/70 R18 BFG KO2s
    It’s been so long. Can you take a picture so I could maybe give you a hand? As John said above you need to remove a couple of screws as well.

    to me it was pretty obvious how it was all supposed to come apart, but I’m good at that kind of stuff. Not trying to be condescending.


    The insert is basically the male part of the clips. The surround is the female part of the clips. The part that is attached to the surround is the part you need to be lifting up on. I found that if I took a sharp razor blade, I was able to trim some of the excess plastic Schlag that is present from when the plastic pieces were molded. This helped to remove The insert. Helping the male part have less interference upon removal. It’s hard to explain without showing someone firsthand. Years ago, I swear I replied in a thread with pictures. But I’m having trouble finding it.
     
    mahmer09[QUOTED][OP] likes this.
  12. Jan 13, 2020 at 4:43 PM
    #12
    TXRailRoadBandit73

    TXRailRoadBandit73 YOTAS,RAILROADER,RÖKnRÖLLN',BEER,MAX/GEMMA

    Joined:
    May 30, 2016
    Member:
    #3487
    Messages:
    50,305
    Gender:
    Male
    First Name:
    Adam
    The 956, TEXAS
    None yet
    Probably where the pressure clips slide into place are breaking, becoming brittle with the weather, and the constant closing of the hood, mine was doing the same, but all the way across, the faster you went on highway the more it got sucked up by wind, if you can pry away on it to check where the pressure clips go the little plastic brackets might be cracked, possibly might need new hood buldge
     
    15whtrd likes this.
  13. Jan 13, 2020 at 6:14 PM
    #13
    ZPMAN

    ZPMAN 2nd place is the 1st looser

    Joined:
    Nov 1, 2017
    Member:
    #10678
    Messages:
    1,720
    Gender:
    Male
    First Name:
    John
    Minnesota
    Vehicle:
    2016 Black Platinum Supercharged
    4" lift, 35s, Magnuson Supercharger
    Lol I forgot I have my old grill hanging. I will take a look.20200113_201117.jpg
     
    NewImprovedRon likes this.
  14. Jan 13, 2020 at 7:01 PM
    #14
    ZPMAN

    ZPMAN 2nd place is the 1st looser

    Joined:
    Nov 1, 2017
    Member:
    #10678
    Messages:
    1,720
    Gender:
    Male
    First Name:
    John
    Minnesota
    Vehicle:
    2016 Black Platinum Supercharged
    4" lift, 35s, Magnuson Supercharger
    Start by taking out all four screws, two per side. Then starting at the top
    20200113_203332.jpg
    start removing clips, with a little force from a large screwdriver and using a very small to pick the clips apart. You might need a helper for the first two because no place to pry with screwdriver.
    20200113_204612.jpg

    Remember to push it together a little then pick the clip and release.

    20200113_205540.jpg
    Good luck!

    Once I got started I believe the yellow screwdriver will trail behind by 6 to 8 inches.
     
    15whtrd and mahmer09[OP] like this.
  15. Jan 14, 2020 at 9:12 AM
    #15
    mahmer09

    mahmer09 [OP] SR5 4x4

    Joined:
    Jan 4, 2018
    Member:
    #11959
    Messages:
    101
    Thanks for all the replies. I used the double tool pry method and only broke two clips. I feel good about that. I have no feeling in the tips of two fingers on my left hand from trying to pull the plastic apart, haha. Glad this is done.
     
    Mcoop, ZPMAN and 15whtrd like this.
  16. Jan 14, 2020 at 9:29 AM
    #16
    Kojack

    Kojack New Member

    Joined:
    Dec 20, 2019
    Member:
    #40107
    Messages:
    236
    Gender:
    Male
    First Name:
    MIke
    Black Mountain, NC
    Vehicle:
    2017 Tundra XSP CrewMax
    If you want to part with that grill surround, lemme know. I have been looking for a gloss black one for my '17
     
  17. Jan 14, 2020 at 9:59 AM
    #17
    1lowlife

    1lowlife Toxic prick and pavement princess..

    Joined:
    May 4, 2016
    Member:
    #3296
    Messages:
    7,941
    First Name:
    DADA
    THE GREAT STATE OF TEXAS
    Vehicle:
    2014 MGM DC SR5
    I had that too.
    I was like WTF the first couple times it happened..
    I bought these and replaced them all a few weeks ago.
    So far they have stayed in.

    Be careful tightening the bolts.
    When I took mine out one of the clip nuts had broken off the bulge.
    I glued it back on and it actually worked..

    https://www.amazon.com/gp/product/B0040CWVTW/ref=ppx_yo_dt_b_asin_title_o05_s00?ie=UTF8&psc=1

    [​IMG]
     
    Last edited: Jan 14, 2020
    15whtrd and sundance like this.
  18. Jan 14, 2020 at 10:01 AM
    #18
    1lowlife

    1lowlife Toxic prick and pavement princess..

    Joined:
    May 4, 2016
    Member:
    #3296
    Messages:
    7,941
    First Name:
    DADA
    THE GREAT STATE OF TEXAS
    Vehicle:
    2014 MGM DC SR5
    I used a small flat blade jewelers screw driver.
    I only broke one tab, but it was right next to the screw.

    It really helps if you have someone else pull the parts apart while you manipulate the tabs.
    It is really hard to do by yourself...
     
    15whtrd and mahmer09[QUOTED][OP] like this.
  19. Jan 14, 2020 at 10:26 AM
    #19
    BROGAN

    BROGAN FNG

    Joined:
    Jun 11, 2018
    Member:
    #16057
    Messages:
    389
    Gender:
    Male
    First Name:
    Logan
    East TX
    Vehicle:
    2015 TRD Pro CM Inferno Fast
    Just ceck out build thread in sig
    Thanks man. Just what I'm looking for. And yes, I already had my issues with the bolts, I used some speed clips to stand in for the broken OEM ones.
     
    1lowlife[QUOTED] likes this.
  20. Jan 14, 2020 at 8:56 PM
    #20
    n deep ship

    n deep ship New Member

    Joined:
    Jan 14, 2020
    Member:
    #41217
    Messages:
    8
    Gender:
    Male
    First Name:
    Phil
    Vehicle:
    16 Tundra Limited *2
    @BROGAN
    There are three bolts under the hood that hold the hood bulge. Remove them then carefully remove the hood bulge. The plastic that the clips are seated in is not very strong. Check your clips to see if they are distorted and look for broken plastic where the clips go into. If you have 2 failed clips or broken plastic mounts beside each other it will tear off while driving. I just replaced the one on my wifes truck this weekend. A tractor trailer in the opposing lane cleaned it right off the hood. Unfortunately I dont know if some loctite glue or epoxy can repair broken plastic should that be the case. In her case on clip was distorted and the next clip bracket was half broken.
     
    1lowlife and 15whtrd like this.
  21. Jan 14, 2020 at 10:27 PM
    #21
    ZPMAN

    ZPMAN 2nd place is the 1st looser

    Joined:
    Nov 1, 2017
    Member:
    #10678
    Messages:
    1,720
    Gender:
    Male
    First Name:
    John
    Minnesota
    Vehicle:
    2016 Black Platinum Supercharged
    4" lift, 35s, Magnuson Supercharger
    Yes in can part with it , it is not midnight Black Metallic.
     
  22. Jan 24, 2020 at 8:30 AM
    #22
    1lowlife

    1lowlife Toxic prick and pavement princess..

    Joined:
    May 4, 2016
    Member:
    #3296
    Messages:
    7,941
    First Name:
    DADA
    THE GREAT STATE OF TEXAS
    Vehicle:
    2014 MGM DC SR5

    I didn't have anymore issues until yesterday it popped back out going 70mph into the wind.
    If it keeps up I guess I might have to cover the inside of that little grille and block the air flow going into the hood bulge..
    Not sure how to stop it..
     
  23. Jan 24, 2020 at 8:49 AM
    #23
    sdde4n

    sdde4n New Member

    Joined:
    Jun 6, 2018
    Member:
    #15956
    Messages:
    1,680
    People's Republic of California
    Vehicle:
    2018 CrewMax - Sierra Romeo Cinco
    Leitner Designs ACS
    Haha, no feeling in fingertips, I definitely remember that part. This is one of the most challenging projects I have encountered in my three years of ownership. It's definitely not something you're doing wrong. Toyota clearly didn't intend for these to get swapped by mere mortals.
     
    mahmer09[QUOTED][OP] likes this.
  24. Jan 24, 2020 at 11:07 AM
    #24
    n deep ship

    n deep ship New Member

    Joined:
    Jan 14, 2020
    Member:
    #41217
    Messages:
    8
    Gender:
    Male
    First Name:
    Phil
    Vehicle:
    16 Tundra Limited *2
    It is a false scoop They are blocked from behind I will try to get some pics tonight of my broken one to show what the problem is
     
    1lowlife[QUOTED] and 15whtrd like this.
  25. Jan 25, 2020 at 6:34 AM
    #25
    n deep ship

    n deep ship New Member

    Joined:
    Jan 14, 2020
    Member:
    #41217
    Messages:
    8
    Gender:
    Male
    First Name:
    Phil
    Vehicle:
    16 Tundra Limited *2
    20200124_190446[1].jpg 20200124_190636[1].jpg 20200124_190446[1].jpg 20200124_190504[1].jpg
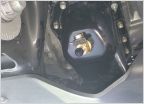
    As you can see there isnt much holding the clips to the actual hood bulge It appears that when brackets break the hood bulge will jump up in a stiff wind. To say the least this is very disappointing to find on my truck. What happened to the legendary toyota quality. I consider this as engineered to to fail I dont know if you repair it with epoxy or something around the broken part of the clip The last pic is of the bolting points are. You can see how they thinned out the attachment points to the rest of the part and they expect this to hold? What you can see looks substantial but the reality is this is designed to FAIL.20200124_190636[1].jpg
     
  26. Jan 18, 2023 at 12:32 PM
    #26
    Bender2017

    Bender2017 New Member

    Joined:
    Jan 18, 2023
    Member:
    #90495
    Messages:
    1
    Gender:
    Male
    First Name:
    Rick
    Vehicle:
    2017 Tundra TSS 4x4
    2 1/2 lift, KMC rims

Products Discussed in

To Top