1. Welcome to Tundras.com!

    You are currently viewing as a guest! To get full-access, you need to register for a FREE account.

    As a registered member, you’ll be able to:
    • Participate in all Tundra discussion topics
    • Transfer over your build thread from a different forum to this one
    • Communicate privately with other Tundra owners from around the world
    • Post your own photos in our Members Gallery
    • Access all special features of the site

What home improvement work did you do today?

Discussion in 'Home Improvement' started by atrinh15, Apr 28, 2018.

  1. Feb 9, 2019 at 11:50 AM
    #811
    831Tun

    831Tun heartless Bastrd

    Joined:
    Jun 7, 2016
    Member:
    #3549
    Messages:
    11,577
    Gender:
    Male
    First Name:
    Warren
    Santa Cruz
    Vehicle:
    '16 CM limited
    TC long travel. Deaver 420 SU leaf packs.
    Thanks Sean, less talent than....old :D
     
    Pudge[QUOTED] likes this.
  2. Feb 12, 2019 at 5:56 PM
    #812
    Pudge

    Pudge Super Secret Elite Member #7

    Joined:
    Nov 8, 2016
    Member:
    #5136
    Messages:
    9,498
    Gender:
    Male
    First Name:
    Sean
    CT
    Vehicle:
    2015 Blue Ribbon Platinum
    TRD PRO grille, OCD consol organizers, DIY wireless phone charger, 33" Michelin Defender LTX MS, Bak revolver X2 tonneau, weathertech liners, 20% tints. DIY pop n lock, 2018 LED headlights, morimoto fogs, TRD shift knob, DirtyDeeds 8"BAM exhaust, kenwood HU,JL amp, Tech12volts Tundra full speaker upgrade w/sub, Swing case, and lots of fluid film
    Made a little dust collection bucket today for my basement "workshop". Parts were laying around for free and I have a old shop vac i can use with it, or my new stainless ridgid if I want.
    Should cut down on dust and keep my shop vac filters clean, those filters are not cheap. The hose from the top goes to the shop vac the side hose does the sucking, it fits in chop saw output but can be used under table saw or just for vacuuming up around the workbench.


    20190212_171958.jpg

    20190212_205849.jpg
    20190212_205834.jpg
     
  3. Feb 13, 2019 at 3:10 PM
    #813
    Pudge

    Pudge Super Secret Elite Member #7

    Joined:
    Nov 8, 2016
    Member:
    #5136
    Messages:
    9,498
    Gender:
    Male
    First Name:
    Sean
    CT
    Vehicle:
    2015 Blue Ribbon Platinum
    TRD PRO grille, OCD consol organizers, DIY wireless phone charger, 33" Michelin Defender LTX MS, Bak revolver X2 tonneau, weathertech liners, 20% tints. DIY pop n lock, 2018 LED headlights, morimoto fogs, TRD shift knob, DirtyDeeds 8"BAM exhaust, kenwood HU,JL amp, Tech12volts Tundra full speaker upgrade w/sub, Swing case, and lots of fluid film
    And it worked. A little bit of sawdust did pass through to the shop vac but not much

    20190213_165140.jpg
     
  4. Feb 13, 2019 at 3:13 PM
    #814
    831Tun

    831Tun heartless Bastrd

    Joined:
    Jun 7, 2016
    Member:
    #3549
    Messages:
    11,577
    Gender:
    Male
    First Name:
    Warren
    Santa Cruz
    Vehicle:
    '16 CM limited
    TC long travel. Deaver 420 SU leaf packs.
    How's the sheetrock repair?
     
    Pudge[QUOTED] likes this.
  5. Feb 13, 2019 at 3:24 PM
    #815
    Pudge

    Pudge Super Secret Elite Member #7

    Joined:
    Nov 8, 2016
    Member:
    #5136
    Messages:
    9,498
    Gender:
    Male
    First Name:
    Sean
    CT
    Vehicle:
    2015 Blue Ribbon Platinum
    TRD PRO grille, OCD consol organizers, DIY wireless phone charger, 33" Michelin Defender LTX MS, Bak revolver X2 tonneau, weathertech liners, 20% tints. DIY pop n lock, 2018 LED headlights, morimoto fogs, TRD shift knob, DirtyDeeds 8"BAM exhaust, kenwood HU,JL amp, Tech12volts Tundra full speaker upgrade w/sub, Swing case, and lots of fluid film
    Sheetrock will go up Friday. I have the day off so I should be able to do it. I've been waiting for everything to completely dry out. Also waited 10 days for parts to fix the bathtub. After 3 different parts I finally got the right one yesterday, and the tub is no longer leaking. So I can finally fix the drywall now.
     
  6. Feb 13, 2019 at 3:42 PM
    #816
    kparrow

    kparrow New Member

    Joined:
    Jun 22, 2018
    Member:
    #16363
    Messages:
    955
    Gender:
    Male
    First Name:
    Kevin
    Nampa, ID
    Vehicle:
    2008 Tundra DC 4x4 5.7l V8 Blue Streak Metallic
    Goodyear UltraTerrain AT 275/70/r18, Stoptech Cryo Slotted Rotors/Hawk LTS Pads, DECKED, and lots more!
    Started a wood accent wall in our living room. The hard part is out of the way cutting around all the outlet boxes and air return. Should go pretty quickly now.
    ECADCF43-7CF2-4103-8856-532462C2BEE9.jpg
     
  7. Feb 13, 2019 at 6:16 PM
    #817
    AKSig88

    AKSig88 New Member

    Joined:
    Dec 5, 2018
    Member:
    #22640
    Messages:
    127
    Gender:
    Male
    Ann Arbor, MI
    Vehicle:
    2023 SR5 Tundra
    My washer machine grenaded itself while the wife was out and she came home to water everywhere. Floors in the laundry room was toast...not a big deal. We've been wanting to replace the floor anyhow.
    But the mudroom's wall that is underneath the laundry, shows alot of water sign. And then in the basement, you can see the same walls and water sign.
    Right now we have fans going, airing everything out. But, my question is, do I need to replace the drywall now? Or paint over the water spots? There is no signs of bubbling in the drywall, so i figured its ok to air out then paint.

    What do you think?
    [​IMG][​IMG][​IMG][​IMG][​IMG]
     
    Prostar 190 likes this.
  8. Feb 13, 2019 at 6:23 PM
    #818
    Prostar 190

    Prostar 190 SSEM #9 I would rather be water skiing

    Joined:
    Sep 26, 2017
    Member:
    #9912
    Messages:
    69,374
    Gender:
    Male
    First Name:
    Bryan
    OH
    Vehicle:
    2010 CrewMax limited 4X4
    6" lift 35" Toyo M/T
    Just depends how soaked the drywall is.
     
  9. Feb 13, 2019 at 6:31 PM
    #819
    TaquitoBandito

    TaquitoBandito SSEM #91, KitKat Aficionado, A Dancer for Money Exotic Dancer

    Joined:
    Sep 29, 2017
    Member:
    #9976
    Messages:
    7,520
    Gender:
    Male
    First Name:
    Joel (AKA Bif)
    Vehicle:
    2020 Army Green TRD Pro Crewmax
    Retrax Pro XR, Desert Eagle Plate, Seat Jackers, Kenwood DMX1037S
    I'd probably leave the fans on it for 3 or 4 days and re-evaluate.
     
  10. Feb 13, 2019 at 6:39 PM
    #820
    831Tun

    831Tun heartless Bastrd

    Joined:
    Jun 7, 2016
    Member:
    #3549
    Messages:
    11,577
    Gender:
    Male
    First Name:
    Warren
    Santa Cruz
    Vehicle:
    '16 CM limited
    TC long travel. Deaver 420 SU leaf packs.
    Doesn't look too bad to me. After it dries you shoudl be fine from what I can see in the photos.
     
    Bama likes this.
  11. Feb 13, 2019 at 6:51 PM
    #821
    AKSig88

    AKSig88 New Member

    Joined:
    Dec 5, 2018
    Member:
    #22640
    Messages:
    127
    Gender:
    Male
    Ann Arbor, MI
    Vehicle:
    2023 SR5 Tundra
    Thanks fellas. I just checked on the drywall and it's already more dry than 5 hours ago. I'll check again tomorrow after work and go from there!
     
  12. Feb 14, 2019 at 12:10 PM
    #822
    Boosted4runner

    Boosted4runner Join the NRA please.

    Joined:
    Mar 18, 2018
    Member:
    #13672
    Messages:
    2,480
    Gender:
    Male
    WA
    Vehicle:
    2015 DC MGM TRD Tundra, Kings, 5.7, 2018 front end
    Resi Kings, 35” Trail Grapplers on 18” Methods, ICON Delta Upper Arms, Front-Runner bed rack, Yakima SkyBox16, 2018 honeycomb grill, 2018 LED headlights, plastidipped bumper covers
    My wife has this on her honey-do-list for me. o_O
    Besides trimming out the outlets/etc, is the install fairly simple? Are you using flooring for material or something specific?
    And are you nailing directly to Sheetrock/studs? What type of nail?
    Sorry - and thank you :D
     
    831Tun and kparrow[QUOTED] like this.
  13. Feb 14, 2019 at 12:24 PM
    #823
    831Tun

    831Tun heartless Bastrd

    Joined:
    Jun 7, 2016
    Member:
    #3549
    Messages:
    11,577
    Gender:
    Male
    First Name:
    Warren
    Santa Cruz
    Vehicle:
    '16 CM limited
    TC long travel. Deaver 420 SU leaf packs.
    What kinda wood do you wanna use? If you use a tongue and groove you can blind nail (yes, to the studs) and have no fasteners showing. The last board needs to be face nailed. If you're running crown moulding that will cover the face nails. If not running crown moulding, you may consider starting at the top and working down. Several benefits to this; face nails can be concealed behind base board and any rip (different width piece) will be less noticeable down low than up at the top. A nail gun like this will work, depending on thickness of material.
    https://www.amazon.com/Senco-4G0001N-FinishPro-15-Gauge-4-Inch/dp/B00008NFQ7
     
    saybng likes this.
  14. Feb 14, 2019 at 12:42 PM
    #824
    kparrow

    kparrow New Member

    Joined:
    Jun 22, 2018
    Member:
    #16363
    Messages:
    955
    Gender:
    Male
    First Name:
    Kevin
    Nampa, ID
    Vehicle:
    2008 Tundra DC 4x4 5.7l V8 Blue Streak Metallic
    Goodyear UltraTerrain AT 275/70/r18, Stoptech Cryo Slotted Rotors/Hawk LTS Pads, DECKED, and lots more!
    First off, beautiful home and property you've got there. Was admiring all your photos!

    I'm using some "weathered" boards that can be bought straight from Home Depot made by Weaber. They come in boxes of 8 boards and run $25 a box. Comes in grey, white/cream, and random wood tone colors. The one I'm using is the Nantucket Grey. There are some boards that are "no good" because of cracks/splits or strange edges but some of the board is salvageable so I only have about 3 boards from a total of 5 boxes that I probably won't use. They vary in thickness a bit as well but again that's what makes the "barn wood" look.
    https://www.homedepot.com/p/Weaber-...Poplar-Weathered-Board-8-Pack-27827/303693402

    Fastening to the wall I'm using dots of construction adhesive (insert favorite flavor here, I'm using Loctite PL375) and 18 gauge brad nails either 1.5" or 1.75" (I can't remember) at the studs (and occasionally on board ends if needed, still holds ok in the drywall till the adhesive sets). I knuckle knocked the studs and then just penciled a line up the wall.

    For trimming out the outlet cuts I have a cheap Harbor Freight multi-tool with a wood blade on it, makes plunge cuts super simple and precise. Overall, the install is fairly simple and not difficult, just time consuming. The main points I would say are:

    - Make sure you paint your wall first with a complementary color behind. There will be small gaps as you go (i.e. my wall is grey and I'm using gray boards)

    - As you lay your boards, find ones of equal width to lay next to each other. It will make the next row tighter with less gaps.

    - Alternate the side of the wall you start the next row on and also start in the middle with a board sometimes. You want to make sure you're always alternating your board seams and randomizing it wherever possible. You don't want seams lining up all the way up your wall, it would look funny. Also starting on the left or right side of the wall will make sure you don't have all your long boards on one side and all your short boards on the other. When starting in the middle, I've been nailing a full board randomly in place (not matching the end gaps from the below rows), and then fitting the other boards into the remaining space on either side. I've found that has been working well for randomizing the wall.

    - For the outlet boxes I used box extenders so I could mount the outlets and faceplates on top of the wood, I didn't like the look of keep the faceplates mounted on the wall and trimming the wood around them. Would have looked off in my opinion.

    - Last bit of advice, if you end up that the top edge of your row varies in height, eliminate your gap on the top edge and make it flat again all the way across by cutting/ripping boards as needed. If you zoom in on my photo, you may be able to find spots where I used my table saw to rip a 1/8"-1/4" off about half the board edge here and there. I then would rip other boards to width to match so the top edge would be perfectly flat for the next row. If you end up ripping any boards lengthwise always have the cut edge down toward the floor so you won't see the "uncolored" edge. I will post another picture of some of those spots specifically so you can see what I mean.

    Hopefully all my advice makes sense. The progress I made from the first picture to the one below took about the same amount of time to complete. Once you get around all the outlet cuts and fitments, it goes pretty quick. The table saw makes easy work of the fitment cuts I need to make. A miter saw would make the cross cuts much quicker but I don't have one yet so have just been using the table saw. I could use my handheld circular but I want the cuts to be nice and flat on the cross cuts as well.


    IMG_5209.jpg
     
    Last edited: Feb 14, 2019
    Twinky, 1UPPER, 757TUNDRA and 2 others like this.
  15. Feb 14, 2019 at 12:57 PM
    #825
    kparrow

    kparrow New Member

    Joined:
    Jun 22, 2018
    Member:
    #16363
    Messages:
    955
    Gender:
    Male
    First Name:
    Kevin
    Nampa, ID
    Vehicle:
    2008 Tundra DC 4x4 5.7l V8 Blue Streak Metallic
    Goodyear UltraTerrain AT 275/70/r18, Stoptech Cryo Slotted Rotors/Hawk LTS Pads, DECKED, and lots more!

    I looked at using tongue and groove as well but it is significantly more expensive. May end up using it for the bathroom remodel or do some faux shiplap with plywood. I would have loved to blind nail but even surface nailing they aren't super noticeable. I'm using a Harbor Freight "better" level brad nailer, not the cheapest and not the most expensive one they make. Came in a blowmold case and can hold a small box of brad nails in it too. Feels like every other brad nailer I've ever used and I expect it to work for a long time...and it was $30. They sell at 15 gauge finish nailer for $99 that is equivalent to Hitachi, and the Banks 16 gauge finish nailer is $85. All solid options I think if you're not using them every day all day they should last for many many years.
     
  16. Feb 14, 2019 at 1:03 PM
    #826
    Boosted4runner

    Boosted4runner Join the NRA please.

    Joined:
    Mar 18, 2018
    Member:
    #13672
    Messages:
    2,480
    Gender:
    Male
    WA
    Vehicle:
    2015 DC MGM TRD Tundra, Kings, 5.7, 2018 front end
    Resi Kings, 35” Trail Grapplers on 18” Methods, ICON Delta Upper Arms, Front-Runner bed rack, Yakima SkyBox16, 2018 honeycomb grill, 2018 LED headlights, plastidipped bumper covers
    Awesome instructions and thanks for the links! Thank you very much! It all makes sense :D
    That’s looking awesome! Very nice work!
    :thumbsup:
     
  17. Feb 14, 2019 at 1:05 PM
    #827
    Boosted4runner

    Boosted4runner Join the NRA please.

    Joined:
    Mar 18, 2018
    Member:
    #13672
    Messages:
    2,480
    Gender:
    Male
    WA
    Vehicle:
    2015 DC MGM TRD Tundra, Kings, 5.7, 2018 front end
    Resi Kings, 35” Trail Grapplers on 18” Methods, ICON Delta Upper Arms, Front-Runner bed rack, Yakima SkyBox16, 2018 honeycomb grill, 2018 LED headlights, plastidipped bumper covers
    Sweet! Thank you! I have a HF Brad nailer but’s it’s smaller. $30 for a one time use does the trick :thumbsup:

    Yep - I was looking at tounge and groove so our living room floor would match (wife wants to do a master bedroom wall). But yea, expensive o_O
     
    Last edited: Feb 14, 2019
    kparrow[QUOTED] likes this.
  18. Feb 14, 2019 at 1:37 PM
    #828
    kparrow

    kparrow New Member

    Joined:
    Jun 22, 2018
    Member:
    #16363
    Messages:
    955
    Gender:
    Male
    First Name:
    Kevin
    Nampa, ID
    Vehicle:
    2008 Tundra DC 4x4 5.7l V8 Blue Streak Metallic
    Goodyear UltraTerrain AT 275/70/r18, Stoptech Cryo Slotted Rotors/Hawk LTS Pads, DECKED, and lots more!
    I honestly thought about going with a 23 gauge pin nailer as the holes would be next to impossible to see and since I'm using construction adhesive, but because some boards are not perfectly flat, I wanted the extra holding power of the brads. I'll be getting a pin nailer when I do faux shiplap with thin plywood strips to minimize the holes so I guess I'll see how it goes then. It's also only $28-30 for the pin nailer. What do I have to loose right? :D
     
  19. Feb 14, 2019 at 3:10 PM
    #829
    2010bigdog

    2010bigdog New Member

    Joined:
    Mar 10, 2018
    Member:
    #13453
    Messages:
    1,345
    Gender:
    Male
    First Name:
    Chuck
    Chicago
    Vehicle:
    2018 MGM SR5 TRD
    how much in material did that wall cost ? might do our master bedroom wall too
     
    kparrow[QUOTED] likes this.
  20. Feb 14, 2019 at 5:55 PM
    #830
    AKSig88

    AKSig88 New Member

    Joined:
    Dec 5, 2018
    Member:
    #22640
    Messages:
    127
    Gender:
    Male
    Ann Arbor, MI
    Vehicle:
    2023 SR5 Tundra
    Checked it when I got home from work and it's fine! Like you said, prime/paint and I'm set! Thanks again!
     
  21. Feb 15, 2019 at 7:49 AM
    #831
    kparrow

    kparrow New Member

    Joined:
    Jun 22, 2018
    Member:
    #16363
    Messages:
    955
    Gender:
    Male
    First Name:
    Kevin
    Nampa, ID
    Vehicle:
    2008 Tundra DC 4x4 5.7l V8 Blue Streak Metallic
    Goodyear UltraTerrain AT 275/70/r18, Stoptech Cryo Slotted Rotors/Hawk LTS Pads, DECKED, and lots more!
    It’s $25 a box and it took 7 boxes and 8 tubes of construction adhesive at $3 a tube. If you already have the tools about $200. I already had the tools, saw and such. Purchased the air compressor and Brad nailer because I needed it anyways, and to rent it once was darn near the same cost.

    All finished
    F9AC13D7-1B1C-441D-B8CD-5E35841AA3C5.jpg
    00598984-8C26-42C7-8A5F-7B407C2B9182.jpg
     
    JH5370, redryder, Trooper2 and 16 others like this.
  22. Feb 15, 2019 at 8:52 AM
    #832
    2010bigdog

    2010bigdog New Member

    Joined:
    Mar 10, 2018
    Member:
    #13453
    Messages:
    1,345
    Gender:
    Male
    First Name:
    Chuck
    Chicago
    Vehicle:
    2018 MGM SR5 TRD
    Looks good !!
     
  23. Feb 15, 2019 at 11:01 AM
    #833
    Boosted4runner

    Boosted4runner Join the NRA please.

    Joined:
    Mar 18, 2018
    Member:
    #13672
    Messages:
    2,480
    Gender:
    Male
    WA
    Vehicle:
    2015 DC MGM TRD Tundra, Kings, 5.7, 2018 front end
    Resi Kings, 35” Trail Grapplers on 18” Methods, ICON Delta Upper Arms, Front-Runner bed rack, Yakima SkyBox16, 2018 honeycomb grill, 2018 LED headlights, plastidipped bumper covers
    Nice work!!!
     
    kparrow[QUOTED] likes this.
  24. Feb 15, 2019 at 5:02 PM
    #834
    Pudge

    Pudge Super Secret Elite Member #7

    Joined:
    Nov 8, 2016
    Member:
    #5136
    Messages:
    9,498
    Gender:
    Male
    First Name:
    Sean
    CT
    Vehicle:
    2015 Blue Ribbon Platinum
    TRD PRO grille, OCD consol organizers, DIY wireless phone charger, 33" Michelin Defender LTX MS, Bak revolver X2 tonneau, weathertech liners, 20% tints. DIY pop n lock, 2018 LED headlights, morimoto fogs, TRD shift knob, DirtyDeeds 8"BAM exhaust, kenwood HU,JL amp, Tech12volts Tundra full speaker upgrade w/sub, Swing case, and lots of fluid film
    I installed these cheapo LEDs in my basement today. I have been organizing down there and making a little area to do projects. It's about 35x25 down there and it had a 4 light bulbs on pull strings, it was dark and gloomy and I had to use spotlights to do any work.
    I took the easy route and bought 4 lightbulb to outlet adapters to plug these lights into. They are linkable from that point. One single fixture (now 2 new LEDs) is controlled by a switch at the top of the stairs, the rest have to be turned on manually which is fine with me and my usage of the space.
    I could still put an LED bulb in the ceramic fixtures if I wanted but I dont really need to.
    I am shocked how bright they are for the price. We will see how long they last.
    Don't judge the mess, I am still working on sorting, cleaning, building storage, and tossing out about half the stuff which the ex wife never took. Also need to staple up the wires.
    I went ahead and ordered another set of 8 for my garage after seeing how well these worked.

    Screenshot_20190215-194948_Chrome.jpg
    20190215_200105.jpg
     
  25. Feb 15, 2019 at 5:12 PM
    #835
    Azblue

    Azblue Beer is Good Ban Moderator

    Joined:
    Nov 17, 2017
    Member:
    #11025
    Messages:
    6,222
    Gender:
    Male
    The Dirty T

    I installed an 8 pack of those type in my garage, you're right, surprisingly bright. Two things, 1 if they are the same type and install with little metal tabs that the light clips into, don't trust them. I mixed up some cheap epoxy and dabbed a little on each clip. 2. I now have to turn off the lights when I leave because they interfere with the remote opener (both the regular opener and the Homelink in the Tundra).
     
    Boosted4runner likes this.
  26. Feb 15, 2019 at 5:15 PM
    #836
    Pudge

    Pudge Super Secret Elite Member #7

    Joined:
    Nov 8, 2016
    Member:
    #5136
    Messages:
    9,498
    Gender:
    Male
    First Name:
    Sean
    CT
    Vehicle:
    2015 Blue Ribbon Platinum
    TRD PRO grille, OCD consol organizers, DIY wireless phone charger, 33" Michelin Defender LTX MS, Bak revolver X2 tonneau, weathertech liners, 20% tints. DIY pop n lock, 2018 LED headlights, morimoto fogs, TRD shift knob, DirtyDeeds 8"BAM exhaust, kenwood HU,JL amp, Tech12volts Tundra full speaker upgrade w/sub, Swing case, and lots of fluid film
    Yeah these mount the same way. Thanks for the tip. And that's interesting about the interference with homelink. Good to know. I was going to hook one to my garage door opener, I won't do that now
     
  27. Feb 15, 2019 at 7:39 PM
    #837
    1UPPER

    1UPPER Not A New Member

    Joined:
    Oct 20, 2016
    Member:
    #4937
    Messages:
    4,898
    Gender:
    Male
    TEXAS
    Flux capacitor!
    My painters got all the remaining steel stair stringers, post and the steel decking painted satin black today. Tomorrow my other painting crew will get all the fascia painted, cedar soffit & doug fir stained. Next week my custom handrails will go in. Then it’s rough grade work, concrete sidewalks, trex decking, fence work, irrigation, water feature, landscaping, outdoor lighting, ceiling fan, recessed lighting & standing seam roofing. 897EBA66-6567-4B54-91F6-1972DE4CF11D.jpg
     
  28. Feb 15, 2019 at 7:46 PM
    #838
    CAM1794

    CAM1794 New Member

    Joined:
    Jan 26, 2019
    Member:
    #25144
    Messages:
    156
    Gender:
    Male
    First Name:
    Chad
    Vehicle:
    2017 MGM 1794
    Stonework and reclaimed wood in dining room.

    B2A90BB2-0D8D-4BFD-B7D3-798270B3B0BB.jpg
     
  29. Feb 15, 2019 at 8:00 PM
    #839
    1UPPER

    1UPPER Not A New Member

    Joined:
    Oct 20, 2016
    Member:
    #4937
    Messages:
    4,898
    Gender:
    Male
    TEXAS
    Flux capacitor!
    With all the post on wood accent walls I wanted to share this wall I did with some old reclaimed wood. I painted the drywall behind the wood a darker color to match the wood in case there were any cracks or holes in the reclaimed wood. 5A3D3AA5-3C4C-485C-B49B-8D77585822ED.jpg
     
    Trooper2, ColoradoTJ, saybng and 11 others like this.
  30. Feb 16, 2019 at 10:39 AM
    #840
    rons23

    rons23 Get The Led Out!!!

    Joined:
    Sep 18, 2014
    Member:
    #625
    Messages:
    8,527
    Gender:
    Male
    First Name:
    Ron
    Kill Devil Hills
    Vehicle:
    2008 Nautical Blue TRD
    Sabm (Gtek-Fab), Blake Carbon Diamond Plate door sil protecters, and Air Dam mod, Black Rivited Grill, Devil Horns- Black Anodized(Diaz Fabrication), Hid's in Low Beams and Fogs -6000k, Piaa Extreme for High Beams. Black Rhino Step Tubes, Razir Led interior Lights (white), Low Profile Black Diamond Plate Tool Box, Trd accesories, Weather Tech Mats, Carbon Fiber Shorty Antenna, Drl's, Plasta Dipped Badges + Front Grill Surround
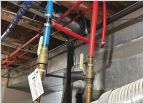
    Finally got around to changing out my hot/cold box. I went ahead with shark bite box, and pvc tubing. My early sheetrock days helped out. Turned out pretty good and no leaks so far:fingerscrossed:.

    20190216_083547.jpg
    20190216_102136.jpg
    20190216_112816.jpg
    20190216_121502.jpg
    20190216_121525.jpg
    20190216_122242.jpg
     

Products Discussed in

To Top