

-
Welcome to Tundras.com!
You are currently viewing as a guest! To get full-access, you need to register for a FREE account.
As a registered member, you’ll be able to:- Participate in all Tundra discussion topics
- Transfer over your build thread from a different forum to this one
- Communicate privately with other Tundra owners from around the world
- Post your own photos in our Members Gallery
- Access all special features of the site
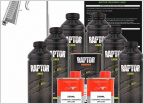 DIY Bed Liner? Quality question.
 12 volt fridge/freezer
 Shadow Chrome
 Battery disconnection requires a computer reset?
 Air compressor question.
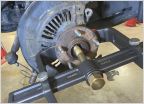 The BEST bearing and hub puller. Period.
SAIS P0418 fixed with pics
Discussion in 'General Tundra Discussion' started by TG705, Aug 1, 2025.


