

-
Welcome to Tundras.com!
You are currently viewing as a guest! To get full-access, you need to register for a FREE account.
As a registered member, you’ll be able to:- Participate in all Tundra discussion topics
- Transfer over your build thread from a different forum to this one
- Communicate privately with other Tundra owners from around the world
- Post your own photos in our Members Gallery
- Access all special features of the site
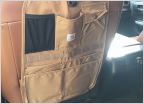 Seatback Organizer
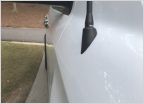 Stubby wasn't Stub Enough
 Slight Chatter Grumble After Diff Fluid Change
 Portable Air Compressor
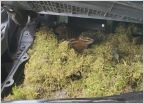 Rodent damage poll
 What Bull Bar is this?
Rust Treatment & Undercoating In Depth
Discussion in 'General Tundra Discussion' started by Snert, Oct 29, 2024.
Products Discussed in


