1. Welcome to Tundras.com!

    You are currently viewing as a guest! To get full-access, you need to register for a FREE account.

    As a registered member, you’ll be able to:
    • Participate in all Tundra discussion topics
    • Transfer over your build thread from a different forum to this one
    • Communicate privately with other Tundra owners from around the world
    • Post your own photos in our Members Gallery
    • Access all special features of the site

My at home Ceramic Coating Application

Discussion in 'Detailing' started by da_jeep_luva, Dec 18, 2018.

  1. Dec 18, 2018 at 11:08 PM
    #1
    da_jeep_luva

    da_jeep_luva [OP] New Member

    Joined:
    Dec 14, 2016
    Member:
    #5551
    Messages:
    291
    Gender:
    Male
    First Name:
    Paul
    Florida
    Vehicle:
    2017 CM and 2008 RCSB
    TRD Pro suspension, powder coated bumpers, wheels, tires, lowered, coated, list keeps going.
    So I decided I didn’t want to spend 2k on a ceramic coating application done professionally. I decided I would figure it out for myself. This is my 2nd ceramic application on one of my personal vehicles.

    My total cost was less than 500$ thanks to Black Friday deals. This was including the dual action polisher.

    I AM NOT A PROFESSIONAL. Everything I did here was was found in “how to videos” on the internet. Specifically autogeek.com. Where I found some good Black Friday deals on all products I purchased. The following was what I had to add to my garage

    Porter cable dual action polisher
    Car Pro IronX
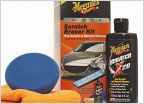
    Meguiar clay kit
    Car Pro TarX
    SONAX Cutmax
    SONAX Polish
    CQUARTz 70ML bottle
    CQUARTZ APPLICATION blocks and micro suede towels
    Bout 100$ in polishing and compounding foam pads from a local professional detailer.

    The local guy gave me all the confidence I needed to tempt this on my own. It is a fairly easy process, just exceptionally time consuming.

    First step I took was to remove the vinyl on the door seams that came from the factory 2 years ago. Pretty straight foward with a hair dryer
    AB9956FA-38CB-42CB-881B-E86DC12FB97A.jpg

    A678059E-3EEE-48F6-88A4-4B1356DA69B9.jpg
    With a little heat to soften it up it just peels Off. Also, wasn’t really impressed with the “protection” it supposedly gives.
    E8311005-5E45-43EB-8A12-A0B276FDB4AF.jpg
    Whatever hit that went right through. Next step is to hit tar and adhesive with TARex
    99CE1309-A563-4B00-AF41-26CC8D401F7F.jpg
    5CD7FE6C-E022-420F-A4F6-902E4BB32902.jpg
    F11E05FA-156E-44C0-B89C-4D257BD70AD5.jpg
    Worked like a charm. I used a paper towel to wipe. I’ve had bad experience with dyed microfiber towels and leaving their color after a tar remover. I simply followed instructions on bottle.

    Next step was IRONX. This product came highly recommend to removed metal bits from the clear coat. I wet the truck and sprayed it on panel by panel. Giving it 5 min roughly. It turns purple when reacting with metal. You can do this in 1/3 sections as long as your in a cool environment with shade

    309DDDC0-7029-47C3-A9E2-8EB21EEF9ED2.jpg
    9A80E745-7C51-4188-A0D2-E83BE256F0E1.jpg

    Stuff smells like ass BTW


    BA4A3980-483E-4858-A377-B957DA6E3980.jpg
    Paint chip I wasnt going to bother fixing. You can see the product reacting with the rust from the surface of the chip.


    Sometime you miss a spot. Simply re apply and wipe.

    636F9DD6-F79F-4FBB-9F6C-C84105710E80.jpg F98AF1FA-A9A8-43FB-BC99-89996A7D348D.jpg

    Time to wash. Two bucket method. Meguiars yellow wash was what I used. Any car wash soap should do the trick. 2 bucket wash cuts down the chance to get swirl marks from washing. I usually give a good rinse to take away big shit. Light wash with a brush to hit medium shit. And a hand scrub to hit small shit that’s stubborn, like bug residue. You have to get this paint as perfect as possible before you put the coating on, otherwise your gonna be looking at it for a while

    B1042366-A612-48D5-A3EF-C4805A2D427D.jpg
    7BB88EED-6A89-47F9-AC67-0C519BA53A30.jpg

    All clean. Dry really well using microfiber towels. I’ll usually go with one for all the big water droplets and a second for small streaks. Dry the vehicle in the garage to prevent any dust from adhesion after washing.

    Prep garage or shed for truck sitting in there for a few days. I have lizzards that sometimes drop their shit from the celing on to my vehicles so I took the extra precautions


    9338CF8B-FE7E-4673-A059-FAC8EB4BD53D.jpg
    Blanket nailed into wood. Simple fix.
    Next step is to clay bar. Probably the most important step. Locate all those little heavy spots and gently use the clay to remove them.

    91B12E33-6F46-4F82-9A15-0C8B11DF4507.jpg
    At this point you should consider paint correction. Depending on your preference, you can clean the paint up tans fill in the chips or wet sand the big scratches. I opted for neither since I have very few chips and white hides most stuff anyway. The chips I have I just went over them with the ceramic. The goal was to learn how to preserve what paint I have, I’ll try wet sanding and chip fills another day.

    953744A6-9D09-4E60-83D5-819736EAB2D2.jpg
    This kinda stuff is not noticeable until you really look for it. Another reason why superwhite is the best :)

    Time for a break. Enough beers for now
    296D886F-CD46-4D74-81BF-E486A999A1A9.jpg
    8 hours total with the wash, IronX, tarX, drying and clay bar.

    Next step is COMPOUND!!!! But first, TAPE EVERYTHING YOU DONT WANT COMPOUND ON UP. Stuff can make a mess.

    5C225996-AAE5-4174-BF6D-06D640022BDE.jpg

    Using a DUAL ACTION POLISHER, and a specific compound pad spread your product of choice on and rub in with nitrile gloves.

    319BE662-89D3-43A7-B9B9-AEFF5F859AD5.jpg
    Then put some dots on and go to town.

    9AA299B3-F0F3-480B-B5E8-F6D90540E125.jpg

    Depending on your paint you may have to do multiple pass and wipes to get rid of swirl marks. Or use multiple compounds and mabye sanding. For my purpose, I just ran over it once. It did a good job in my eyes. I can still see scratches and shit, but it’s so small that nobody is going to notice.

    EE130A57-4778-41AD-A7BE-2045E57E35E2.jpg
    Work in small sections. I spent roughly a minute working that section. If you don’t see residue while your using the machine then you might need to add more. The idea is to keep moving and keep the heat down. You can damage your paint if this is done improperly. BUT.... considering I’ve never done this before, I think you be fine. Start on the roof or the tailgate, once you got the learning curve down, hit the rest.

    Wipe down each area after.
    A4BA041B-677B-4FCB-A899-0F4C81C8817B.jpg

    This is the best example of a compounded section vs a non compounded section. The compound will give your paint a slight haze. But don’t worry. The polish will brighten it up. The hazy part has been compounded. The left is untouched and the right is compounded. Sorry these shots were hard to get so close.

    Next up is polish. Using a polishing pad, go through the same motions as the compound. This will bring that paint back to a nice shine.
    0D78CACB-BC21-40D5-A212-EB445512DE08.jpg

    Now time for ceramic. This may seem like the scary part, but trust me it’s quite easy. I used CQUARTZ. It’s roughly 75$ for 70ml. This should be enough to to the painted surfaces of a CrewMax. Possibly the rims and some plastic trim.
    EF443E1D-3222-4EB0-ACA5-6B6F2C1A3A84.jpg

    Sorry, I was lazy and didn’t take a photo of the bottle.


    APPLICATION: swap out your blocks regularly. I used 4 blocks and 6 micro suede towels. If the micro suede gets dirty you can just flip it to the clean side.
    88A455F5-C65D-4BBC-AE30-2723D5B499D0.jpg

    Work small sections. I recommend 1ft by 1ft areas at first. If you get comfy with application then you can do bigger areas. But keep in mind, you’ll need more liquid on the block.

    At first the application looks oily and foggy. After 1-5 minutes it clears up and is ready to be wiped off. Don’t sweat leaving it on. I left a spot on my roof for 20min to see if it hardened and IT DIDNT!!!!! It took a little extra buffing but the haze and residue came off!!!!

    The instructions say 1-5 min should do it for that section your working. For the 50ish degrees outside, it took about 2.5- 3 min for my flashtime. When you go to wipe, you’ll feel resistance. This means the product is ready to come off. If you don’t feel resistance and your on point with the flash time, don’t sweat. I had a 30-45 second variation sometimes with this application.

    6BBFF8FF-A615-41EF-81C4-06AF269D770B.jpg

    Fan also helped with air circulation. It followed the spots I was working.


    204F175A-52EC-4952-96B2-B4970950EF52.jpg

    Weatherstripping is dirty. Avoid direct contact. If you find yourself in this situation, just turn the towel over. And be cautious around the black parts. If you see black residue in the application, just wipe off and re apply.

    I had instances where I found leftover adhesive from the door protection films mixed in with the coating. This stuff is pretty forgiving. Just remove stuff that might get caught and wipe over the area you wiped the contamination from. It should be fine.
    C3E60A35-3759-4020-AEC5-C76A5A2E4DD2.jpg

    Shit looks slick as hell right now. I can’t wait to see it outside. It feels super smooth too!

    At this point I’ve spent roughly a full 36 hours on this. This is why it costs so much to have it done professionally. But if you got the time, go for it!!!!!! I’ve learned an incredible amount from this, especially a respect for detailers and their craft. I will post more pics when the coating has cured in a few days and when I’m ready to take it out the garage. They say at least 48 hours no water. Some places say a few hours is fine to drive in, just avoid water.

    Will report further!


    1AC4BCD1-B1D3-44C4-A850-CD76207DFD43.jpg
    C6FD1C18-6FBB-45CF-B4B2-4409E30D1F15.jpg

    White is pretty tough to get to have a mirror like surface, but I think it turned out pretty well

    0FB640A8-FDE3-44BD-98D2-DF2E30E3C762.jpg 0E59158E-185B-4027-AFB3-C835492E2B38.jpg
    02301FAC-2FD0-422E-AF92-D048AEFDD74F.jpg ABFD836A-1D6B-4E22-959C-DBA9F68B8BCF.jpg B83D023D-935B-41A0-B8F8-4076DB0C1690.jpg 10C890E0-F85C-4861-B65C-46DDF12BB58D.jpg
     
    Last edited: Dec 23, 2018
  2. Dec 19, 2018 at 4:27 AM
    #2
    War Machine

    War Machine SSEM # 5 3MW

    Joined:
    Aug 7, 2017
    Member:
    #8939
    Messages:
    17,127
    Gender:
    Male
    First Name:
    Jason
    Texas
    Outstanding write up Paul! Thanks for doing this. Definitely a huge goal for me. I’ve been sitting on a few bottles of CQuartz for months now, just not confident in my paint correction abilities. I’m seriously leaning toward having someone else do the prep work for me.

    I actually got a quote from a guy running a Christmas special for $500.00, including applying CQuartz. That’s such a good deal, I may just have him do all of it.
     
    da_jeep_luva[OP] likes this.
  3. Dec 19, 2018 at 4:39 AM
    #3
    Omohundro

    Omohundro 2018 Not a Pro

    Joined:
    Sep 8, 2017
    Member:
    #9530
    Messages:
    1,639
    Gender:
    Male
    First Name:
    Jody
    McMinnville TN
    Vehicle:
    2018 Tundra Platinum
    Bak Revolver, BedRug, Undercover Swingcase, PopLock, Bilstein 5160(rear), Firestone RideRite, TRD rear sway bar, Coachbuilder +2 rear shackles, Andersen 5” aluminum adjustable hitch, TRD dual exhaust, VLEDS interior leds including the footwell kit, TundraTex FRAC mod, VLEDS LPR backup tag mount led, Husky X-Act mats, Color matched cup holder bezel (silver), Ceramic 20% tint all around, 50% Ceramic windshield, Color Matched door handles & mirror caps, The “Stubby” antenna, AMP Research steps, VLEDS 6”step lights, ToyTec/5100 Bilstein coil overs, 700lbs red ToyTec springs (2.75” lift), 20x9 +18 Method 306 custom painted and custom fit center caps, Gorilla spline lugs, Bridgestone Revo 3s 285/60R20, TRD skid plate, RaptorLiner “Red” tow hooks, 19 Pro black LED headlights, VLEDS Triton V6 turns, Rigid SAE D series fog lamps, 19 TRD hood scoop, 2019 TRD Pro grille, Coachbuilder bumper shims, X-Pel protect under mud guards, Opti Coat Ceramic, Opti Coat Sealed. And some snakes and sparklers, because they are my favorite!
    Great job!
     
    da_jeep_luva[OP] likes this.
  4. Dec 19, 2018 at 5:29 AM
    #4
    MikeyMTBs

    MikeyMTBs New Member

    Joined:
    May 30, 2017
    Member:
    #7924
    Messages:
    359
    Great write up!
     
    da_jeep_luva[OP] likes this.
  5. Dec 19, 2018 at 6:34 AM
    #5
    DJFaninTN

    DJFaninTN New Member

    Joined:
    Jul 17, 2018
    Member:
    #17133
    Messages:
    624
    Gender:
    Male
    Panama City Beach, FL
    Vehicle:
    2018 Super White 1794
    I appreciate all your hard work and sharing your experience with us. I can see lots of hours of manual labor but I am sure the results will be worth it. get yourself some Bead Maker and go over that ceramic coating and they say it will really pop! I highly suggest using the microfiber towels from The Rag Company. they make a huge difference IMO and you can get them on Amazon. https://www.amazon.com/RAG-COMPANY-...1545230036&sr=8-3&keywords=eagle+500+edgeless
     
    Trooper2 likes this.
  6. Dec 19, 2018 at 3:34 PM
    #6
    da_jeep_luva

    da_jeep_luva [OP] New Member

    Joined:
    Dec 14, 2016
    Member:
    #5551
    Messages:
    291
    Gender:
    Male
    First Name:
    Paul
    Florida
    Vehicle:
    2017 CM and 2008 RCSB
    TRD Pro suspension, powder coated bumpers, wheels, tires, lowered, coated, list keeps going.
    Honestly if I didn’t enjoy doing that kinda stuff I would definitely be paying someone. It’s a big task. If you had two people who knew what they were doing you could cut it down to a single day.
     
  7. Dec 19, 2018 at 3:40 PM
    #7
    da_jeep_luva

    da_jeep_luva [OP] New Member

    Joined:
    Dec 14, 2016
    Member:
    #5551
    Messages:
    291
    Gender:
    Male
    First Name:
    Paul
    Florida
    Vehicle:
    2017 CM and 2008 RCSB
    TRD Pro suspension, powder coated bumpers, wheels, tires, lowered, coated, list keeps going.

    Yea the quality of micro fiber cloths is key. I’ve had luck with Wally World ones but this time they left a lot of fine threads all over the truck. I’m sure they’ll wash off though. I’m gonna try that stuff for sure. My other truck has reload on it and I haven’t had it on enough to test longevity.

    I just washed my other truck that has had CQUARTz on it for about two weeks for the first time. And I tell you what that was the easiest wash I’ve ever had to do. Mostly everything just blows right off with water. If not that a quick scrub and it’s clean. Very satisfied so far, I really want to test how long the coating actually lasts based on my single layer application.
     
  8. Dec 23, 2018 at 1:09 PM
    #8
    da_jeep_luva

    da_jeep_luva [OP] New Member

    Joined:
    Dec 14, 2016
    Member:
    #5551
    Messages:
    291
    Gender:
    Male
    First Name:
    Paul
    Florida
    Vehicle:
    2017 CM and 2008 RCSB
    TRD Pro suspension, powder coated bumpers, wheels, tires, lowered, coated, list keeps going.
    Updated with a few photos after sittin in garage for 4 days
     
  9. Dec 23, 2018 at 8:09 PM
    #9
    Pudge

    Pudge Super Secret Elite Member #7

    Joined:
    Nov 8, 2016
    Member:
    #5136
    Messages:
    9,493
    Gender:
    Male
    First Name:
    Sean
    CT
    Vehicle:
    2015 Blue Ribbon Platinum
    TRD PRO grille, OCD consol organizers, DIY wireless phone charger, 33" Michelin Defender LTX MS, Bak revolver X2 tonneau, weathertech liners, 20% tints. DIY pop n lock, 2018 LED headlights, morimoto fogs, TRD shift knob, DirtyDeeds 8"BAM exhaust, kenwood HU,JL amp, Tech12volts Tundra full speaker upgrade w/sub, Swing case, and lots of fluid film
    Wow Paul great job. Very inspiring that's for sure.
     
    Rica25 likes this.
  10. Dec 24, 2018 at 3:04 AM
    #10
    Sunnier

    Sunnier Pity the warrior that slays all his foes

    Joined:
    Aug 21, 2017
    Member:
    #9171
    Messages:
    12,294
    First Name:
    Sunny
    San Diego, CA
    Vehicle:
    2017 Inferno Tundra DC TRD & Longtravel 1st Gen, Banner/ HulkSmash build
    Stellar job and write up! :thumbsup:
     
  11. Dec 30, 2018 at 6:25 PM
    #11
    SteyrM40A1

    SteyrM40A1 New Member

    Joined:
    Nov 1, 2018
    Member:
    #21224
    Messages:
    190
    Gender:
    Male
    First Name:
    Gregg
    Vehicle:
    2018 Toyota Tundra Crew Max SR5 TRD Sport, Magnetic Grey
    Air flow accelerator mod, charcoal filter delete. LED interior lights.
    Looks amazing bro!!
     
  12. Dec 30, 2018 at 8:55 PM
    #12
    da_jeep_luva

    da_jeep_luva [OP] New Member

    Joined:
    Dec 14, 2016
    Member:
    #5551
    Messages:
    291
    Gender:
    Male
    First Name:
    Paul
    Florida
    Vehicle:
    2017 CM and 2008 RCSB
    TRD Pro suspension, powder coated bumpers, wheels, tires, lowered, coated, list keeps going.
    Thanks man!!!!!
     
    SteyrM40A1[QUOTED] likes this.
  13. Dec 30, 2018 at 9:06 PM
    #13
    Blueknights75

    Blueknights75 040 IS THE FASTEST

    Joined:
    May 13, 2018
    Member:
    #15276
    Messages:
    4,426
    Gender:
    Male
    First Name:
    Ron
    Clayton, NC
    Vehicle:
    18’ TRD CM leveled with 295/70 Ridge Grapplers
    Amazing write up and truck looks beautiful! What’s the longevity of the product?
     
  14. Dec 30, 2018 at 9:07 PM
    #14
    da_jeep_luva

    da_jeep_luva [OP] New Member

    Joined:
    Dec 14, 2016
    Member:
    #5551
    Messages:
    291
    Gender:
    Male
    First Name:
    Paul
    Florida
    Vehicle:
    2017 CM and 2008 RCSB
    TRD Pro suspension, powder coated bumpers, wheels, tires, lowered, coated, list keeps going.
    They say two years. I will keep updates on cleaning and maintaining, etc etc
     
    Blueknights75[QUOTED] likes this.
  15. Dec 30, 2018 at 9:19 PM
    #15
    TokerJoker

    TokerJoker ΜΟΛΩΝ ΛΑΒΕ

    Joined:
    Sep 12, 2018
    Member:
    #19328
    Messages:
    2,223
    Gender:
    Male
    First Name:
    Travis
    Nowhere, Specific
    Vehicle:
    2014 Black SR5 4.6 Dbl Cab
    None.....yet
    Nice work both on the truck and the very informative write up
     

Products Discussed in

To Top