1. Welcome to Tundras.com!

    You are currently viewing as a guest! To get full-access, you need to register for a FREE account.

    As a registered member, you’ll be able to:
    • Participate in all Tundra discussion topics
    • Transfer over your build thread from a different forum to this one
    • Communicate privately with other Tundra owners from around the world
    • Post your own photos in our Members Gallery
    • Access all special features of the site

Leer Cap Brake Light Replacement + Fiberglass Repair

Discussion in '2.5 Gen Tundras (2014-2021)' started by SNO BUS, Mar 30, 2020.

  1. Mar 30, 2020 at 1:25 AM
    #1
    SNO BUS

    SNO BUS [OP] Professional Moneywaster

    Joined:
    Feb 17, 2018
    Member:
    #12980
    Messages:
    333
    Gender:
    Male
    First Name:
    Nick
    Washington
    Vehicle:
    White '18 CM 4x4 Limited+
    LEER Canopy, Line-X, Bed mat, Wireless charging
    My Leer cap had a leak in it, so I took it to the dealer to get it fixed. It was coming from the third brake light, so they removed it and sealed it with silicone. Somehow, in the process, they ruined the brake light and I did not realize it for a long time.
    upload_2020-3-30_1-21-33.jpg
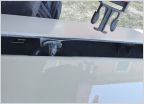
    Anyways, I needed to replace the light, so I ordered a new one and began tooling. For anyone whose brake light has not been siliconed in to all high heaven, it’s just a matter of being patient with a thin spudger to separate the 3M tape on the bottom of the light. I had to go at mine with a spudger and a long, scary box knife. Once I got through all the silicone and tape and had the light off, there was a hole and some cracks in the fiberglass below.
    upload_2020-3-30_1-21-50.jpg
    At first, I thought I had done this, but when I checked the inside to see the extent of the damage, there was silicon applied to the inside of the headliner, telling me that the cap dealer had done this damage while doing the original leak repair. Now I have fiberglass repair and light replacement on my hands. I didn’t have time for this, so I temporarily wired up and installed my new light, not peeling off the adhesive, and instead using a plastic-bag-painter’s-tape method, which worked for 3 months with 80mph+ speeds, car washes, and inclement weather.
    upload_2020-3-30_1-22-5.jpg
    I went to West Marine and picked up a very nice fiberglass boat repair kit. First, I cleaned up the damage by getting rid of loose pieces and opening up the damaged areas to be workable with a razor and a drill. Then, I cut a little bit of the repair fabric in the kit and stuffed it in the damaged areas. I mixed up the epoxy and liberally applied it to the areas, along with the powder that came with the kit to reinforce/smooth out the epoxy repair. I set up a sketchy method to dry this faster, and once it was dry, it came out very nicely. Also ugly, but it won't be visible.
    upload_2020-3-30_1-22-19.jpg
    upload_2020-3-30_1-22-28.jpg
    upload_2020-3-30_1-22-34.jpg

    Light installation is very simple: Pull the red adhesive protectors off the new light, slip the wiring in, fit it in place, and you’re done!

    In terms of getting the new light wired, I custom-wired my cap anticipating a replacement like this would need to happen, so I was able to unscrew the 12v wire from the old light and terminate and screw in the new one. I used a butt connector to connect the new light’s ground to the old one right below the dome light. The wiring runs through the hole, behind the dome light, along the window seal, behind the window hinge, and to the 12v source.

    To avoid a leak, I sealed the hole that the wire goes through from the inside and the outside with silicone.
    upload_2020-3-30_1-22-46.jpg
    upload_2020-3-30_1-22-52.jpg
    If anyone has questions about this or any Leer electrical stuff/automotive electrical stuff, feel free to DM me, I'd be happy to help.
     
    butch2427 and Rex Kramer like this.

Products Discussed in

To Top