

-
Welcome to Tundras.com!
You are currently viewing as a guest! To get full-access, you need to register for a FREE account.
As a registered member, you’ll be able to:- Participate in all Tundra discussion topics
- Transfer over your build thread from a different forum to this one
- Communicate privately with other Tundra owners from around the world
- Post your own photos in our Members Gallery
- Access all special features of the site
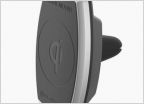 Fast Wireless Charging - Not enough power?
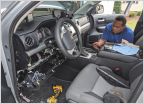 Remote Start & Bulge LED
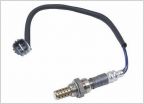 2014 Sequoia 5.7 Flex: P0157, P0158, P0607 all at once
 Laptop Mount/Stand
 Rear Diff maintenance?
 2019 crewmax limited no stake pockets?
katzkin install on 2019 double cab
Discussion in '2.5 Gen Tundras (2014-2021)' started by Nightstalker82, May 20, 2020.
Page 1 of 2
Page 1 of 2


