

-
Welcome to Tundras.com!
You are currently viewing as a guest! To get full-access, you need to register for a FREE account.
As a registered member, you’ll be able to:- Participate in all Tundra discussion topics
- Transfer over your build thread from a different forum to this one
- Communicate privately with other Tundra owners from around the world
- Post your own photos in our Members Gallery
- Access all special features of the site
 Getting a p3400 code on my 2004 toyota tundra
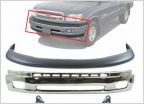 00-02 Steel bumper replacement
 Rear diff fluid type and brand with lsd
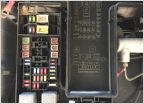 Part # for 2006 DC Foglight Relay
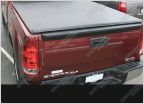 Bed size
 Cold blooded Tundra
JAKEJAKE'S Big Thanksgiving Week Bumper Build Extravaganza (Pic Heavy)
Discussion in '1st Gen Tundras (2000-2006)' started by JakeJake, Nov 20, 2023.
Page 1 of 2
Page 1 of 2


