1. Welcome to Tundras.com!

    You are currently viewing as a guest! To get full-access, you need to register for a FREE account.

    As a registered member, you’ll be able to:
    • Participate in all Tundra discussion topics
    • Transfer over your build thread from a different forum to this one
    • Communicate privately with other Tundra owners from around the world
    • Post your own photos in our Members Gallery
    • Access all special features of the site

Few Rear Brake Questions

Discussion in '1st Gen Tundras (2000-2006)' started by jpink, Nov 3, 2020.

  1. Nov 3, 2020 at 11:14 AM
    #1
    jpink

    jpink [OP] Aspiring Shade Tree Mechanic

    Joined:
    Sep 25, 2020
    Member:
    #52763
    Messages:
    370
    Gender:
    Male
    First Name:
    John
    Knoxville
    Vehicle:
    05 Black Tundra DC SR5
    It's very possible I overlooked a thread (or 70) already discussing this. My first time doing a brake job.

    tl;dr
    1) Why Wheelers vs Powerstop SS brake lines?
    2) Terrible of me to want to just get the misc spring hardware from RA vs Toyota?
    3) Parking brake is garrr-baggge. Worthless. Rekt. Aside from Bell Crank, anything else I should budget to replace at same time?
    4) Am I overthinking this brake job? I just want to make sure I've got what I need once the thing is in the air and ripped apart. In November. In Iowa.

    First:
    I see the suggested a lot. However, RockAuto sells the PowerStop Stainless Steel (red) lines (BH00127/BH00129) as well. The price difference (after tax/shipping on either) is roughly the same.

    Is there a reason the Wheeler's is suggested, other than they also have ones designed for lifts as well?

    Second:
    It seems when replacing drums, the general advice is Toyota for ease of weight/balance. There is a fair amount of rust in these areas so I'm thinking I'll give it a fresh round with the brake backings, shoes, drums and start at zero.

    The Toyota Parts website breaks every single spring and nut and plug and washer down. I'll probably get the new bolts/nuts to hold splash/backings in place, but feel it would be easier to just buy a kit from Rock Auto containing all the misc. hardware.

    Third:
    Parking brake might as well not exist on this truck. Hasn't worked, apparently, for some time. It engages, the light goes on, but you can still drive as if it weren't engaged. I'm going to snag new Bell Cranks at same time. Anything else I should consider, that's easy and in that area?

    Fourth:
    E468C7AC-45FB-42B4-92BA-C87E620738A7.jpg
     
  2. Nov 3, 2020 at 12:34 PM
    #2
    Professional Hand Model

    Professional Hand Model A.K.A ‘Golden Hands’

    Joined:
    Apr 29, 2018
    Member:
    #14878
    Messages:
    14,993
    Gender:
    Male
    First Name:
    Fred
    ‘Somewhere’... a State of Mind
    Vehicle:
    2002 Tundra SR5 4WD 4.7L AC Silver Metallica
    Hand Protectors
    1) Do the Wheelers SS Hoses.

    2) Wire wheel the rust off inside and out. They should look new again as mine did. I even Rust Reformed and finish coated my drums.

    2.5) I bought the NAPA Spring Kit ($15) in prep for mine. Ended up only using the Large Shoe Spring and the horseshoe clip, as the rest of the stuff looked inferior to the existing OEM which cleaned up nicely and was reused.

    3) Parking Brake System: Use penetrating oil and lube every single pivot point/clip/lever and work them loose. You’ll be surprised by the amount of moving parts that comprise the system. Once you’ve loosed everything, then load all levers/pins up with MolyB Grease. You may need to adjust the turnbuckle.

    Inside the drum, use Silglyde at all contact points and Star Adjuster. Follow FSM Instructions. My PB works nicely now. Takes about 3-5 clicks to firm pedal. Truck can be stopped with PB if needed. Truck lifts up when PB is engaged from stop letting you know its on.

    I’ve lived your experience with the system and ended up never using it for about 4-5 years until recent correction which leads to the rear drums never self adjusting which makes your front brakes work harder. A bad compound cycle. Start at the cranks and Adjust inward to the axle levers and then move towards the turnbuckle in that order. I did not need to go farther forward than the turnbuckle on any adjustment. Once everything is adjusted and working, then you can begin to mess with the Prop Valve Nuts Ratio.
     
    N84434, FrenchToasty and jpink[OP] like this.
  3. Nov 3, 2020 at 12:47 PM
    #3
    jpink

    jpink [OP] Aspiring Shade Tree Mechanic

    Joined:
    Sep 25, 2020
    Member:
    #52763
    Messages:
    370
    Gender:
    Male
    First Name:
    John
    Knoxville
    Vehicle:
    05 Black Tundra DC SR5
    Mine is already near the top, similar to how yours looked in the pictures after adjustment. Do you think there's any benefit to "zeroing" it out and working it back up after all the brake work?
     
  4. Nov 3, 2020 at 12:56 PM
    #4
    Professional Hand Model

    Professional Hand Model A.K.A ‘Golden Hands’

    Joined:
    Apr 29, 2018
    Member:
    #14878
    Messages:
    14,993
    Gender:
    Male
    First Name:
    Fred
    ‘Somewhere’... a State of Mind
    Vehicle:
    2002 Tundra SR5 4WD 4.7L AC Silver Metallica
    Hand Protectors
    Zeroing it out would serve to show how much your rear drums come into play or not. My Prop Valve Nuts are at the middle of the threads.

    Might be a good base line to zero it out. Get the Cable system Optimized and then adjust up. Grease that lever up at the Valve, as well.
     
    jpink[QUOTED][OP] likes this.
  5. Nov 3, 2020 at 4:04 PM
    #5
    Professional Hand Model

    Professional Hand Model A.K.A ‘Golden Hands’

    Joined:
    Apr 29, 2018
    Member:
    #14878
    Messages:
    14,993
    Gender:
    Male
    First Name:
    Fred
    ‘Somewhere’... a State of Mind
    Vehicle:
    2002 Tundra SR5 4WD 4.7L AC Silver Metallica
    Hand Protectors
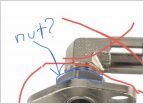
    Make sure everything is not seized prior to grease. Even those little pins near the crank arms. If they are frozen the cable will not properly engage. A small detail, but highly necessary. The pins should spin freely and allow the cable end clips to square off as its pulled tight.


    upload_2020-11-3_19-0-42.jpg
     

Products Discussed in

To Top